How to Draw “Chill” Graffiti Art
I fell in love with making graffiti art many years ago when I was putting together a lesson for my eighth grade students. This Chill step by step graffiti drawing will show you the process I’ve been using for years to create unique graffiti art.
Breaking things down into a simple process gives you a roadmap for your art creations. Which means you’ll always know what the next steps are going to be.
I don’t know about you, but that sounds much easier to me than staring at a blank page and wondering how to start.
Let’s grab some supplies and make some art.
* Some of the links in this post may be affiliate links. This means I receive small commissions for purchases made through these links at no extra cost to you.
Art Supplies
- Thin black marker
- Paper or cardstock
- Markers
- Pencil
- Click Eraser, Pink Pearl Eraser
- White Gelly Roll pen
About Graffiti Art
Graffiti art is a type of art that people create on walls, buildings, or other public places. It often uses bright colors, big letters, and cool designs. Some people do graffiti just for fun, while others use it to share messages or express their feelings. Today, graffiti is seen as a real form of art and is even shown in art galleries!
Graffiti art can also be created on paper with markers, pens, and colored pencils. It’s a great way to develop your art skills and learn to make interesting designs.
Thumbnail Sketching Practice Exercise
When working on a graffiti art design, it can be useful to make a series of thumbnail sketches first. This will help you work through some ideas for your layout and design.
Plus they’re quick and easy to do which means it will actually save you time in the long run.
To learn more check out our post on How to Make Thumbnail Sketches.
How to Draw “Chill” Graffiti Art
I like to begin all of my drawings with some guidelines and simple shapes whenever possible. And it’s no different with graffiti art. So let’s begin by drawing some guidelines.
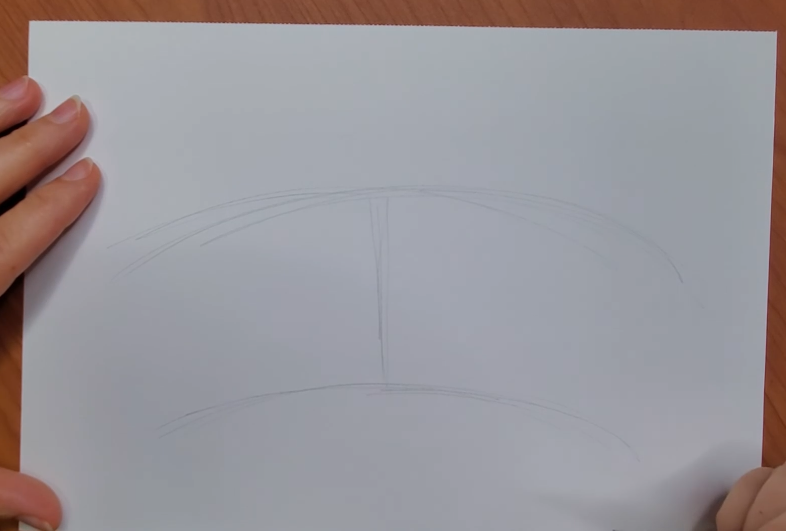
Step 1: Guides
If you did the thumbnail sketching exercise you should have a pretty good idea of how you want your letters laid out.
Begin by drawing the lines for the overall shape of your lettering. And then mark out the center of that area. This will help you balance out your letters when you draw them.
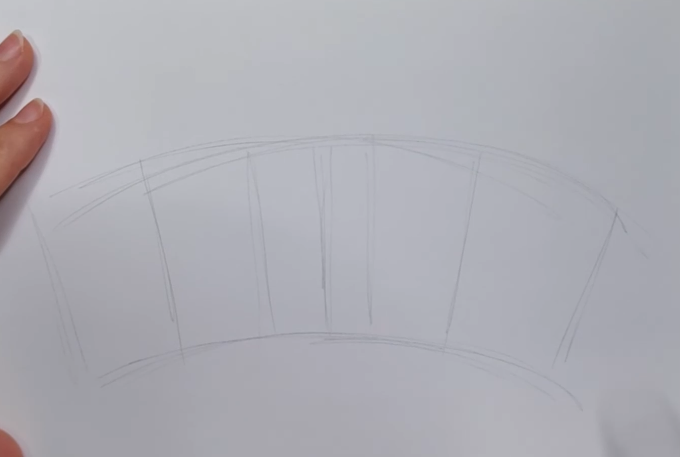
Then you want to make some light guidelines for where each letter will go. The word chill has five letters, so we need five sections.
Step 2: Sketch Letters
Now we can begin sketching out each letter for the word Chill. When drawing your letters, make sure they follow your guidelines. For this drawing I want my letters to form a bit of an arch shape.
So I need to make sure my letters follow that curve at the top. But by drawing the guides first we make this really easy to do.
Choose a style for your letters and keep them consistent throughout the graffiti drawing.
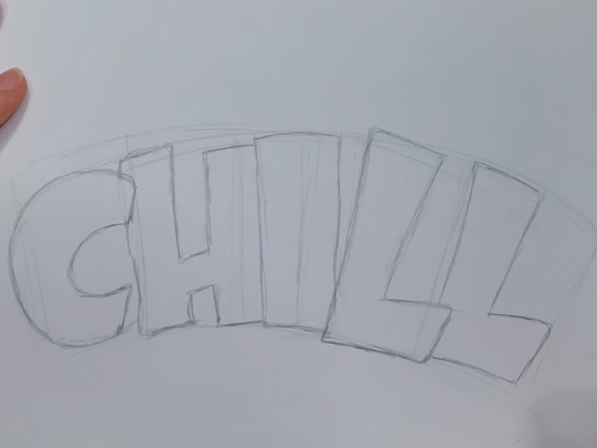
I like to overlap my letters because I think it looks more interesting. But you can space them out however you’d like.
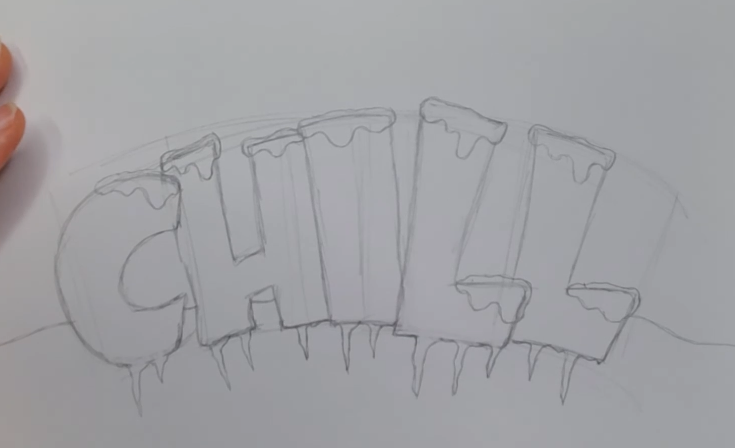
Step 3: Add Snow and Ice
Since I’m drawing the word “chill”, I wanted to make my letters with snow and ice on them.
So I decided to make the word have icicles dripping from the bottom of each letter. And snow piled up on the tops.
Check out the full tutorial on How to Draw Snow and Ice on Letters.
You could play around with some other ideas as well.
Graffiti Art Outline
After you have the letter all drawn out it’s time to add the outline. I like using a black pen or marker for this, but you can use whatever you prefer.
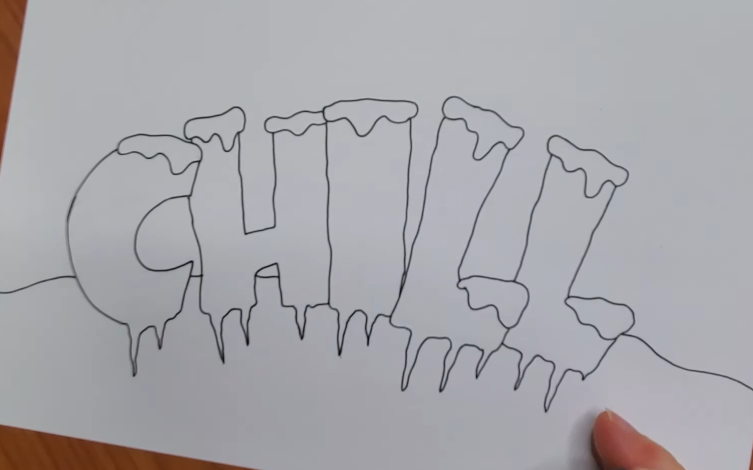
You can make your outlines thick, thin, or a combination of thicknesses.
I like to have a thick outline on my graffiti letters. When I make my outlines I’ll start with a thin outline, then make it thicker in specific areas.
“Chill” Graffiti Drawing with Markers
After you have your drawing outlined it’s time to start adding some color. I’m using markers for my drawing but colored pencils work well too.
Begin by choosing some colors for your letter. I’m using blue for this drawing because I want my chill graffiti drawing to have a cool feel to it.
Pick out three or four markers of that color ranging from light to dark.
Fill the letters in with your blue markers by using similar shades next to each other if you want a smooth transition of color.
You can use the lighter blue or a colorless blender to smooth the edges more.
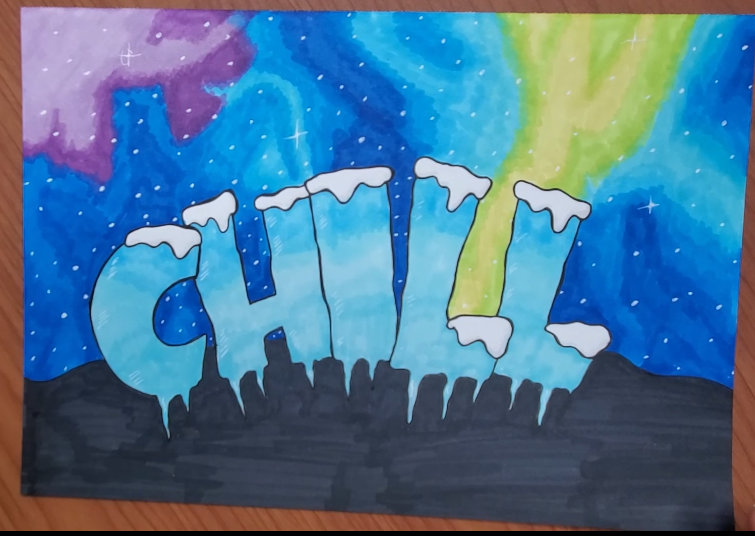
After the letters are all filled in, add your background.
I wanted to make a northern lights type of effect so I used blues, purple, and some yellow. Then white was used to add some stars.
A white Gelly Roll pen can be used to add highlights.
Final Thoughts and Next Steps
That’s all for this Chill step by step graffiti drawing tutorial. I hope you enjoyed the post and feel inspired to create some of your own graffiti art.
Drawing is something that takes practice to get better at. It’s not a skill you are either born with or not. If you want to improve you can with a little effort.
Making graffiti art is a lot of fun and can be challenging as well. But it also can be mastered with some practice.
Get your FREE Graffiti Guide and learn the steps to creating your own graffiti art.
