
Step by Step Bubble Letter Z
There’s something calming about sitting down with a pencil and drawing just one letter. Focusing on the shape of this single bubble letter Z will help quiet the mind and ease you into a creative flow.
It’s a gentle, low-pressure way to enjoy drawing, even if you don’t consider yourself an artist.
Practicing individual letters builds your confidence with lines and curves, and gives you space to experiment. Whether that’s with color, shading, or adding a personal flair. It’s a small but satisfying way to carve out a little creative time for yourself.
So let’s grab some supplies and let’s get started.
* Some of the links in this post may be affiliate links. This means I receive small commissions for purchases made through these links at no extra cost to you.
Art Supplies
- Thin black marker
- Paper or cardstock
- Markers
- Pencil
- Click Eraser, Pink Pearl Eraser
- White Gelly Roll pen
About Bubble Letters in Art
Bubble letters have their roots in graffiti and street art culture, emerging in the 1970s and 1980s alongside the rise of hip-hop in New York City.
Artists used bold, rounded letters to make their tags and messages stand out on city walls, trains, and other public spaces. The “bubble” style was eye-catching, playful, and easy to read from a distance—making it a favorite among graffiti writers.
As bubble letters grew in popularity, they moved beyond street art and found their way into graphic design, advertising, and even school art projects. Over time, they became a fun and accessible form of creative lettering that artists of all ages enjoy experimenting with today.
Bubble Letter Z Sketch Practice
Doing a quick sketch practice exercise is a great way to warm up and get familiar with whatever it is you’re about to draw. In this case, the letter Z.
And it’s quick and easy to do. Here’s how.
- Get some paper and something to sketch with (pencil, pen, marker, etc.)
- Pull up some reference photos of the letter Z
- Set a timer for three or five minutes
Then just sketch out as many letter Z’s as you can before you run out of time.
You could also keep sketching until your paper is filled and you run out of room. But be careful not to spend too much time on your sketches.
The idea is to keep them loose and quick.
How to Draw Bubble Letter Z
I’m drawing my bubble letter Z on an artist trading card, but you can use whatever size and type of paper you prefer.
When beginning a drawing it’s easiest to start with some simple shapes and guidelines. So that’s how we’re going to start this drawing.
Step 1: Guidelines
Begin by sketching out your letter Z as you would if you’re writing it. Just one single line. But pay attention to how the lines flow. We want our letters to have some style to them.
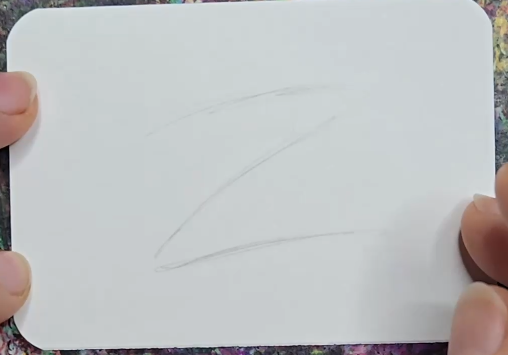
Also, make sure the overall size and placement of your letter is right. Keep in mind we will be making the letter bigger in the next step.
Step 2: Rough Sketch
After you have your guidelines drawn and you’re happy with how it looks you can add the thickness of the letter around it.
Using the guidelines, draw the outside edge of your bubble letter Z. Think about how you want your overall letter to look.
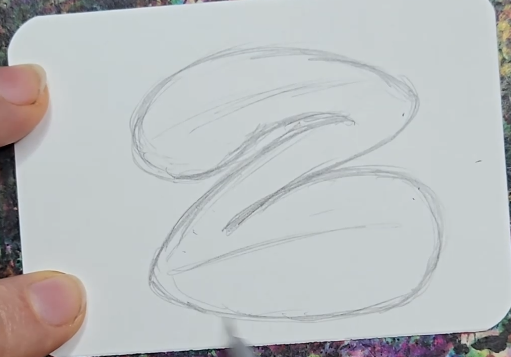
You will want to have some variation in the thickness of your letter. And think about how to make it look more interesting. An example of this is to make some areas wider and some thinner for some variation.
Step 3: Add a Background
Finish your sketch by adding a background. If you’re unsure of what to draw you can always add a brick wall.
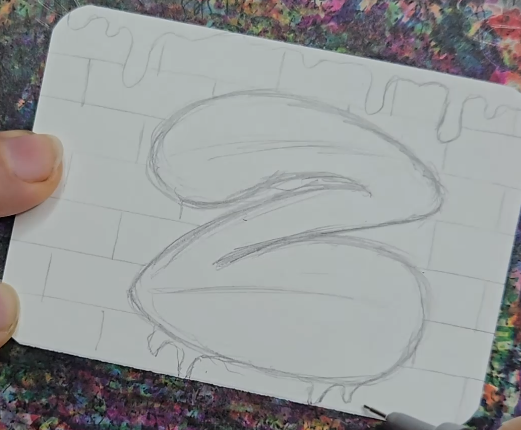
Or you could just fill it in with color later.
You could also add some paint drips or other types of accents.
Bubble Letter Z Outline
After you have your bubble letter Z sketched, out it’s time to add an outline. I like using a black outlining pen. But you could also use a black marker.
Or you could experiment with using a color other than black.
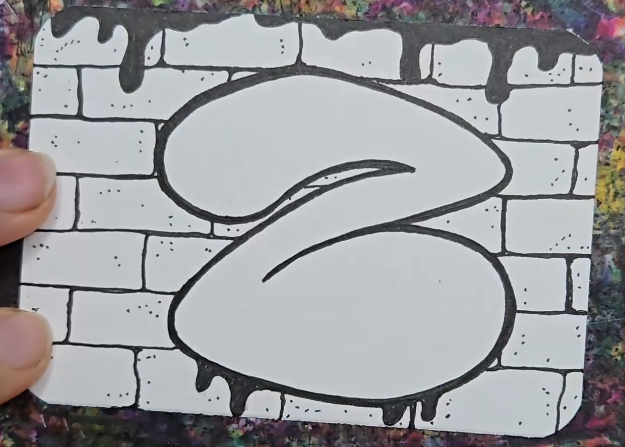
I like using a thick black outline on my lettering designs. But you could try adding thinner lines too. Or a combination of thick and thin lines.
There are so many options.
Bubble Letter Z Drawing with Markers
I love using markers, especially on my lettering art. The colors are so bright and bold.
But you could also use paint markers or colored pencils for your drawing.
When using markers I like to choose two or three values for each color. If I’m using purple, I would have a light, medium, and dark marker.
At minimum I like to have a light purple and a purple that is slightly darker. This will add some depth and contrast to your drawing. You could also go a few shades darker like I did with mine.
The colors you should choose will depend on the look you are going for.
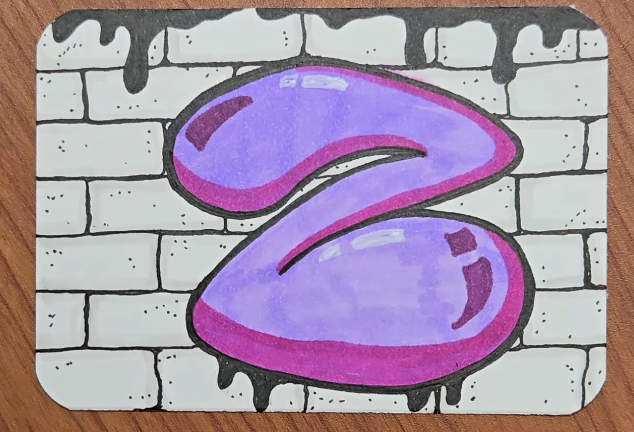
I use the lightest color first and fill in the letter. Then I add the darker color on top of that in specific areas.
You could also add some shapes or designs inside your letters. I finished up my drawing by adding some texture to the bricks. Learn how to draw brick texture here.
A white Gelly Roll pen can be used to add highlights.
I just shared one method for adding color to your bubble letter Z. You should try different ways of using color and discover what works best for you.
Final Thoughts and Next Steps
Now that you’ve drawn your bubble letter Z, graffiti style, what’s the next step?
If you want to get good at art and drawing you just need to practice. The more you practice the better you will get.
Working small helps to get more practice in less time. That’s why I love working on individual letters and doing them on artist trading cards.
Whether you’re practicing with individual letters or working on words, make sure you’re having fun. Creating art should feel relaxing and enjoyable.
Get your FREE Graffiti Guide and learn the steps to creating your own graffiti art.
