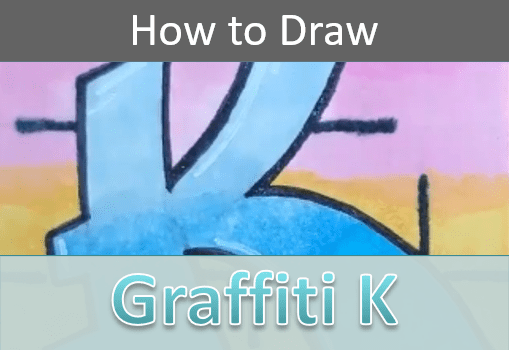
Step by Step Graffiti Letter K Drawing
In this tutorial I’ll be making a graffiti K drawing with markers. I’ll take you step by step through my process for drawing any letter of the alphabet.
You can use this same process to draw your letters in any style.
Let’s grab some supplies and get started on our graffiti letter K drawing.
* Some of the links in this post may be affiliate links. This means I receive small commissions for purchases made through these links at no extra cost to you.
Art Supplies
- Thin black marker
- Paper or cardstock
- Markers
- Pencil
- Click Eraser, Pink Pearl Eraser
- White Gelly Roll pen
About graffiti Art
Graffiti lettering is a form of visual art that uses stylized, often exaggerated, letters and fonts to create unique and expressive designs. Originating in urban environments, particularly on walls and public spaces, it is closely associated with street culture and hip-hop movements.
Graffiti lettering typically features bold colors, intricate details, and dynamic shapes, with letters often overlapping or morphing into abstract forms. Artists use various techniques, like spray paint, markers, or stencils, to create these works, which range from simple tags (artist signatures) to more elaborate and complex murals.
The style emphasizes creativity, individuality, and sometimes social or political messages.
Graffiti K Sketch Practice
Before doing any drawing it’s a good idea to warm up first. This only takes a few minutes to do so it’s usually well worth the time.
Here’s how to do it…
- Get some paper and something to sketch with (pencil, pen, marker, etc.)
- Pull up some reference photos of graffiti letters
- Set a timer for three or five minutes
Then quickly sketch out as many graffiti letter K drawings as you can before the timer runs out.
You could also just sketch them out until you run out of room on your paper.
Either way is fine. Just keep your sketches quick and loose.
Graffiti K Drawing – Step by Step
I like to start my drawings with basic shapes or guidelines whenever possible. So that’s how we’ll begin our graffiti K drawing today.
Step 1: Guidelines
Begin by drawing the letter K as you would if you were just writing it. But think about how you want the letter to flow.
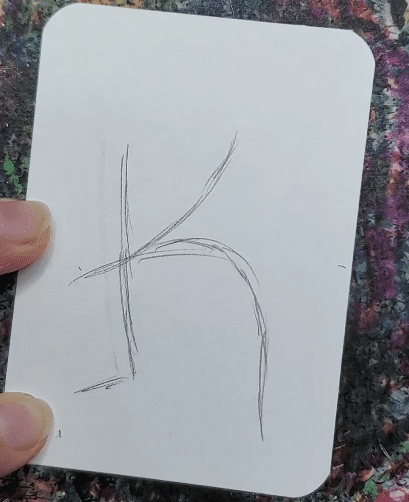
Your guidelines will be roughly in the center of your finished letter, so keep that in mind.
You can have your lines overlap or extend past the other lines. And you can add some extra lines on the ends to give it more character and make it look a bit more interesting.
It’s not necessary to add all of the extra details here, but you do want to make sure you have a good idea of what your finished letter will look like.
Step 2: Sketch
After you have the basic design of your letter drawn out, it’s time to start adding in some of the details and adding the thickness to the letter.
Follow along with your guidelines as you make your graffiti K drawing. As you draw your letter, think about how you want the letter to look.
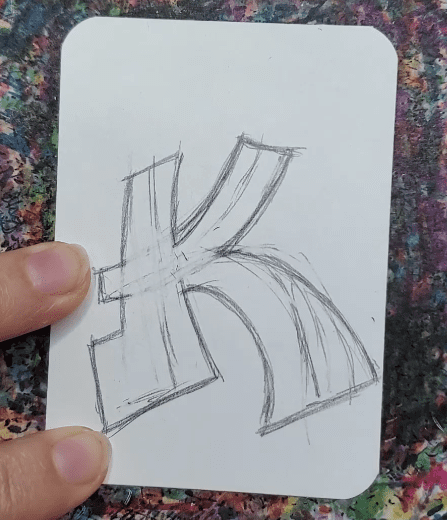
It looks more interesting to have some areas wider and some thinner. Also, think about how you can make parts of your letter longer or shorter.
Step 3: Add Details
Finish your graffiti K drawing by adding in any extra details. Arrows are pretty popular in graffiti art.
You could also add a background design or images to finish up your drawing.
Graffiti K Drawing – Outline
After you have your letter all drawn out you can add your outline using a black pen or marker.
This can be done before or after you draw your background designs and images.
I like using a black pen but you can use whatever you want for your outline.
Trace over all of the pencil lines that you want to keep to create your outline. You can make your lines thick or thin.
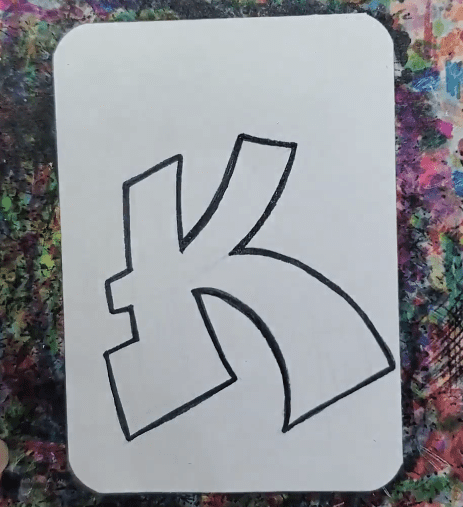
You can also vary your line weights and use a combination of thick and thin lines.
How to Draw a Graffiti K with Markers
I’ll be using markers today but any medium can be used to add color to your graffiti art. If you are using markers and you want to be able to blend the colors together, be sure to use alcohol based markers.
I’m doing a blue fade for my drawing so I picked out three different blue markers that are similar in color to each other.
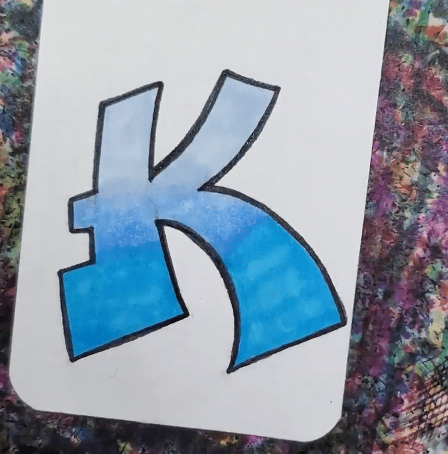
Begin by adding the lightest color to the top of the letter. Then add the medium blue to the middle of the letter. To blend the two together, use the lighter color and go back over your letter where the two colors meet.
Then follow the same process for the darkest blue at the bottom. Always use the lighter color to blend or a colorless blender if you have one.
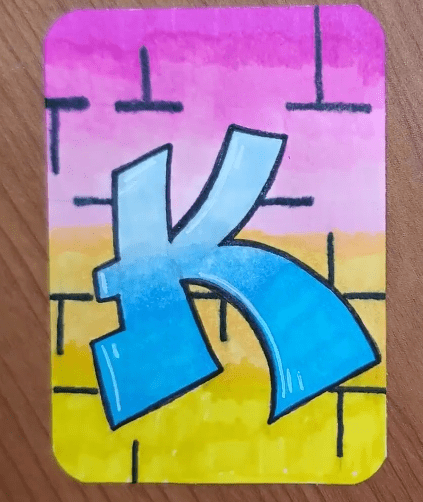
Finish your drawing by adding color to your background.
A white Gelly Roll pen can be used to add highlights.
Final Thoughts and Next Steps
That’s it for our graffiti K drawing tutorial. Practicing individual letters is a great way to improve your art and drawing skills in less time.
I like using artist trading cards for my drawings because they are quicker to do so I can get a lot more practice in.
This allows me to work through my ideas quickly and try out new things.
The best way to get good at something is by practicing. The more you practice, the better you will get. Have fun and enjoy the process of creating art.
Get your FREE Graffiti Guide and learn the steps to creating your own graffiti art.

