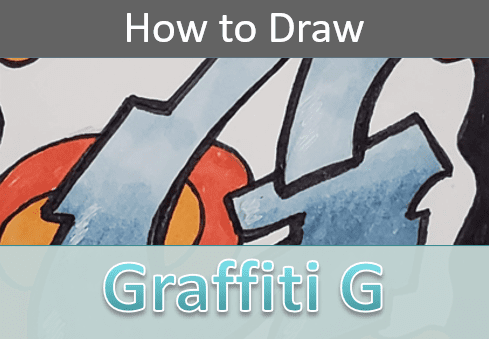
Step by Step Graffiti Letter G (with markers)
In this tutorial I’ll show you how to draw graffiti letter G. This is an easy step by step lesson that’s good for all levels of artists, including beginners.
There are many different ways to create your artwork. I’m going to show you my process for making graffiti letters.
Let’s grab some supplies and learn how to draw a graffiti G.
* Some of the links in this post may be affiliate links. This means I receive small commissions for purchases made through these links at no extra cost to you.
Art Supplies
- Thin black marker
- Paper or cardstock
- Markers
- Pencil
- Click Eraser, Pink Pearl Eraser
- White Gelly Roll pen
Styles of Graffiti Lettering
- Tagging: The simplest form of graffiti, consisting of a writer’s signature or nickname. Tags are usually created quickly and can be found in high frequency.
- Throw-Ups: More complex than tags, these involve more color and bubble-like letters, often filled in with one color and outlined in another.
- Blockbusters: Large, blocky letters usually used to cover large areas. They are often simple and designed for maximum visibility.
- Wildstyle: Highly complex and intricate lettering, often with interlocking letters and additional elements like arrows, spikes, and 3D effects. This style can be difficult to read for those not familiar with it.
- Bubble Letters: Rounded, soft-edged letters that are often filled with bright colors. This style is accessible and popular among many graffiti artists.
Graffiti Letter G Sketch Practice
Doing a quick sketch practice exercise is a great way to warm up and get some ideas flowing. It only takes a few minutes to do but the benefits will last a lifetime.
Here’s how to do it…
- Get some paper and something to sketch with (pencil, pen, marker, etc.)
- Pull up some reference photos of graffiti letter G
- Set a timer for three or five minutes
Then simply sketch out as many different graffiti G designs as you can before the timer goes off.
You don’t have to worry about getting too detailed. Just try to capture the flow and style of the letter.
You could also sketch until you run out of room on the paper. Just make sure you’re sketching quickly and keeping things loose.
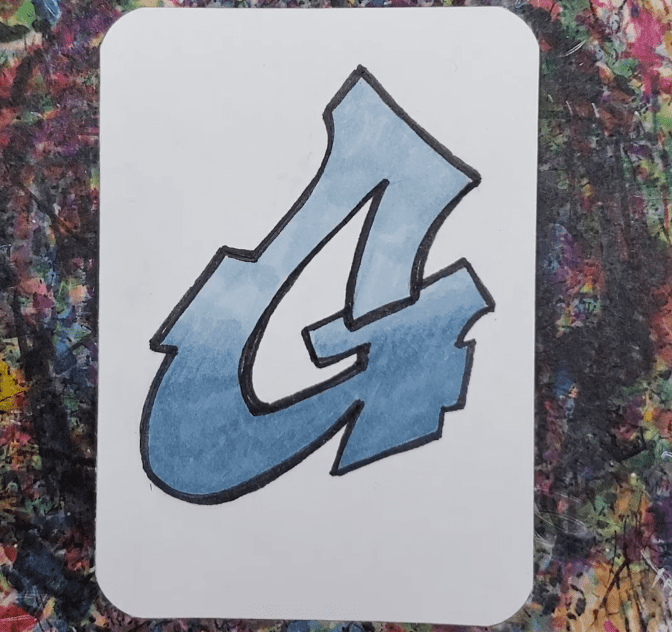
How to Draw Graffiti Letter G
I did this drawing on an artist trading card (ATC). They are a great time saver and perfect for practice drawings.
You could also use a full sheet of paper or a sketchbook. Any size paper will work for this.
To learn more about ATCs, check out this tutorial:
The Ultimate Guide to Artist Trading Cards
Let’s get started with some simple guidelines.
Step 1: Guidelines
Starting with basic shapes and guidelines will make taking those first steps easier. And it helps you see how the finished drawing will look before spending a bunch of time on it.
For our graffiti G guidelines we want to capture the size, placement, and flow of the letter.
Start by drawing the letter like you would if you were writing. Don’t worry about adding the thickness yet. We’ll do that in the next step.
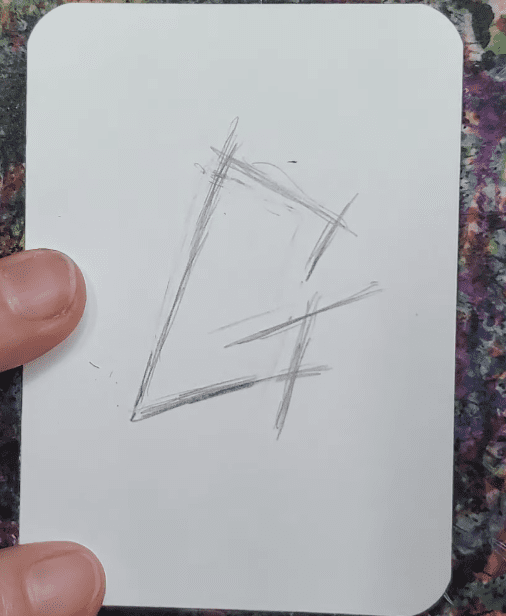
Keep in mind that this guideline will be the center of the letter.
Make sure the size and placement of the letter G looks good. You can also add a bit of style to your letter in this stage.
Step 2: Sketch
When you’re happy with how your graffiti G guidelines look, start adding the thickness to your letter.
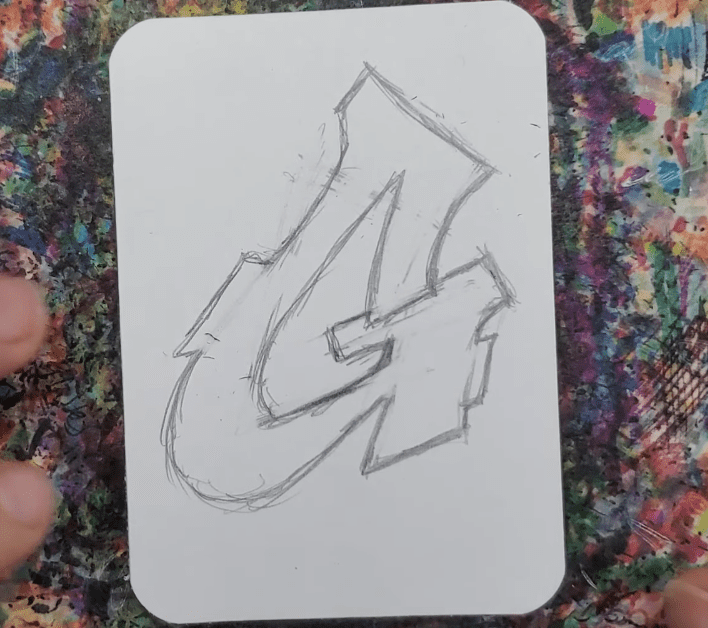
Do this by sketching out the details using the guideline to draw the letter. When you’re finished the guidelines should be in the center of your letter.
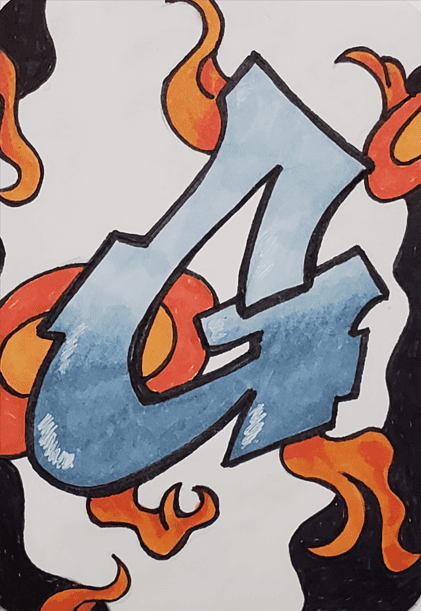
Step 3: Accents and Background
After you’ve finished drawing your graffiti G you can add a background design and some accents.
The backgrounds are where you can really get creative with the design. You can add images, abstract shapes, or a simple brick wall.
Graffiti G Outline
After you have everything sketched out you’ll need to add an outline to your drawing before filling in the color.
I like using a black Sharpie pen for my drawings, but any pen or marker will work. You could also try using a color other than black.
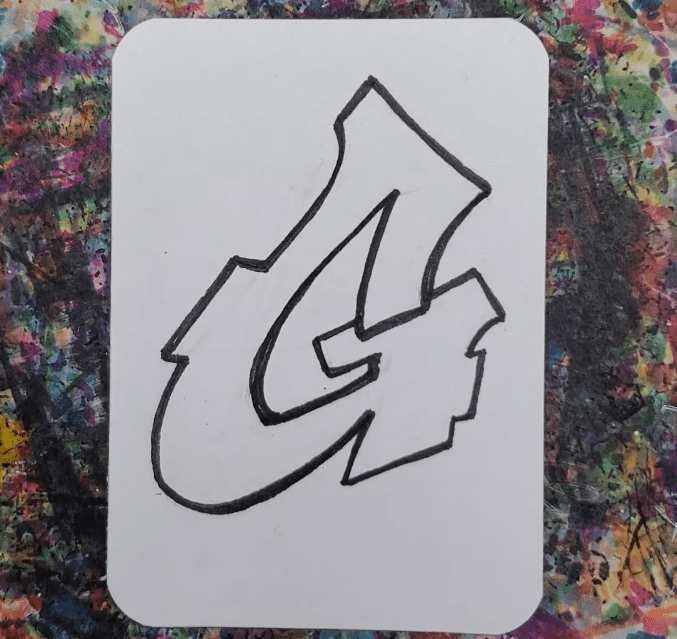
You can make your outline thin, thick, or a combination of line weights. This will depend on your artistic style and the overall look you’re going for.
How to Draw a Graffiti G with Markers
After your graffiti G is outlined you can start adding in some color. This can be done with any medium of your choice. I’ll be using markers for this tutorial.
If you want to use markers you’ll need to keep a few things in mind.
First, you’ll want to use alcohol based markers if you want to blend the colors together.
You’ll also need to work while the markers are still wet, and the colors need to be similar to each other to achieve a smooth transition between colors.
Pick out two or three markers for each color. Then begin with the lightest color first and work your way to the darkest color.
Where the colors overlap, use the lighter color or a colorless blender to smooth out the transition line.
Add color to the background design by using solid or blended colors.
A white Gelly Roll pen can be used to add highlights.
Final Thoughts and Next Steps
Now that you learned how to draw graffiti letter G, what’s the next step? If you want to get better at drawing and art you’ll need to practice as often as possible.
The more consistent you are, the better your results will be. This could be for ten to fifteen minutes each day. You don’t have to practice for hours each day. But being consistent will speed up your improvements.
For more information on creating graffiti art check out our free guide.
Get your FREE Graffiti Guide and learn the steps to creating your own graffiti art.
