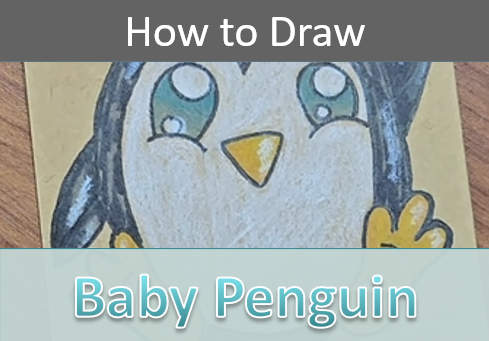
How to Draw a Baby Penguin
This baby penguin drawing tutorial will show you how to draw an adorable penguin step by step, using simple shapes that are easy to follow.
Whether you’re new to drawing or just want a fun, low-pressure sketch, this tutorial is designed to help you create a cute baby penguin without stress or complicated techniques.
Let’s grab our art supplies and get started.
* Some of the links in this post may be affiliate links. This means I receive small commissions for purchases made through these links at no extra cost to you.
Art Supplies
- Thin black marker
- Paper or cardstock
- Markers
- Pencil
- Click Eraser, Pink Pearl Eraser
- White Gelly Roll pen
Why Baby Penguins Often Look Fluffy and Round
Baby penguins are known for their soft, fluffy appearance, and there’s a good reason for that. Instead of sleek, waterproof feathers like adult penguins, chicks are covered in downy feathers that help keep them warm in cold environments. This gives them a rounder, puffier shape that feels especially cute and appealing.
From a drawing perspective, this is great news. That fluffiness allows you to simplify the body into soft curves and rounded shapes rather than worrying about sharp details or exact anatomy. When drawing a baby penguin, focusing on circles and gentle outlines helps capture that fluffy look without overworking your sketch.
This is also why baby penguins are such a forgiving subject for beginners, slight inaccuracies often add to the charm rather than taking away from it.
Baby Penguin Sketch Practice
Doing this quick sketch practice exercise is a great way to warm up and get familiar with drawing baby penguins. But without the pressure of wanting things to be perfect.
It’s quick and easy to do. Here’s how:
- Get some paper and something to sketch with (pencil, pen, marker, etc.)
- Pull up some reference photos of baby penguins
- Set a timer for three or five minutes
Then sketch out as many baby penguins as you can before the timer runs out. Don’t worry about all the little details, just focus on the shape and overall look.
You could also continue to sketch until your paper is full and you run out of room. Both work as long as you keep this exercise quick and loose.
How to Draw Baby Penguins Step by Step
We’re going to begin this drawing with some basic shapes because that’s the easiest way to start a drawing.
Beginning this way will help us with the size and placement on our paper. I’m doing my drawing on an artist trading card (ATC). But any size and type of paper will work.
Step 1: Basic Shapes
Start by drawing a circle for the body. I made mine a bit more of an oval shape, but more plump. Then divide the circle down the middle and across the center to make four, mostly even, sections.
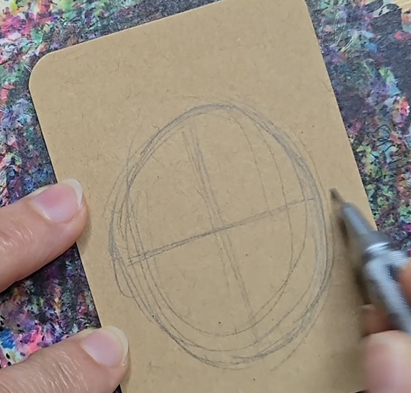
These will act as our guidelines to keep things symmetrical.
Then add a couple of ovals for the feet and flippers. Also add in a couple of circles or ovals for the eyes and a small upside down triangle for the bill.
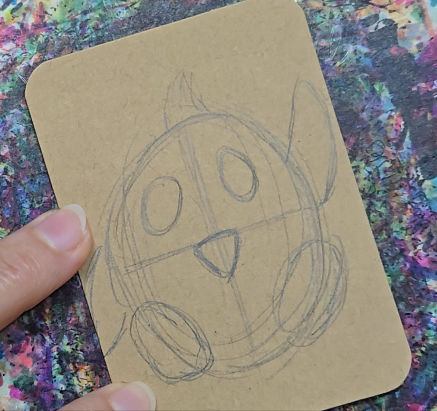
Now we can start adding in more details to those basic shapes.
Step 2: Rough Sketch
Penguins have webbed feet, but you can draw them anyway you’d like. Mine look more like toes than webs, but I think they look cute so I left them like that.
Then add in the details for the eyes. You can draw in the iris and the pupil. Or, you could draw one or the other.
When drawing the flippers you can add an extra line to show both the inside and outside surfaces to make your baby penguin drawing look more interesting.
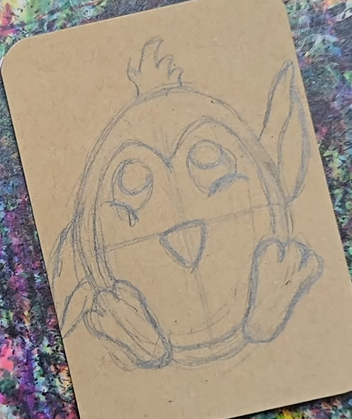
Lastly, add the belly that goes around the eyes and down towards the bottom of the body. You can add some hair at the top as well.
Step 3: Add Details
Finish up by adding in any extra details for your baby penguin or the background. You could add in some snow or other polar scenery.
Inking Your Baby Penguin Drawing
Now we need to ink our baby penguin drawing before adding some color. I like using a black fine liner but you can use whatever type of pen or marker you want.
You could try using a color other than black too.
All you need to do is trace over all of the pencil lines that you want to keep with the pen. You can make some of the lines thick and some thin. Or you can keep your line weight consistent throughout your drawing.
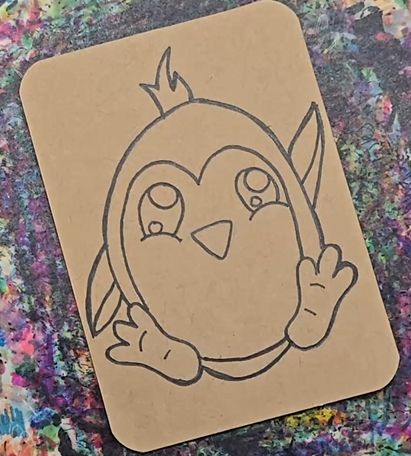
When you’re finished inking your drawing you can use a block eraser to clean everything up.
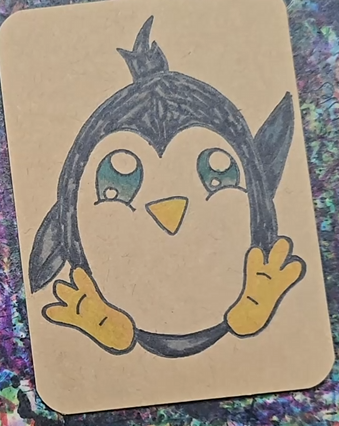
Baby Penguin Drawing with Markers
Now we’re ready to add some color. This is where your drawing really comes to life and makes an impression.
I’m using markers and colored pencils for my baby penguin drawing. But you can use other media as well.
Start by selecting the colors you want to use and test them out on a piece of scrap paper to make sure they’re going to work for your drawing.
When using markers, it looks better if you use light, medium, and dark tones of each color. This helps to create depth in your drawings.
Also, instead of using black for the darkest areas of your penguin, use a few different gray markers. This is done by adding layers.
Begin with your lightest marker. Then add the medium value of the color. And then add the darkest value on top of that, leaving the light and medium values to show.
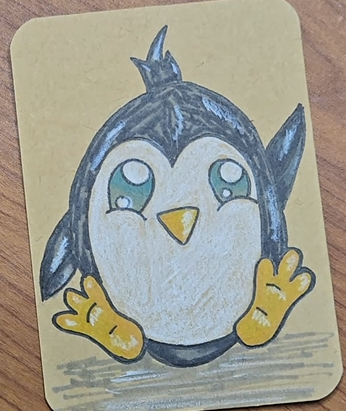
You can also add some texture by using shorter lines like I did in my baby penguin drawing.
For the white area on his belly I used a white colored pencil. And I added some gray to the ground so he wasn’t just floating on the paper.
Final Thoughts and Next Steps
Drawing a baby penguin doesn’t have to be complicated. By focusing on simple shapes and soft, rounded lines, you can create a charming drawing without stressing over details or perfection. This baby penguin drawing tutorial is meant to remind you that small, enjoyable drawings are often the best way to build confidence and stay consistent.
If you’d like to keep practicing, try drawing the penguin again using different poses or expressions, or experiment with light shading to add a bit more fluff and depth. Even just a few minutes of drawing a day can make a noticeable difference over time.
As your next step, you might enjoy exploring other easy animal tutorials or revisiting this one later to see how your drawing style has grown. The most important thing is to keep it fun and keep going. Progress comes naturally when you do.
Grab your FREE Guide to Better Art in 7 Days
