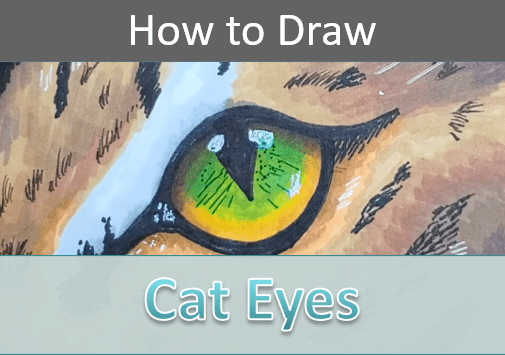
Step by Step Cat Eye Drawing
Learning how to draw a cat eye is easy and fun. This is a good beginner art tutorial for learning and growing your art skills.
In today’s lesson you’ll learn how to draw using basic shapes and guidelines. And how to add color with markers. But you could use another medium if you’d like.
Let’s grab our supplies and learn how to draw a cat eye.
* Some of the links in this post may be affiliate links. This means I receive small commissions for purchases made through these links at no extra cost to you.
Art Supplies
- Thin black marker
- Paper or cardstock
- Markers
- Pencil
- Click Eraser, Pink Pearl Eraser
- White Gelly Roll pen
Cat Eyes in Art
The depiction of cat eyes in art has a long and varied history, often associated with symbolism, mysticism, and cultural beliefs. Cats have been admired in many societies, and their eyes, with their unique vertical pupils, have captivated artists throughout the ages.
The ancient Egyptians associated cats with protection, fertility, and good fortune. Artists frequently depicted cats with large, expressive eyes that conveyed a sense of mystery and divinity.
In medieval Europe, cats were sometimes associated with superstitions and witchcraft. Their eyes were portrayed in art with an air of mystery, often emphasizing their nocturnal and elusive nature. Cats were sometimes linked to witches, and their eyes were depicted as having a supernatural quality.
Surrealist artists, such as Salvador Dalí, often used dreamlike and fantastical imagery in their works. Cats, with their surreal and otherworldly qualities, frequently appeared in surrealistic art. The eyes of cats were sometimes exaggerated or distorted to create a sense of the uncanny.
Cats and their eyes continue to be a popular subject in contemporary art. With the rise of digital art and pop culture, cat imagery has taken on new forms. The internet, particularly social media, has also played a role in popularizing cat memes and contributing to the modern fascination with cats.
Whether seen as symbols of mystery, magic, protection, or playfulness, cat eyes have left their mark on the canvas of human creativity.
Cat Eye Sketch Practice
Prior to starting your artwork, it’s sometimes beneficial to do some quick practice sketches. This will allow your muscles to warm up a bit, and it gives you time to get more familiar with the subject matter you’re getting ready to draw.
Here’s how to do a sketch practice session…
- Get some paper and something to sketch with (pencil, pen, marker, etc.)
- Pull up some reference photos of cat eyes
- Set a timer for three or five minutes
Then quickly sketch out as many cat eyes as you can before the timer runs out. Another option is to simply sketch until you fill your paper up. The key is to keep your lines quick and loose.
After doing this type of exercise you’ll have a better idea of how you want to draw your cat eye.
How to Draw Cat Eyes Step by Step
It’s time to learn how to draw a cat eye. I’m doing my drawing on an ATC. You can learn more by reading A Beginner’s Guide to Artist Trading Cards.
ATCs are a great way to save time and work really well for creating a nice portfolio of your artwork. And trading them is a lot of fun too.
But of course you’re welcome to use whatever size paper you prefer for your drawing.
Step 1: Simple Shapes
The easiest way to start any drawing is with some basic shapes. When learning how to draw a cat eye, we want to start with a circle because the eyeball is a sphere.
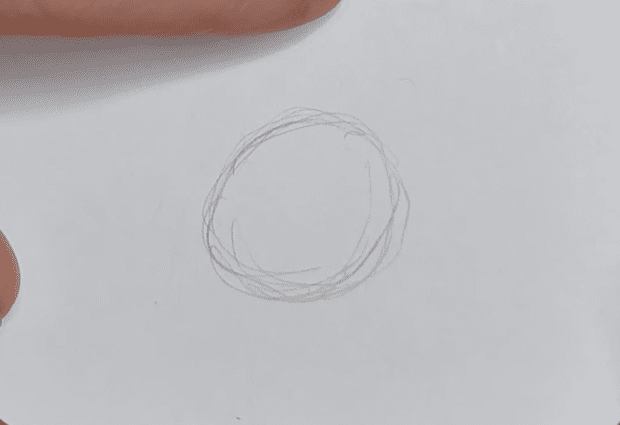
When the drawing is finished you won’t see the entire circle so be sure to make your lines light.
Guidelines are helpful too so you can also add a slanted line to represent the angle of your cat’s eye.
Step 2: Rough Sketch
Next we need to start adding the outside part of the eye to make it look more like a cat eye. We’re not worried about the specific details yet. We just want to get a rough sketch for how we want the eye to look.
Start by drawing the top lid of your cat eye. Use the circle you drew as a guide, but remember that the lid partially covers the eyeball.
Then do the same thing for the bottom lid. Again, keeping in mind that part of the eyeball will be covered.

Keep working on your rough drawing until you’re happy with how it looks.
Step 3: Add Details
Now we need to start adding in the details for your cat eye drawing.
Draw a diamond shape for the pupil. The upper eyelid will cover the top of the pupil so draw it lightly at the top or stop when you get to the upper lid.
It will look better if you add some thickness to the upper and lower eyelids. This is where a reference photo really comes in handy.
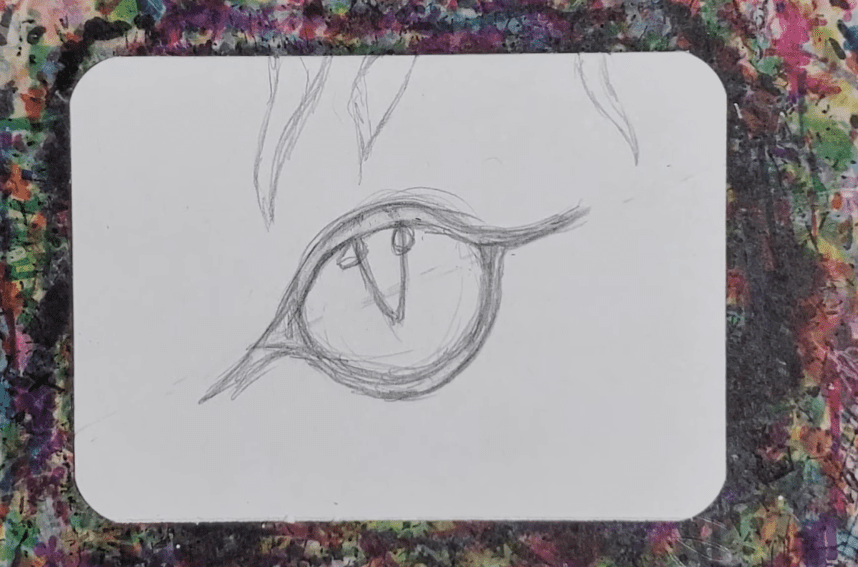
It’s these kinds of small details that really take your drawings to the next level.
You can add some fur texture now or do it with your pen in the next step.
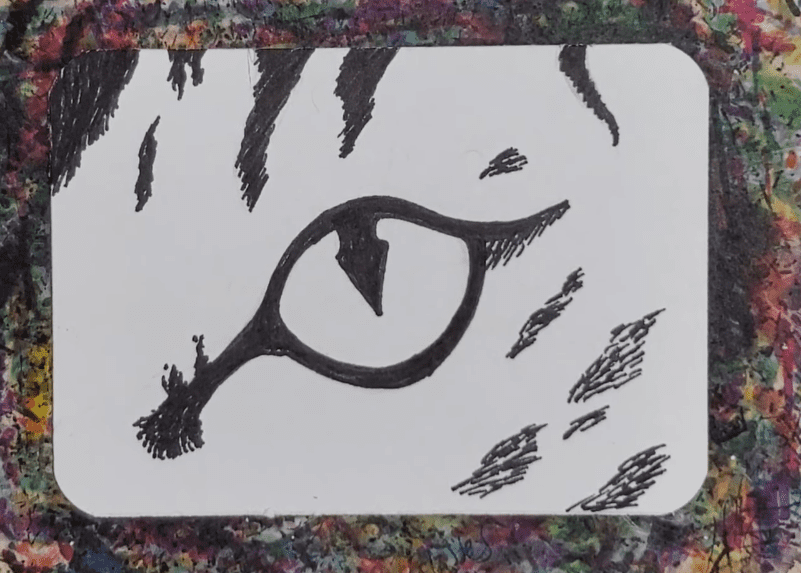
Cat Eye Outline
You’re ready to outline your cat eye with a black pen or marker. I prefer using an outline pen for this, but there are other options as well.
You could use a black marker, or you could use a dark gray instead.
Simply trace over your pencil lines with the black pen. You can fill in the black areas with the pen as well, including the pupil.
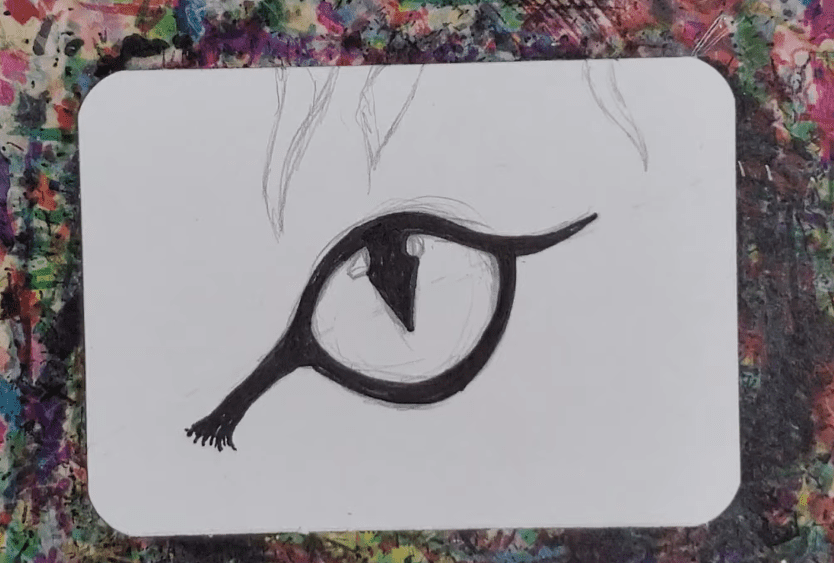
I added some areas of black fur with my pen as well. This step is optional but it adds some nice texture to your cat eye drawing.
How to Draw a Cat Eye with Markers
When you’re finished with the black pen it’s time to start adding some color with markers. When using markers for your artwork, there’s a few things to keep in mind.
First, if you want to be able to blend your colors together you need to use alcohol based markers. Bic, Sharpie, and Copic for example. As well as many others.
Second, you need to work while the colors are still wet or they won’t mix together. This isn’t a big deal. Just make sure you work on a section at a time.
Third, you need to use colors that are similar to each other if you want to create a smooth transition of color. If your markers are too different they will leave a harder edge.
For this cat eye drawing I want smoother transitions so I need to make sure to follow those rules when working with markers.
Choose one area to start working in and add the lightest color first. Try to use at least two or three different markers for each area.
Then go over that lighter color with the next darkest one where you want the fur to be darker.
Keep doing this until you get your fur to look the way you want. For now just color in solid blocks. You can add some texture later.
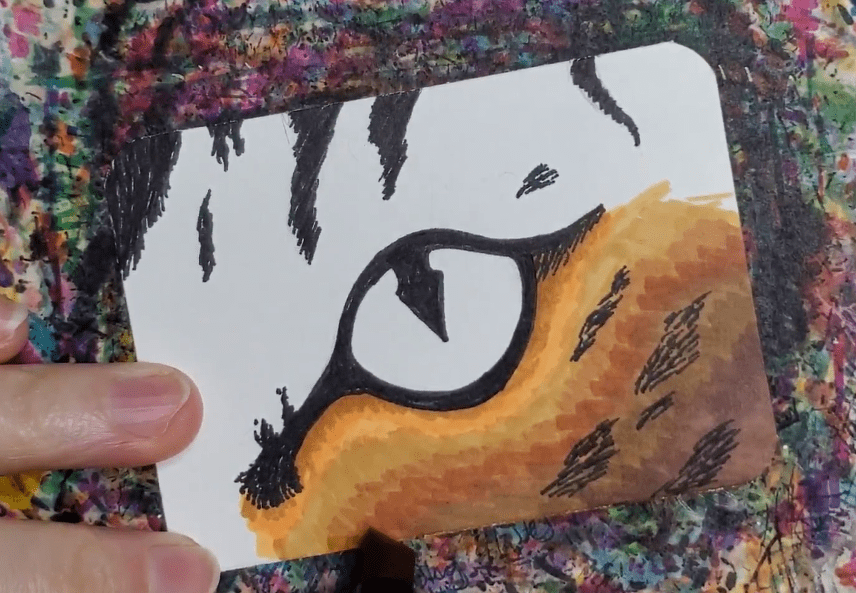
Continue working your way around your drawing until you have color added to all of the fur areas.
Now move on to the eyeball and work the same way, adding the lightest color first. Use your reference photo to choose the right colors.
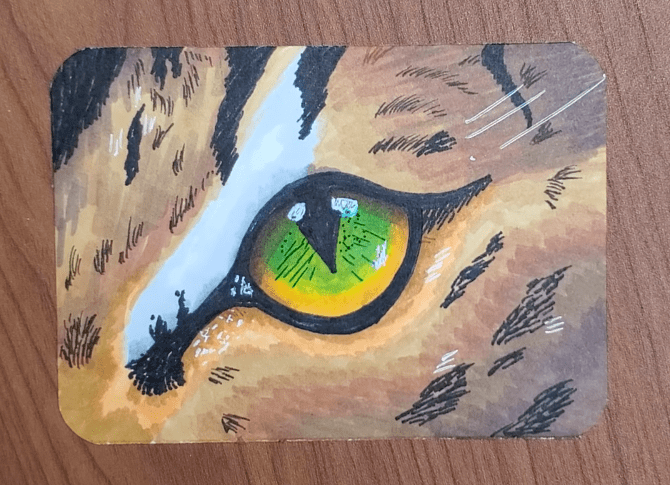
Use different colored pens to add individual hairs to create more texture in your cat eye drawing. You can add as much or as little as you’d like.
A white Gelly Roll pen can be used to add highlights.
Final Thoughts and Next Steps
Now that you’ve learned how to draw a cat eye, what’s next? If you want to get good at art and drawing, you need to practice.
The more you practice, the better you will get. Even if it’s only for a few minutes each day, it will benefit you over time if you’re consistent.
You could try doing a seven day drawing challenge and really learn how to draw a cat eye well.
Grab your FREE Guide to Better Art in 7 Days
