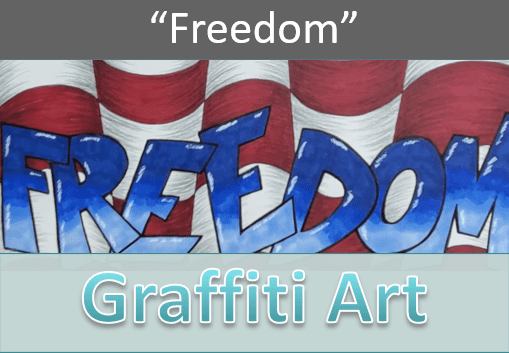
Freedom Graffiti Drawing and Ohuhu Marker Review
In today’s art lesson I’m going to show you how I made my Freedom graffiti drawing. This was really fun to draw and I enjoyed trying out a new set of Ohuhu markers, which I’ll talk about in this tutorial as well.
Graffiti art is a great way to improve your art and drawing skills. And you can make it in your own style.
Let’s grab some supplies and get started.
* Some of the links in this post may be affiliate links. This means I receive small commissions for purchases made through these links at no extra cost to you.
Art Supplies
- Thin black marker
- Paper or cardstock
- Markers
- Pencil
- Click Eraser, Pink Pearl Eraser
- White Gelly Roll pen
About Graffiti Drawings
Graffiti drawings have a long and varied history:
- Ancient Times: Prehistoric cave paintings and Roman graffiti, including political slogans and everyday messages, are early examples.
- Middle Ages and Renaissance: Graffiti appeared as etchings and carvings on buildings and public spaces.
- 20th Century: Modern graffiti emerged in the 1940s with “Kilroy was here,” gaining momentum in the 1960s-70s in Philadelphia and New York City, with pioneers like Cornbread and TAKI 183.
- 1970s-1980s: The golden age of graffiti in New York saw the evolution from simple tags to elaborate pieces. Artists like Lee Quiñones, Jean-Michel Basquiat (SAMO), and Keith Haring bridged street art with contemporary art.
- 1990s-Present: Graffiti evolved further, influenced by hip-hop culture. Artists like Banksy and Shepard Fairey brought global attention to street art, now recognized in galleries and museums for its social and political commentary.
Throughout history, graffiti has been a dynamic and often controversial form of artistic expression.
Freedom Sketch Practice
Doing some quick thumbnail sketches is a great way to warm up and work through your design ideas. They only take a few minutes to do so they’re definitely worth your time.
Check out the tutorial for more information, How to Make Thumbnail Sketches.
Thumbnail sketches are a perfect tool to use with your graffiti art to brainstorm through a bunch of layout ideas quickly. By doing this first you can save time when working on your finished drawing.
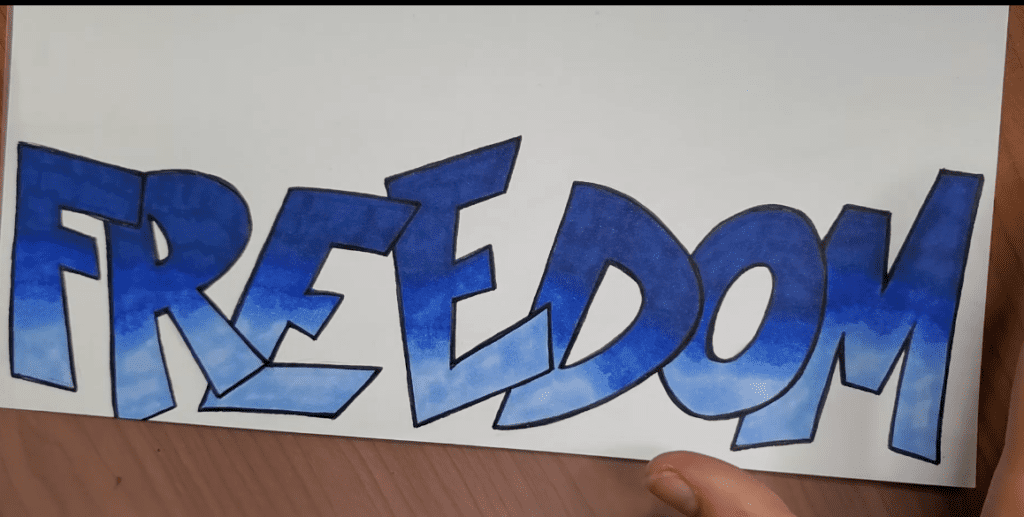
How to Draw a “Freedom” Graffiti Drawing
This tutorial will walk you through my process for creating graffiti art. I’ll be using markers and colored pencils for the color, but you can use whatever you want.
Step 1: Rough Sketch
I almost always start with some rough guides or basic shapes. So that’s how I’m going to begin this Freedom graffiti drawing. For lettering, the guides are simple, just draw out the letters like you would if you’re printing them.
Think about how you want your letters to overlap as you’re doing this. Graffiti art is more interesting if the letters interact with each other.
When doing this you do want to focus on the size, position, and placement of the letters. But keep in mind that your guidelines will be roughly in the center of your finished letters so accommodate for that.
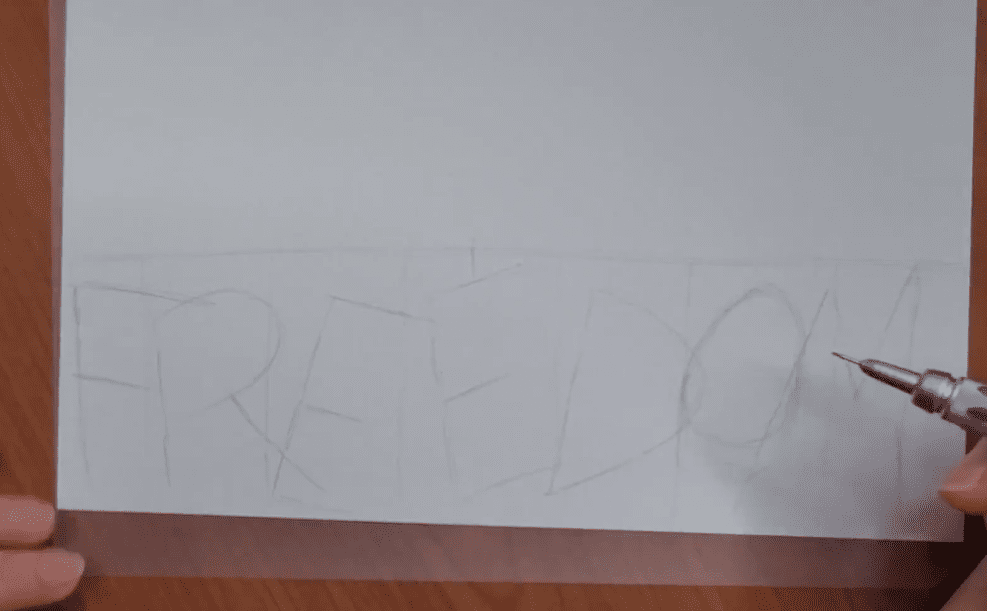
You can start to add some extra details to your letters at this point as well. Things like extra pieces at the ends or parts of the letters you want to extend beyond the basic style letter.
Give your letters some character and get away from boring lettering.
Step 2: Graffiti Drawing Letters
Now it’s time to flesh out your lettering design. Using your guides as your compass, begin adding the outside edges to each letter. You can start in the middle or one of the ends.
Draw lightly as some of these lines will get erased.
Some of your letters will overlap but it’s easier to draw the entire letter and decide which lines to erase.
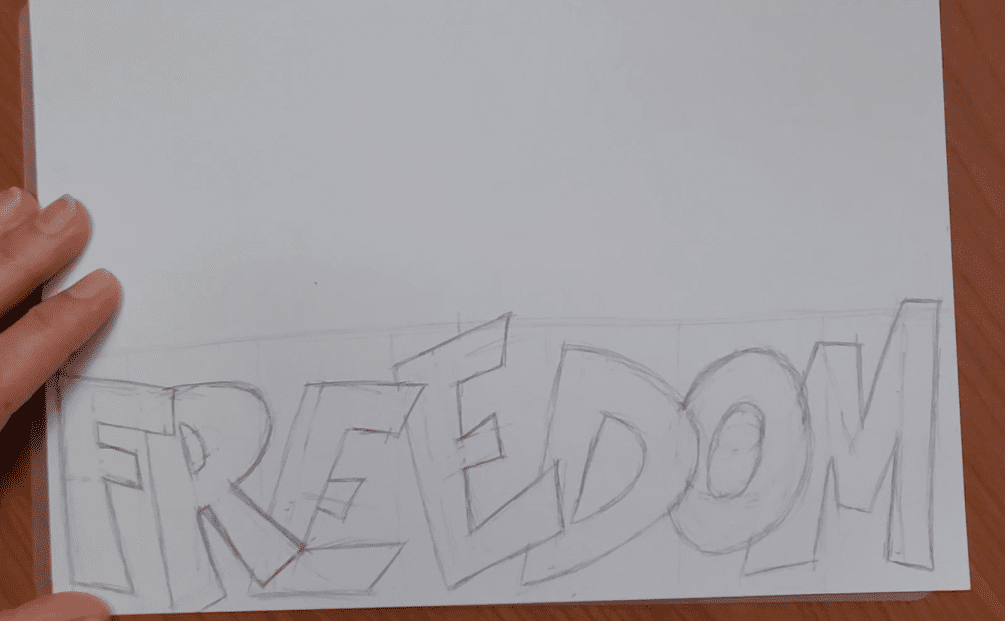
Continue working on each letter until you have them all drawn out and you’re happy with how everything looks.
Step 3: Background Image
There are a lot of different designs and images you could use for your background. You want to choose something that goes along with the word you’re drawing and the theme of your graffiti art. Since the word is Freedom, I decided to do an optical art waving flag for the background.
There’s a lot of steps to this background and you can find the full step by step tutorial by clicking on the link below.
How to Draw Optical Art Waving Flags
Graffiti Drawing Outline
After you have your letters all drawn out you can add an outline using a black pen or marker. You could also try using a different color and see how that turns out. Which color you choose will depend on your artistic style and the overlook you’re going for with your graffiti drawing.
I usually make my outlines a bit thicker. But for this Freedom graffiti drawing I decided to make the outline a little thinner so the optical illusion in the background stood out a bit more.
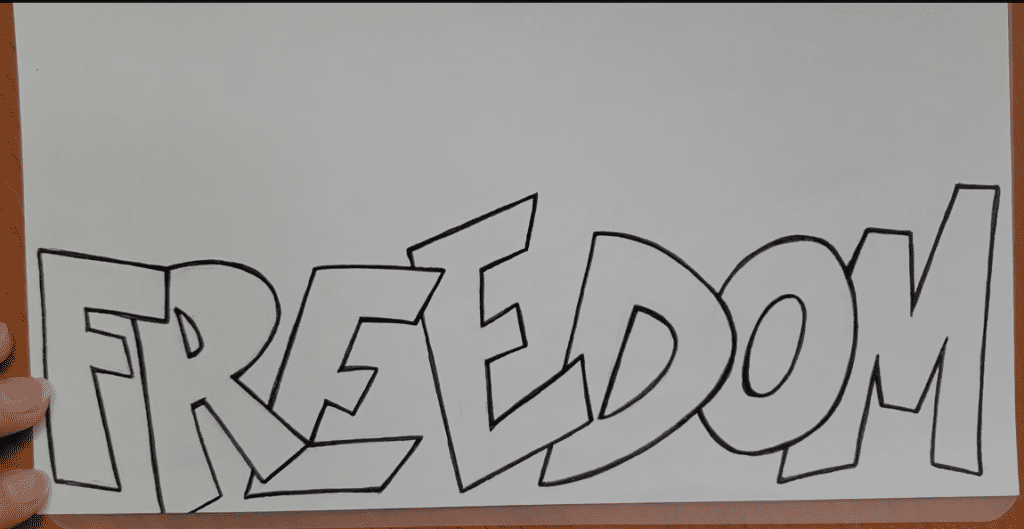
If you want to make a thicker outline you can use a marker instead of a pen. Or, you can use a pen and keep going over the outline until it’s the thickness that you want.
How to Draw a Freedom Graffiti Drawing with Markers
For today’s tutorial I’m using a new set of Ohuhu markers that I just got. This is my first time using this brand, and my first time using brush tip markers for a drawing. But I’m excited to try them out.
When using markers you need to work while they’re wet if you want to blend your colors together. To do this simply work in small sections at a time.
For my Freedom graffiti drawing I decided to make the letters blue with a fade. Choose two or three blue markers that are similar in color. Use a scrap piece of paper to test the colors before choosing which markers to use.
Starting with your first letter, add the darkest blue to the top part of the letter. Then add the next lightest blue, overlapping the two markers a little bit.
Finish the letter by adding the lightest blue to the rest of the letter.
Finish the lettering by filling in the rest of the word following the same process.
For the background, the areas of the flag were filled in using one marker for the blue and red areas. You could use two or three markers here as well if you want to create an even better optical illusion.
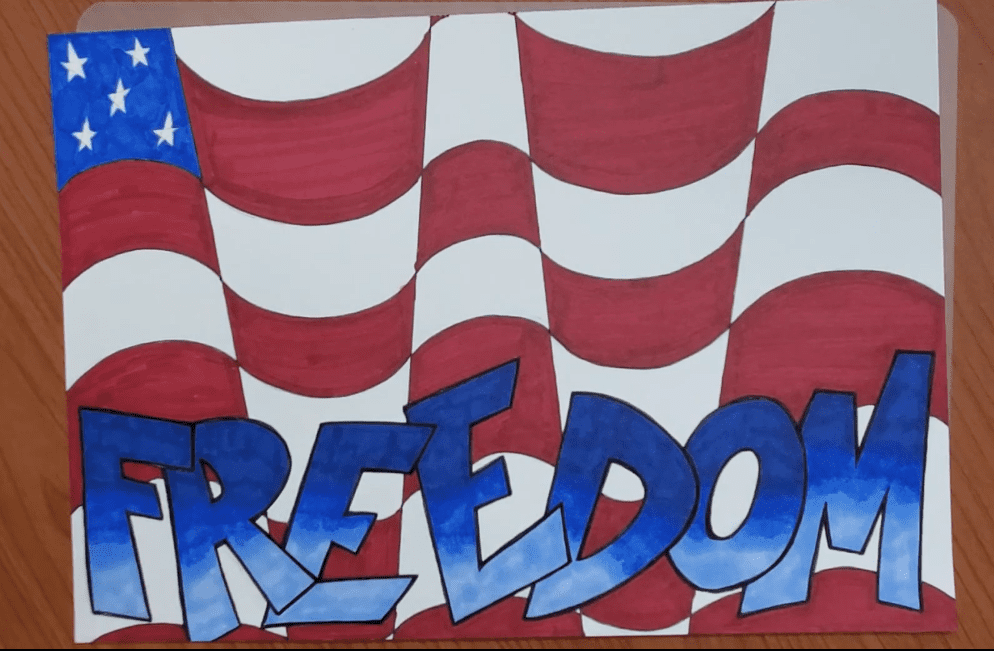
A black colored pencil was used to create the shadows on the flag. You could also use markers to do this.
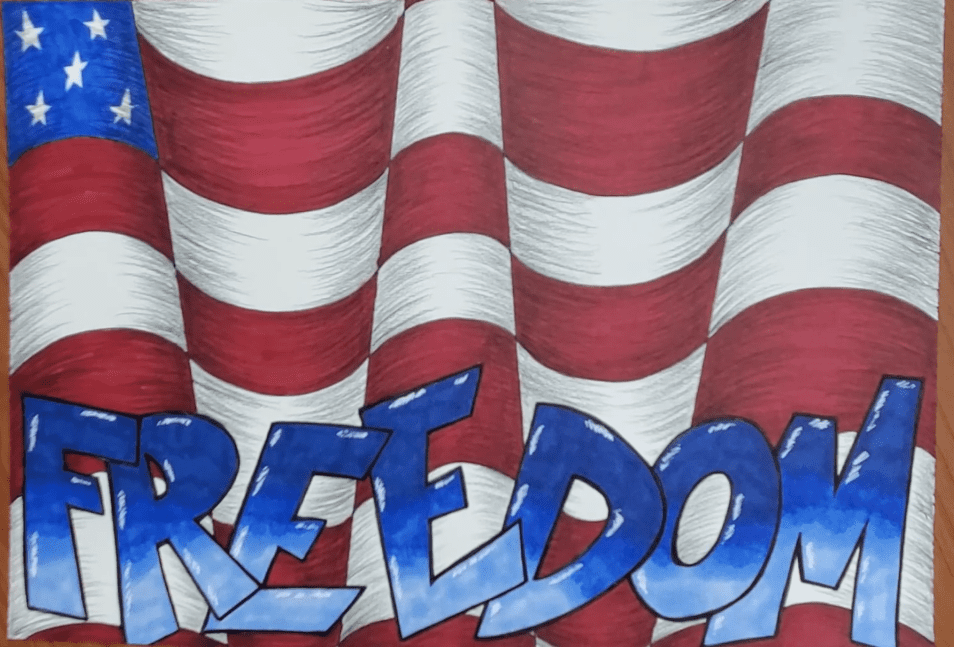
A white Gelly Roll pen can be used to add highlights.
Ohuhu Marker Review
This was my first time using this brand of markers. The set I received are duel tip with a brush end. I don’t typically use brush tip markers but I was excited to give them a try.
The set came with a good selection of colors and a nice wooden shelf to store them in. However there were some gaps in the color selection and unfortunately it doesn’t look like you can buy individual colors.
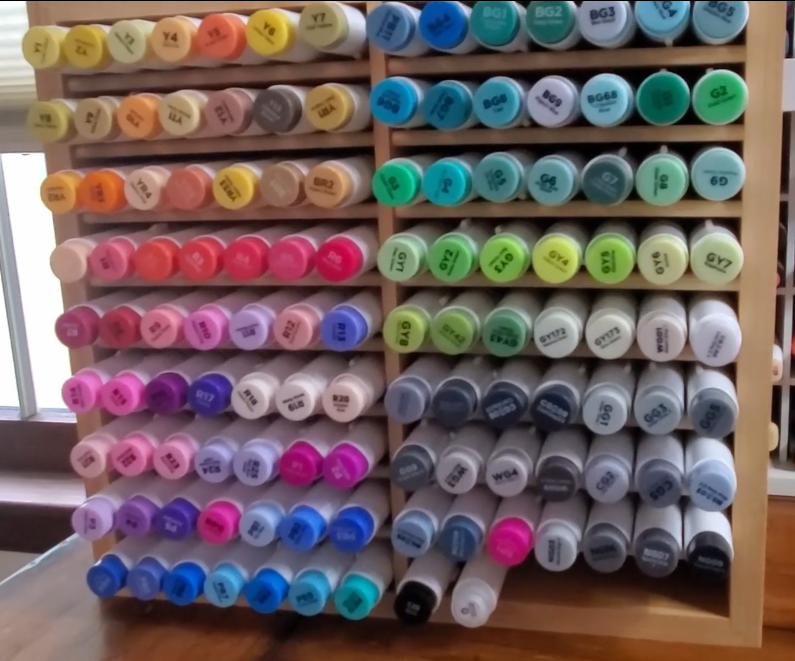
I enjoyed using the markers but the brush tip did take a bit to get used to. But that’s because I normally use the smaller bullet tip markers instead of the brush tip.
A big plus with these markers is that they are low odor, which is a must for me.
My opinion of the Ohuhu brand is that they are nice markers and reasonably priced. The next test is to see what their longevity is, but of course that will take some time to find out.
Final Thoughts and Next Steps
That’s it for this tutorial on how to make a Freedom graffiti drawing with an optical art background. Hopefully you feel inspired to make some artwork of your own.
Art and drawing are skills that are learned over time with practice and repetition. If you want to get better at creating art all you have to do is practice.
Get your FREE Graffiti Guide and learn the steps to creating your own graffiti art.
