
Learn How to Draw an Easy Butterfly
There are so many natural beauties in life and butterflies are one of them. Today you’ll learn how to draw a butterfly and use markers to add color to your drawing.
Because of their vibrant colors, markers are a great choice when working on our butterfly drawings. And once you’ve learned the basic steps there no limit to what you can create.
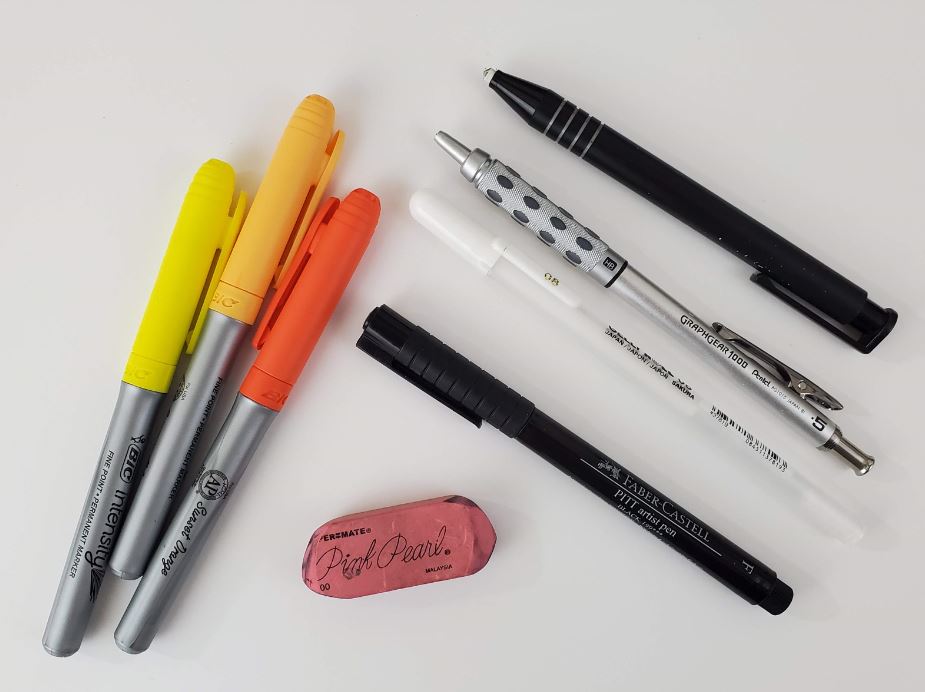
Let’s get started by looking at some basic supplies that were used for this lesson. I’m going to list everything I use today, but there are lots of other options as well.
* Some of the links in this post may be affiliate links. This means I receive small commissions for purchases made through these links at no extra cost to you.
Art Supplies
- Thin black marker
- Paper or cardstock
- Markers
- Pencil
- Click Eraser, Pink Pearl Eraser
- White Gelly Roll pen
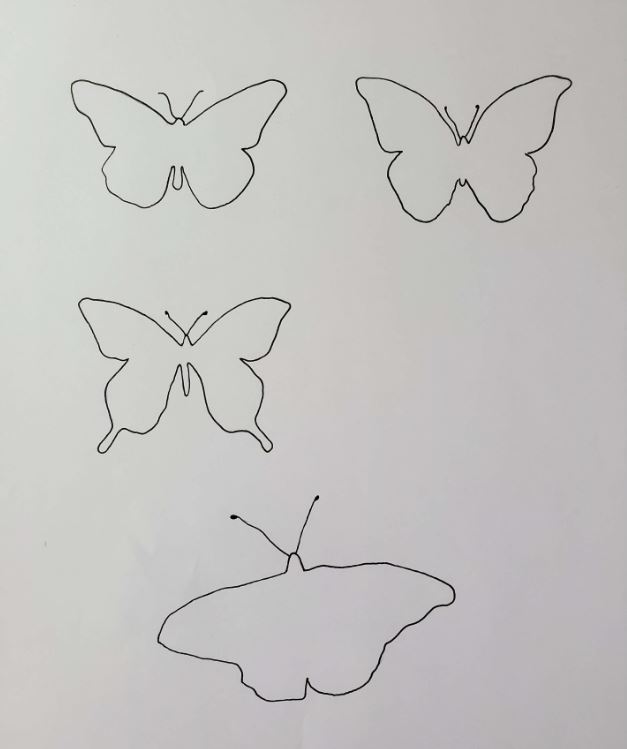
Butterfly Shapes
All butterflies are symmetrical, but their over shape can vary a little bit. Some have shapes that are fairly simplistic, while others look a bit more fancy.
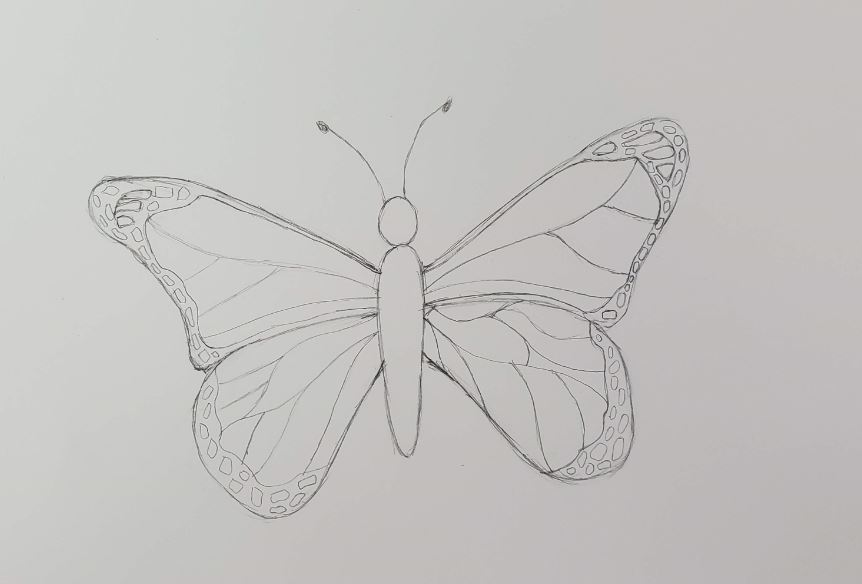
How to Draw a Butterfly Step by Step
To draw your butterfly, begin by making the main body. To do this, start with a circle and an oval directly below the circle.
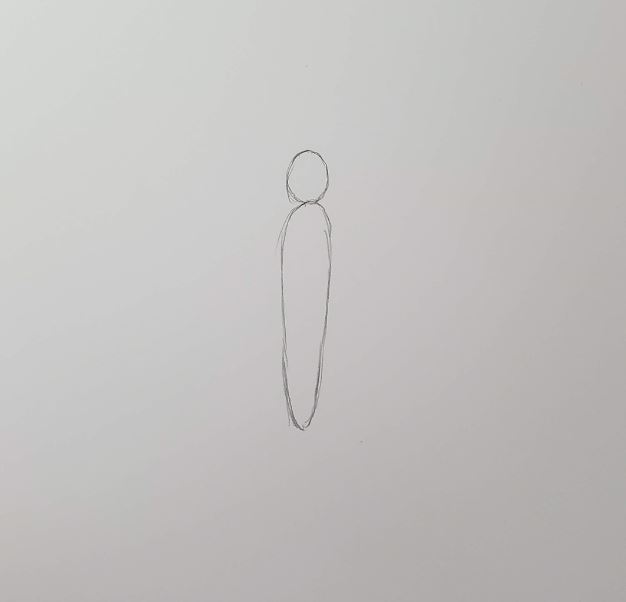
It should look kind of like an exclamation point. Whenever you are drawing something, it’s important to break it down into basic shapes. Learning how to draw is really about learning how to see.
And if you can see the basic shapes in something, then you’ll be much more successful in your artistic journey. You can learn more about this technique at, How to Use Shapes to Draw.
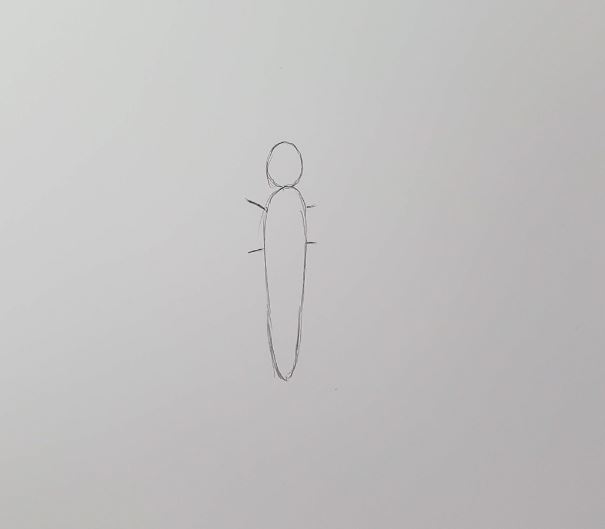
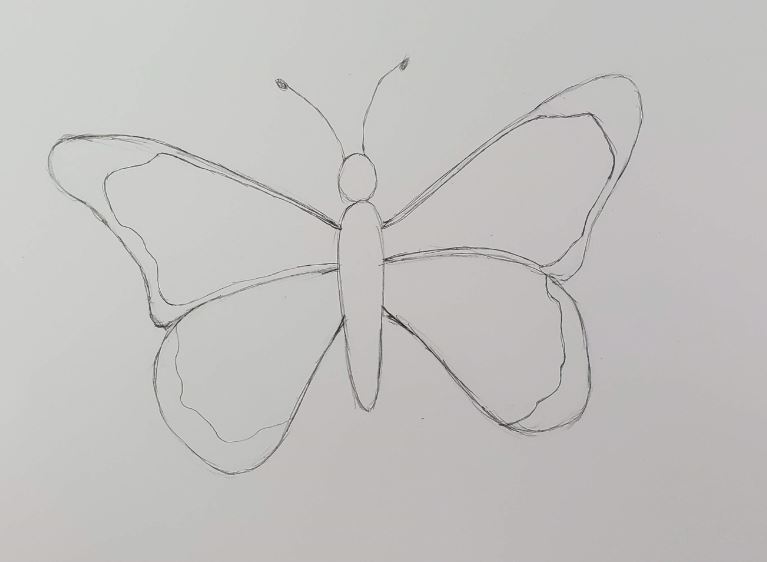
How to Draw Butterfly Wings
Next, you need to draw the shape of your wings. There are four different sections for the wings. Two on the left, and two on the right. Make a couple of small marks on the top of the body to indicate where you want the placement of the upper part of the wings to be.
Draw a curved line that is rounded at the corner, and goes up to form the top part of the wing. The top of your wing should come out further than the bottom.

Start at your other indication mark, curving that line up and connecting to your first line.
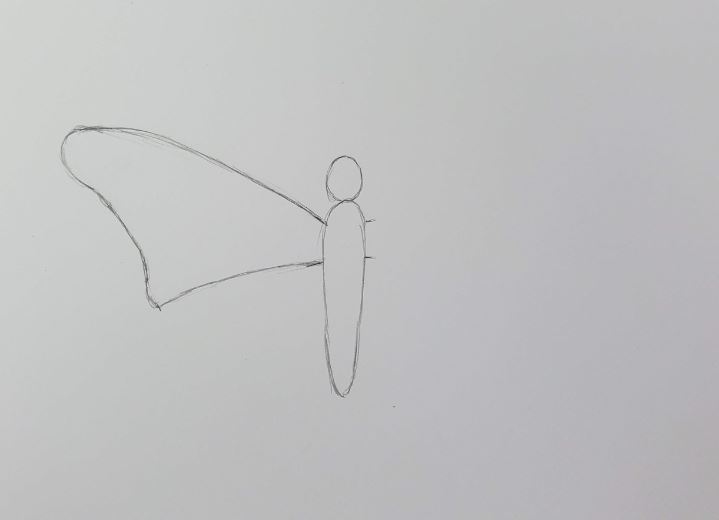
Notice the overall shape of the wing. And be sure to keep your pencil lines light until you are happy with how your drawing looks.
Now move onto the lower section of that wing. Draw this section of the wing so it comes off of the upper section and curves around and back to the body.
You want to avoid any sharp edges when drawing your lines, so always curve anything you draw.
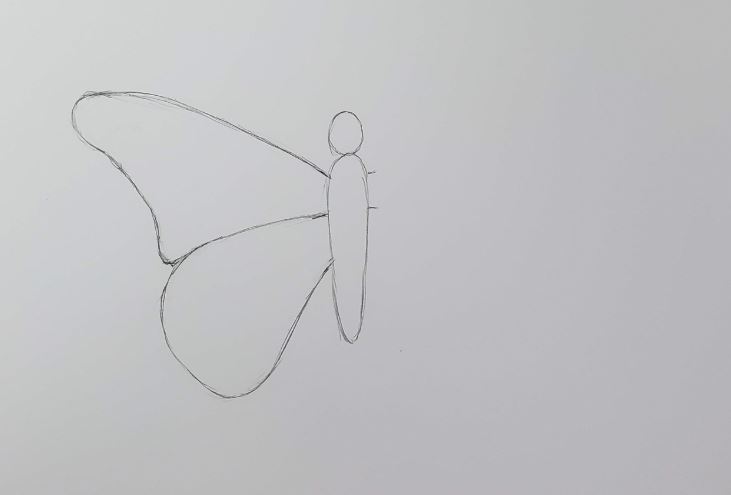
For the opposite side of your butterfly wings, draw a mirror image of what you just drew. Butterflies are symmetrical so the two sides should match.

Draw a couple of antennae on the top of its head. That’s it for the basic shape of your butterfly. Now let’s move and add some beauty to your drawing.
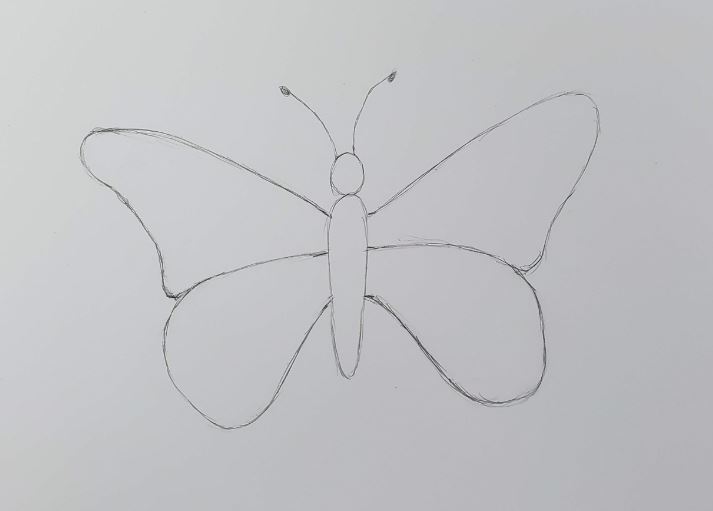
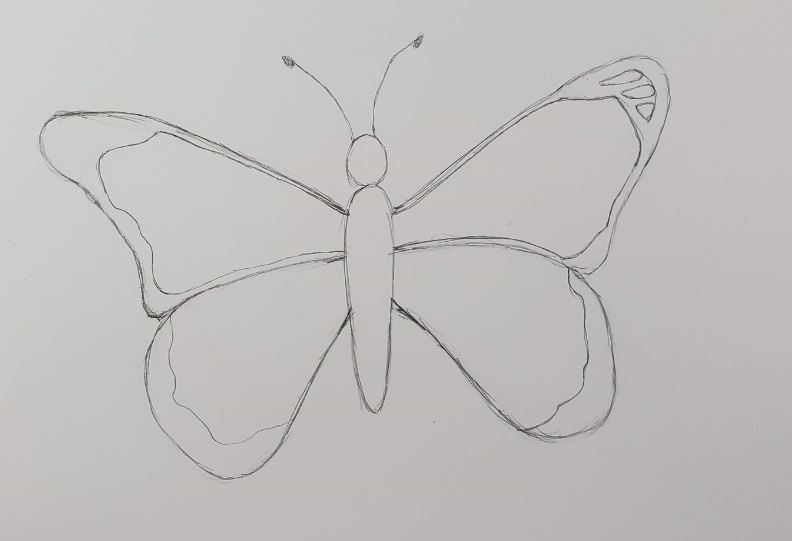
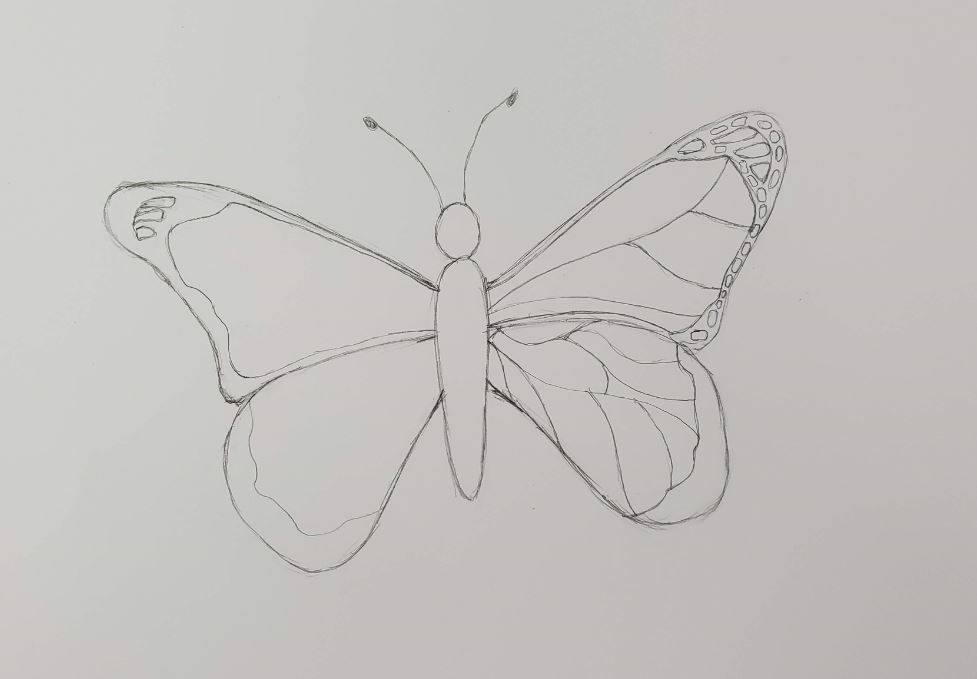
Butterfly Wing Patterns
Next you need to draw in the details and patterns for the wings. This is where your butterfly starts to look interesting. If you look at the details of a butterfly’s wings there are wider areas of black around the edges and at the top. Let’s begin by adding that detail in first.
To do this, add some thickness to the top section of each wing by drawing another line along the inside edge. When you get to the top of the wing, curve that line around so it leaves an open section. This is where your patterns will be drawn in.
Do the same thing for the bottom section of each wing. Make the outside edges slightly wider than you did for the top of the wings.
Don’t forget to keep everything symmetrical.
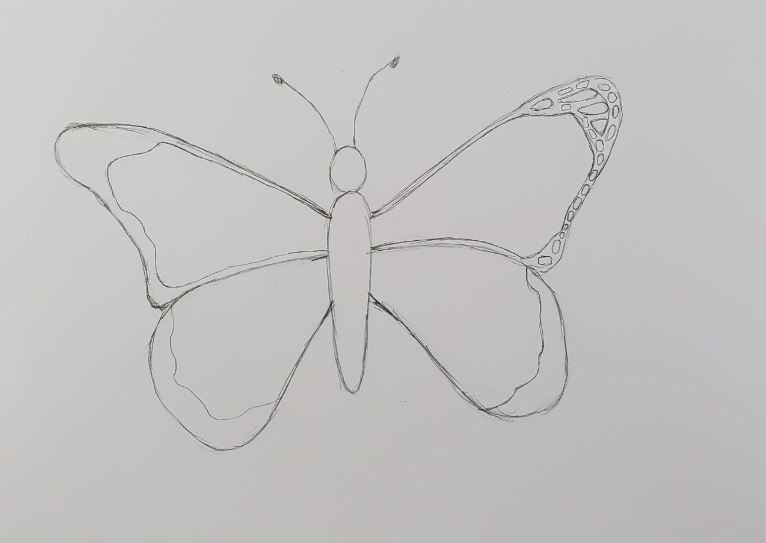
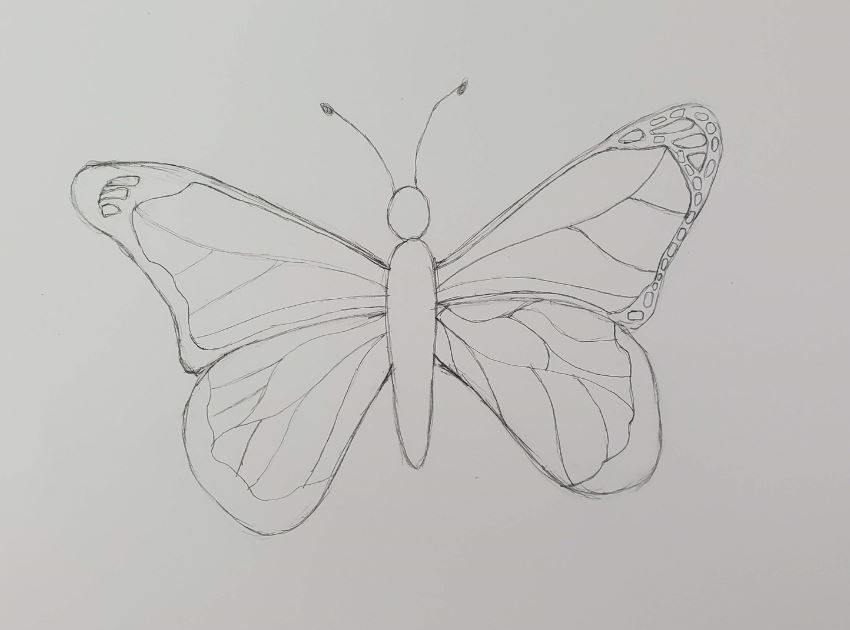
Drawing Symmetrical Patterns
Now it’s time to draw in some patterns for your butterfly, which is where the colors will go. Most of your patterns will go in that section you drew in on at the top corner of each wing. Draw a small, curved line, to use as a guide.

Next, add a few triangles along that curved line. You can vary the size and shape of your triangles. But keep your edges rounded and avoid sharp corners.
After that’s done, fill in the rest of that area with smaller rectangles or triangles. Keep going until you run out of room to draw them.
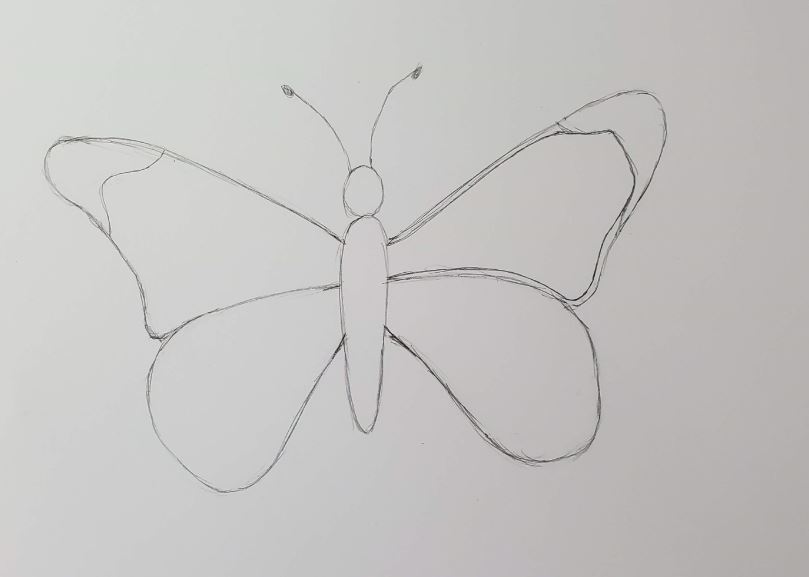
How to Draw Butterfly Wing Designs
Now we need to add some lines for the inside of the wings. Draw your first line from the body to the upper corner of the wing.
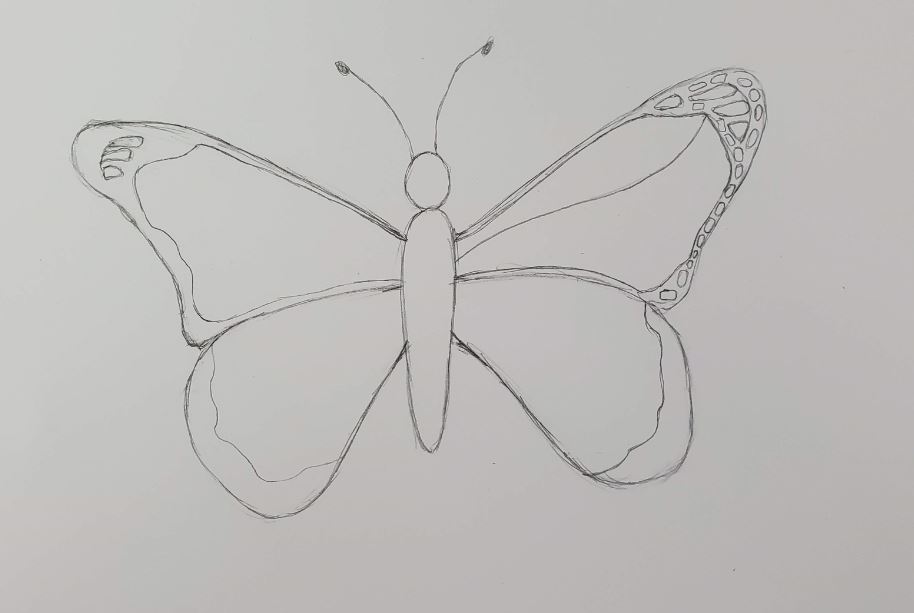
Avoid drawing a perfectly straight line. Allow your line to curve back and forth a little.
Add a few additional lines coming from that main line, down to the bottom of your wing.
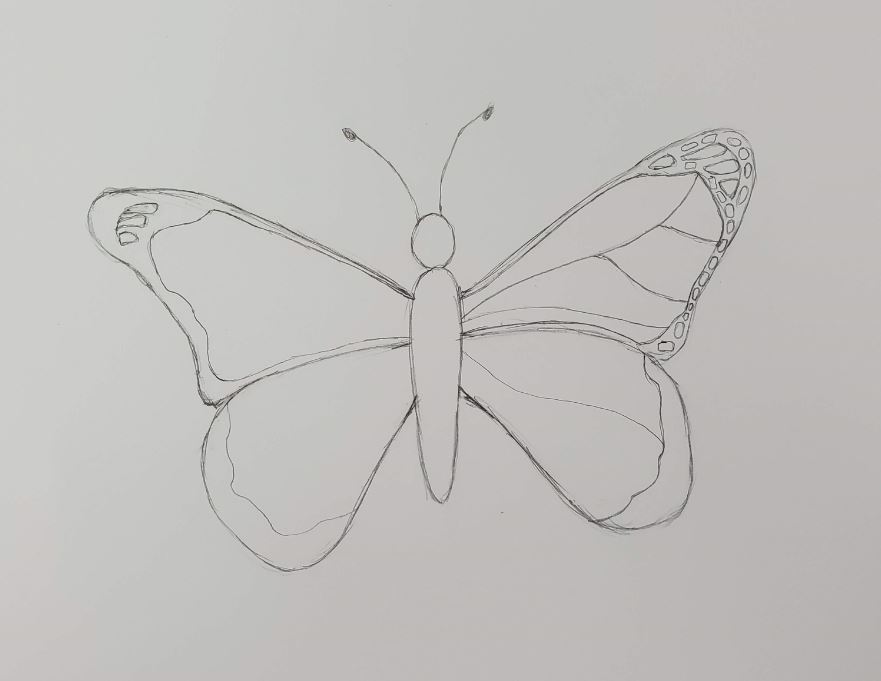
Follow that same process for the lower section of the wing.
We need to add a little more detail to this section though.
Fill in the lower section of your butterfly wing by adding in a few more lines coming from that main line that you drew.
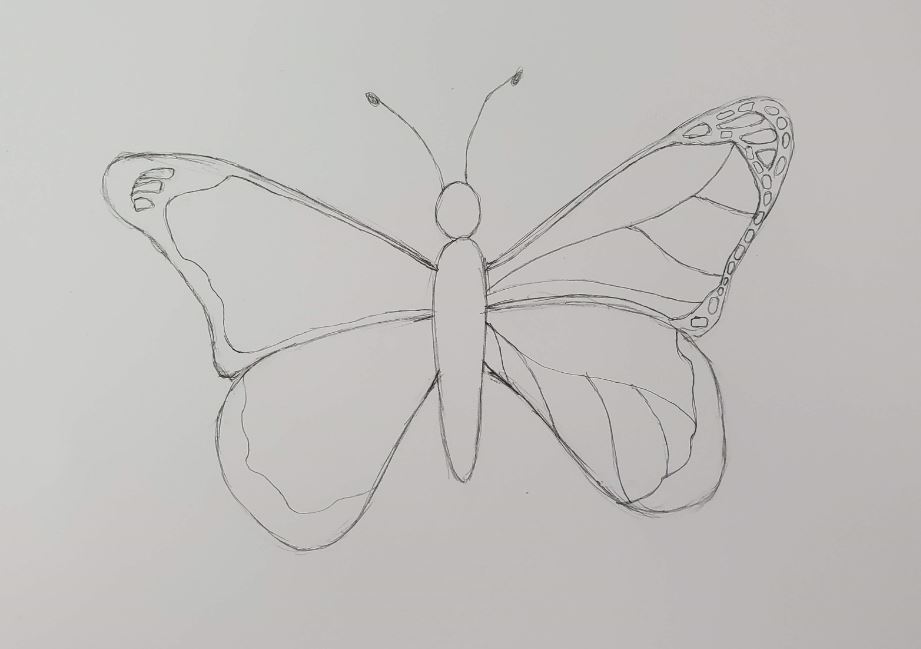
Finish up your drawing by completing the opposite side of your butterfly. Make sure you are keeping everything symmetrical.
Finish up your butterfly drawing by adding in more patterns at the bottom section of the right side wing. And then fill in the left side of your butterfly wing the same way.
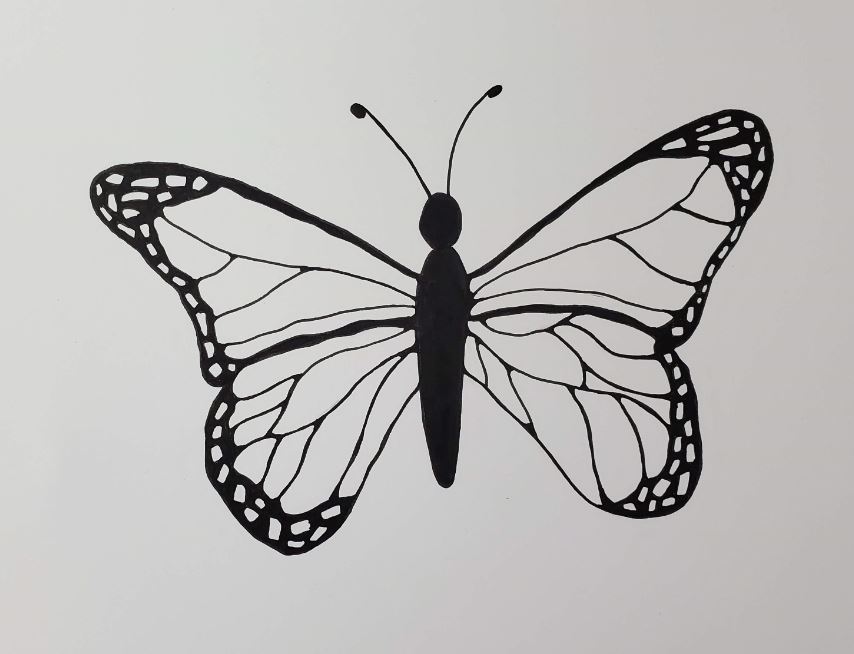
Butterfly Drawing Outline
When you are happy with how your drawing looks, go over your pencil lines with a black pen or marker. I’m using a Pitt Artist pen for my drawing, but you can use whatever pen you’re comfortable with.
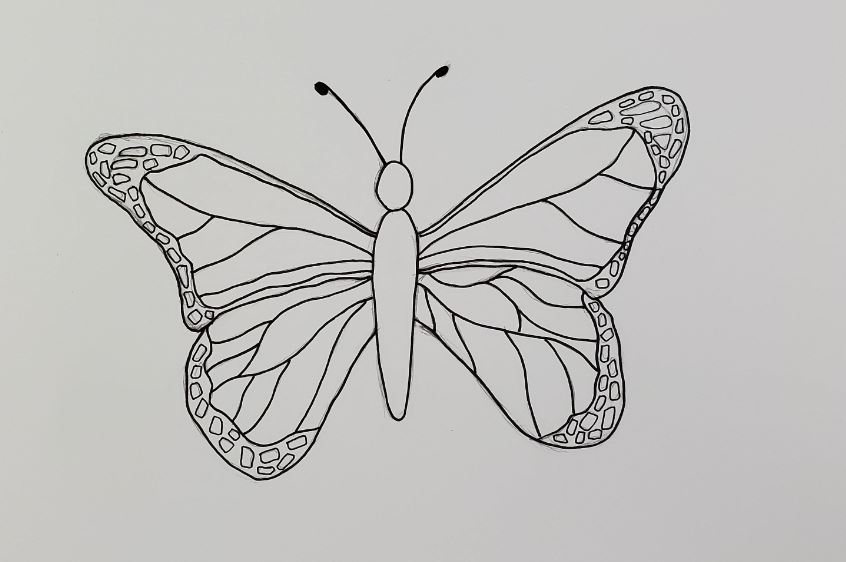
Use a Pink Pearl eraser to get rid of all the pencil lines before adding in your color.
Next, fill in all the black areas with your pen before moving onto the next step, which is coloring your butterfly drawing. The other thing you should do at this stage of your drawing is to round out your lines on the insides of the wings.
This is similar to how we rounded our lines in An Introduction to Neurographic Art.
Monarch Butterfly Colors with Markers
There are lots of choices when it comes to adding color to you artwork. I love the vibrancy of the Bic Intensity markers, so that’s what I’ll be using for this example.
One of the things I always tell beginners is to make sure you use more than one color for each section of your drawing. This will make your artwork look less flat.
For the butterfly I used Tiki Hut Tan, Peach Parfait, Summer Melon, Yellow Blaze, and Sunset Orange.
When using markers to add color to your artwork you want to make sure you blend them together for a smooth transition. You can learn more about this at How to Blend Markers for Beginners.
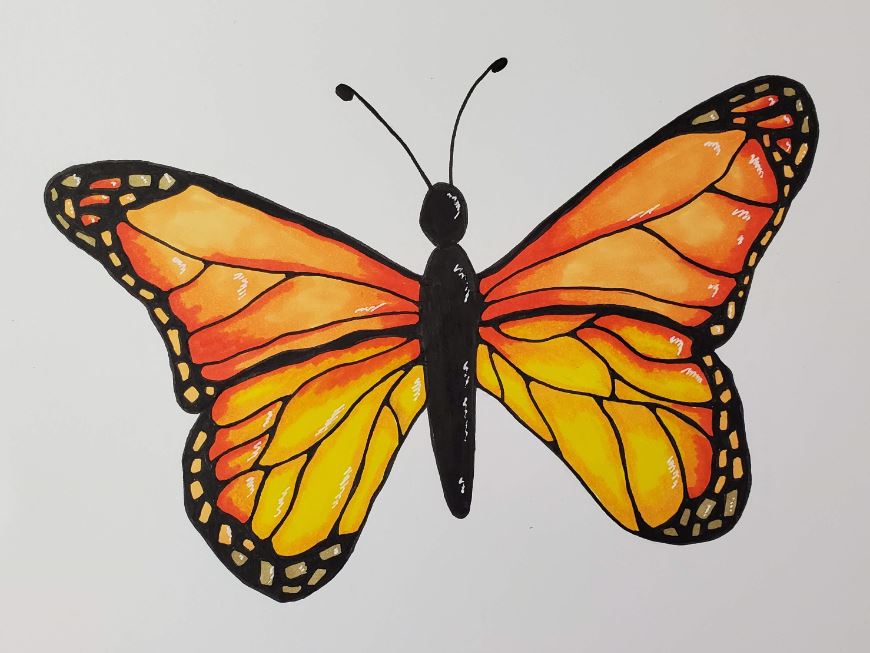
There’s not much to adding color to a butterfly drawing. You do want to make sure you have a little bit of variation in the coloring, but there’s not a whole lot you can do here. You can finish by adding in some white highlights using a Gelly Roll pen.
Get Your FREE Marker Blending Guide
How to Draw a Butterfly Easy Marker Drawing
Thanks for stopping by today and learning how to draw a butterfly. We hope you enjoyed the lesson.
What will you do with your butterfly drawing? Let us know in the comments.
