How to Draw a Cylinder in 3 Simple Steps
So why would you ever need to know how to draw a cylinder? Most, if not all, objects in real life can be broken down into simple shapes. What I consider to be these shapes are circles, squares, rectangles, and triangles. The three-dimensional counterparts to these shapes are spheres, cubes, cylinders, and pyramids.
If you can look at an object and break it down into shapes, it will become much easier to draw. Even professional artists use this method for their drawings. The foundation of drawing complex items begins by breaking it down into simple shapes. Once you can break an object down into it’s shapes, you need to be able to draw those shapes convincingly.
Foreshortening
Foreshortening is a technique used to create the illusion of depth in a drawing or work of art. When using this technique, the artist distorts a portion of the drawing to make areas look closer or further away. For this article we will be drawing foreshortened circles, which is really just a fancy way of saying a squashed circle.
* Some of the links in this post may be affiliate links. This means I receive small commissions for purchases made through these links at no extra cost to you.
Art Supplies Used for this Tutorial
Start Your Art Journey Today
How to Draw a Cylinder Step by Step
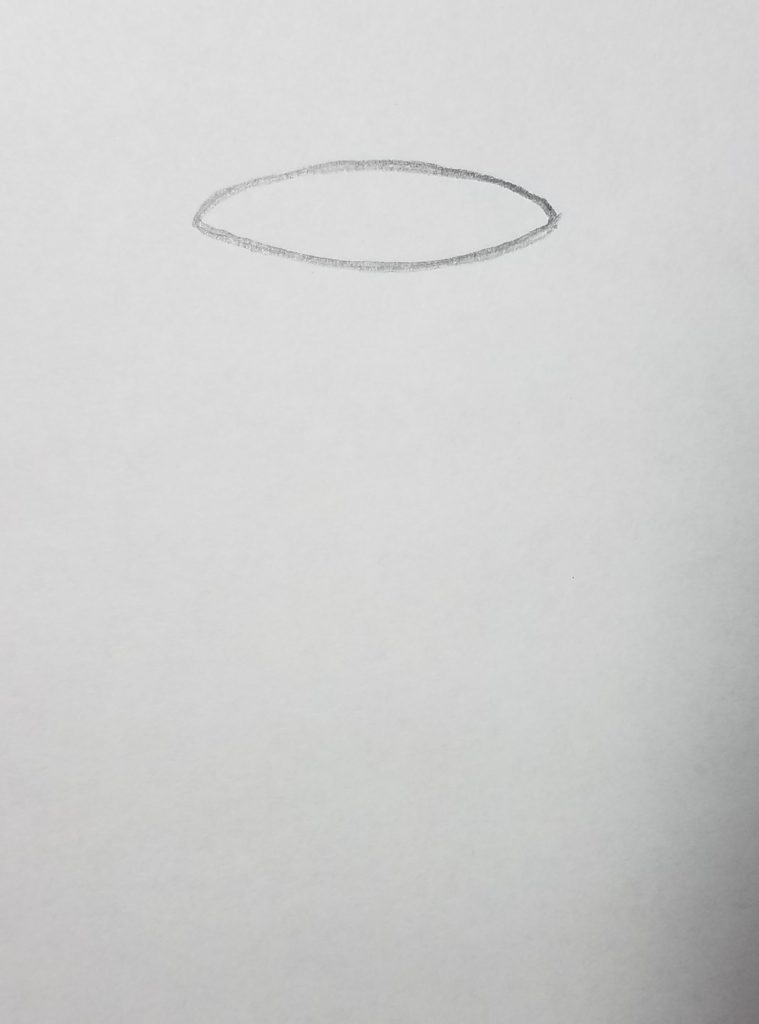
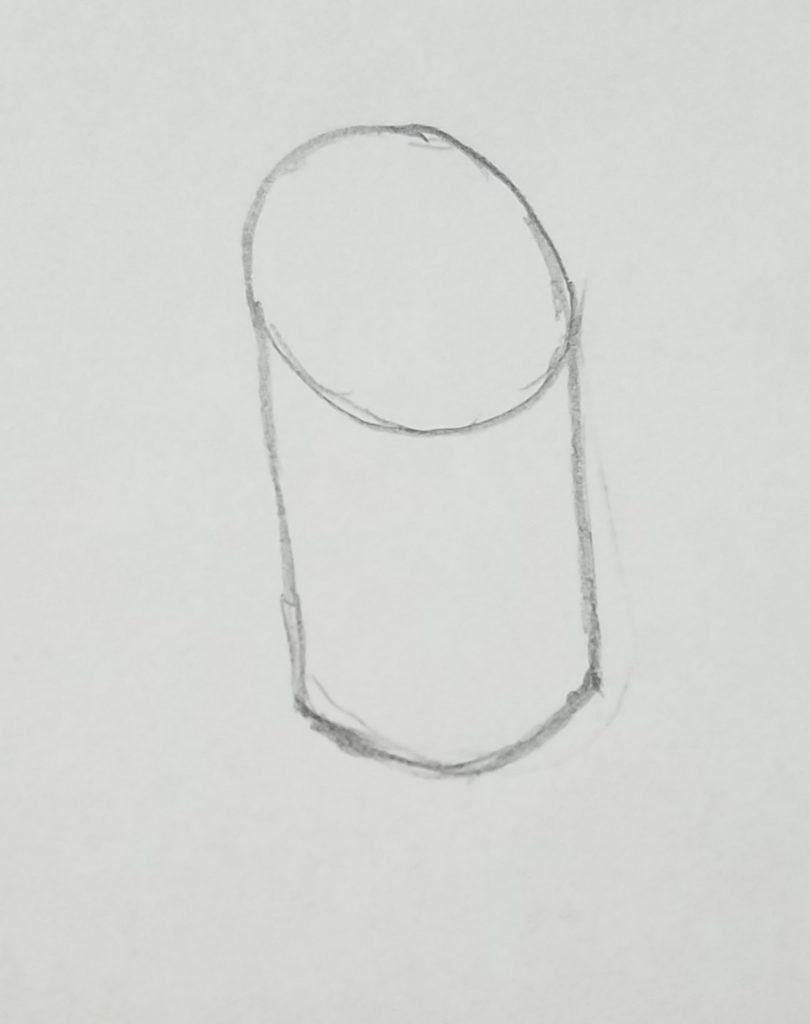
Step 1
Begin by drawing a foreshortened circle. How much you “squash” your circle will be determined by the angle you are viewing your cylinder from. The higher up your viewpoint is to the side, the more rounded your circle will be. The lower your viewpoint, the less rounded it will appear.
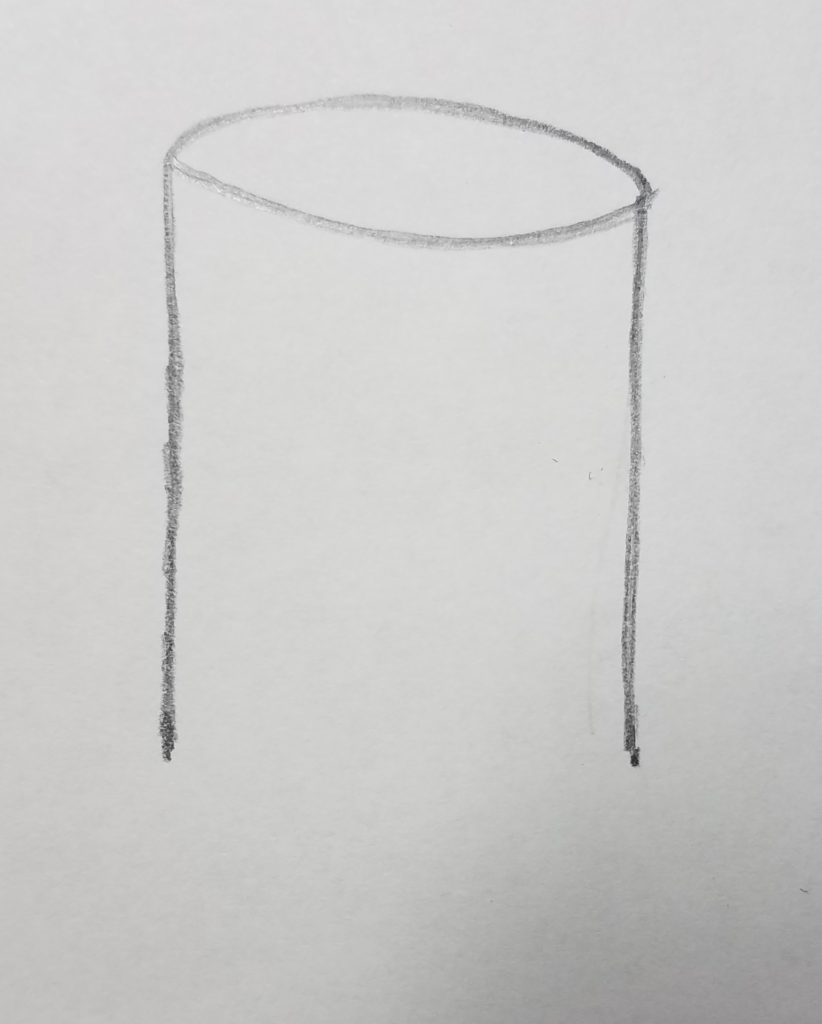
How to Draw a Cylinder – Step 2
Draw straight lines from the edges of your foreshortened circle. These lines will represent the sides of your cylinder.
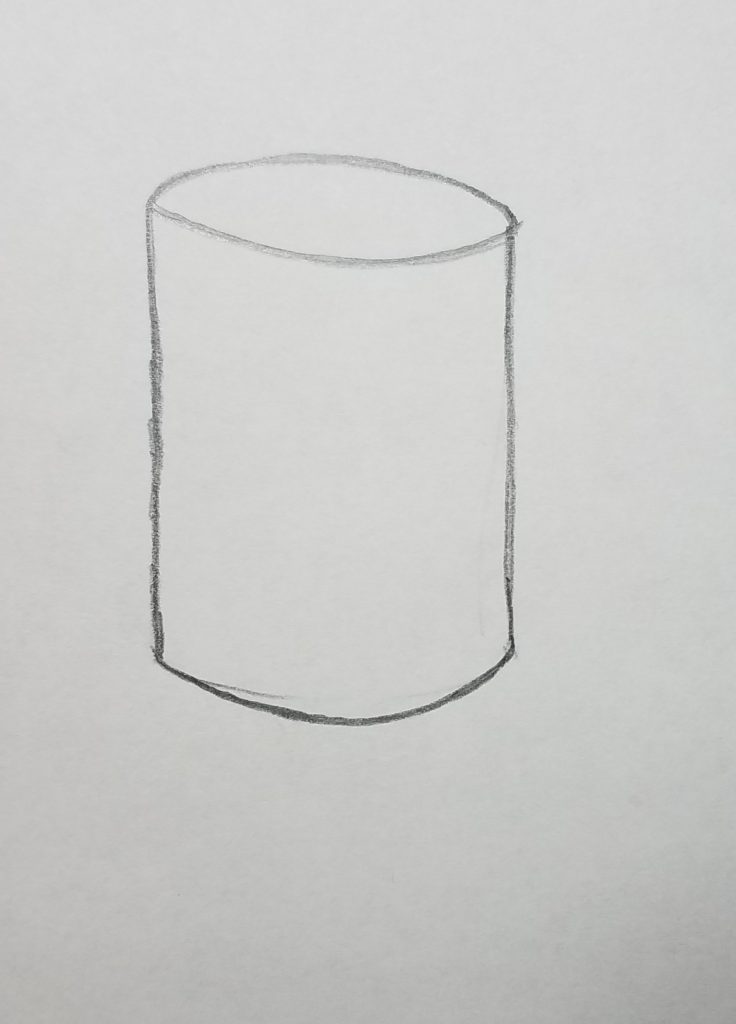
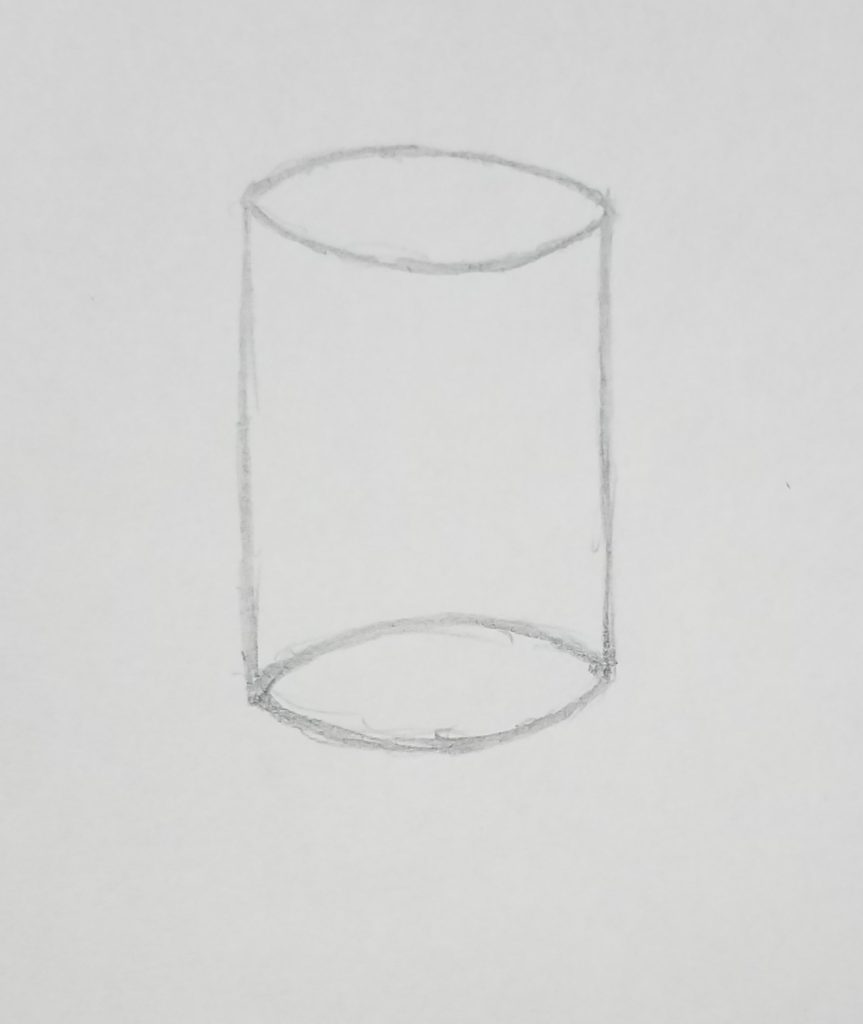
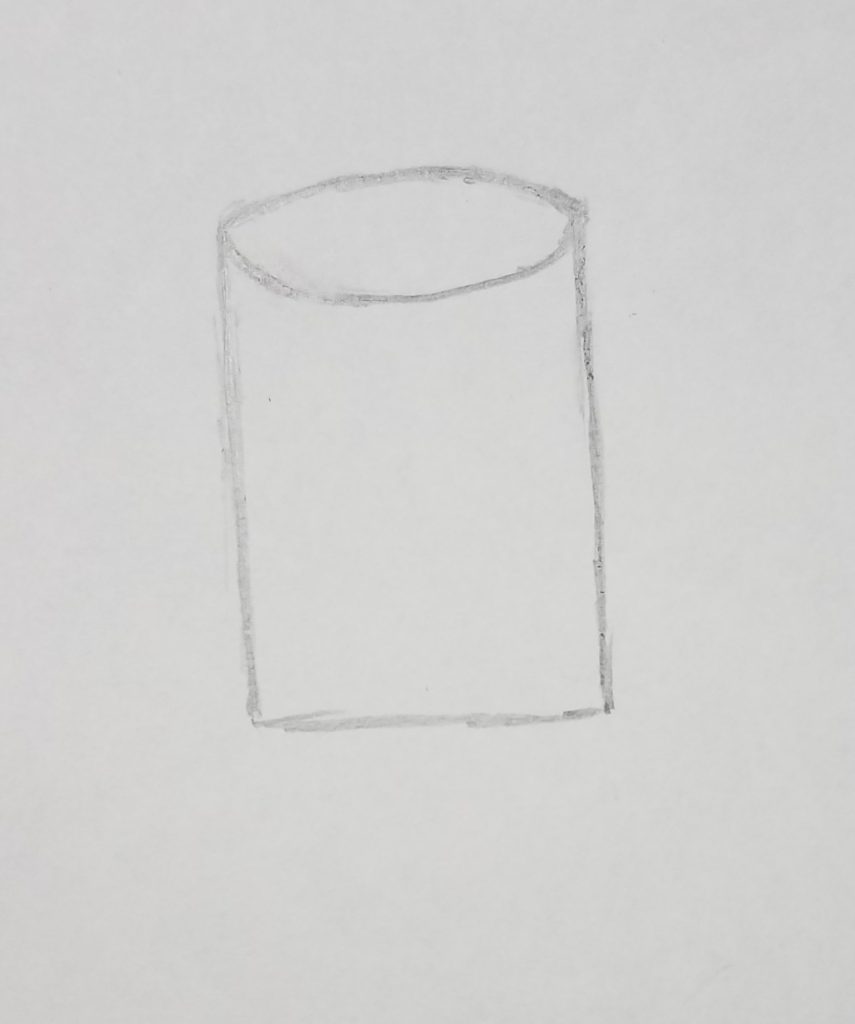
How to Draw a Cylinder – Step 3
Draw a curved line at the bottom of your sides. The curve should be parallel to your foreshortened circle you drew for the top of your cylinder.
If you are drawing a cylinder that is see-through, such as a glass, you will want to draw the far edge on the bottom. This can be done by drawing a foreshortened circle on the bottom, similar to the one you drew for the top of your cylinder.
Common Mistakes When Drawing a Cylinder
There are a few common mistakes I have seen when teaching both adults and children how to draw cylinders. The first mistake is drawing the upper surface of the cylinder too round. The only way this would look like a perfect circle is if you were looking straight down at the cylinder from the top. Drawing a circle will make your cylinder look strange and incorrect.
Another common mistake I have seen repeatedly over the years is for the bottom edge to be drawn straight across instead of being curved. This will also result in an unnatural look to your cylinder.
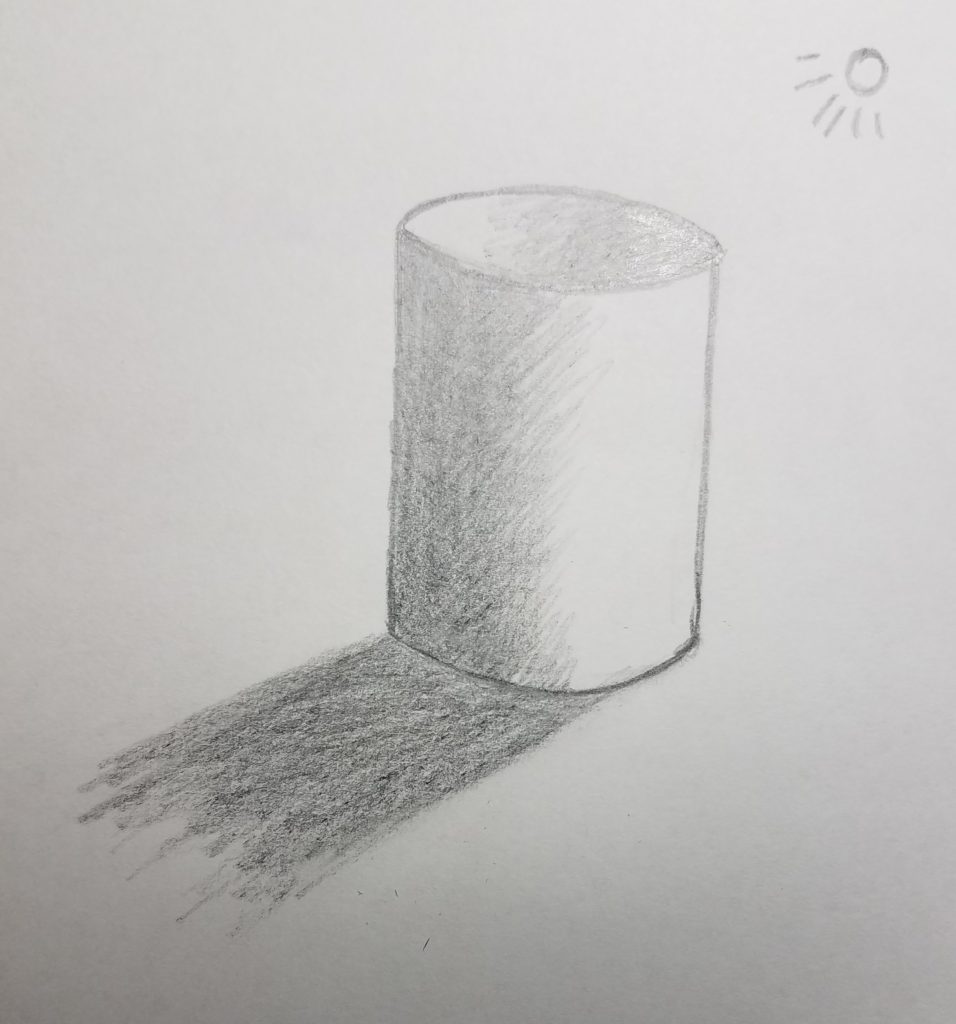
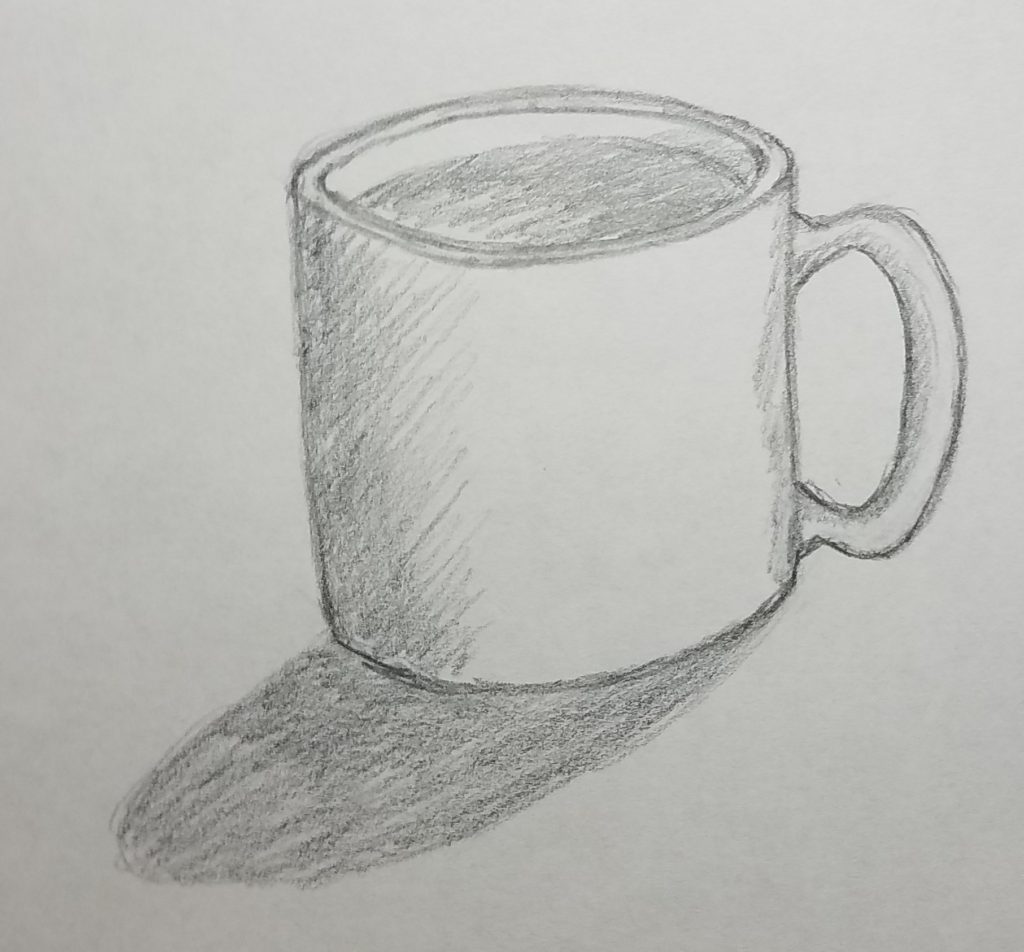
How to Shade a Cylinder
Now, let’s talk a little bit about shading. In the example below, the light source is coming from the top right of the page. This would cause the shadow to be on the left side of the cylinder. If the inside of the cylinder were open, the shadow would be on the right of the inside of the cylinder.
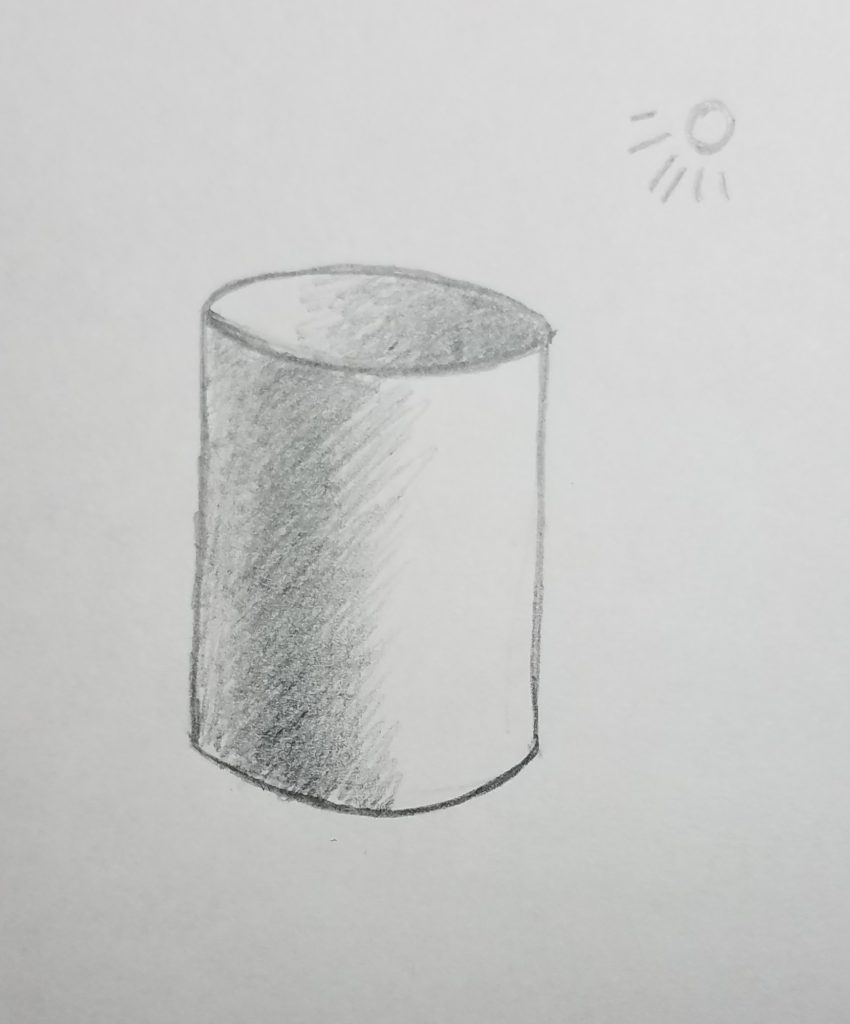
The cast shadow will also fall to the left of the cylinder if your light source is coming from the top right of the page.
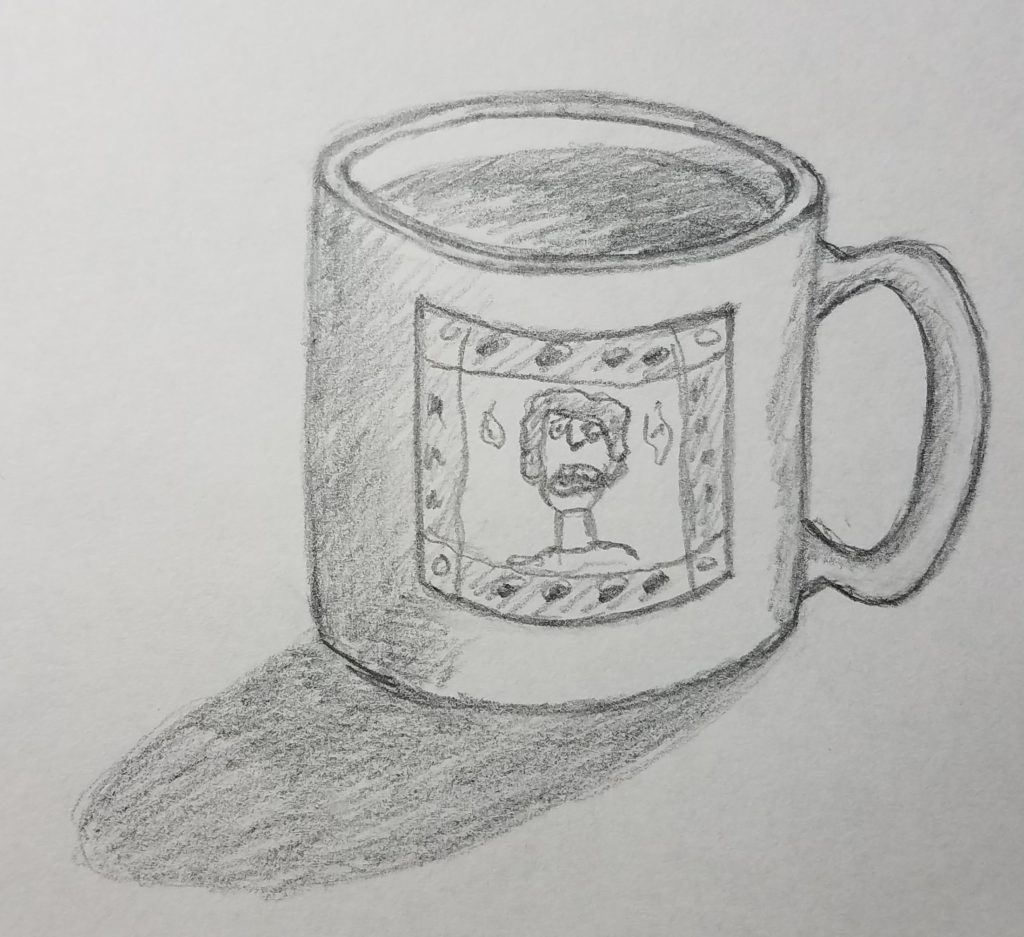
How to Draw a Coffee Cup
A coffee mug is basically a cylinder with a handle on it. There are a few more details that need to be added to make it look a little more realistic, but not many. When you draw your own coffee mug, you can use a reference or just draw one from your imagination. If you are going to add some kind of image or lettering on your mug, it would be useful to have a reference. Anything that is printed on the mug will be curved as it goes around the edges. If the images are drawn perfectly straight across the mug it isn’t going to look right.
The mug I chose for this example is one of my favorites. It’s a mug with a print of a drawing my youngest son drew when he was 9 years old.
Draw a Cylinder with a Handle
Draw the mug shape the same way as if you were drawing a simple cylinder. Pay attention to the overall shape of the mug. When drawing my mug, I made it slightly shorter than when I drew my cylinder. I also added the inside of the handle, paying close attention to how the handle angles towards the side of the mug.
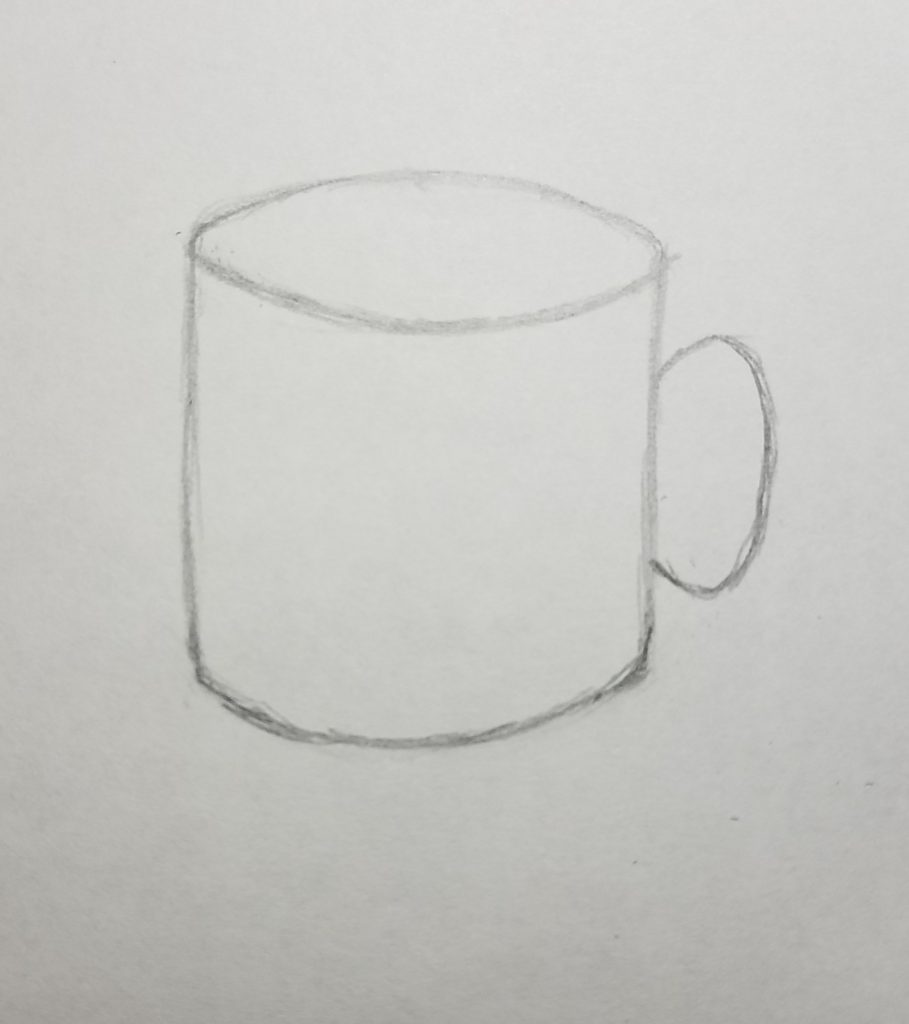
Draw the Handle
The next thing I do is add the outside edge of the handle. Again, paying attention to the angle and how it connects to the mug. Be sure to leave enough space between the edge of the mug and the inside of the handle. If you draw that space too narrow it will look like a non-usable mug. Be sure to leave enough room for a hand to grab the mug by the handle.
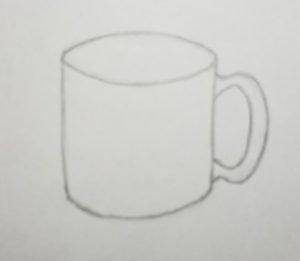
Draw Some Extra Details
Next, add the thickness to the rim of the mug. Adding in some extra little details will make a big difference. Just follow the contour of the rim, keeping the same distance all the way around. The thickness should be whatever looks natural to you. If you draw it too thick or too thin, it won’t look right.
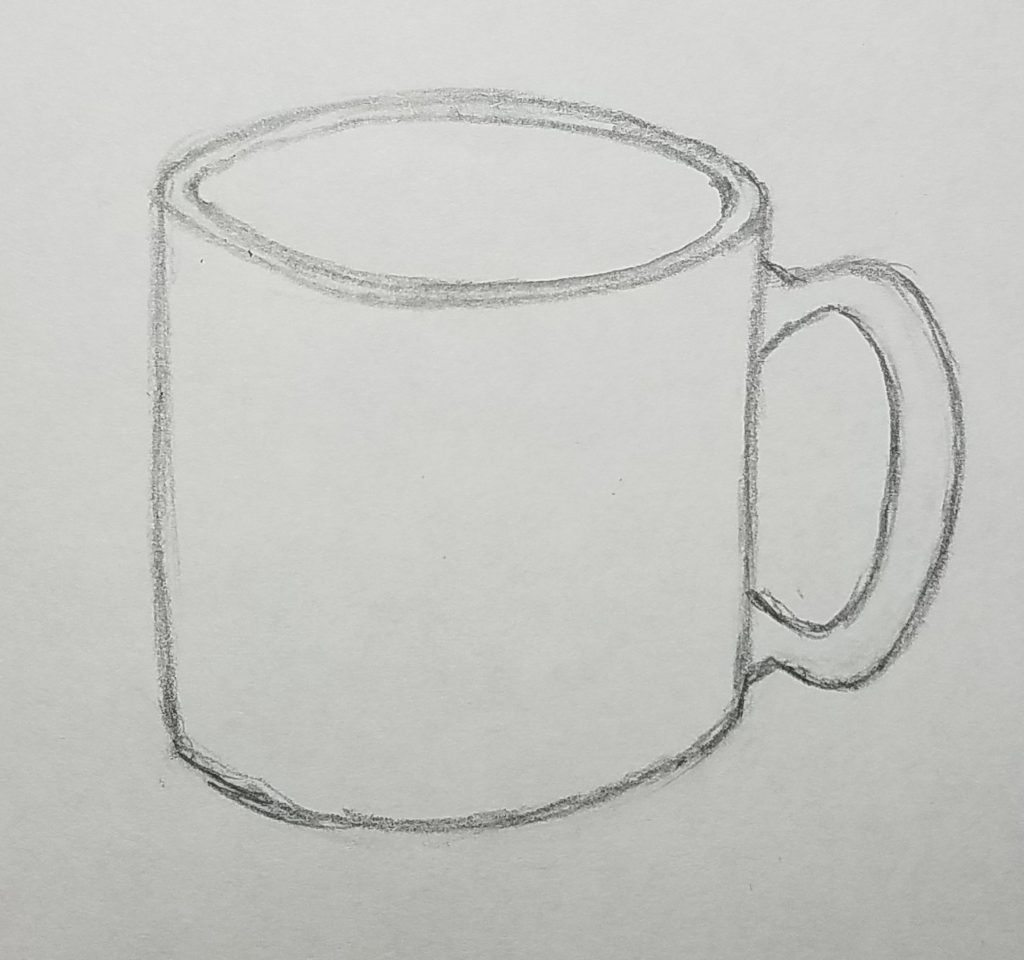
Shading and Cast Shadow
Finish drawing your mug by adding some shading and a cast shadow. I added some coffee to the inside of my mug as well. When drawing liquid inside the mug just follow the same curve as the back edge of the upper rim. The amount of space you leave between the top edge and the liquid will indicate how full your mug is. The narrow area of shadow on the right edge of the mug is caused by the handle blocking the light source in that area.
Adding Artwork to Your Coffee Cup Drawing
The final step is to add your artwork, logo, or lettering to your mug. I drew the image from my favorite mug. When adding an image or lettering to your mug, be sure to follow the upper and lower curves like I did here. If you add lettering, just make sure they curve with the edges. Do not draw them straight across your mug. The easiest way to do this is to draw some light guidelines that follow the curve of your mug. Then draw your lettering inside that guide.
How to Draw a Cylinder in 3 Simple Steps
That wraps up this tutorial on how to draw a cylinder. It’s a good idea to get comfortable drawing different shapes and how objects break down into these shapes and forms. You can check out my lesson on How to Draw a Cube if you haven’t already done so.
Don’t forget to Grab Your FREE Guide to Creating Art

how to draw a horizontal cylinder?
You would draw it the same way, but on it’s side.
This is great Roshanda, I took up drawing on 1 January of this year and have mainly been drawing (or trying to draw) straight lines and ellipses. The above has been a useful exercise, thanks!
Martin
Thank you so much Martin. And how awesome that you’ve decided to take up drawing. Good luck on your artistic journey!
I’m so glad you found it helpful. Is there something specific you’re interested in learning?