3D Cube Drawing Guide for Beginners
In this art tutorial you’ll learn how to draw a 3D cube (freehand) using two point perspective concepts. I won’t be teaching you technical techniques using a ruler. Instead I want to show you how to draw a 3D box without using a ruler and vanishing points. The skills you will learn here would be best utilized for sketching, drawing cartoons, or comic style art.
If you want a more technical drawing lesson, go to The Basics of One Point Perspective.
You’ll learn some basic concepts when it comes to drawing 3 dimensional cubes. There are some common mistakes people make that are easily corrected. All you need is some basic knowledge to be able to identify and fix these mistakes.
With the techniques you will be learning in this drawing tutorial, you’ll be able to draw just about anything that takes on the basic shape of a cube. I didn’t realize how many objects there are that are cubes until I starting putting this lesson together. They are everywhere!
Cube Drawing Vocabulary
Shape – a two-dimensional element created from line, and can be positive or negative.
Form – is created when depth is added to a two-dimensional shape making it three-dimensional.
Parallel Lines – 2 lines that are always the same distance apart but never touch.
Light Source – the direction in which the source of light is coming from. The light source tells you where all of your light values and shadows.
Shading – used in drawing to show a range of lighter to darker values. This helps to create the illusion of depth.
Value – Lightness or darkness of colors and tones that range from white to black.
Shadow – a dark area where the light from a light source is blocked by a solid object. This shadow is what we typically see no the object itself.
Cast Shadow – a shadow that is create by an object blocking light that is cast on the ground or another surface.
Shape Vs. Form
So technically, a cube is a form not a shape. And by definition, is 3-dimensional. Both shape and form are one of The 7 Elements of Art. The difference between shape and form is that a shape is 2-dimensional, and a form is 3-dimensional.
And since drawing anything in 3D is way cooler looking than with 2D, most of our lessons focus on drawing objects in 3D.
Since we have the technical stuff out of the way, let’s get started.
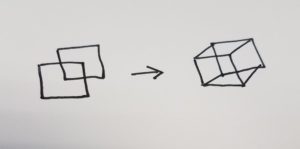
Don’t Draw Cubes Like This
I’d like to start by saying this… If you are currently drawing your 3D cubes using the overlapping square method. Please stop! It drives me nuts when I see this.
It’s nothing short of a parlor trick and doesn’t teach you anything. Furthermore, it’s almost impossible to apply this method to any everyday object. My goal is to teach you the needed skills for you to be able to look at any (cube shaped) object and draw it.
Let’s get started on something a bit more practical to use in your drawings.
* Some of the links in this post may be affiliate links. This means I receive small commissions for purchases made through these links at no extra cost to you.
Art Supplies
- Col-erase pencil (red)
- Mechanical or regular pencil
- Pink Pearl Eraser
Learn to Draw in Only 5 Minutes a Day
How to Draw a Cube – Step by Step
I settled on this method after struggling to get my students to understand the concepts involved in drawing 3D shapes. Even the older ones struggled to draw a 3D cube correctly. After trying several different techniques, this is what I came up with that made the most sense to them.
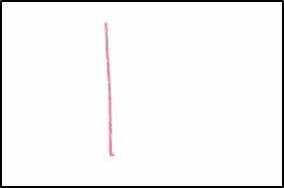
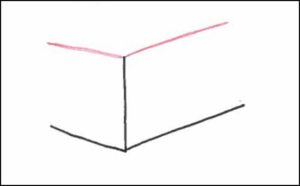
Step 1 – Start by Drawing the Corner Nearest to You
There are a couple of ways to begin drawing your cube. How you start will depend on the angle you will be viewing your object. If you are looking at your object from a straight on view, you would use a 1-point perspective concept. I won’t be showing you that here though.
I find the ¾ view to be the most interesting most of the time. For the purpose of this tutorial, I’ll be focusing on the ¾ view. This will require you to follow the 2-point perspective concepts.
Begin by drawing the corner of the cube that is nearest to you. It should look something like this.
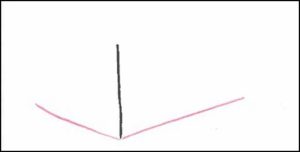
Step 2 – Draw the Bottom Edges
For the bottom edges of the cube, draw two lines forming a slight “V” shape. The length of these lines will determine the overall shape of your cube. If you want your final drawing to look like an even cube, keep these lines roughly the same length.
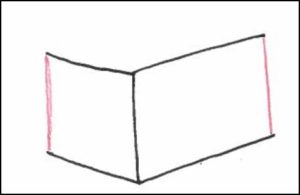
Step 3 – Draw the Top Edges
Next, draw the lines for the upper edge of your cube that are closet to you. These should also form a slight “V” shape. It’s very important that these lines are parallel to the corresponding lines on the bottom of the cube. The top and bottom lines to the left of your corner must be parallel to each other. As well as the top and bottom lines to the right of your corner being parallel to each other.
Step 4 – Draw the Sides
Now you want to connect these lines with two vertical lines. Both of these lines need to be parallel with your initial corner line. If these three lines are not parallel with each other, your cube will start looking funky.
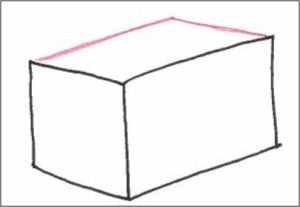
Step 5 – Draw the Edges Furthest from You
Add in the edge of the cube that is furthest away from you. Again, keep these lines parallel with their counterparts across from them. If you look at the image below, you want to keep the shorter lines parallel with each other. As well as the longer lines parallel with each other.
Step 6 – Adding Depth to a 3D Box
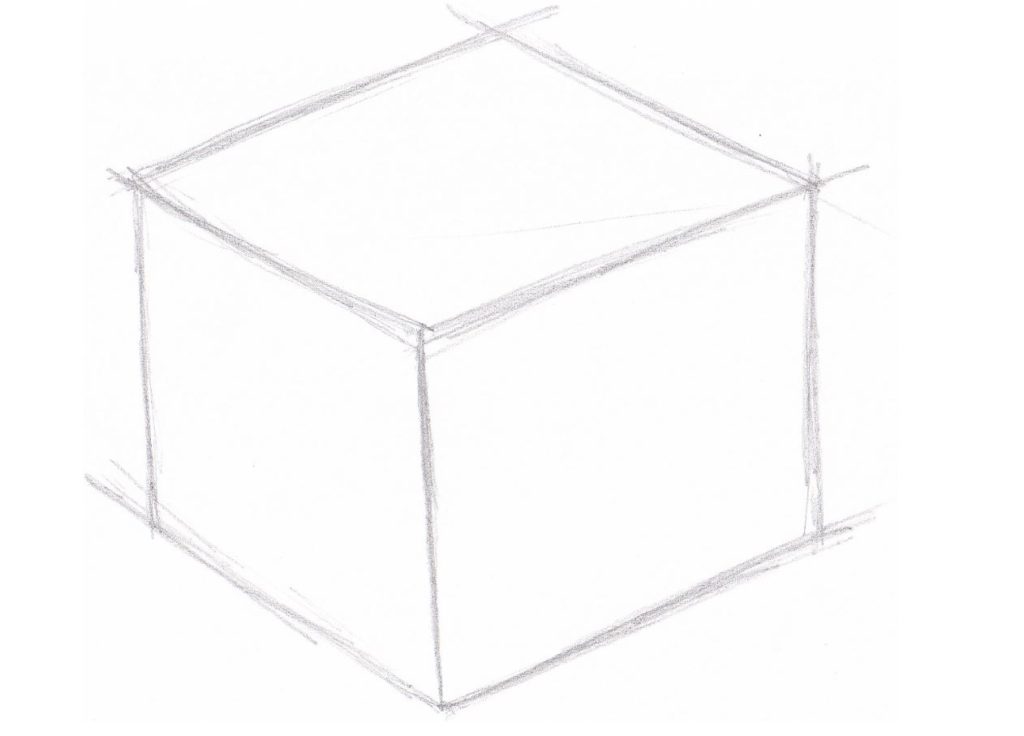
The last thing you need to do is add in the far corner to the inside of your cube. This line should also be parallel with the other three vertical lines.
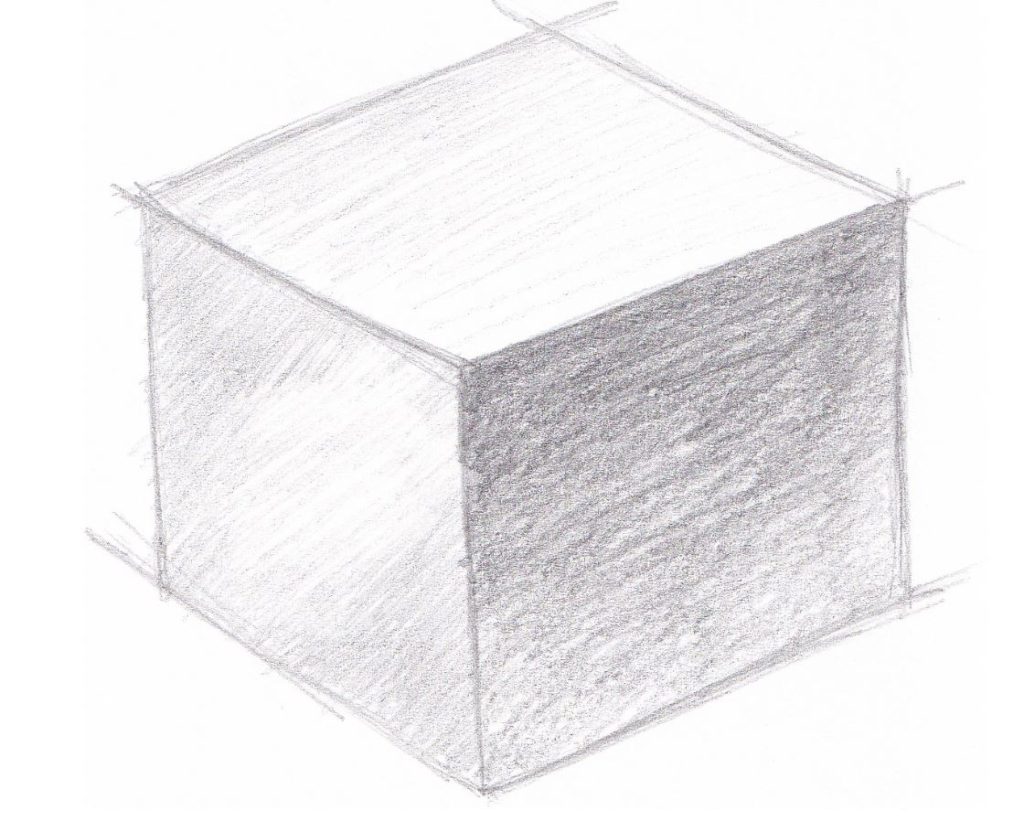
Here is what my completed cube looks like.
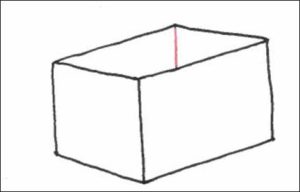
You can also take this a step further and add some thickness to your cube by adding some additional lines to your drawing. Again, just keep your lines parallel.
How to Shade a Cube
An important part of drawing, is learning how to shade. First, draw your 3D box or cube and decide on your light source. For this example, our light source is going to be coming from the upper left.
This will create the darkest shadow on the opposite side of the cube. The source of light will be completely blocked on the far side of the cube.
I find it easier to start with the darkest area first.
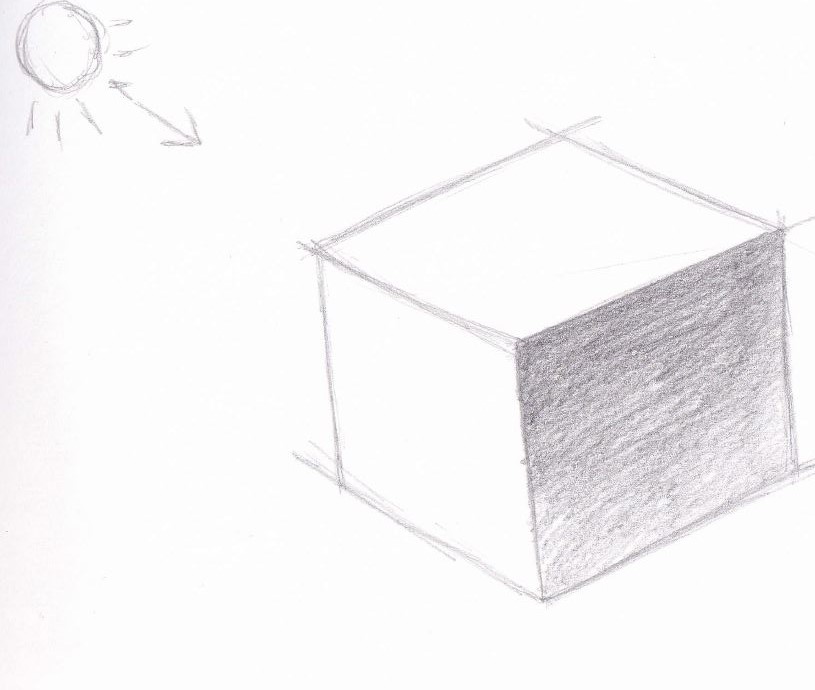
We’re going to work from darkest to lightest, so our middle value will be next. This light source on this side of the cube will be partially blocked.
Take a look at Creating a Value Scale if you need help achieving different values.
The exact location of the light source will determine where the light reflects off the surface of your cube. For the purpose of learning how to shade a cube, you can just choose a spot on this side to leave a light spot.
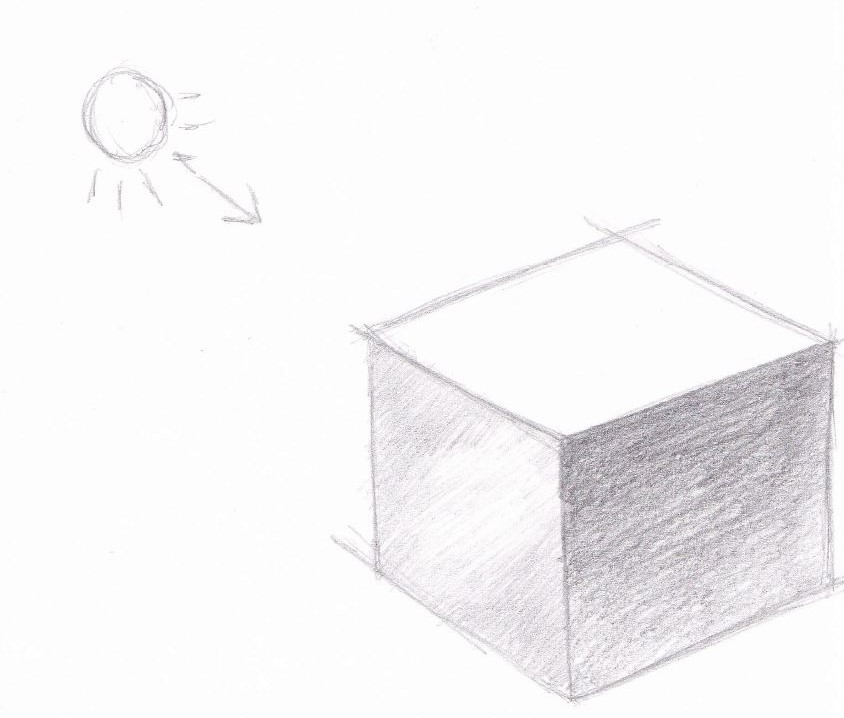
The lightest side will be the top of the box because there isn’t anything blocking the light. It looks better if you add a light shadow nearest the light, and then fade that into white. You can leave it completely white if you want too.
The final step is to add a cast shadow on the far side of your 3D cube drawing. This should be as dark, or darker than the side of your cube.
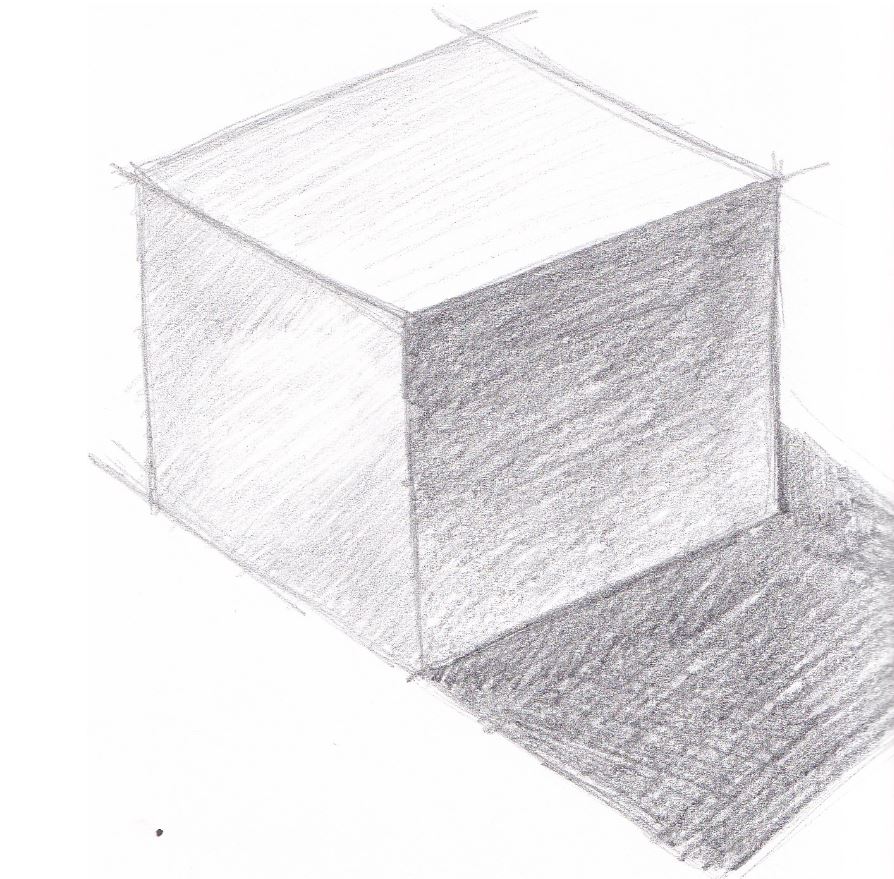
When learning how to draw a cube, shading is almost as important as the actual drawing. Don’t feel like everything you do has to be perfect though. Learn and understand the basic concepts, and improve over time with practice.
How to Draw a 3D Box from Real Life
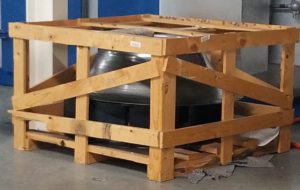
As I was walking around work today I was looking for something interesting to draw that had a basic shape of a cube. There were so many options to choose from.
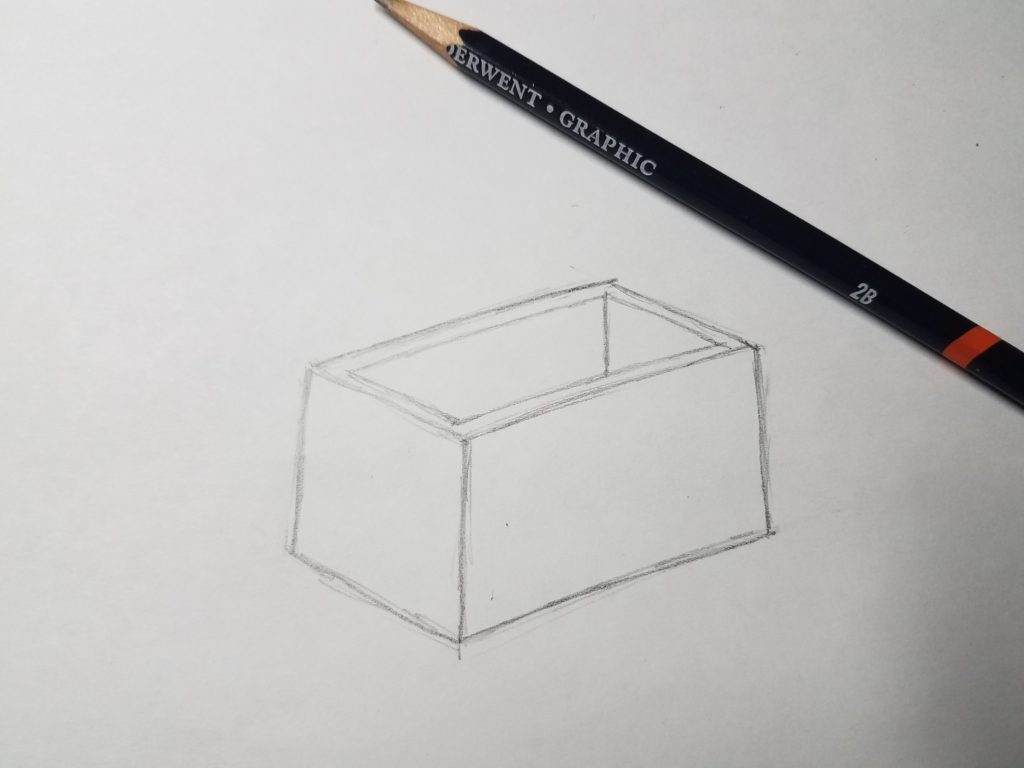
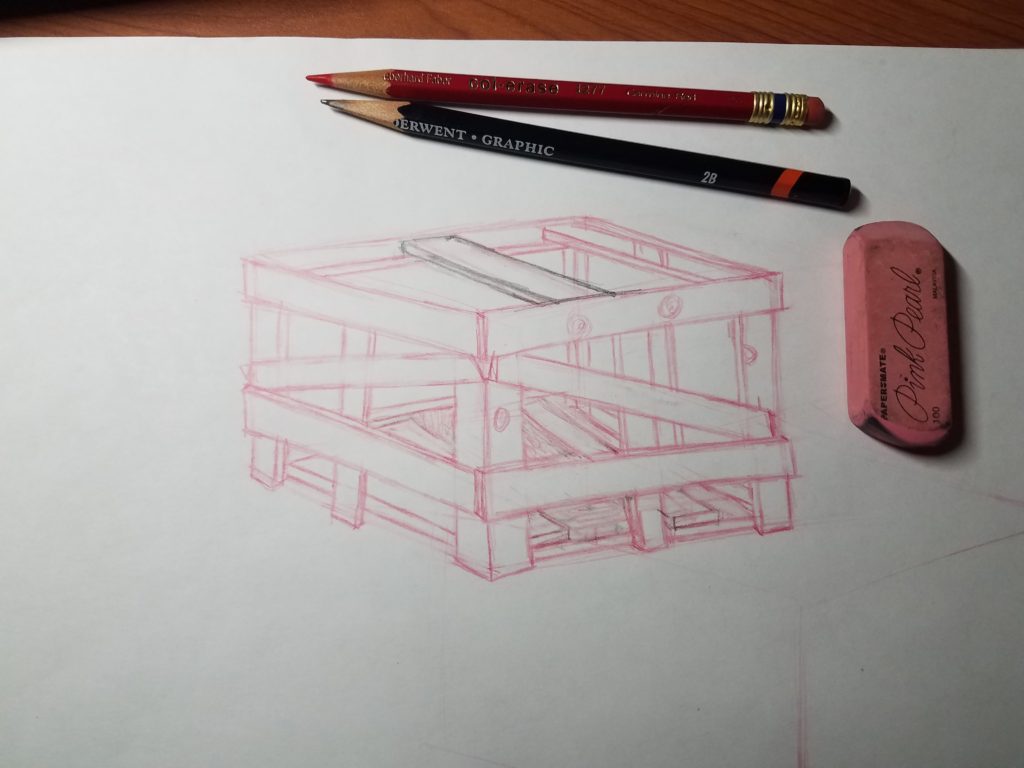
I settled on this crate that I came across. I thought it would be fun to draw, so here we go. As mentioned in my earlier post, Anyone Can Learn to Draw, the first thing you have to do is learn to “See”. You should begin by taking note of the angle at the bottom of the crate as you start to layout your sketch.
This was my initial sketch that I did. However, after looking at it, I realized one of the boards wasn’t quite right. The angle of the center board on the top is off just slightly, which makes a pretty big difference. If you wanted your boards to look uneven, then this would work just fine.
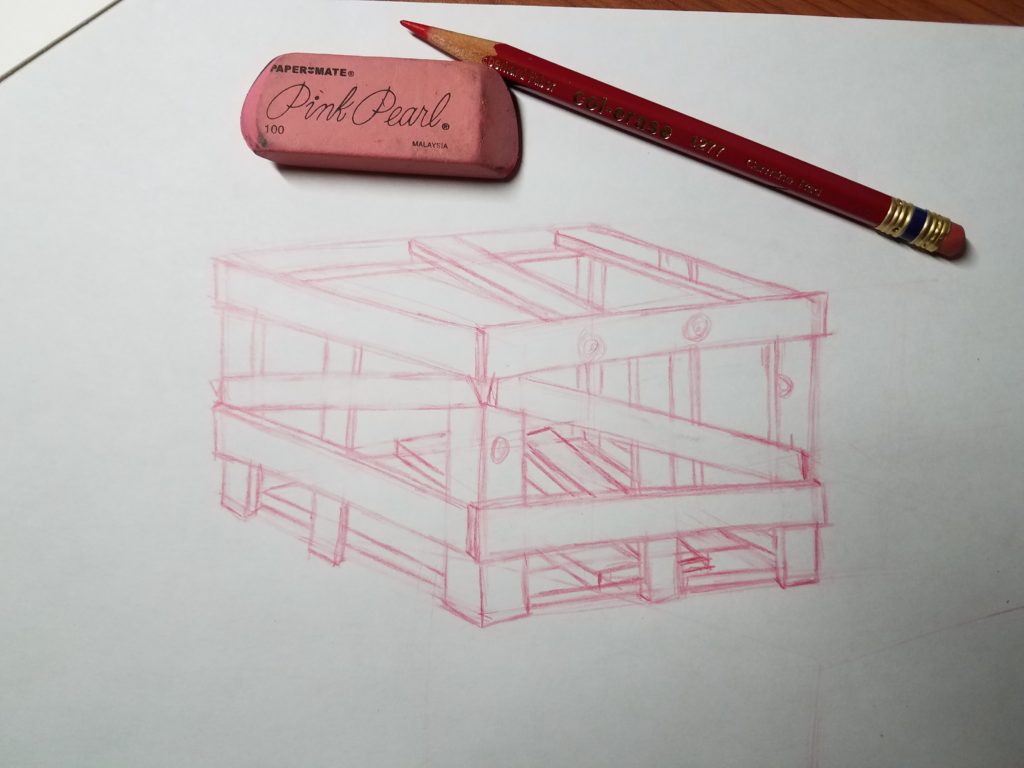
I re-drew the top board so it was parallel with the boards next to it. This was my final sketch. The board I fixed is drawn with a regular pencil. I also cleaned up the bottom boards as well.
I’ll leave you with this challenge. How many different objects can you draw from a cube? I would love to see what you come up with. Please stop back and share your results.
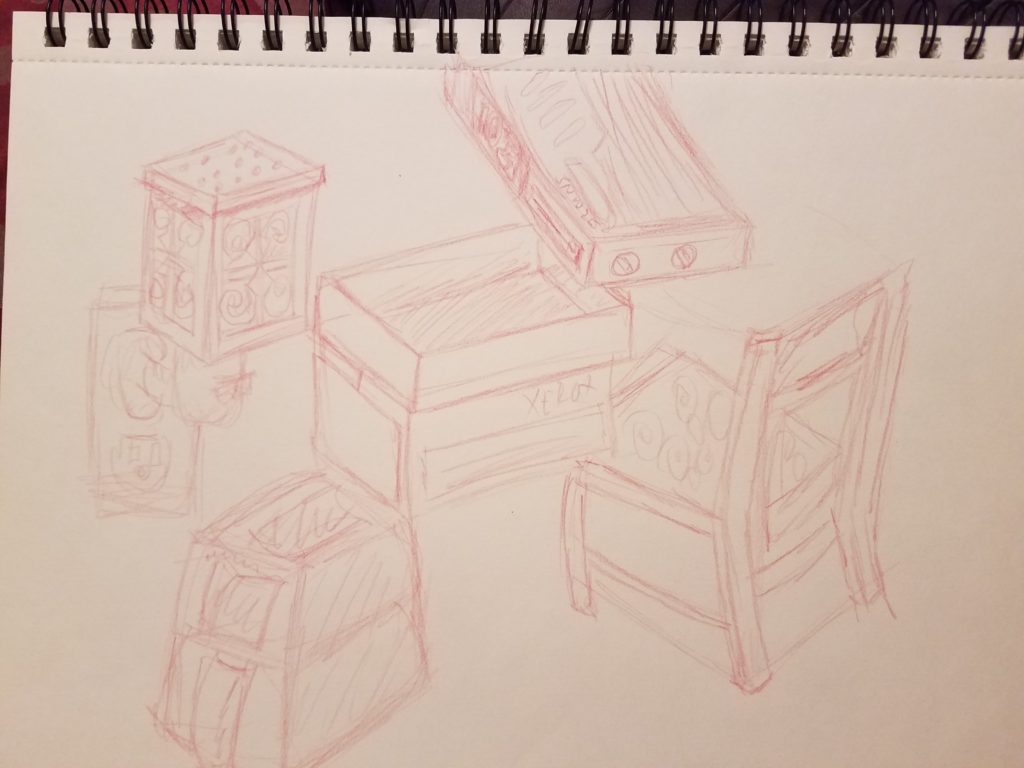
Here is my practice page. I walked around the house and quickly sketched anything that was cube shaped. The more you practice, the better you will be able to “See” what you are drawing. This is a quick exercise that you would benefit from doing often.
![]() How to Draw a 3D Cube in 6 Easy Steps
How to Draw a 3D Cube in 6 Easy Steps
Learning to draw a cube will help you in many other areas of creating art. The more you practice, the better you will get. So keep practicing and be sure to have fun.

These instructions need some adjustments, as lines from the front edge of a cube/rectangle must converge at two vanishing points. This is because parallel lines appear to meet in the distance. The lines in this example are drawn parallel and so they will diverge rather than converge if you keep extending them out to the back.
You are correct. This method is a freehand alternative to drawing objects in 3D that is easy to understand and works very well. We have several other art tutorials that use proper 1pt and 2pt perspective for those who want a more mathematical approach.
Thanks for the guide!
You’re welcome. I’m glad you found it useful.
Your instructions were easy and simple to follow and helpful. Thank you.
I’m glad you enjoyed the lesson!