Learn How to Draw a Polar Bear for Beginners
Art and drawing are skills that anyone can learn. It just takes consistent practice over time. Working on your artwork for a few minutes each day will give you good results. Don’t feel like you have to spend hours a day to get good at drawing and art.
Keep things relaxing and enjoyable so you’ll look forward to your creative time.
So let’s grab our supplies and get ready to have some fun learning how to draw a polar bear.
* Some of the links in this post may be affiliate links. This means I receive small commissions for purchases made through these links at no extra cost to you.
Art Supplies
FREE Guide to Better Art in 7 Days
Polar Bear Sketch Practice
Doing a polar bear sketch practice exercise is a really great way to warm up your drawing muscles and work through some of your ideas. And it only take a few minutes to do.
Here’s how to do a quick sketch session…
- Get some paper and something to sketch with (pencil, pen, marker, etc.)
- Pull up some reference photos of polar bears
- Set a timer for three or five minutes
Then just do as many polar bear sketches as you can before you run out of time. Keep your lines quick and loose.
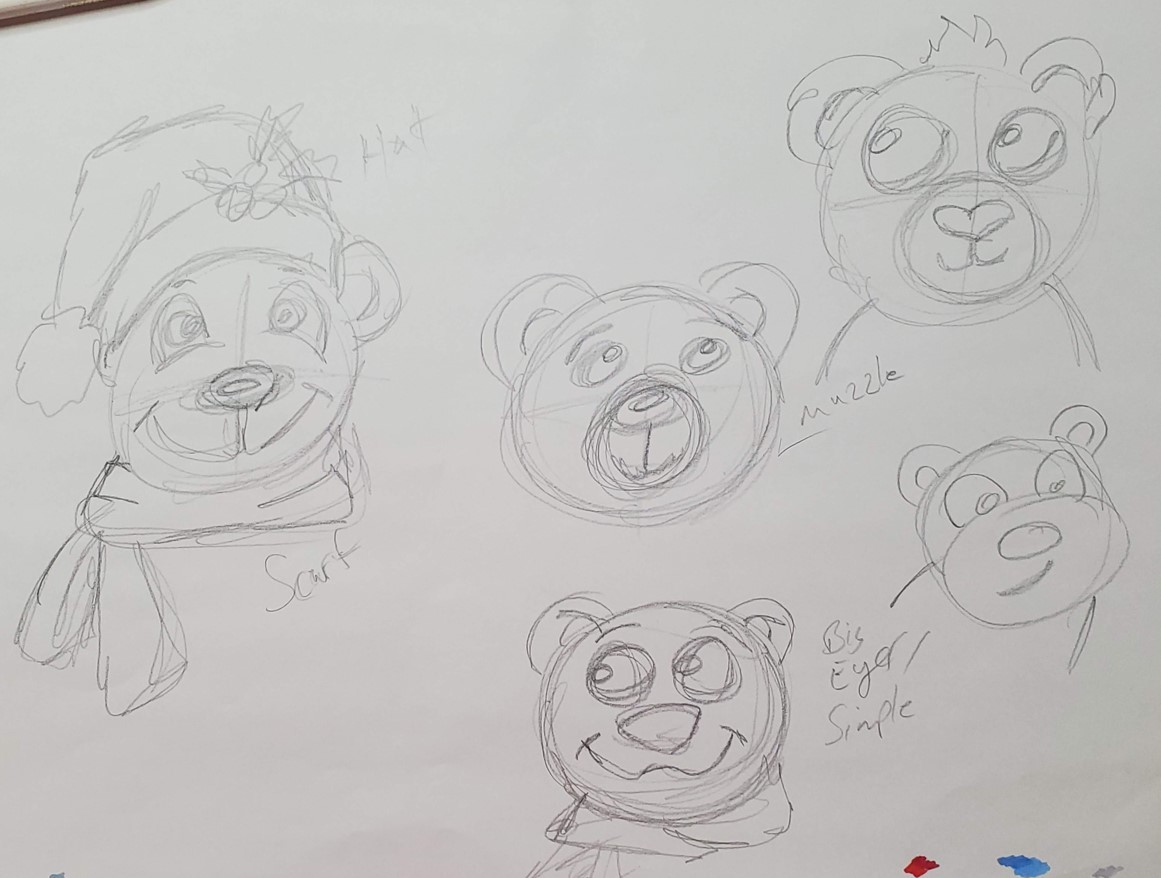
Another option is to do as many polar bear sketches as you can before you run out of room on your paper. Either method is fine and should only take five minutes or less.
How to Draw a Polar Bear Face Step by Step
Step 1: Start with Basic Shapes
The easiest way to draw anything is by breaking it down into basic shapes. For our polar bear drawing we need to start with a circle for the head.
Then draw some guidelines that divide the head into quarters. This will help with the placement of the eyes and nose.
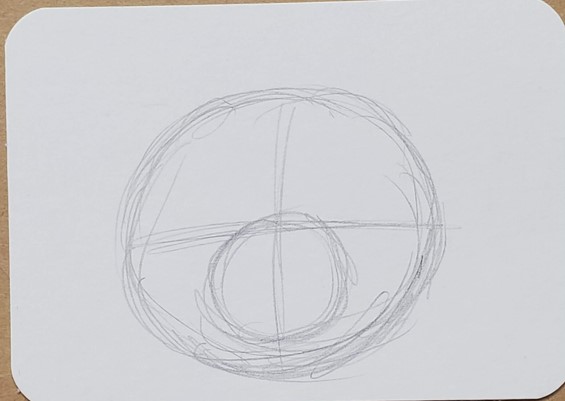
You can draw a smaller circle for the muzzle, if you want to include that in your drawing. If you’re not sure how you want to draw your polar bear, then try doing a few different variations of it and see what you like best.
Step 2: Make a Rough Sketch
The next step is to sketch out all of the details for your drawing. You can make your polar bear as simple or as complex as you want.
For example, the eyes can just be a couple of circles. Or, you can make them arches with more details in them.
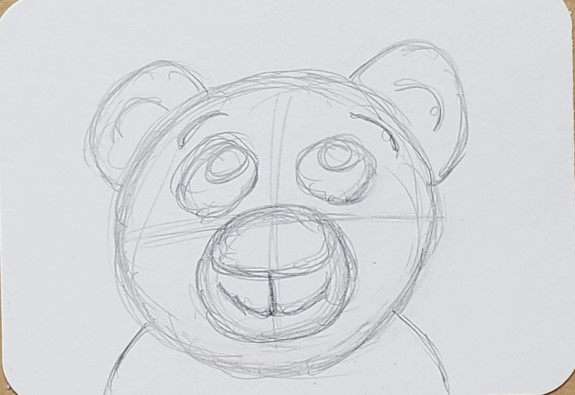
And of course there’s many options in between the two ends of the spectrum.
The same thing goes for the ears, nose, and mouth.
Polar Bear Drawing Outline
If you’re happy with how your sketch looks, go ahead and start outlining your drawing. I like using Pitt Artist Pens for my outlines, but there are many other options that work too.
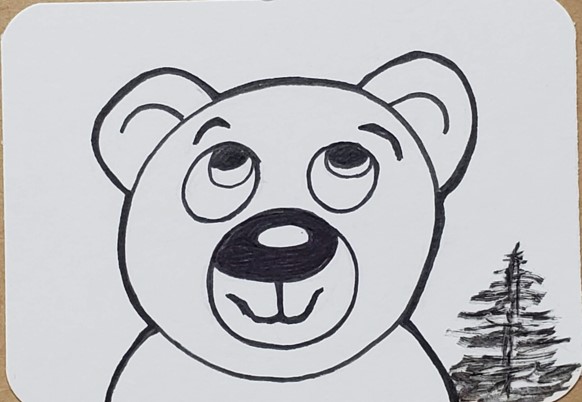
When making your outlines you’ll need to decide if you want your lines to be thick, thin, or a combination of the two.
This will be determined by your artistic style and what you think looks good. There’s really no right or wrong way to do it. Experiment and have some fun.
How to Draw a Polar Bear with Markers
Learning how to draw a polar bear with markers is really easy. And there’s only a few things you need to keep in mind when using them.
First, if you want to be able to blend your colors together you need to use alcohol based markers. Bic, Sharpie, and Copic for example. As well as many others.
Second, you need to work while the colors are still wet or they won’t mix together. This isn’t a big deal. Just make sure you work on a section at a time.
Third, you need to use colors that are similar to each other if you want to create a smooth transition of color. If your markers are too different they will leave a harder edge.
I always recommend using two or three colors for each section of your drawing so it looks less flat.
When adding shadows to your polar bear you can use gray. Or, you could add another color like blue or purple. There’s lots of options when adding shadows to white. Think about what colors might be reflected onto your polar bear.
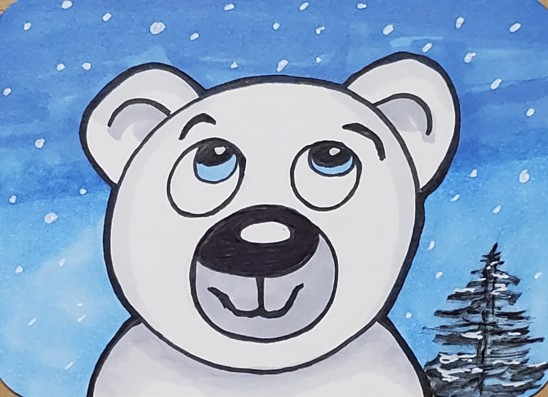
For the background you can add some scenery, trees, mountains, or just add some color.
For adding white highlights, or snow, you can use a Gelly Roll pen or Paint Marker.
Drawing Ideas for Making Your Own Polar Bears
When learning to draw something it’s a good idea to do several different drawings. You can start out by doing some quick rough sketches for practice, as mentioned earlier in the lesson.
The next thing I do is make 7 drawings of the same thing, but I change the way I draw it each time. You can add hats, a scarf, or whatever else you can think of.
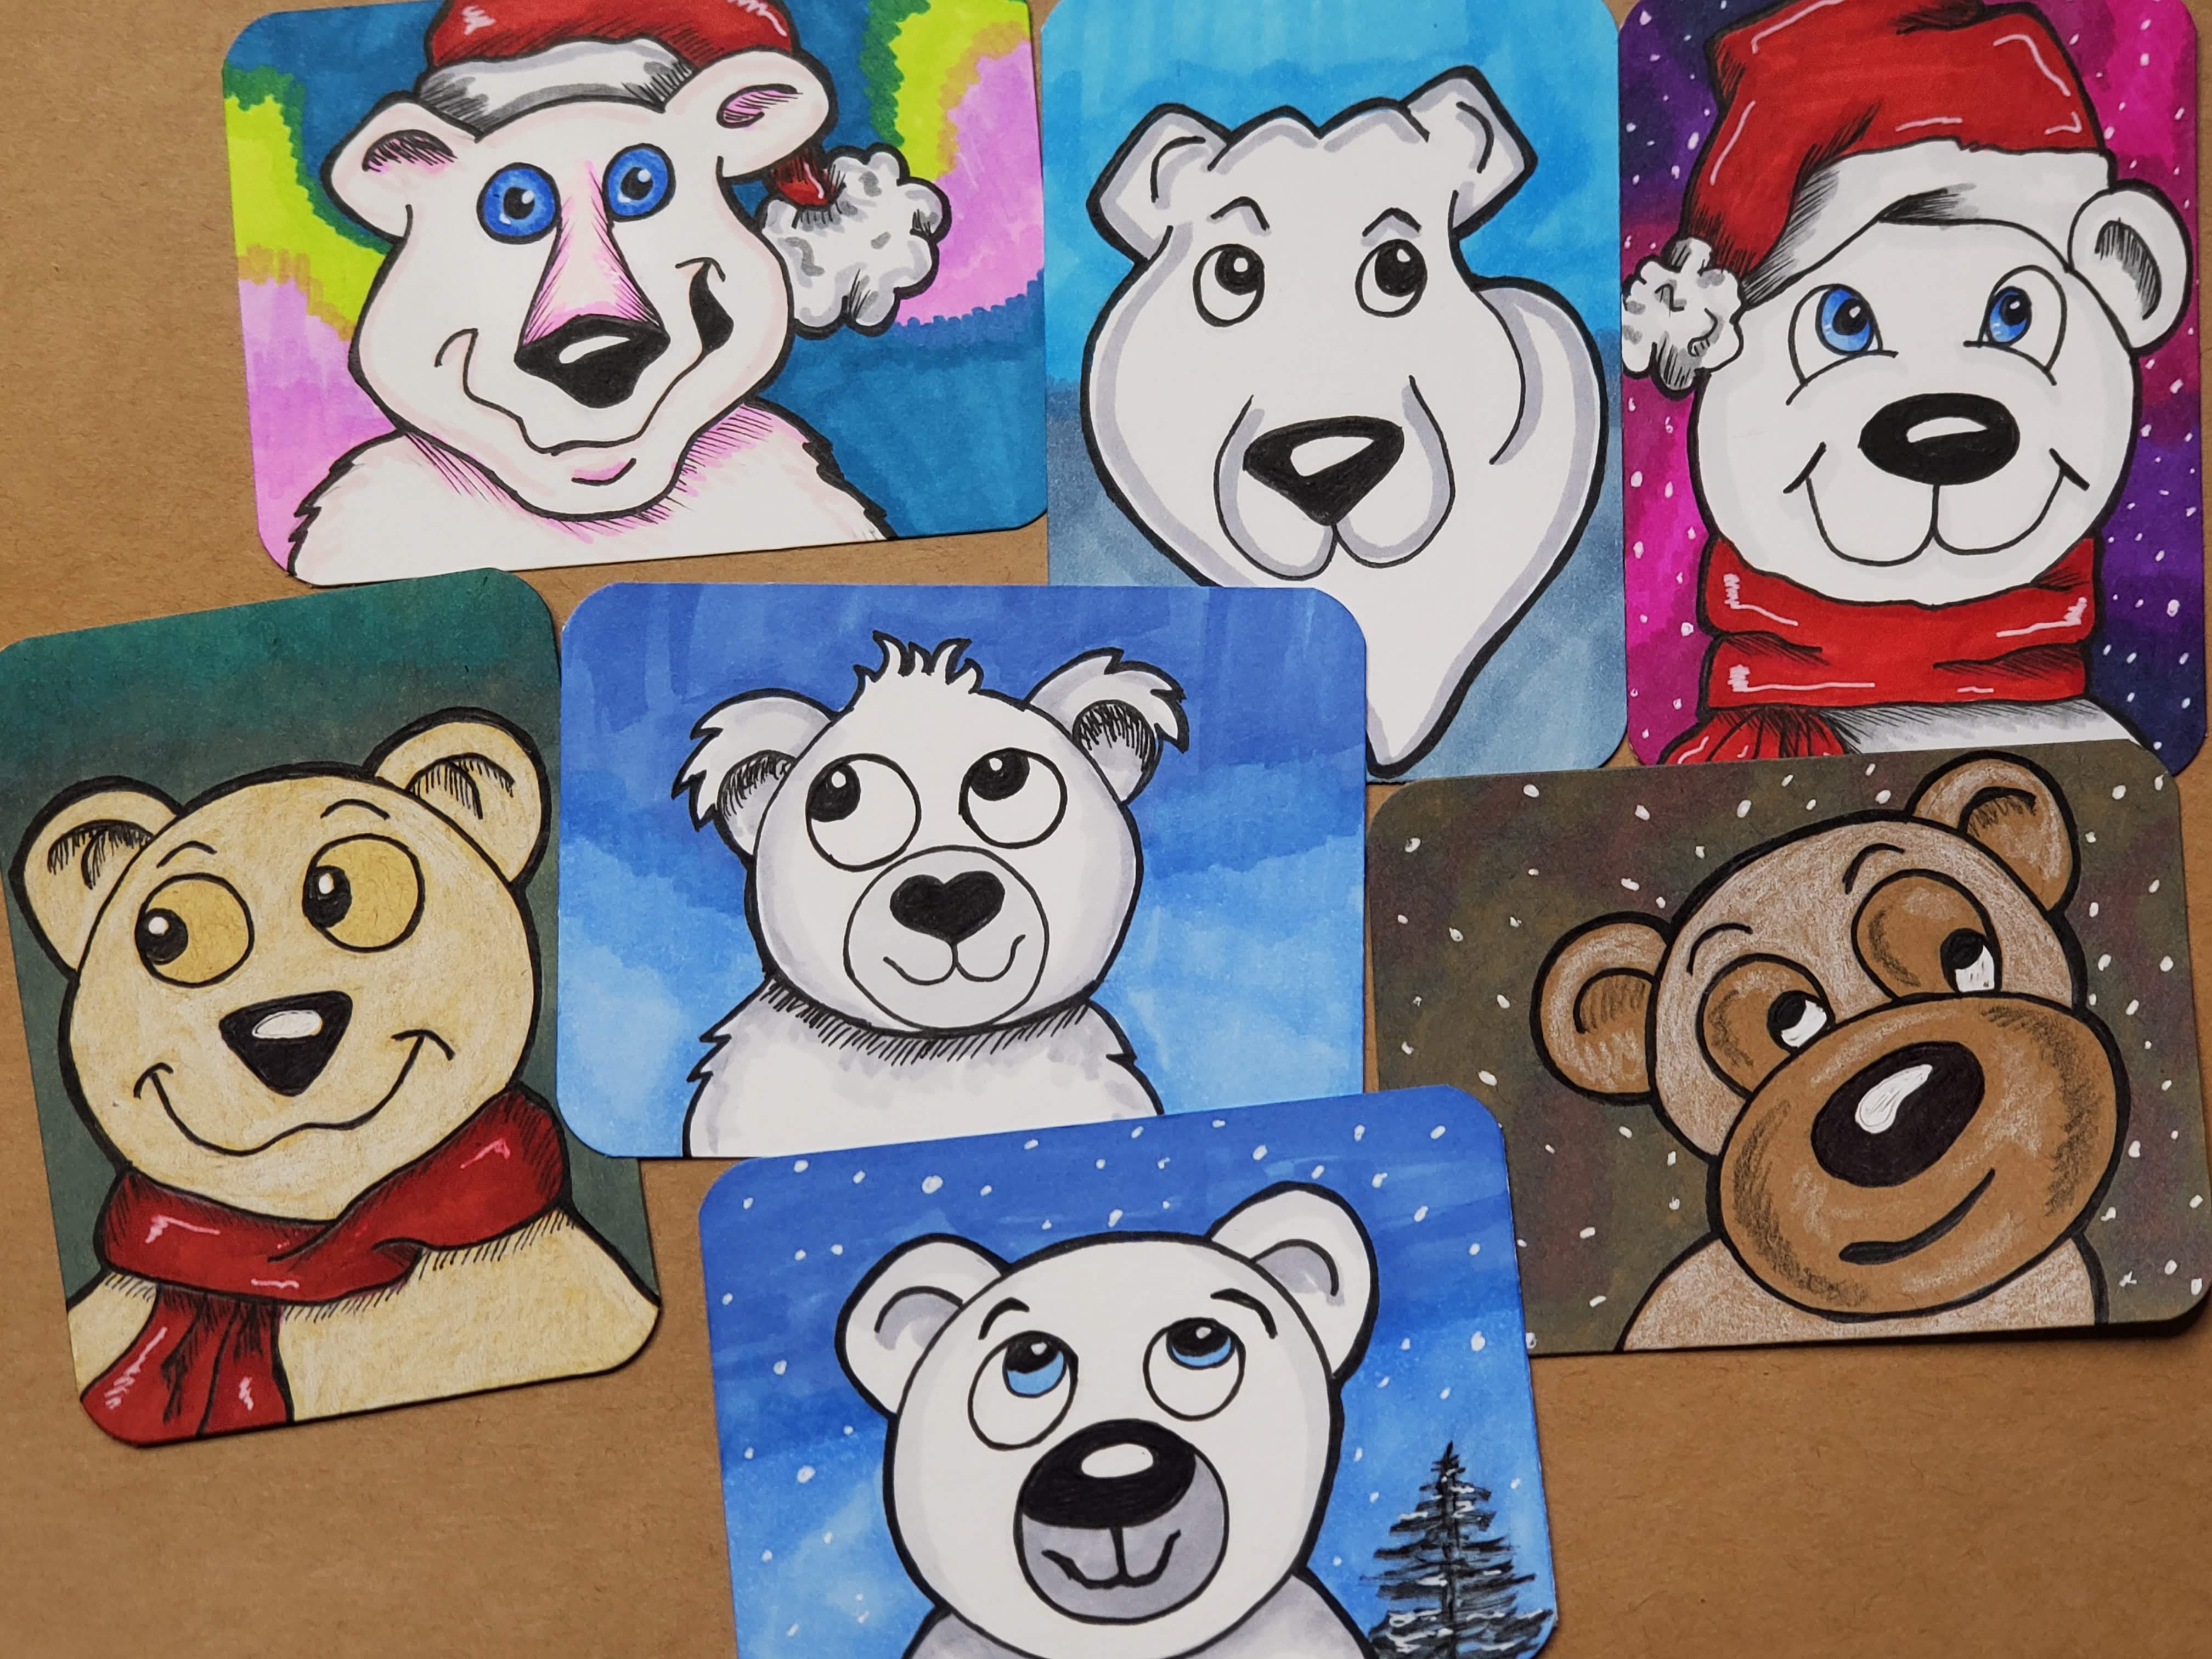
This is a great way to work on your creativity and develop your art skills and style.
To save time you can do your drawings on Artist Trading Cards (ATCs). This is by far my favorite time saving hack. Even if you’re not interested in trading them to other artists.
How to Draw a Polar Bear Face (Plus Drawing Ideas for Inspiration)
I hope you enjoyed this art tutorial on how to draw a polar bear face. There are so many different ways you could draw your own.
Make sure you’re having fun and enjoying the process, not just stressing out about the finished drawing. Art starts to get too stressful if all you care about is the final outcome.
And remember, art is a skill that everyone can learn.
Grab your FREE Guide to Better Art in 7 Days
More Drawing Tutorials
- Learn to Draw Mountains
- How to Draw Christmas Lights
- Teddy Bear Drawings
- Easy Lion Drawing Tutorial
- How to Draw Santa Claus

