Step by Step Mola Art
In this art tutorial I’m going to show how I made a mola drawing using markers. This is a really fun style of art that is also great for beginners. The art in this tutorial was inspired by traditional Mola art, but not necessarily a duplication of it, since it’s typically done on textiles.
We can find inspiration for our artwork wherever we look. What we choose to do with that inspiration will determine the path for our art. Today’s tutorial will show you how I used Mola art as inspiration.
Let’s grab some supplies and get started on the Mola drawing tutorial.
* Some of the links in this post may be affiliate links. This means I receive small commissions for purchases made through these links at no extra cost to you.
Art Supplies
- Thin black marker
- Paper or cardstock
- Markers
- Pencil
- Click Eraser, Pink Pearl Eraser
- White Gelly Roll pen
About Mola Art
Mola art originates from the indigenous Kuna people of Panama and Colombia. The Kuna women began creating mola textiles in the early 19th century as a form of personal adornment. Molas were traditionally made by layering and cutting colorful fabric pieces to create intricate designs, often inspired by nature, mythology, and daily life.
Originally, molas were part of traditional Kuna clothing, worn as blouses by women. Over time, they gained recognition beyond the Kuna community for their vibrant colors and intricate patterns..
Today, mola art continues to thrive both as a traditional craft and as a form of contemporary artistic expression. Many Kuna women still create molas using traditional techniques, while others incorporate modern influences and materials into their designs.
Mola Drawing Sketch Practice
Doing a quick sketch practice is a great way to warm up and get familiar with what you’re going to be drawing. This is an optional step, but since it only takes a few minutes to do is definitely worth the time.
- Get some paper and something to sketch with (pencil, pen, marker, etc.)
- Pull up some reference photos of Mola art
- Set a timer for three or five minutes
And then simply sketch as many designs as you can before the timer goes off. Or, just sketch until your paper is filled and you’re out of room.
Either way is fine. Just be sure to keep your sketches quick and loose.
Mola Drawing Tutorial (Step by Step)
I did my Mola drawing on an artist trading card (ATC), but you can use any type and size paper you want for your drawing.
Grab the free ATC guide to learn more.
Step 1: Basic Shapes
It’s always best to begin with some simple shapes. For today’s drawing we’re drawing a fish, so we’ll start by drawing an oval for the body. I want my fish to fill most of my paper so I want to keep that in mind when drawing my shapes.
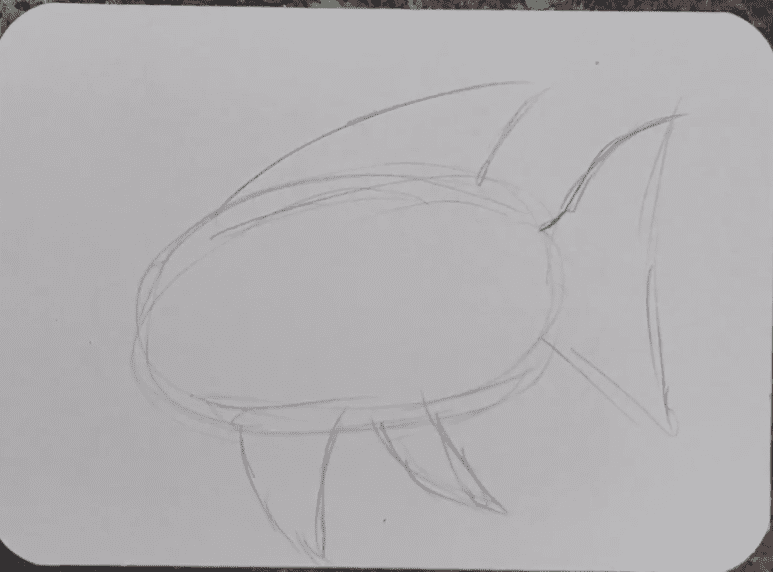
Next, draw some triangular shapes for the fins. We don’t need to worry about any details yet. We’ll do that in the next step.
Step 2: Fish Sketch
Now we need to start adding in some details for our fish. Traditional Mola art is not usually very detailed since it’s done on textiles. But we are only using it for inspiration so you can make your fish more or less detailed as you see fit.
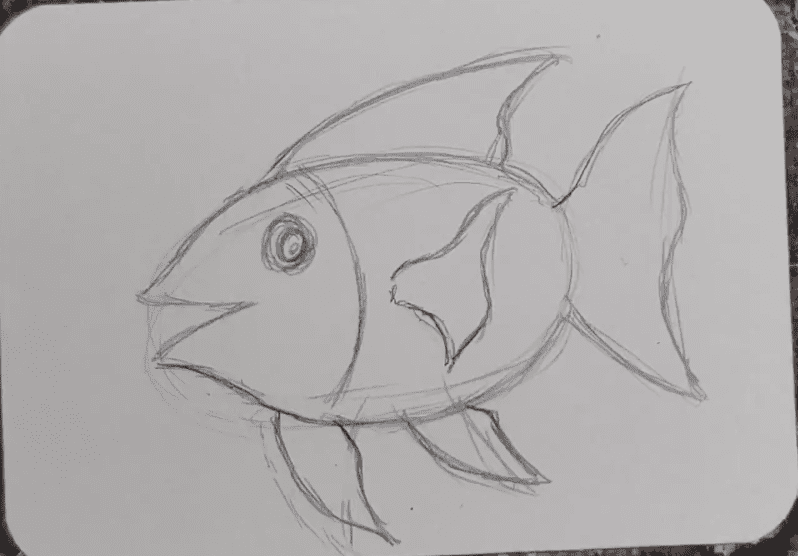
Start by refining the shape of the body and the fins. And clean up your lines a bit as you work on your fish sketch. If you want your fish to be more detailed, add some curves to the fins. If you want your fish to look more simplified, add fewer curves, or none at all.
As you can see there are a lot of different ways you could draw your fish. Do whatever looks and feels right to you.
Step 3: Add Patterns
After you have your fish all sketched out, you can start adding some patterns and designs to it. Adding a few lines to create different sections on your fish is a good way to break up larger areas.
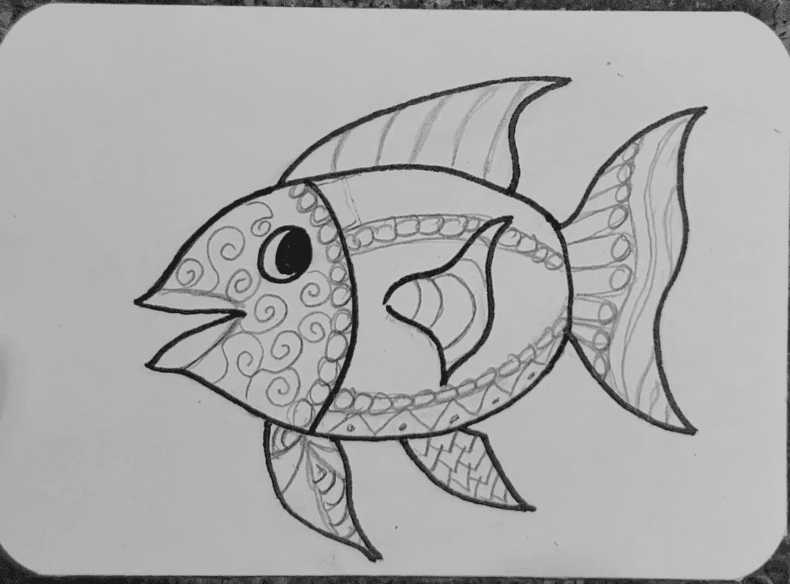
Then simply fill in each section with a different pattern. You could also repeat patterns in different areas that aren’t adjacent to each other.
Lines, circles, swirls, and zig-zags are easy patterns to use.
Mola Drawing Outline
After you have all of your patterns drawn in you can use a black pen to outline your Mola drawing. This can be done with a fine point pen, or a larger pen.

You could also use a color other than black. Maybe try using a different color for each pattern to add an extra level of color to your Mola art.
After you have your drawing outlined, use a block eraser to clean up all the pencil lines.
How to Draw Mola Art with Markers
The last thing we need to do is add some color to our Mola drawing. This can be done with any medium, but I’m using markers today.
When choosing your colors it’s best to stick to a color theme. So for the inside of my fish I’m using warm colors.
I picked out several markers that were orange, yellow, and brown. Light green was added, which is a cool color, just to see what it would look like.
I added the green to the solid areas of the fish only.
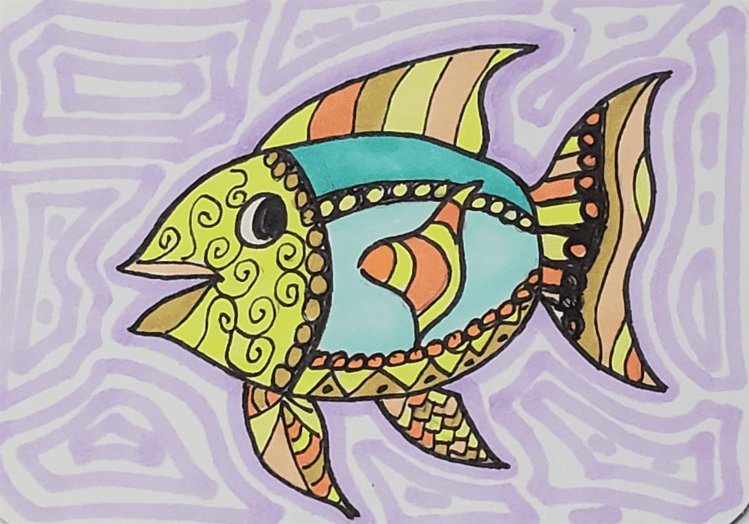
Experimenting and trying new things is important when creating art. That’s why I love using artist trading cards for my work. Since they’re small, it allows me more freedom to try new things.
For the background I used a light purple marker to add some designs. I don’t love how it looks. Next time I’ll try something different for the background.
Final Thoughts and Next Steps
That’s it for this Mola drawing tutorial. To improve your art and drawing skills you need to practice. The more you practice the better you will get.
Even if it’s only for a few minutes each day it will help you grow and improve. Being consistent will take you far.
Doing a series of drawings is a great way to experiment and grow your skills.
Grab your FREE Guide to Better Art in 7 Days
