Easy Op Art Star Drawing
Today we are going to learn how to do a 3D op art star drawing. This is a great beginner drawing lesson for all ages. If you’re interested in learning how to draw optical art, this is a great place to start.
Optical art is really easy to make and fun to see the results. There are so many really cool op art projects that we can make. And they are much easier to create than what they look like they would be.
Learn more about the op art movement and it’s characteristics.
Let’s gather up our supplies and get started with our op art stars.
* Some of the links in this post may be affiliate links. This means I receive small commissions for purchases made through these links at no extra cost to you.
Art Supplies
Paper 10×10 inches
Pencil
Star template (optional)
Ruler
Blue markers or colored pencils
Op Art Star Background
The first thing we need to do is get our drawing all laid out. To do this we want to start with the background.
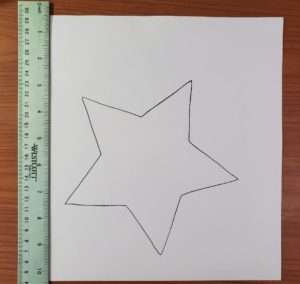
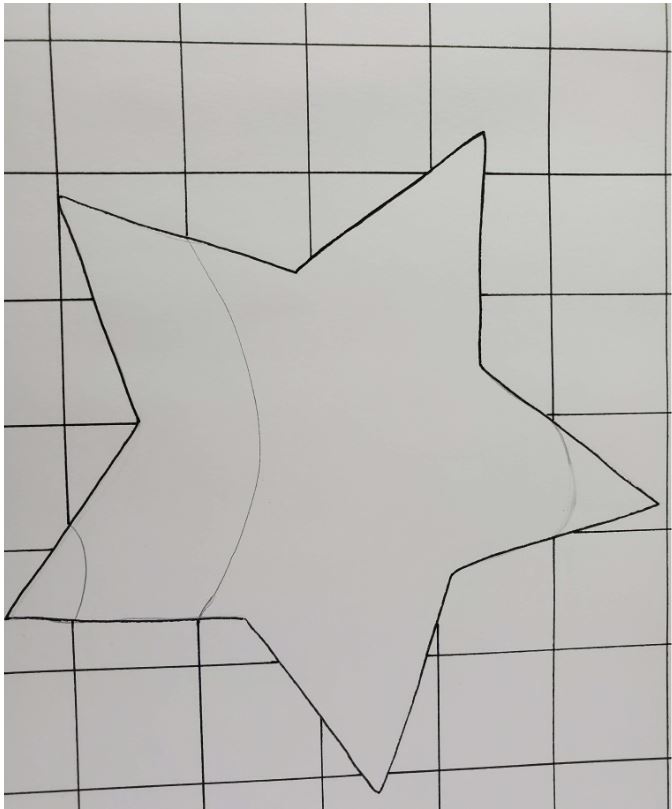
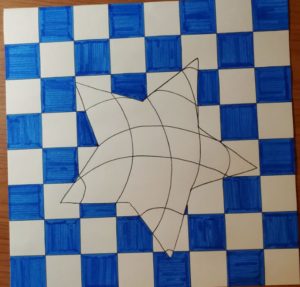
But first, let’s draw or trace our star using a pencil. You want your star to fill up a good amount on your paper. But don’t feel like it has to be perfectly centered or perfectly straight. You can use a marker instead of pencil if you’re level of confidence is good.

We are going to draw a grid on our background. When drawing your background, don’t draw anything in your star. The easiest way to draw a grid is by using the width of your ruler. Or, you can cut strips of cardstock to the desired width and use that instead.
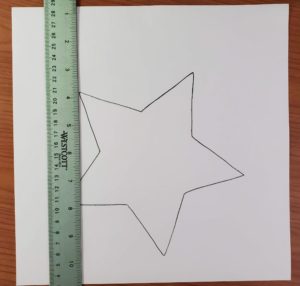
Line your ruler up with the edge of your paper. Make sure you keep it as straight as possible. Draw a line using the opposite edge of the ruler.
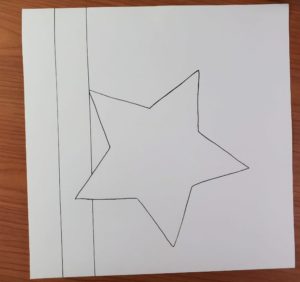
Then move your ruler over, lining it up with your first pencil line. And again, drawing your line down the opposite edge of the ruler.
I’m using a marker for this demonstration so it’s easier for you to see. You could draw everything out with a pencil first, or just use a marker. It really just depends on your comfort level.
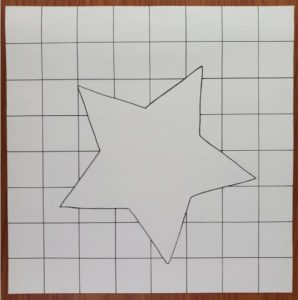
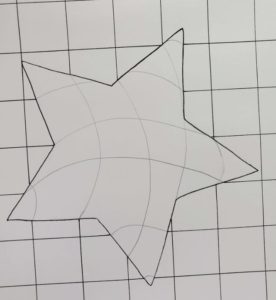
Continue doing this until you’ve reached the opposite side of your paper.
Rotate your paper and follow that same process until you have a grid on your entire background.
To give your op art star drawing a slightly different look you could try making your grid smaller by moving the lines closer together. This will take a little longer to make, but it looks really nice.
If you want to save some time you can try working on a smaller scale. Check out our Beginner’s Guide to Artist Trading Cards for our best tip on how to get more art done in less time.
Optical Illusion Star Drawing
To create the optical illusion we need to make it look like the star is coming forward towards the viewer.
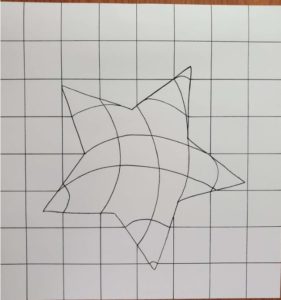
The way we do this is by drawing curved lines on our star. Remember how we drew our background in, but didn’t draw any lines on our star? Well now we need to add in those lines.
But if we make our line straight, our drawings will look flat. So we need to connect those background lines with curved lines. Pick any one of those lines, and connect where the star is with a curved line.
Then continue to do this with each of the other lines. Connect both the vertical and horizontal lines. But make sure they are all curved.
Make sure to always use light pencil lines for any of your drawings. Just in case you need to erase or fix anything.
Color Your 3D Star Op Art Drawing
If you are happy with how your drawing looks, trace over all of your pencil lines with a thin black marker.
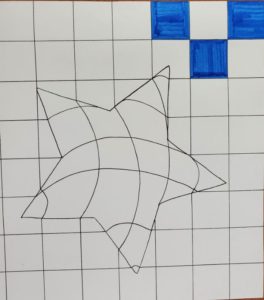
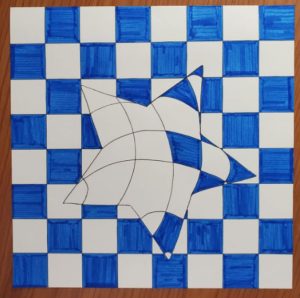
Now you need to fill in your squares with a checkerboard pattern. Leave every other square white. And every other square will be blue. You don’t want to have two adjacent squares blue.
It seems to be easier to color the background first and then move onto coloring the star.
After you have your background colored in using a checkerboard pattern, fill in the star using the same method. If a piece of the star falls within a square, color the star opposite of the square.
So if the square is white, the star inside of that square should be colored. And if the square is colored, the star should be white.
Because of your lines being curved on the star and the difference between shapes, your pattern won’t always work out 100% correct. Don’t worry too much about it. Just do the best you can to alternate between colored and white sections.

The last thing you need to do is add some shading around the edges of your star. This will help give the illusion that it is popping off of the paper. You can use a pencil, colored pencil, or a marker to do this. I used an indigo blue colored pencil.
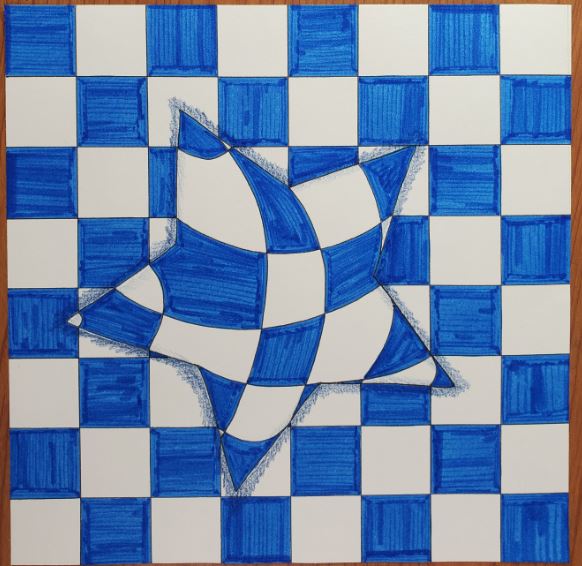
That’s it. Your optical art star is all done.
3D Star Op Art Drawing
Now that you know how to draw a 3D star, what’s the next step? If you want to get better at art and drawing you need to practice. The more you practice the better you will get.
This doesn’t mean you have to draw for hours each day. But working for a few minutes on your artwork everyday will add up and give you noticeable results.
Try making it part of your daily routine. And keep things fun so you’ll look forward to your creative time. Making op art drawings is a great way to boost your self-confidence.
Don’t forget to grab your FREE Op Art Star template.
