Easy Reindeer Drawing
The holiday season is just around the corner, and what better way to celebrate than with a cute reindeer drawing for beginners. You’ll learn step by step how to draw a reindeer.
We’ll be using shapes to draw the head and body for proper placement and proportions. Then add some color to finish our drawing of a reindeer.
Take a look at some photos of real reindeer for inspiration before doing your drawing. Or watch the video below for several reindeer drawing ideas.
* Some of the links in this post may be affiliate links. This means I receive small commissions for purchases made through these links at no extra cost to you.
Art Supplies
- Thin black marker
- Paper or cardstock
- Markers
- Pencil
- Click Eraser, Pink Pearl Eraser
- White Gelly Roll pen
Get Your FREE Marker Blending Guide
How to Draw a Reindeer Step by Step
Learning how to draw a reindeer is really easy if you break things down into simple shapes and steps. This will make the drawing process less intimidating, and it will help you get over the blank page syndrome as well.
So we’ll begin this step by step drawing by laying out some basic shapes.
Start by drawing an oval for the body. And then a circle for the head.
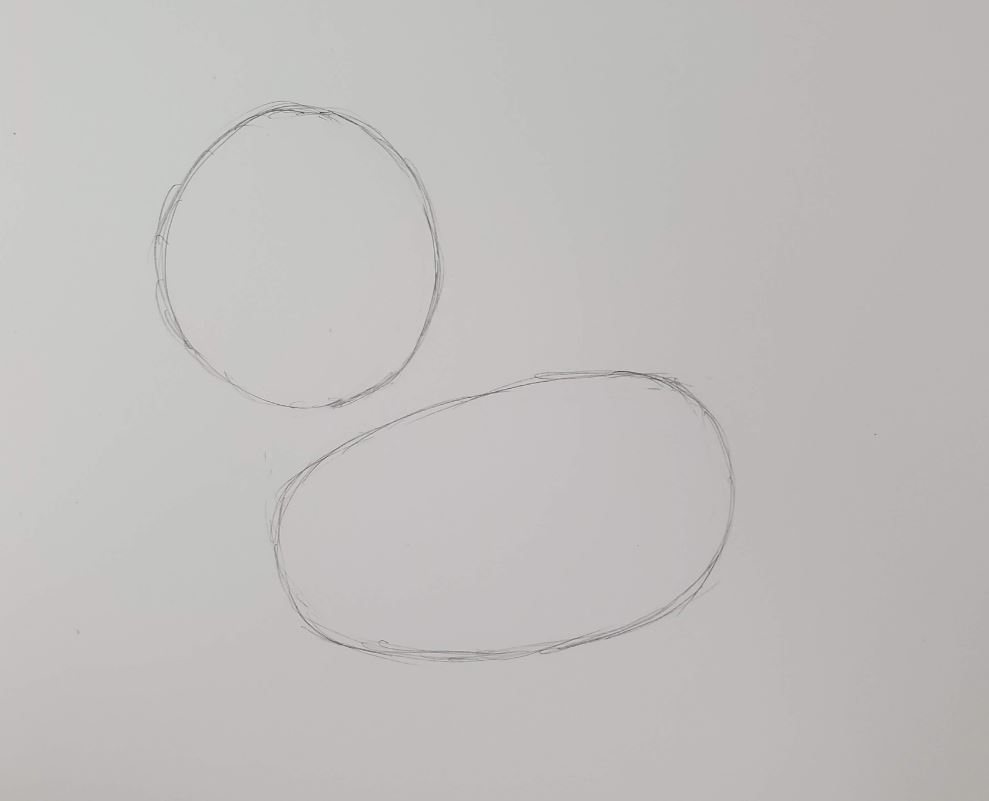
Notice where the placement of the head is in relationship to the body.
Next we’ll start adding in some details for our reindeer drawing. Draw a tail, ear, and an area for the nose and mouth.
And draw a neck to connect the head to the body.
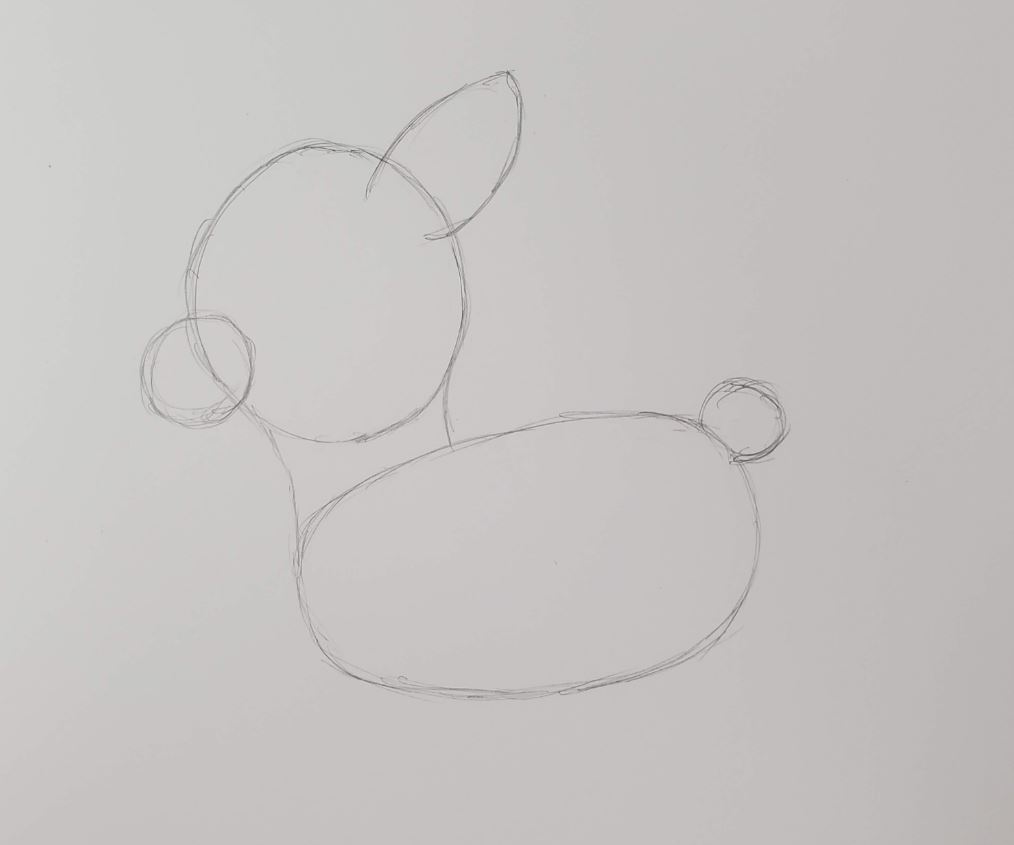
These can be rough shapes as we will refine them later.
Draw your reindeer legs. You’ll want to make the legs on the far side of his body slightly smaller to show some depth in your reindeer drawing.
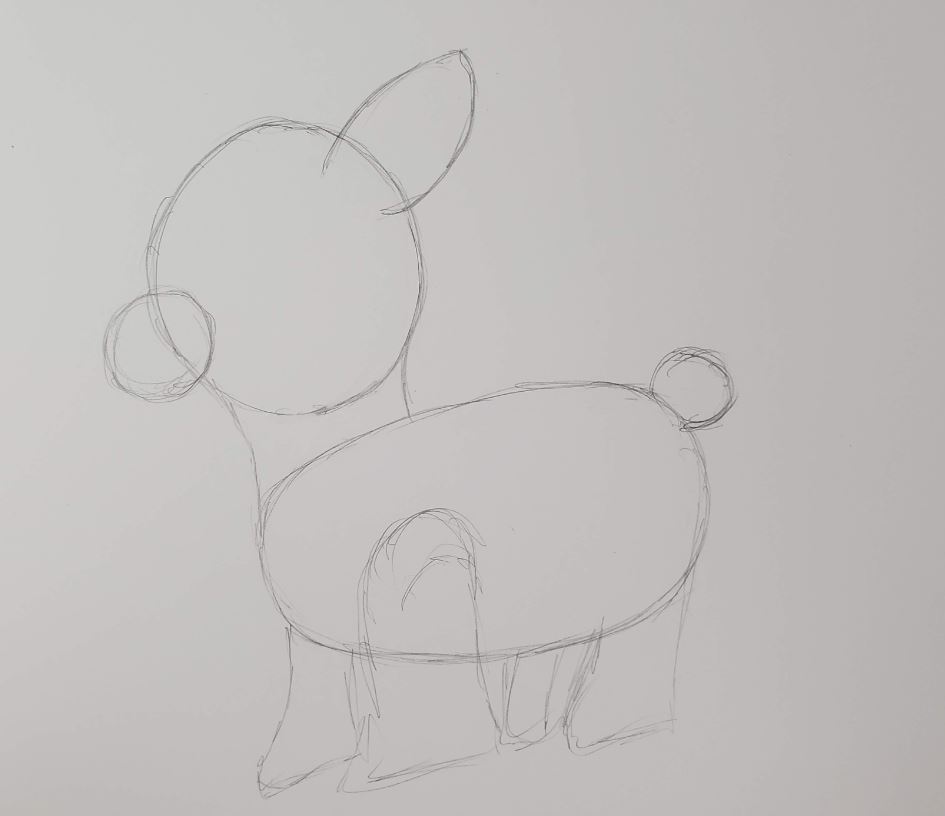
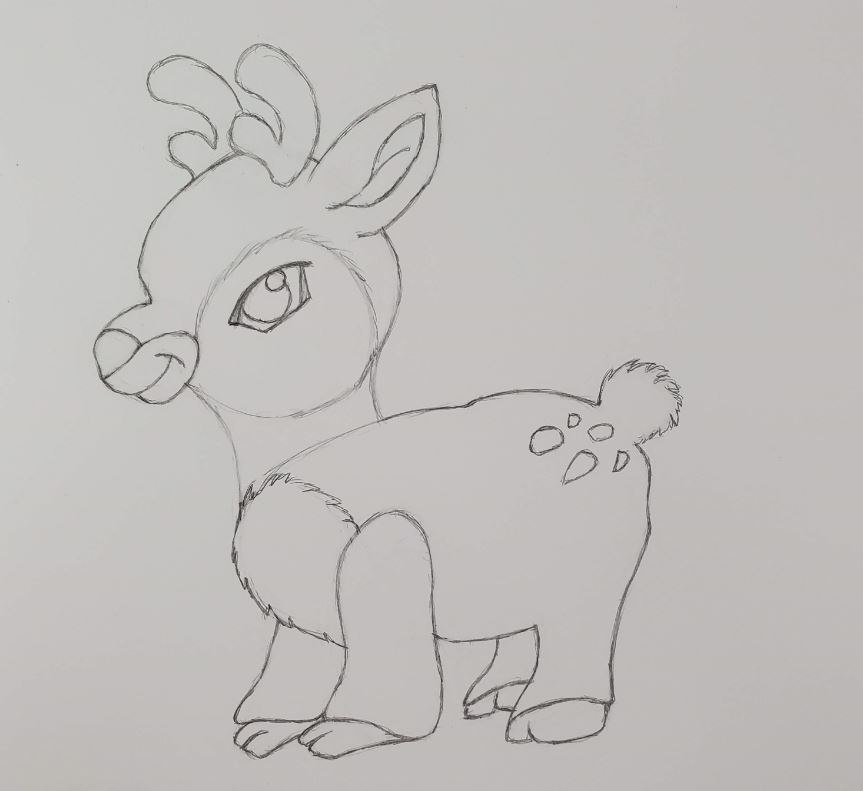
At this point you can see the basic size and proportions of your drawing, as well as the placement on your paper. This gives you a general idea of what your finished reindeer drawing is going to look like.
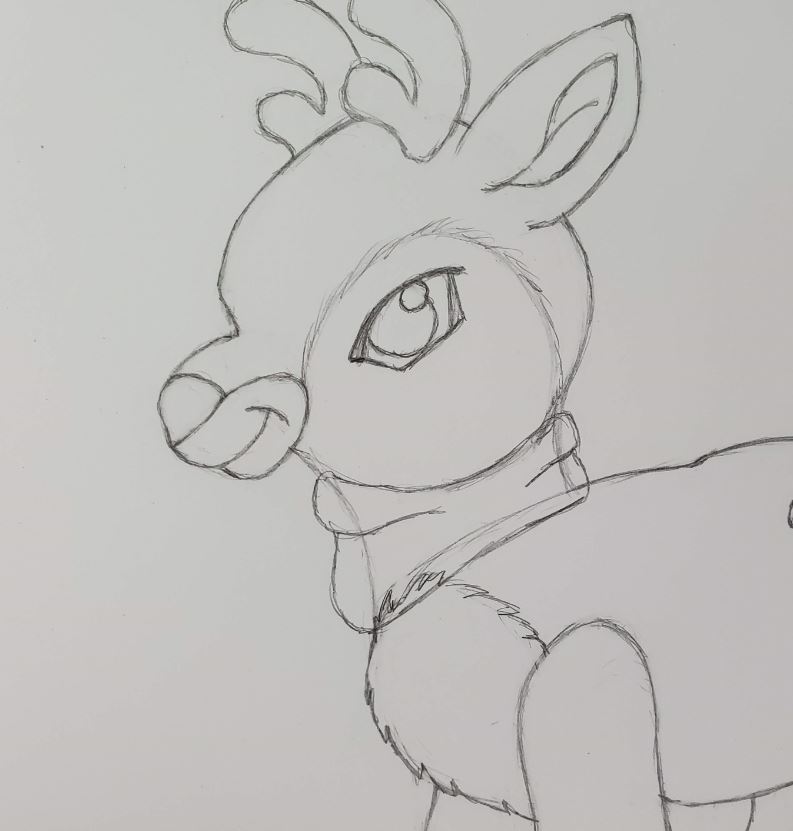
How to Draw a Reindeer Head
Next we’ll work on drawing our reindeer head. Begin by adding in the details for his nose and mouth.
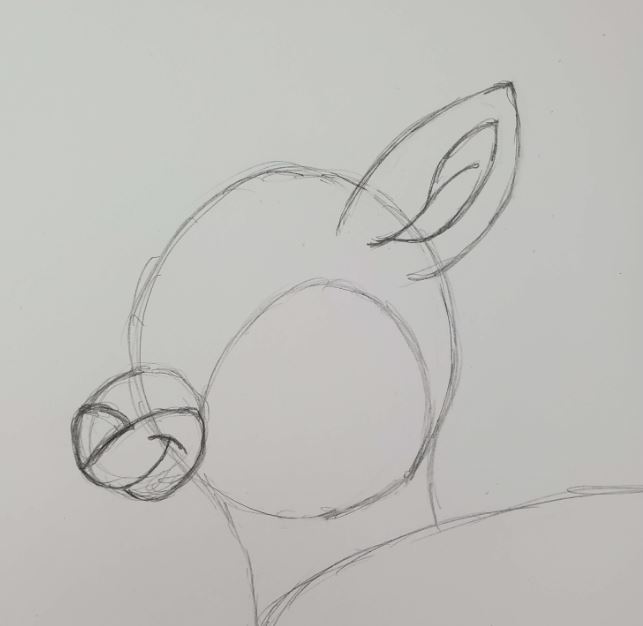
And then draw the inside fold for his ear.
For the eye, there are many different ways to draw it. You can draw them as a simple circle or oval. Or you can make them more detailed like I did here.
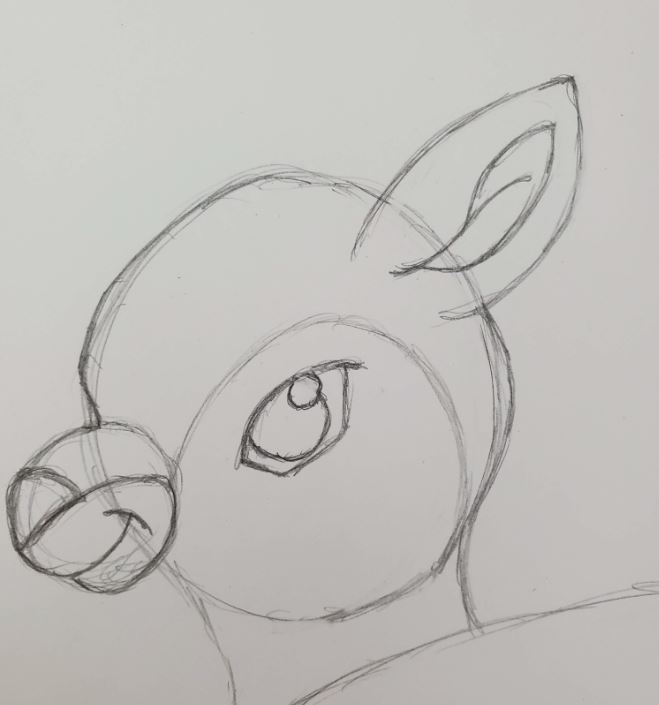
I also added an indication of where his fur will be a different color.
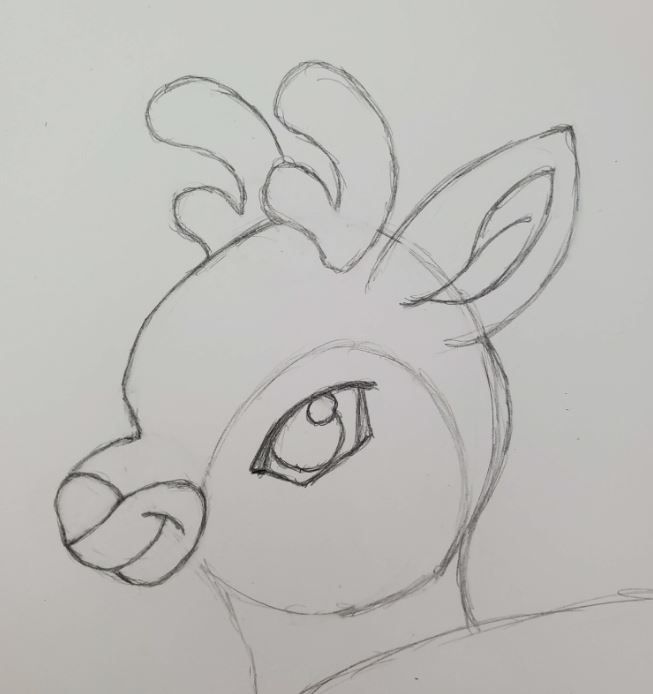
Draw a couple of antlers. Be sure to draw the far antler so the bottom is covered by his head.
How to Draw a Reindeer Body
Now let’s work on drawing the body of our reindeer.
Add in some details for the tail. This is done by drawing some curved lines to show texture for the fur.
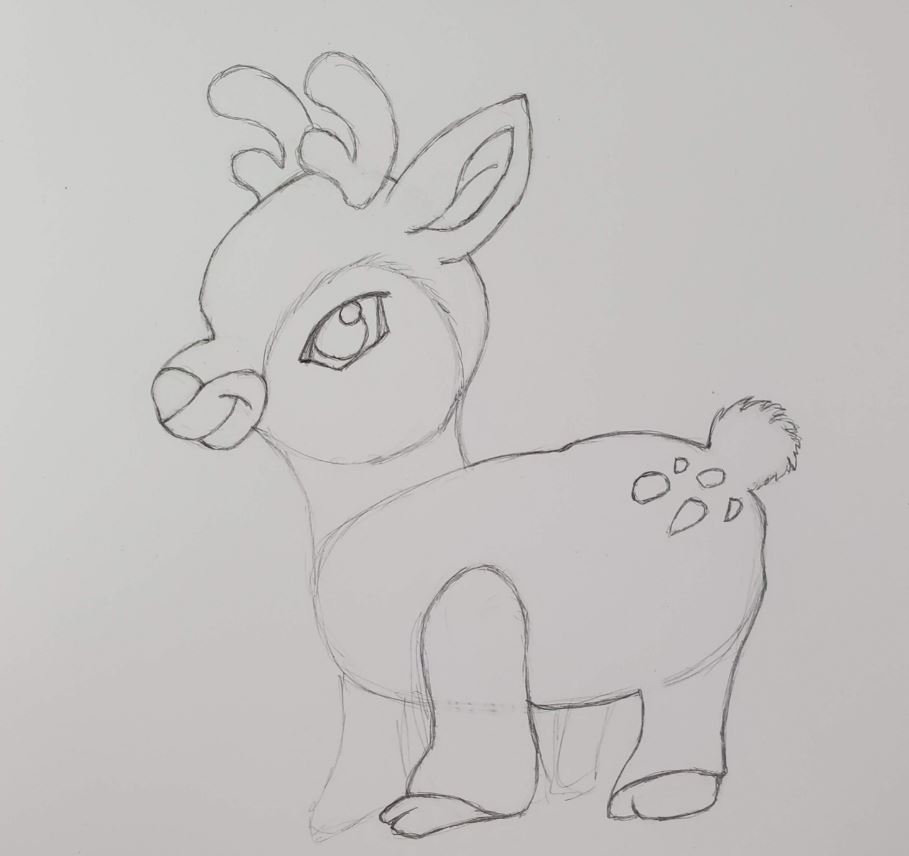
Clean up the legs and feet, and add in extra details for the hooves. I also added some spots, but those are optional.
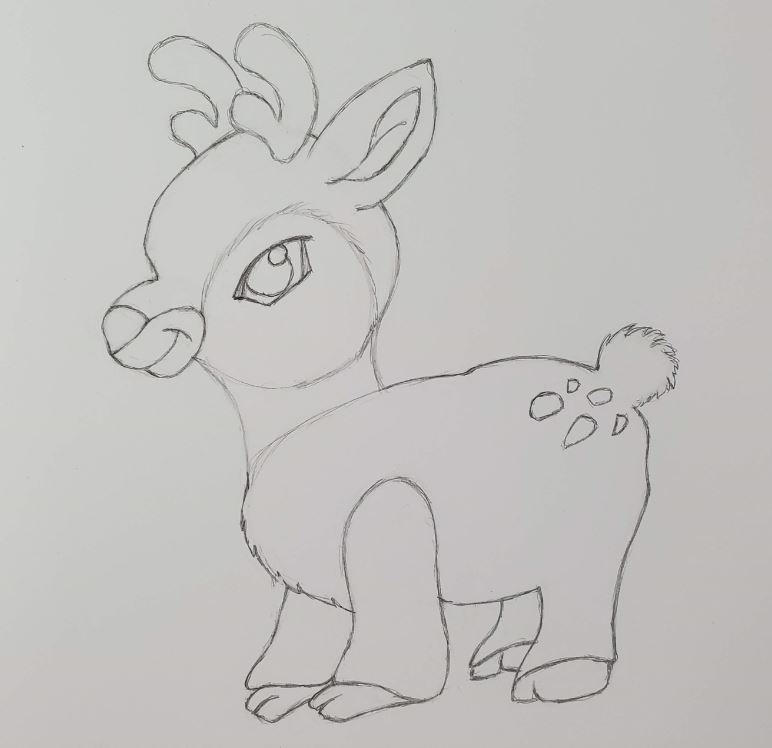
You can start cleaning up your drawing a bit by erasing the lines you no longer need.
Draw more curved lines to his chest to add some texture and to show where the fur is different.
How to Draw a Scarf on Your Reindeer
Now let’s draw a scarf on our reindeer. Begin by making the part that wraps around the neck.
Drawing the short lines in the middle will make your scarf drawing look like it’s bunched up. Draw the top and bottom of your scarf so they curve with the shape of your reindeer.
When you’re satisfied with how that part of your scarf looks, draw the two ends. Don’t forget to add some tassels at the bottom.
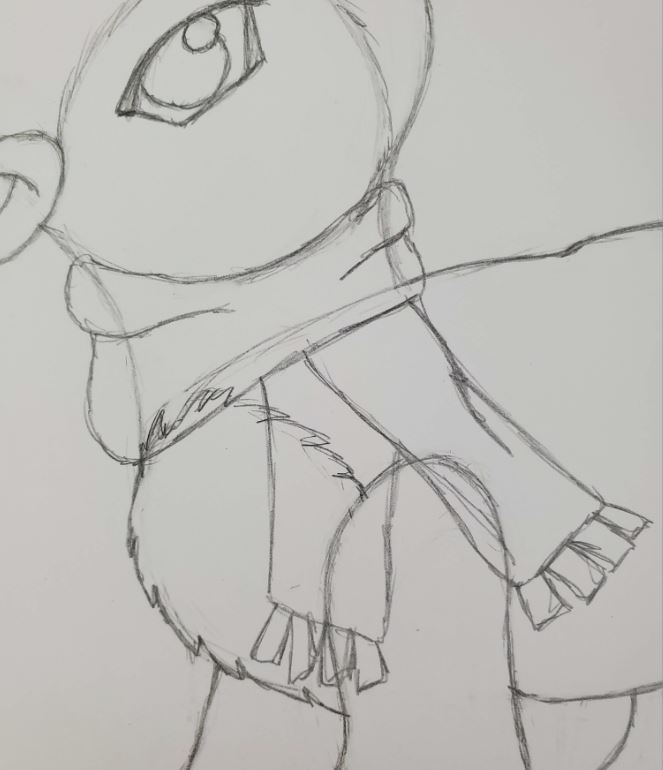
Overlapping the ends will make your scarf look more interesting. If you need some additional help, we have an entire post on How to Draw a Scarf.
Reindeer Outline
I always outline my drawings with a black pen. This is part of my artistic style and is sometimes called inking your drawing.
You can add a lot of variation to your drawings during the inking process. You can change the shape of your lines and add thickness, or line weight to them. Or you can make them more stylized.
How you make your lines will help develop your artistic style.
After finishing your outlines use a Pink Pearl eraser to remove all of your pencil lines.
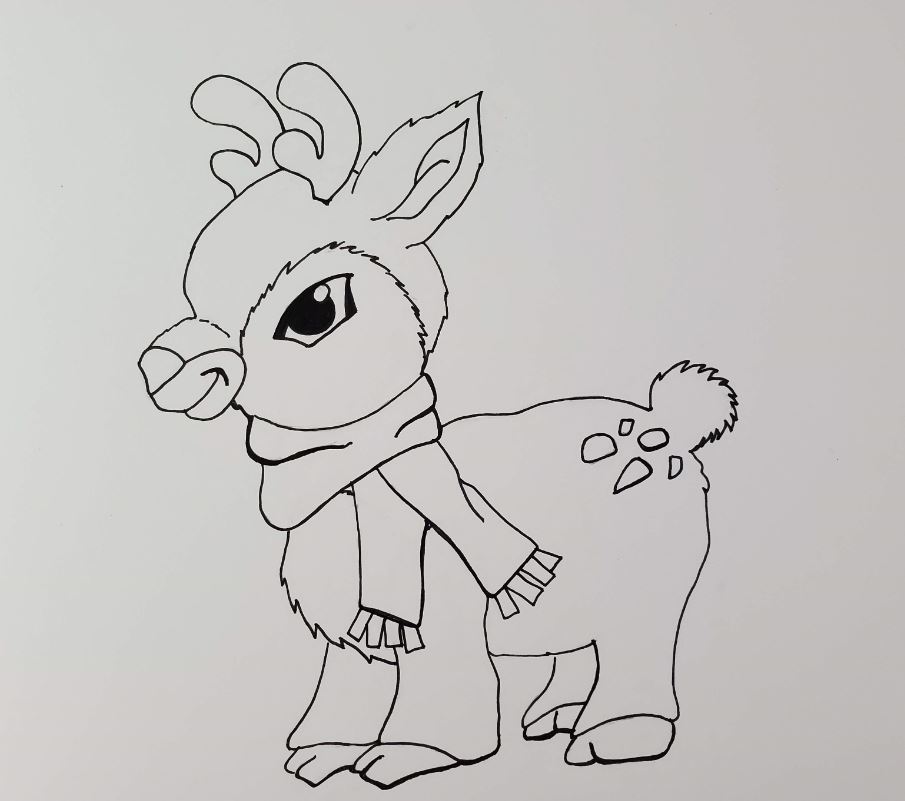
Your reindeer drawing is now ready for color.
How to Draw a Reindeer with Markers
Learning how to draw a reindeer with markers is really easy. And there’s only a few things you need to keep in mind.
First, if you want to be able to blend your colors together you need to use alcohol based markers. Bic, Sharpie, and Copic for example. As well as many others.
Second, you need to work while the colors are still wet or they won’t mix together. This isn’t a big deal. Just make sure you work on a section at a time.
Third, you need to use colors that are similar to each other if you want to create a smooth transition of color. If your markers are too different they will leave a harder edge.
As a rule, I always recommend using two colors for each section of your drawings. For example, a light brown and a darker brown were used for the antlers.
I used Bic Intensity markers for my reindeer drawing. These are the markers that I typically use. They are inexpensive and work really well.

Plus there is a good variety of colors available.
For the highlights, I used a white Gelly Roll pen. These pens work great on marker.
I didn’t do anything for the background, but you could add some scenery or maybe just some color.
How to Draw a Reindeer Step by Step the Easy Way
I hope you enjoyed this lesson on how to draw a reindeer. By following the steps and making a few small changes, you can come up with several different looks for your reindeer. Repetition is a great way to come up with your own unique drawings. And it’s the best way to improve your creativity and develop your artistic style.
And don’t forget to add a bit of your own style to your drawing.
Drop a comment and let us know how yours turned out.
