Step by Step Watercolor Splash Background Technique
Painting a watercolor splash background is a lot of fun and look great behind hand drawn images. This technique can be used for so many types of drawings, really anything you can image. You can experiment with different color combinations and apply them using both wet and dry techniques.
There’s also a lot of opportunity for variation in how much you smooth out your watercolor splashes, and how much you leave the drops of paint as they are. It’s incredible how much you could vary this technique and make completely different effects for your backgrounds.
Let’s go ahead and get started so you can see what I mean.
* Some of the links in this post may be affiliate links. This means I receive small commissions for purchases made through these links at no extra cost to you.
Art Supplies
- Watercolor paper
- Watercolor paint
- Paint brush
- Cup of water
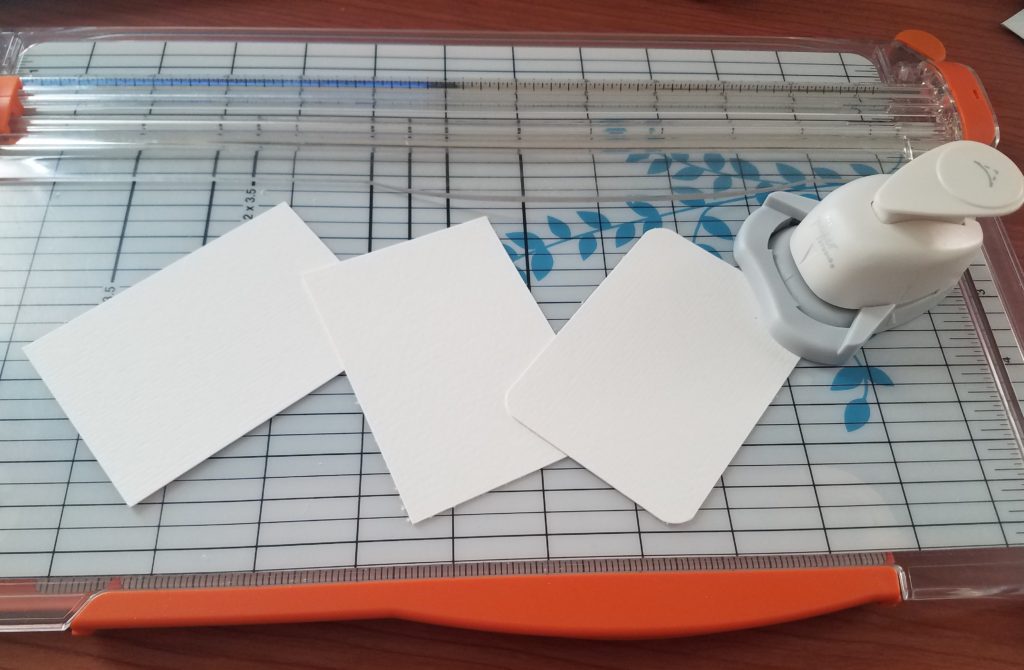
- Paper trimmer
- Corner punch
- Black Illustration pen
- Gelly Roll pen (white)
Artist Trading Card Blanks (How to Make)
I do most of my artwork on artist trading cards (ATCs) for several reasons. But the biggest, and most impactful, is because they are a huge time saver. Over the past several years I have discovered that if I can complete more works of art in less time, I feel more motivated.
You can make or buy your ATC blanks. I prefer to make my own because it’s much cheaper, and I like trying out different types of paper. And making your own cards is really easy to do. I’m using coldpress watercolor paper for my cards.
Cardstock works pretty well for the watercolor splash background technique as well, since the paper doesn’t get totally saturated with water.
Watercolor Splash Background – Step by Step
The next step is to splatter paint the background of each ATC, or a sheet of paper if you’re not using artist trading cards. Decide on two different colors for each of your backgrounds. I used my Koi watercolor paint set for this card.
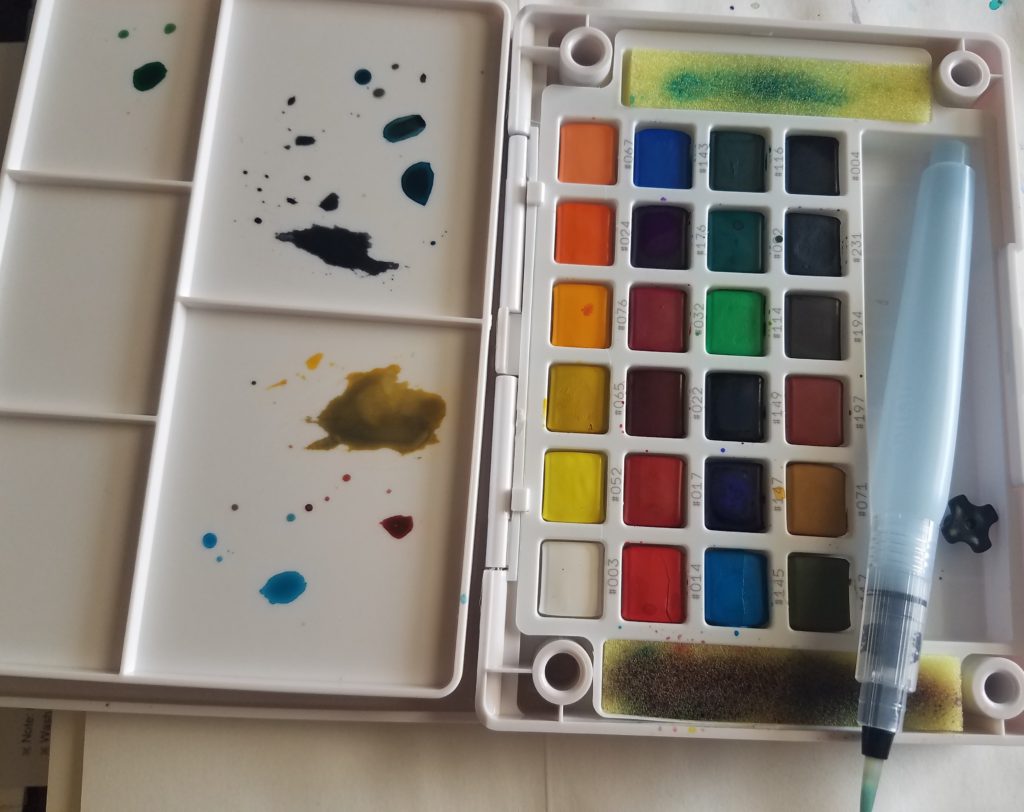
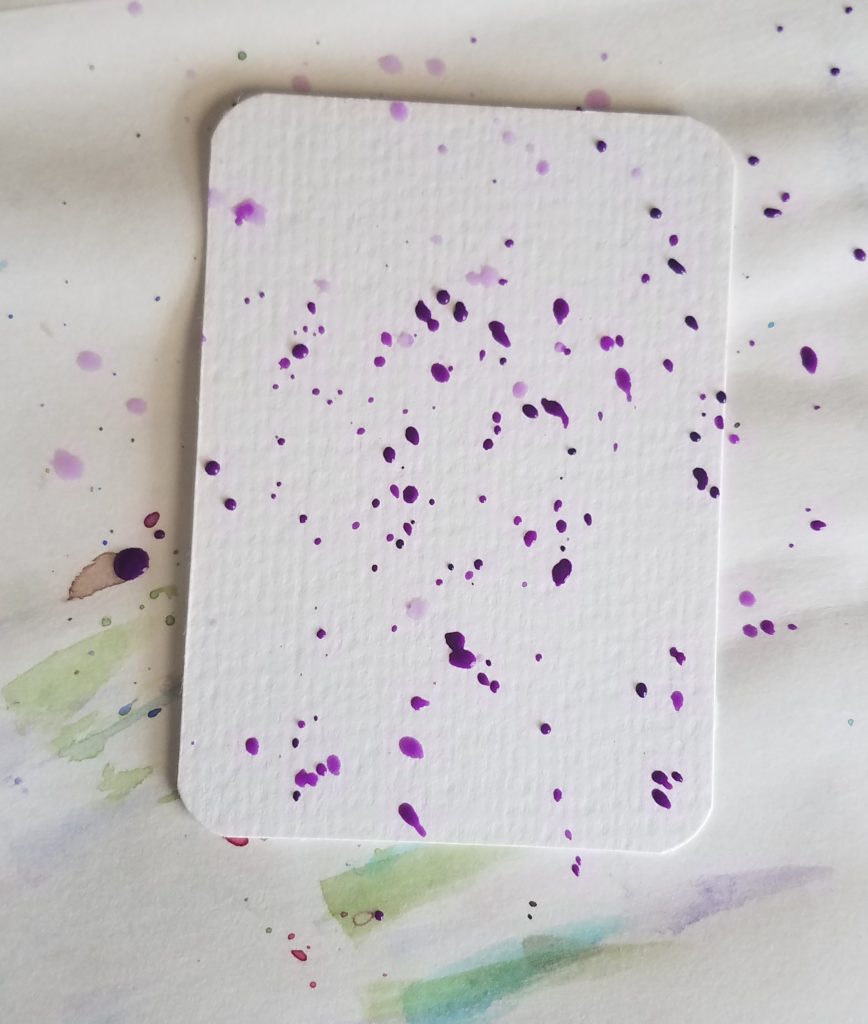
Load your paintbrush with the color, and then splash it onto your card. To do this, lightly tap your paintbrush against the edge of your finger. For this example, I used #176 & #145.
When you are satisfied with the amount of paint on your card, rinse your brush off in clean water. As you can see, this is a bit messy so be sure to protect your area from getting covered with paint.
With you paintbrush loaded with clean water, push the paint drops around your paper. How much water you use, and how much paint you move around, will determine how your background ends up looking. You can leave some of the droplets there, or smooth them all out.
Just have fun and play around with the technique.

Load your paintbrush with your second color, and repeat the above process.
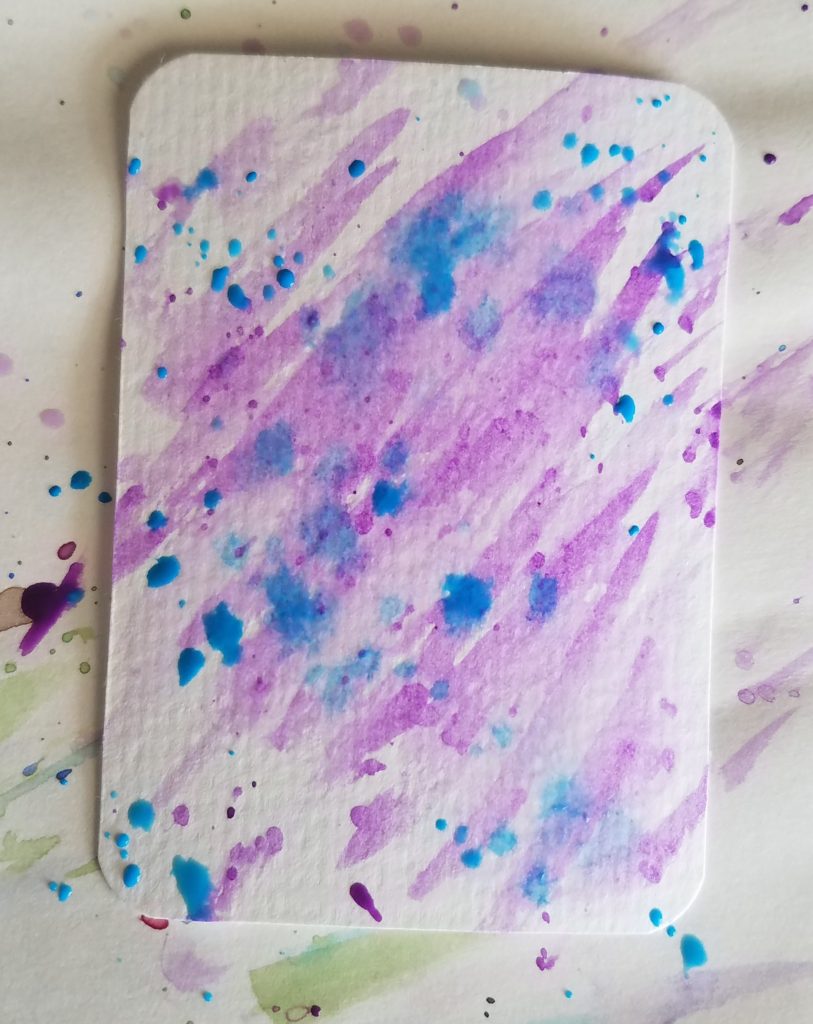
After rinsing your brush out again, push your second color around the paper. Again, leaving some of the droplets or smoothing them all out.
You can dilute the paint with more water if you want your colors to be lighter on your watercolor splash background. Or, you can use a paper towel to lift some of the color off if you think it is too dark.
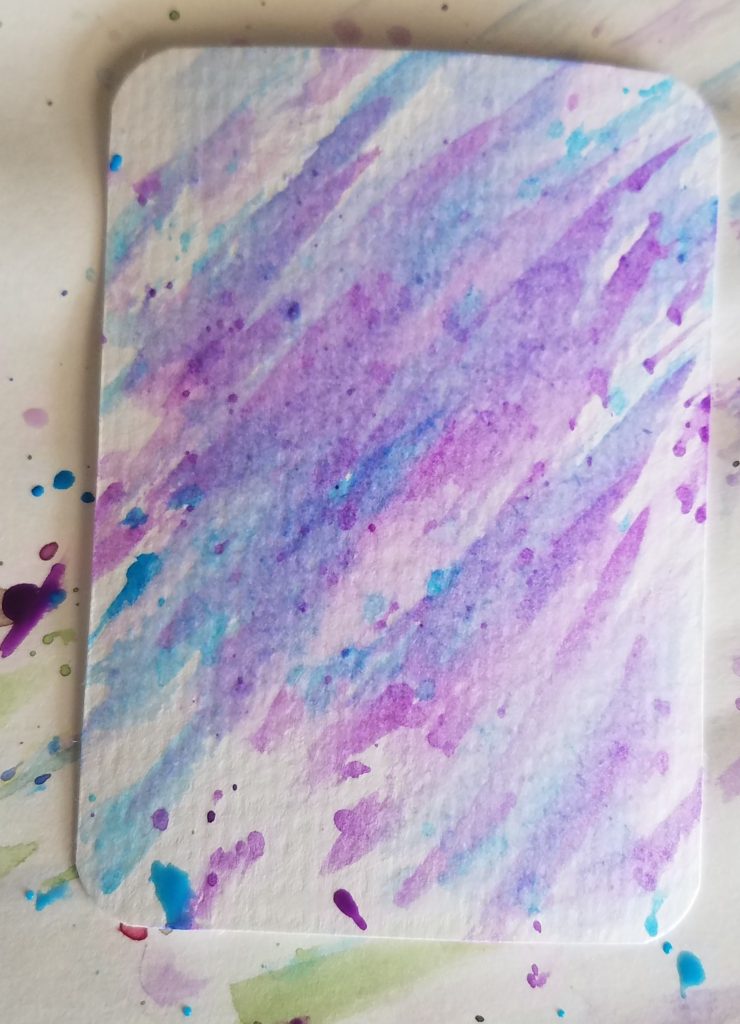
When you are satisfied with how your colors look, set them aside to dry. This will take several hours. I will typically leave mine overnight so I know they are completely dried.
Drawings on Watercolor Splash Background
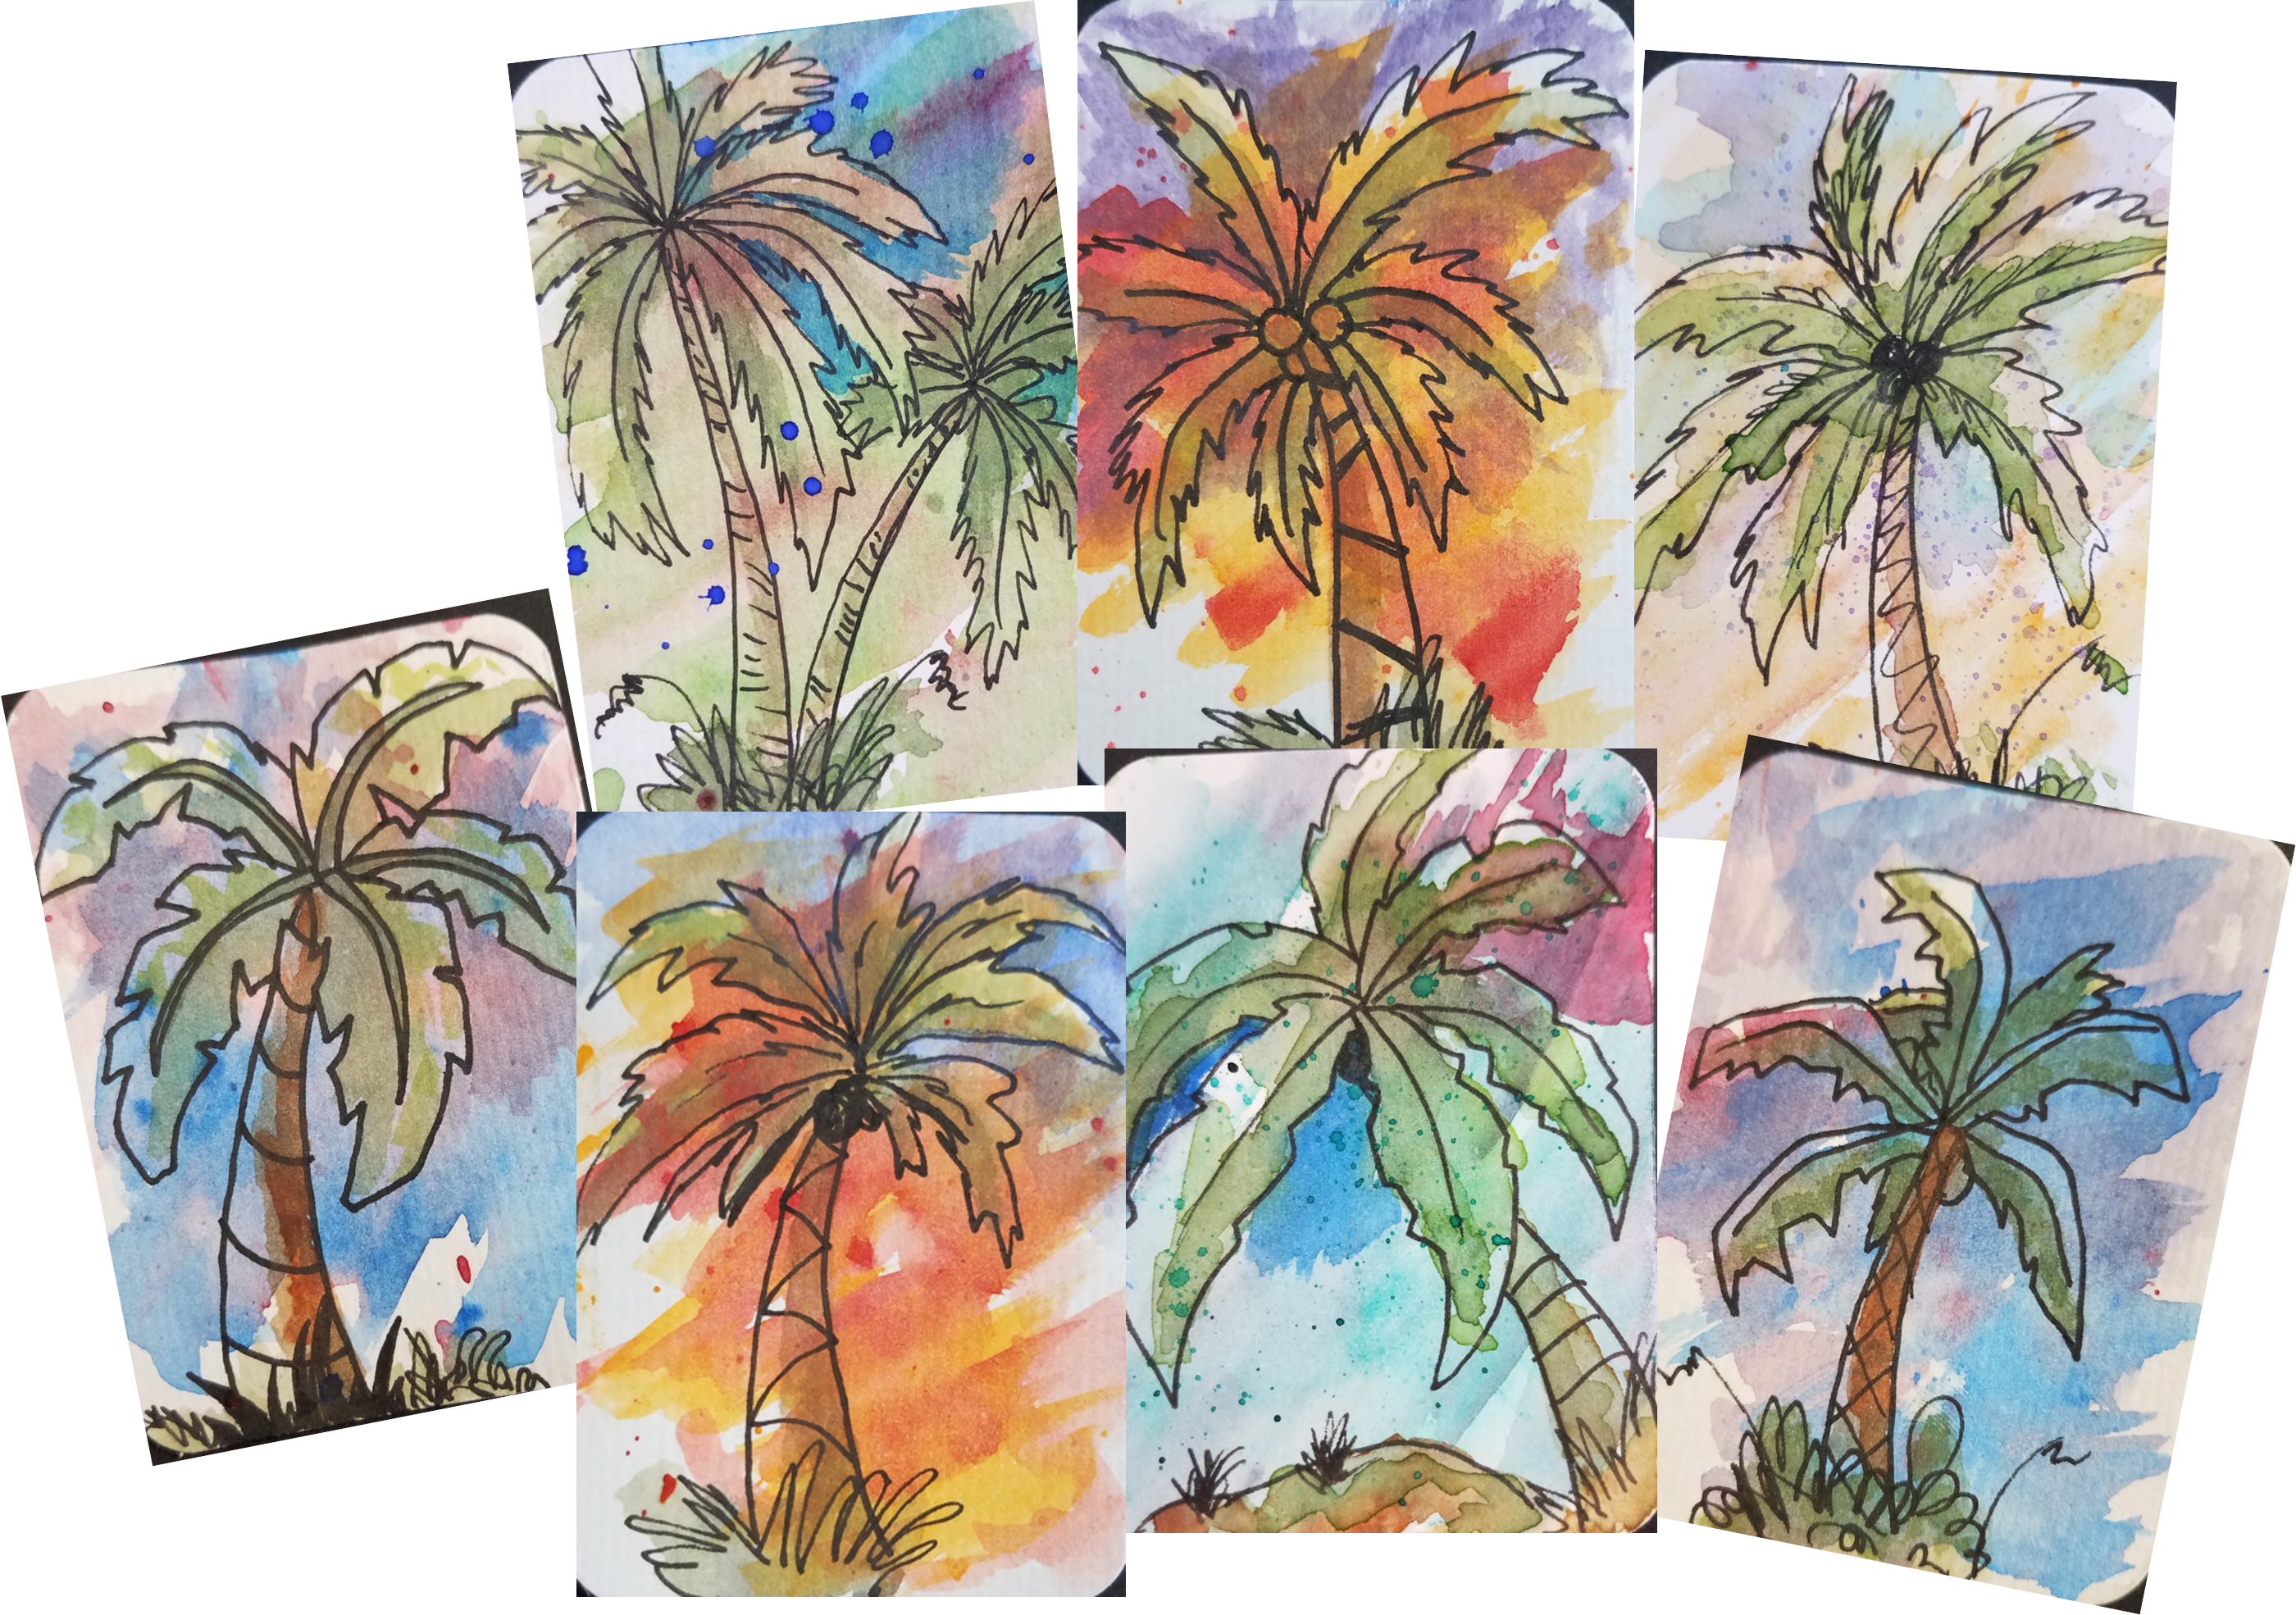
I decided to try drawing some palm trees on top of my watercolor splashed backgrounds. I went with a loose, quick sketch style for my drawings.
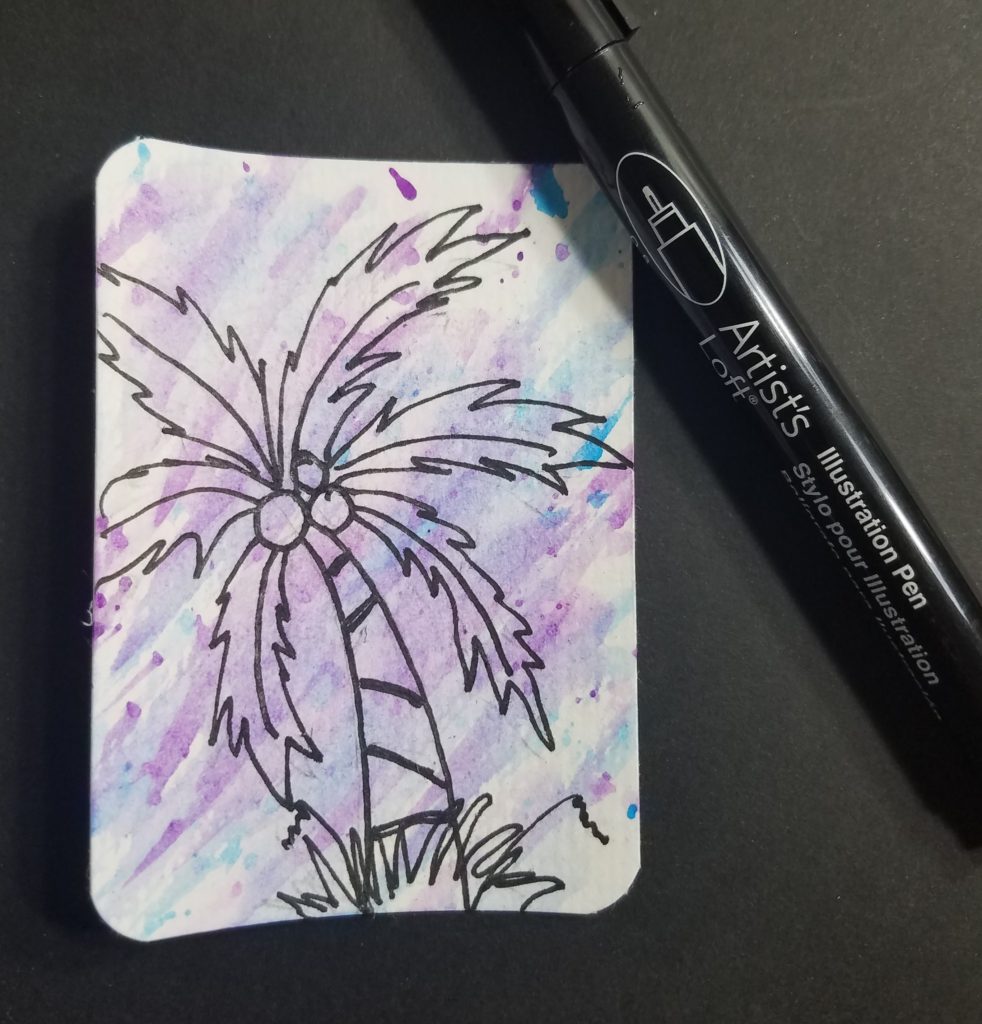
Check out How to Draw Palm Trees if you want to try drawing some of your own.
Next, I used the Koi watercolors to add some color to my drawing. When painting the tree, I left some of the paper showing through in random areas. There are a lot of different ways you could finish your drawings. Mixed media would work really well here too. You could try adding color with markers or colored pencils too.
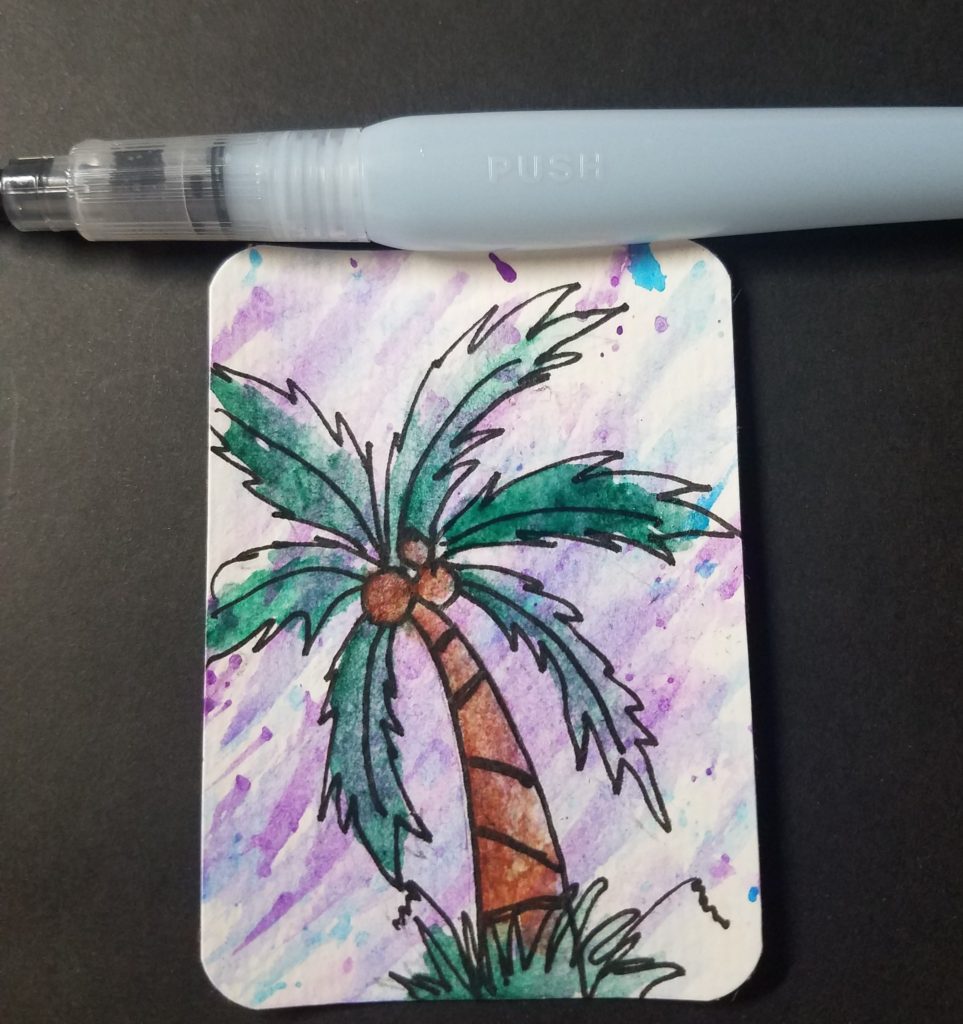
You could leave your painting like it is, or you can go back in with your watercolors and add some color around the drawing. I went back in with my original colors and added some deeper color around some areas of my tree.
I’ve also done this with one or two completely different colors with some interesting results. Again, just play around with the technique and experiment.
Next, I added some more splashes of color to the completed painting. Again, using the two original colors.
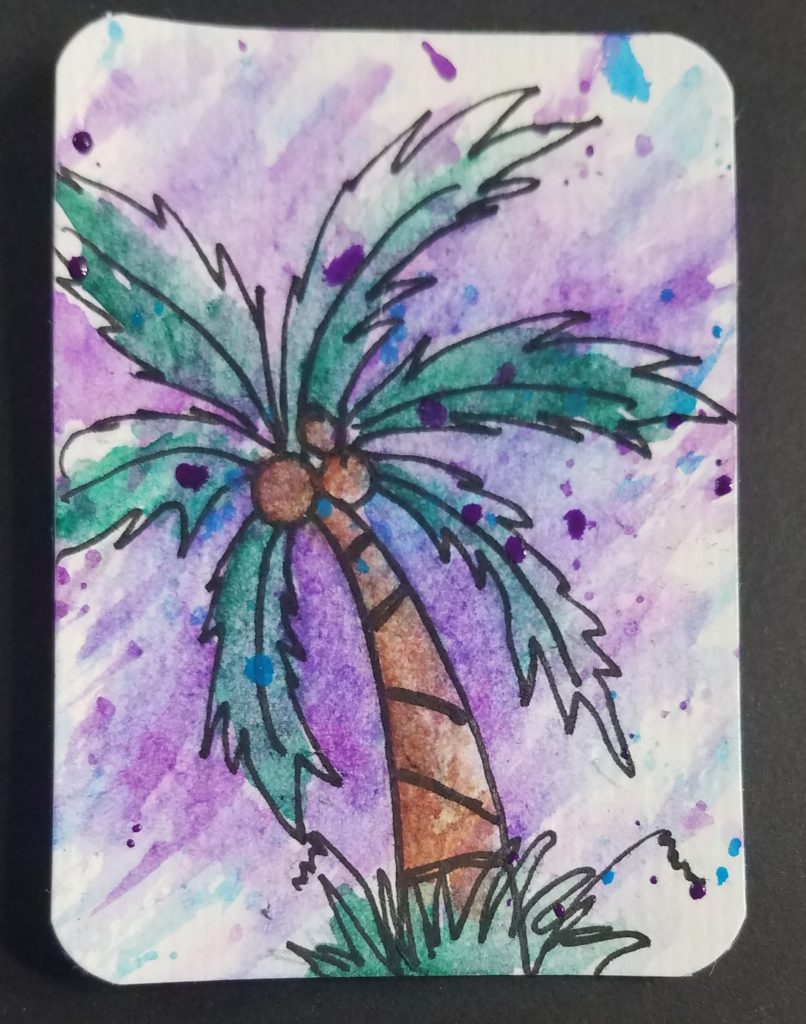
The final painting felt too dark to me. So, I decided to go back in with my white Gelly Roll pen and add in some white highlights. I also signed and dated the bottom of my card.
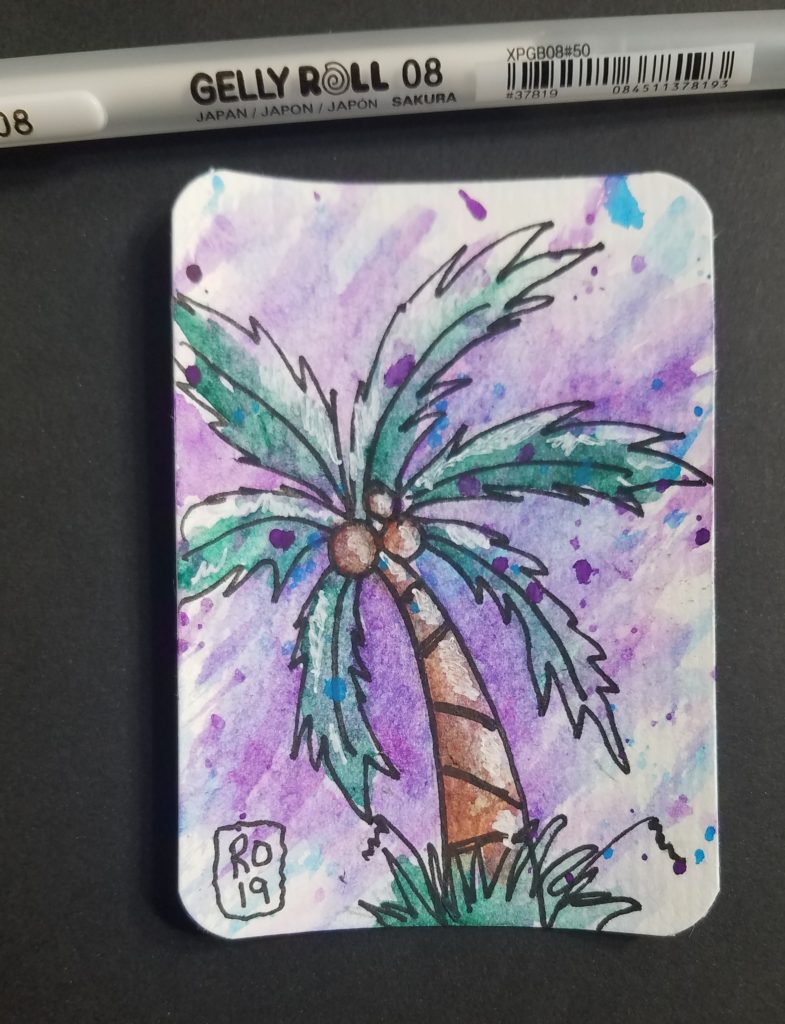
My card curled a little bit, so I spritzed the back of the card with some water using a squirt bottle and then placed it underneath a stack of books to flatten it out. After leaving it like that overnight it flattened out and was no longer curled.
Watercolor Splash Background – Easy Painting Tutorial
As you can see, painting a watercolor splash background is really easy to do. After your background dries you can add some cool drawings or artwork on the top of it. There’s a lot you could do with this technique by changing it up just a little bit.
The more you practice the better you will get. And if you work on doing several of these backgrounds you’ll feel yourself getting more creative and experimenting more. Repetition is the best way to improve your skills and creativity.
Grab your FREE Beginner’s Guide to Artist Trading Cards
For my first round of splashed backgrounds I did several palm tree drawings on them. But there’s no limit to how these paintings can be used.
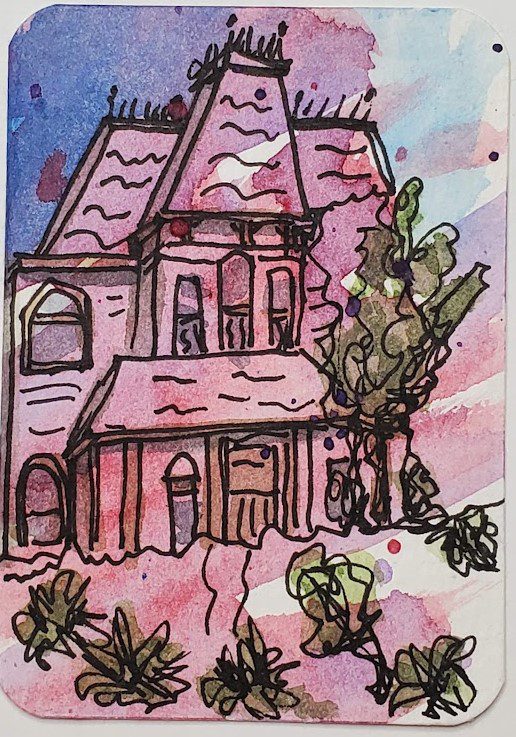
The splashed background worked really well for this haunted house drawing. And it was so much fun to make.