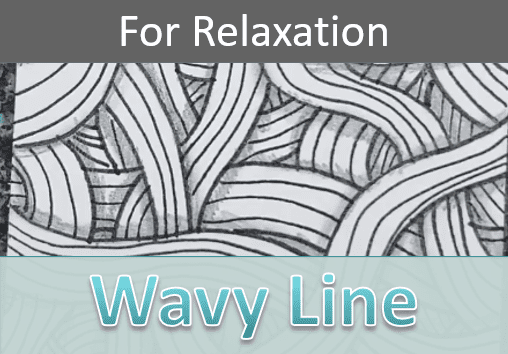
Wavy Line Drawing for Relaxation
This wavy line drawing is great for beginners and a perfect relaxation exercise. And you can do it over and over again because each time will create a slightly different drawing.
Creating art can be an extremely therapeutic experience if you allow it to be. And this exercise is an easy first step towards doing that.
Let’s grab some supplies and get started.
* Some of the links in this post may be affiliate links. This means I receive small commissions for purchases made through these links at no extra cost to you.
Art Supplies
- Thin black marker
- Paper or cardstock
- Markers
- Pencil
- Click Eraser, Pink Pearl Eraser
- White Gelly Roll pen
Creating Patterns and Rhythms with Line
Using line to create patterns and rhythms in art involves the strategic repetition and arrangement of lines to produce visual interest and cohesion. Here’s a closer look at how this is achieved:
- Repetition: Repeating lines at regular or irregular intervals can form patterns that are pleasing to the eye. This repetition can create a sense of rhythm, much like in music, leading the viewer’s eye across the artwork.
- Variation: Changing the thickness, length, direction, and spacing of lines can add complexity and depth to patterns. Variation within repetition prevents the pattern from becoming monotonous and keeps the viewer engaged.
- Symmetry and Balance: Symmetrical patterns, where lines are mirrored on either side of an axis, can create a sense of harmony and balance. Asymmetrical patterns, while less predictable, can still achieve visual balance and interest through careful arrangement.
- Direction and Flow: The direction of lines within a pattern can guide the viewer’s eye and create a sense of movement. Curved lines can create a flowing, organic rhythm, while straight lines can produce a more structured, mechanical rhythm.
- Overlap and Intersecting Lines: Overlapping lines and intersections can add layers and depth to patterns. This can make the pattern appear more dynamic and complex.
- Contrast: Using contrasting lines (e.g., thick vs. thin, light vs. dark) within a pattern can enhance visual interest and highlight certain areas of the artwork.
By combining these elements, artists can use lines to create intricate patterns and rhythms that contribute to the overall composition and emotional impact of their work.
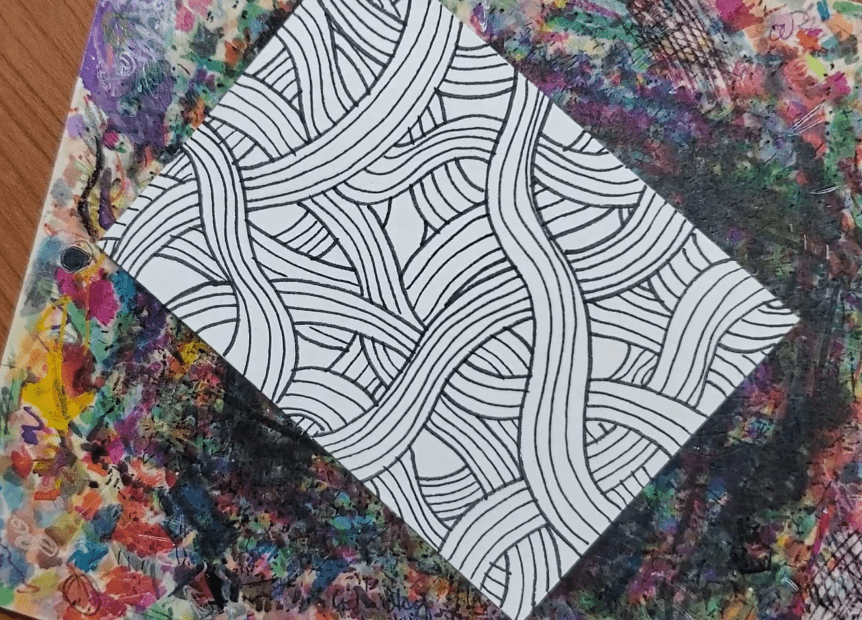
Wavy Line Drawing for Relaxation (Step by Step)
For this type of drawing I like to use two different sized pens. One for the outside lines and a smaller one for the inside lines.
I also like using a black pen. You can try using a different color or sized pens. Play around with your drawing and try different things.
I’m also using artist trading cards which saves time, allowing me to create more drawings in less time.
Step 1: Outside Lines
The first step is to create a set of lines that are spaced a little bit apart. Leave enough room to draw three or four additional lines inside of those lines.
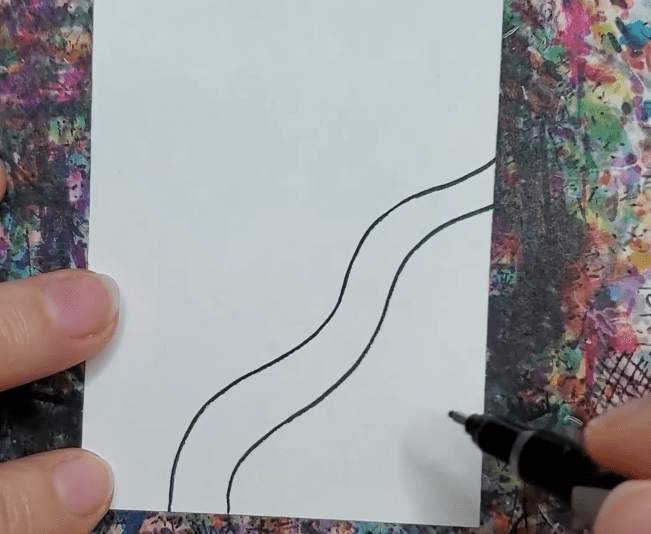
This is a wavy line drawing so make your lines curve in different directions. You can draw them anywhere on your paper but make sure both ends of your lines continue off the edges of the paper.
I use the larger pen for these outside lines.
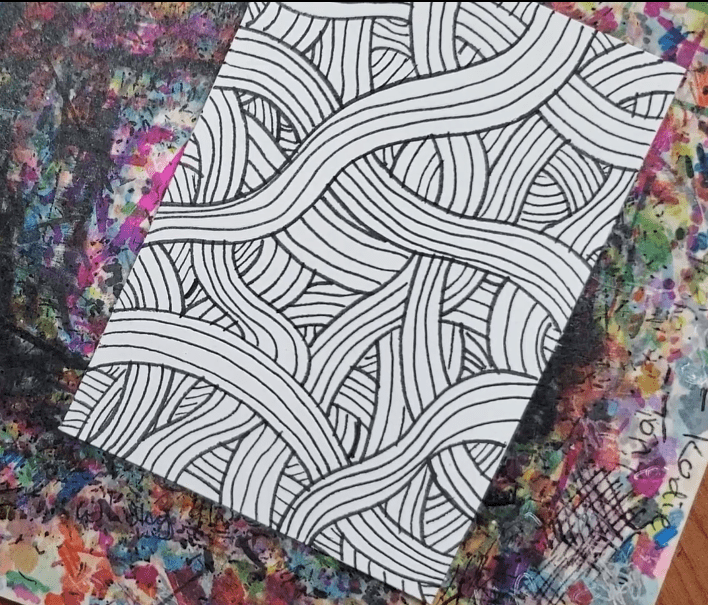
You can continue making your outside lines, or you can start adding the inside lines.
I find it’s easiest to go back and forth between drawing the outside lines and the inside lines. Then just keep going back and forth until your paper is full.
Step 2: Inside Lines
After you have your outside lines drawn you’ll need to drawn the inside lines. Do this by following the contours of the outside lines with a smaller pen.
I added three lines to the inside of each set of wavy lines. You can add whatever looks good to you for your own drawing.
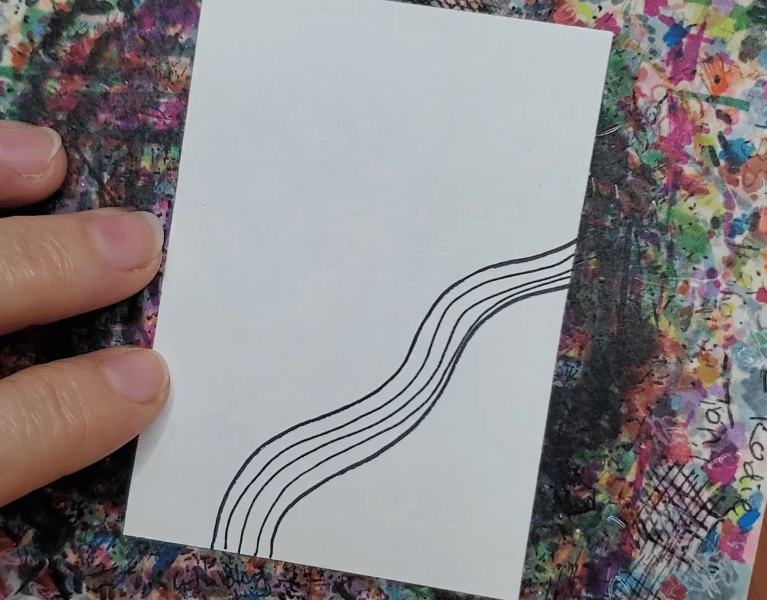
You can experiment with varying the number of inside lines or you can keep them consistent like I did with mine.
Then draw another set of wavy lines anywhere on your paper. At some point your lines will have to overlap so don’t be intimated by that.
Just do the best you can and try to stay relaxed. The more you do this the easier it will get.
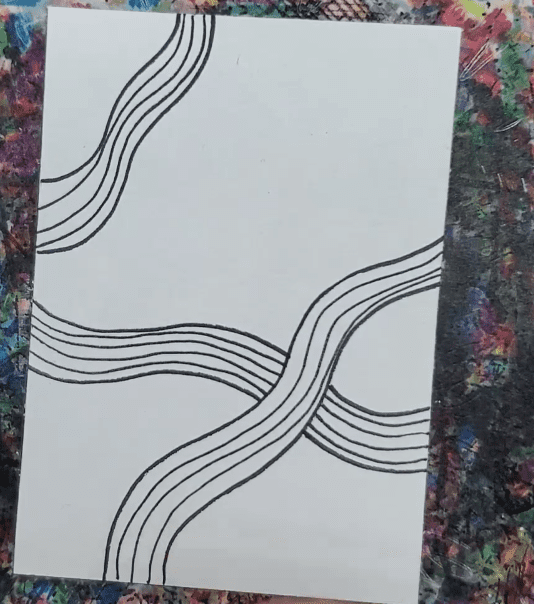
Repeat this process until most of your paper is filled.
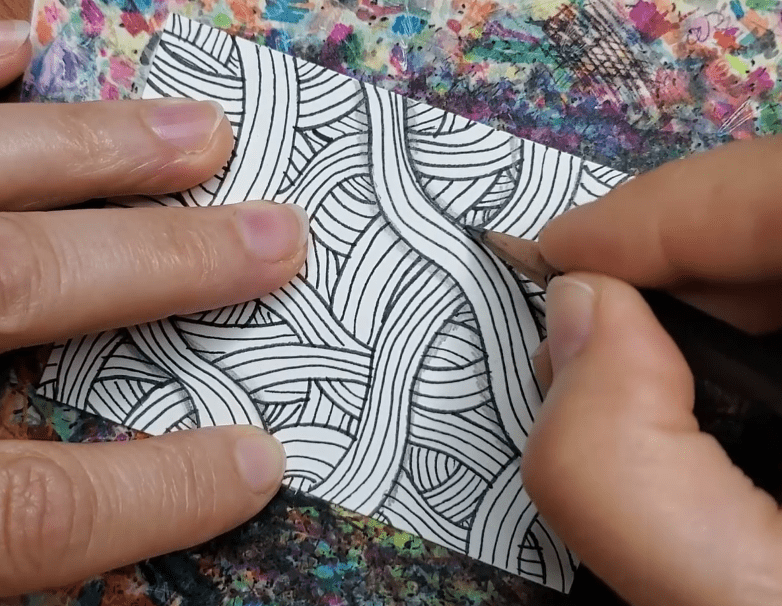
Step 3: Filler Lines
After you’ve filled in most of your paper you’ll be left with some small sections of empty space. For these areas just add in some lines.
If you kept the number of inside lines consistent throughout your drawing add the same number of filler lines.
When you’re done you shouldn’t have any areas of paper showing. Everything should have wavy lines drawn in.
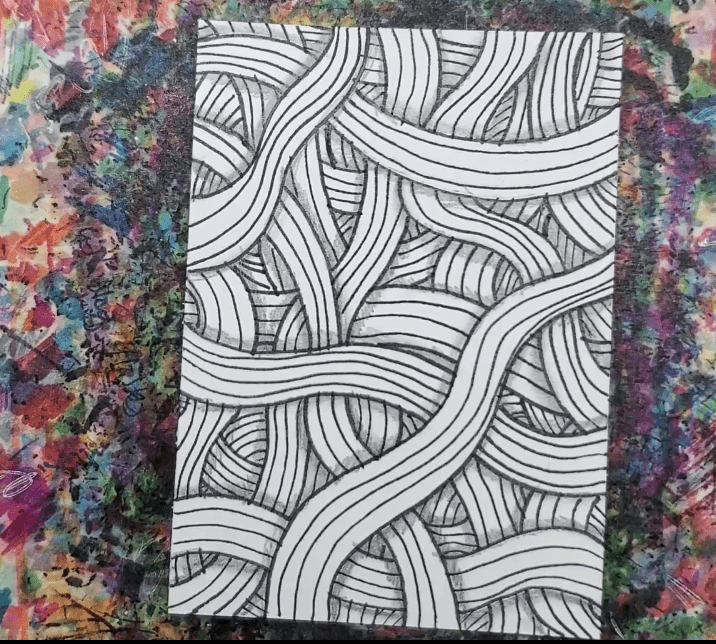
Step 4: Shading Your Wavy Line Drawing
The last step is to add some shading along the edges of your outside lines with your pencil. This step is optional but it really helps to create some depth in your drawing.
Use a pencil to lightly shaped the edges of your lines. You can use a blending stump to soften the lines or just leave them as they are.
Do this for each of the outside lines until all of them are shaded.
Final Thoughts and Next Steps
Now that you’ve made your first wavy line drawing, what’s the next step? Since art and drawing are learned skills, they can be improved with practice and repetition. So the next step would be to make more wavy line drawings.
I like doing a series of drawings for the week. It’s a great way to improve your art and creativity skills. Experiment and try something different like adding some color with pens or markers.
Grab your FREE Guide to Better Art in 7 Days
