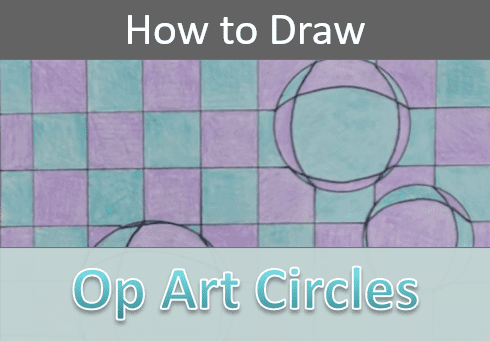
Easy Op Art Circles Drawing
Learning to draw optical illusion circles is much easier than it looks. In this lesson you’ll learn step by step how to draw your own op art.
Art and drawing are learned skills that take practice and repetition. Anyone can learn how to draw. So if something seems difficult to draw or above your skill level, don’t worry, just keep trying and you’ll get there.
Let’s gather our supplies and get started.
* Some of the links in this post may be affiliate links. This means I receive small commissions for purchases made through these links at no extra cost to you.
Art Supplies
About Optical Art
Optical art, also called Op art, is a visual art movement that emerged in the 1960s. It employs geometric shapes, patterns, and vibrant colors to create visually deceptive effects that play with perception and illusion.
Artists within this movement often utilize precise techniques such as precise lines, grids, and contrasting colors to produce artworks that seem to pulsate, shimmer, or appear to move when viewed. Op art aims to engage the viewer’s eye and mind, challenging perceptions and creating dynamic visual experiences that evoke a sense of movement and depth.
Prominent artists associated with optical art include Victor Vasarely, Bridget Riley, and Julio Le Parc.
How to Draw Optical Illusion Circles (step by step)
When drawing your optical illusion circles, you can use a pencil or a pen to make your lines. For this drawing we’ll be finishing with a black pen so it would be easier to begin using the pen. However, for many artists it can feel intimidating to draw with a pen or marker so using a pencil feels more comfortable.
Either way is fine. Just do whatever you’re most comfortable with.
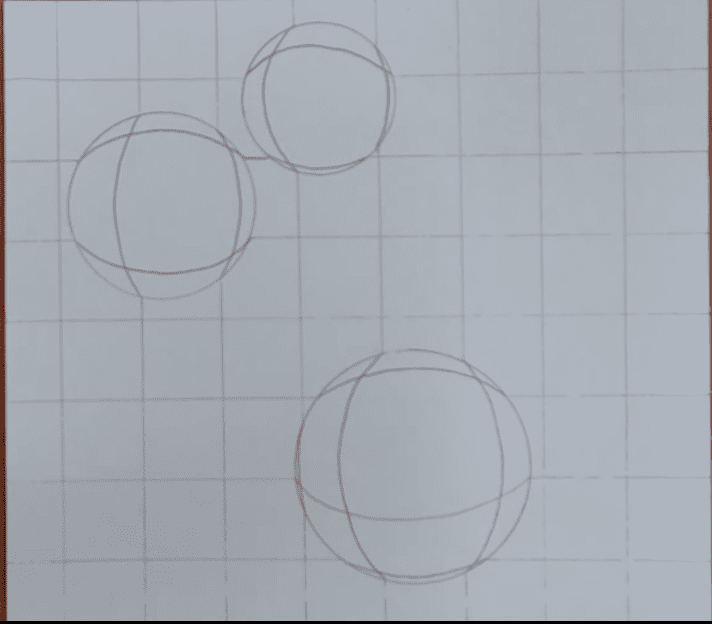
Step 1: Draw Circles
Begin your drawing with a few circles. I like making three circles, all different sizes. But you can try doing a different amount, and experiment with the sizes as well. How you choose to draw your circles will depend on the size of your paper and the look you are going for with your finished drawing.
My paper is 6 inches by 6 inches.
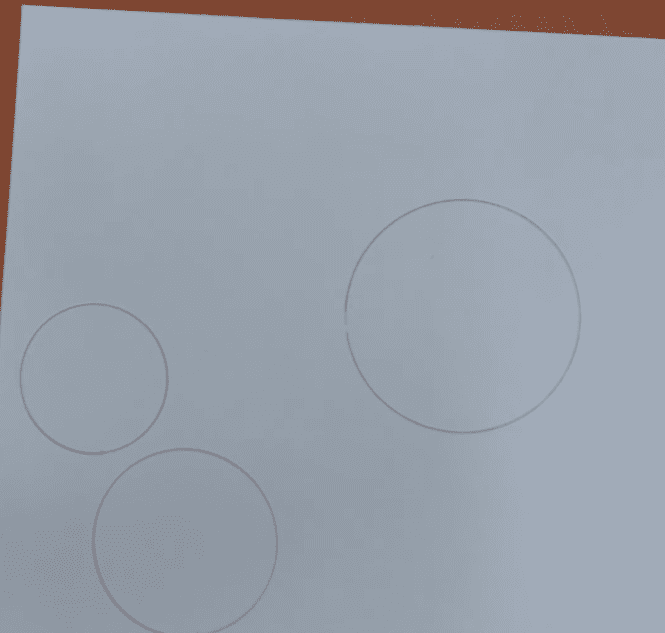
You want your circles to be perfectly drawn, so use a template or an object you can trace. Avoid drawing them freehand if possible.
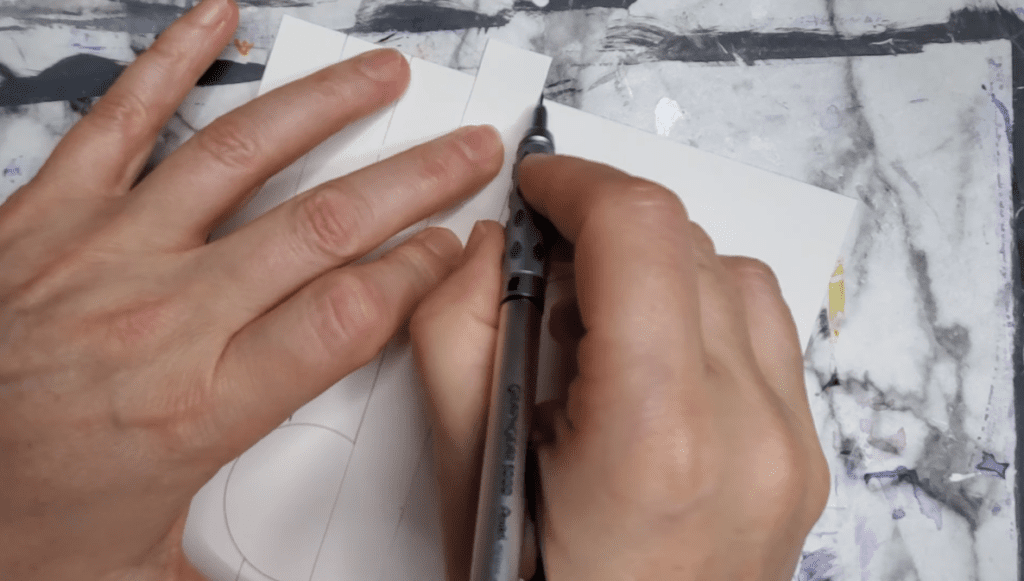
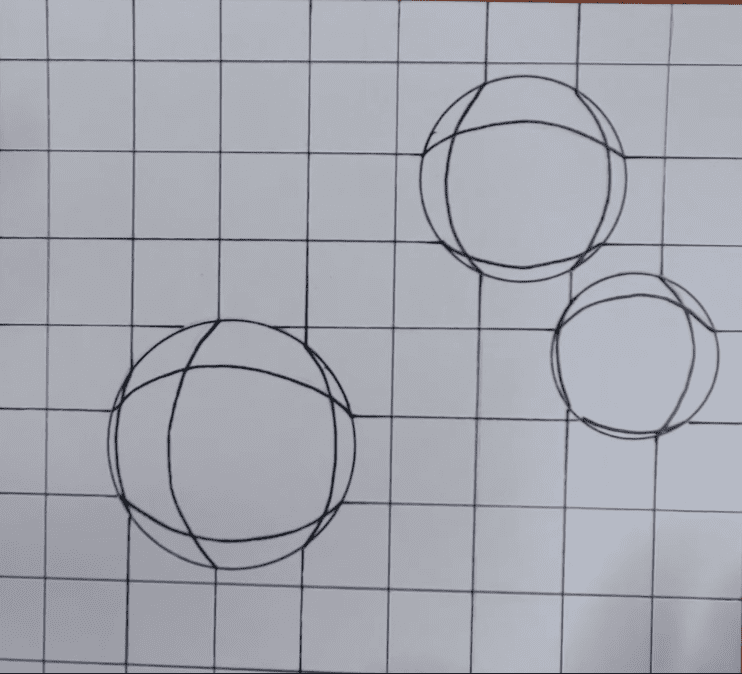
Step 2: Draw the Background Grid
Next, you want to draw a grid in the background. Don’t add the grid to your circles yet. We’ll do that in the next step.
The easiest way to draw a straight, and even, grid is by using a straight edge. When making grids I like to cut a piece of cardstock down to the width I want my grid to be.
Then all I have to do is line up the straight edge with the edge of my paper and draw my first line. After that, just line up the straight edge with each line and work your way across the paper. Doing this will keep your grids nice and even, without having to measure anything out.
When you’re finished with one direction of your grid, simply rotate your paper and draw your lines going the other direction.
I used a paper trimmer to make my straight edge by cutting a piece of cardstock.
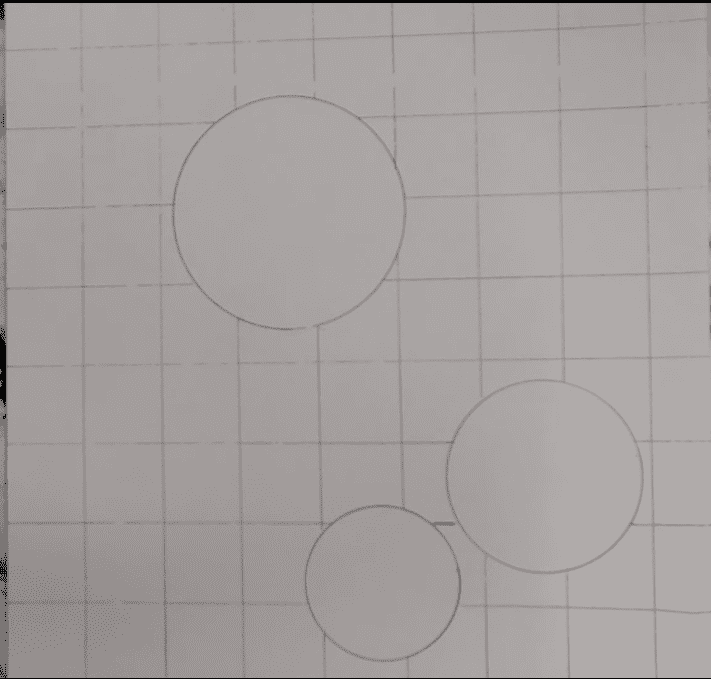
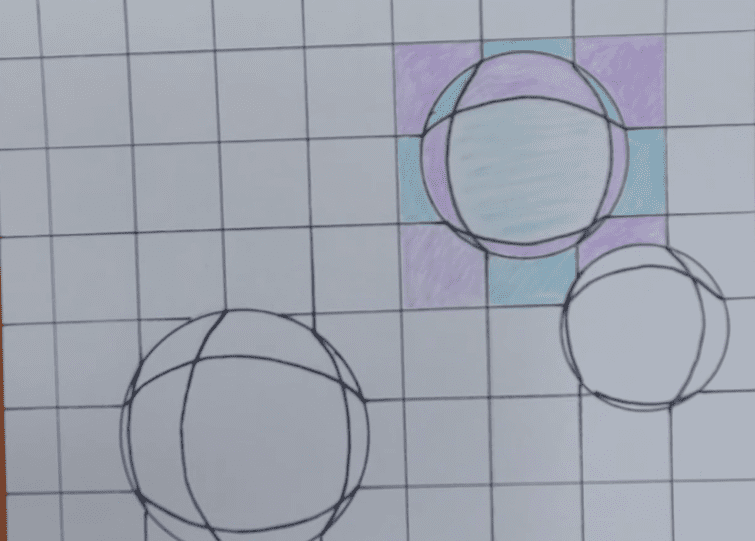
Step 3: Draw Grid on Circles
This is where you will be creating your optical illusion. The goal is to make it look like your circles are coming out of the paper. We create this effect by curving the lines for the circles.
Start with any one of your circles and connect the background grid with a curved line. Make sure your curved line touches both of the straight lines for your grid.

If the line is above the center of your circle, curve the line up. If it’s under the center of your circle, curve the line down. You want to follow the contour of the circle.
Repeat this process for all of the grid lines for each of your circles. If the line is near the edge of your circle, just do your best to get it drawn correctly. Some of the lines can be tricky if they’re close to the edge of the circle.
Op Art Circles – Outline
For this drawing everything was traced over using a black outlining pen. You could also try using a different color or not making an outline at all. How you choose to create your artwork will determine the end results. So don’t be afraid to experiment and try different ideas and techniques. This tutorial teaches you just one way of creating this op art drawing.
For your optical illusion circles, simply trace over all of the pencil lines with a black pen or marker. Use a ruler or straight edge to keep your lines even and clean.
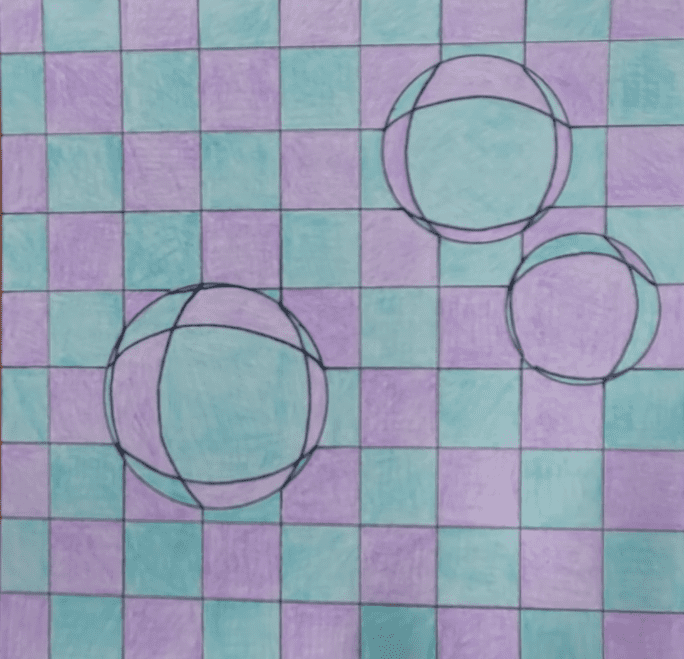
How to Draw Optical Illusion Circles with Colored Pencils
For this example I’ll be using colored pencils to add some color. You can use any colors you want. Or you can make your grid black and white. The possibilities are endless. Markers work well for these drawings too.
Keep in mind that the more art you create, the better you will get at choosing the right colors and medium. Art and drawing are skills that take practice. Because of this, it’s always a good idea to do several of the same type of drawings so you can try different ideas to see what works. This also helps develop your artistic style.
Colored Pencils – Background
Again, we’ll begin by filling in the background grid since this is the easiest part of the drawing to color. We’ll leave the circles for last since they are a bit tricky.
Begin by choosing one or two colors for your grid. If you’re leaving part of the drawing white, then you will only need one color.
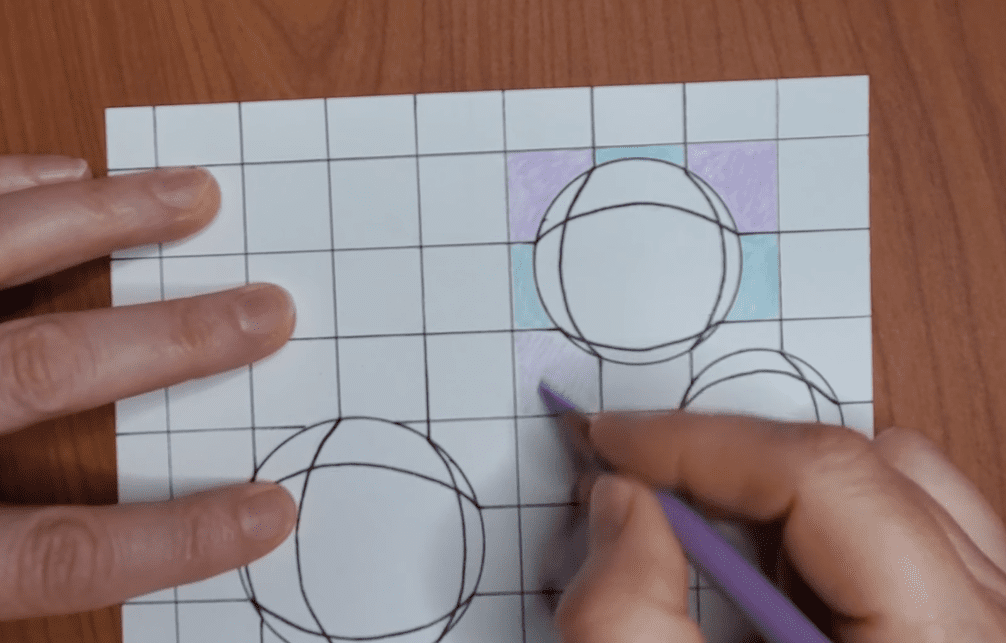
When using colored pencils be sure to keep them sharpened so you get an even coverage on your paper. It’s best to use an electric pencil sharpener for this.
Choose any square to begin adding color and fill it in with one of your colors. Use several layers instead of using heavy pressure to add your colors. When your first square is all filled in, move onto one of the squares next to it.
Using your second color, fill in one of the squares next to the first one. Fill all of the background grid in before moving onto the circles.
Switch back and forth between your two colors until the entire background is filled in. It’s best to avoid skipping around with only one color as this can result in the color pattern being broken and ruin the drawing.
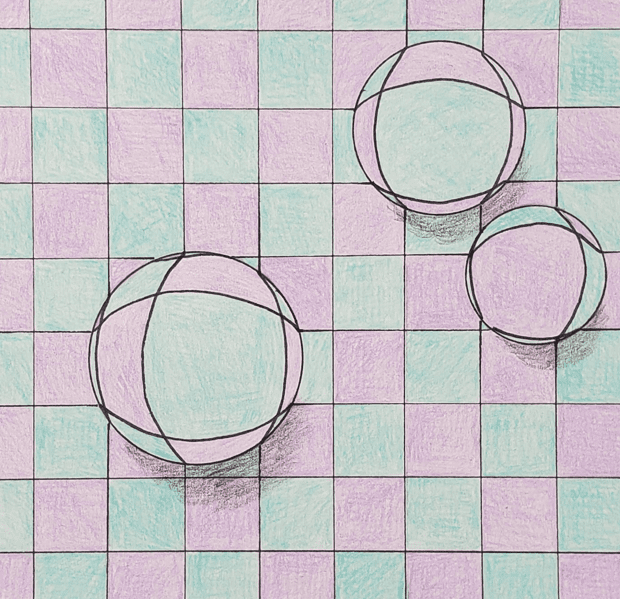
Colored Pencils – Circles
After you’ve filled in your entire background grid it’s time to tackle the circles. Begin with a section of one of your circles that is right next to your background grid, and fill it in with the opposite color from the background.
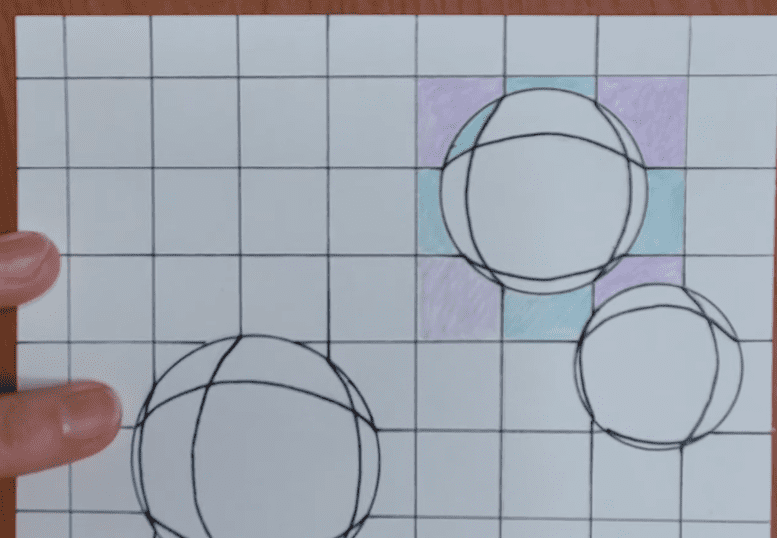
Then just work your way around the circle. Pay close attention to areas of your circle where the grid is really small, or where you may have missed it altogether. You should never have the same color next to each other. If you do, you most likely missed a small grid section on your circle.
Fill in the colors on the rest of your circles. Don’t rush when doing your circles, or any of this drawing. You don’t want to make a mistake and ruin the entire thing!
To finish up your drawing you can add some shadows to your optical illusion circles to make them really look like they’re pushing through the paper.
Final Thoughts and Next Steps
You’ve learned how to draw optical illusion circles, so what’s next? If you want to improve your art skills you just need to practice. The more you practice, the better you will get.
That doesn’t mean you have to spend hours a day creating art. But spending a few minutes each day will move you forward on your art journey.
Try doing a series of the same drawing for the week. Making multiple variations of the same topic is a great way to work your creativity muscles and improve your art skills.
Grab your FREE Guide to Better Art in 7 Days

weoiner