How to Draw Cat Eyes
I love drawing eyes of any kind. In this cat eyes drawing tutorial I’ll show you how I draw my cat eyes. This is an easy to follow process that beginners can follow.
There are many different ways to draw cat eyes, or anything else. I’m going to show you one way to draw them today.
Let’s grab some supplies and get started on our cat eyes drawing.
* Some of the links in this post may be affiliate links. This means I receive small commissions for purchases made through these links at no extra cost to you.
Art Supplies
- Thin black marker
- Paper or cardstock
- Markers
- Pencil
- Click Eraser, Pink Pearl Eraser
- White Gelly Roll pen
About Cats in Art
Cats have been a muse for artists across history, from ancient Egypt to modern times. They’ve symbolized everything from divinity to domesticity, appearing in paintings, sculptures, and even woodblock prints.
Whether as sacred guardians in Egyptian tombs or playful companions in Renaissance portraits, cats have left their mark on art with their mysterious allure and graceful presence.
Cat Eyes Sketch Practice
Doing a sketch practice exercise is a great way to warm up and get ready to do some serious art creation. And it lets you get familiar with your subject matter before you start your actual drawing.
And it only takes a few minutes to do. This is an optional exercise, but the benefits make it well worth the time. Here’s how you do it.
- Get some paper and something to sketch with (pencil, pen, marker, etc.)
- Pull up some reference photos of cat eyes
- Set a timer for three or five minutes
Then simply sketch as many cat eyes as you can before the timer goes off.
You could also just sketch until you run out of room on your paper. Either way is fine. Just make sure you’re keeping your lines quick and loose.
Cat Eyes Drawing Tutorial (Step by Step)
In this cat eyes drawing tutorial I’m going to show you how I made my drawing. This is an easy step by step tutorial that any skill level can follow.
If you’re a beginner just do your best and don’t get discouraged. Drawing and art are skills that take practice. If you keep practicing, you will get better.
Step 1: Guidelines
The first step with any drawing is to lay out some basic guidelines. There are many benefits to doing this. One of the biggest benefits is that it gets you over the blank page syndrome. As soon as you start making those first marks, your creative juices will begin to flow.
Doing this also helps you to begin laying out the composition of your drawing. Begin by drawing a line down the center of your paper. A cat’s face is mostly symmetrical, so we want to keep this in mind when doing our drawing.
Then draw a line across the paper where the eyes will be. And another smaller line where the nose will be. You can already begin to see what the drawing will look like.
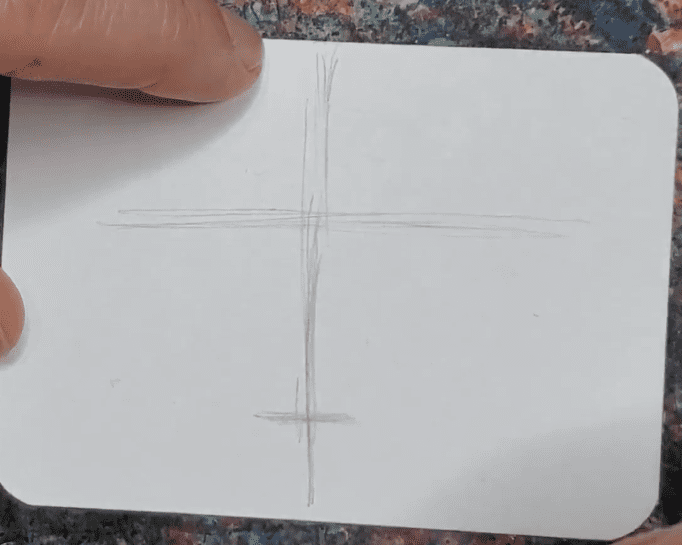
If the spacing doesn’t look right you can make those adjustments now. This is another benefit of drawing out guides. It’s easier to make these changes now rather than after you’ve spent a bunch of time drawing out all of the details.
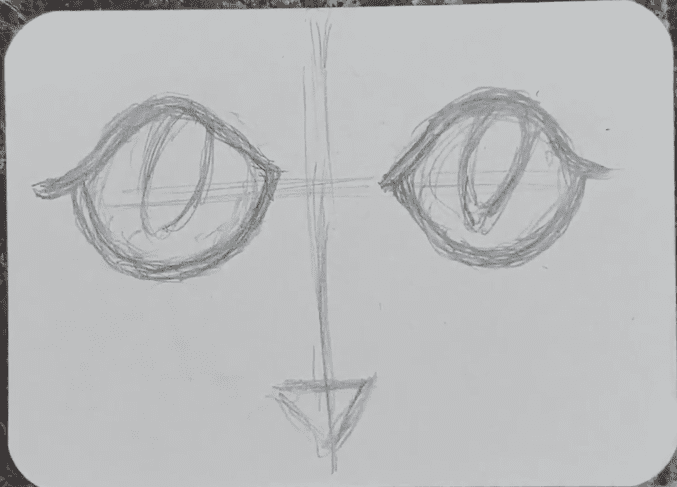
Step 2: Basic Shapes
The next step is to start drawing some basic shapes. Like with drawing our guidelines, this helps us to get the size and proportions right. If something doesn’t look right we can make those changes now when it’s easier.
Draw two circles for the eyes, paying attention to the distance between the center line so they are evenly spaced. Try to make your eyes as similar to each other as possible without being too critical about it. It’s really hard to make perfect circles so don’t expect them to be perfect.
Then draw a small triangle for the nose.
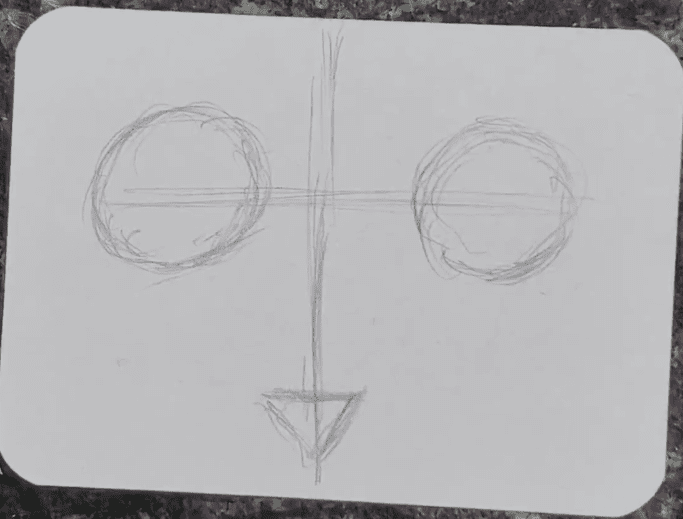
Again, look at what you have drawn and make sure everything looks correct. Make any necessary changes to your cat eyes drawing.
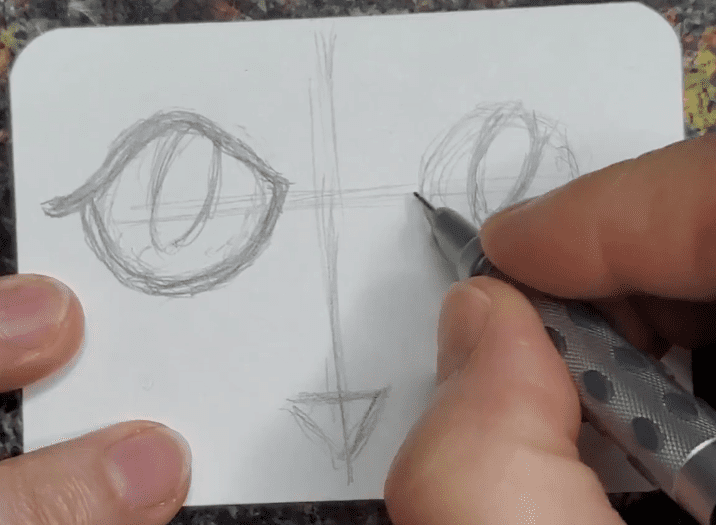
Step 3: Details
Now we need to start adding in the details for the eyes. Begin by drawing the pupils. Cat’s don’t have round pupils. They are more elongated than human pupils are.
If you’re using a reference photo, use that as your guide. If not, just draw ovals instead of circles.
Next draw the eyelid for one of the eyes. This will cover up part of the circle you drew for the eyeball. Don’t draw your eyelids a perfect circle. And notice how the upper part of the eyelid extends past the lower lid.
Add another line for some thickness to the eyelid.
Then draw the eyelid for the other eye, keeping your drawing symmetrical.
Finish your details by drawing the nose. Try to keep your cat’s nose symmetrical as well. Again, don’t stress too much about it being perfect. Just do the best you can.
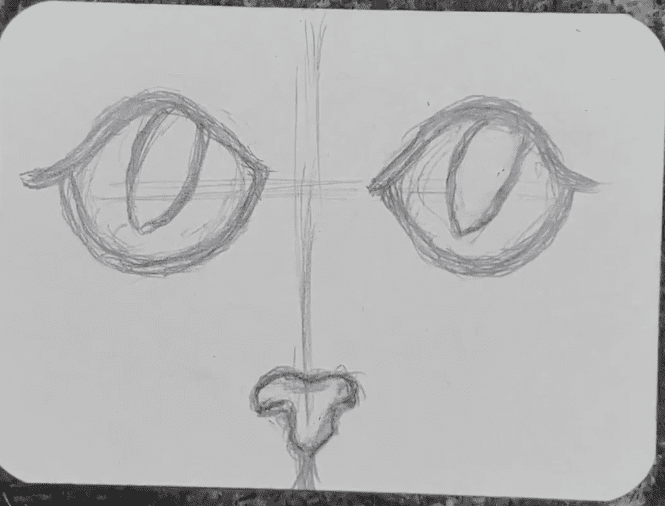
You can also add some indications of fur as well. This will act as a guide for different colors and parts of the cat’s face.
Cat Eyes Outline
Now we need to add an outline to our cat eyes drawing. This can be done with a black pen or marker.
You could also use a color other than black. Brown or gray might be a good option as well.
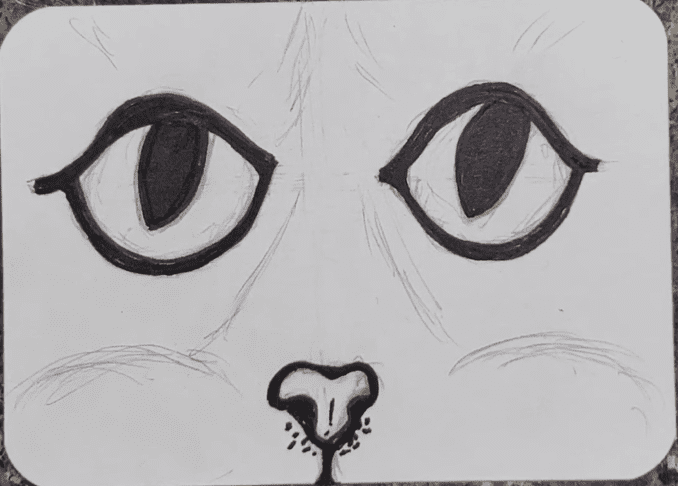
To make your outline just trace over the areas that need to be black. This will be the eyelids, pupils, and nose. You can also add in some black around the nose and whisker area.
Cat Eyes Drawing Tutorial (with Markers)
The example in this cat eyes drawing tutorial was done with markers. But you could follow the same process for colored pencils, paint, or pretty much any other medium.
If you’re using markers and want to be able to blend your colors you’ll need to keep a few things in mind while working.
First, you’ll want to use alcohol markers. Most markers are alcohol based so this shouldn’t be a problem. Bic, Sharpie, Copic, and many other popular brands will work. And you can use a variety of brands together.
Second, you need to work while the markers are still wet if you want them to blend. After the alcohol evaporates from your paper they won’t blend together in the same way. Just work on one area at a time and you should be fine.
You also need to make sure your colors are similar to each other. If there’s too much of a difference in the colors you’ll end up with a hard edge. But to find similar colors means you’ll have to have a pretty large selection of markers to choose from, which can get a bit pricey. So just do the best you can here.
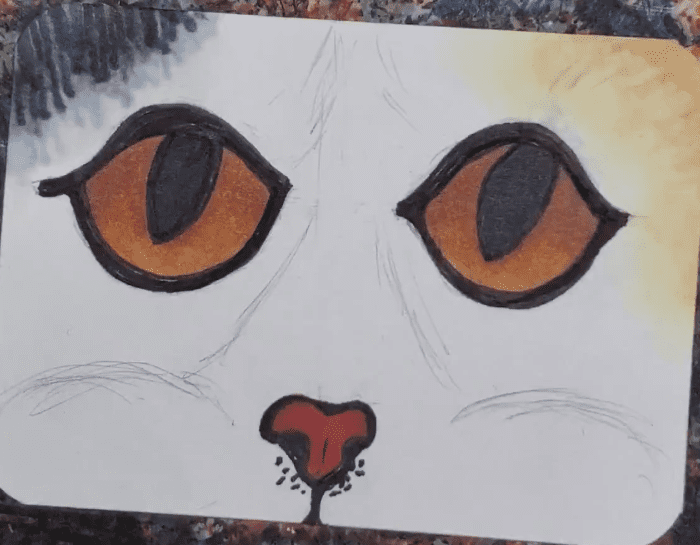
How to Color Cat Eyes, and Nose
I like to start with the eyes since they are my favorite part of this drawing. And they are also easier than the fur, and I like to work on the easiest areas and work my way to the harder areas.
First you’ll need to decide what color you want your cat’s eyes to be. I’m making mine brown, but you could also do green, gold, or blue.
Find two or three markers in the color range that you’re using. Since I’m working small, I found two brown markers that are pretty close to each other in color.
Start by filling in one of the eyes with the lightest color. Then add the darker color on top of that in the areas where you want it to be darker.
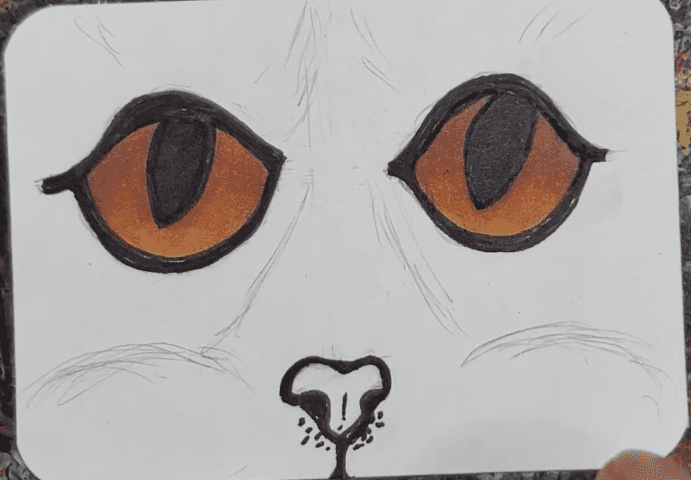
Then you can use the lighter color to blend the two areas together. Keep in mind that when you add more of the same color on top of itself it will get slightly darker as you layer it.
You could add a third color on top of that to make some areas even darker, like right below the upper eyelid.
Follow this same process for the cat’s nose. I wanted the nose to be more of a pinkish color so I chose a couple of markers that fit with that color combination.
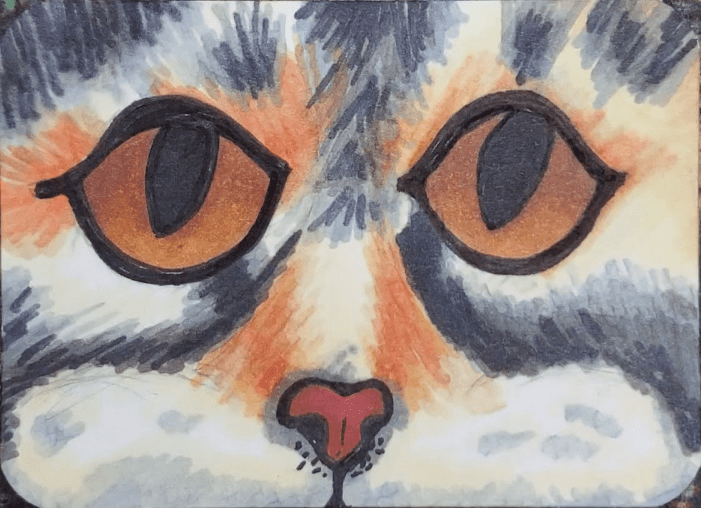
How to Draw Cat Fur Texture
For the cat fur texture you want to use two or three similar markers again. Follow the same process of layering the colors from lightest to darkest, and blending them together where they meet.
You can use the darker color to add some individual strands of fur. Work on one block of color at a time and work your way around the drawing until each area is filled in with the fur texture.
You can add some smaller strands of fur with pens that are the same color as your fur.
A white Gelly Roll pen can be used to add highlights.
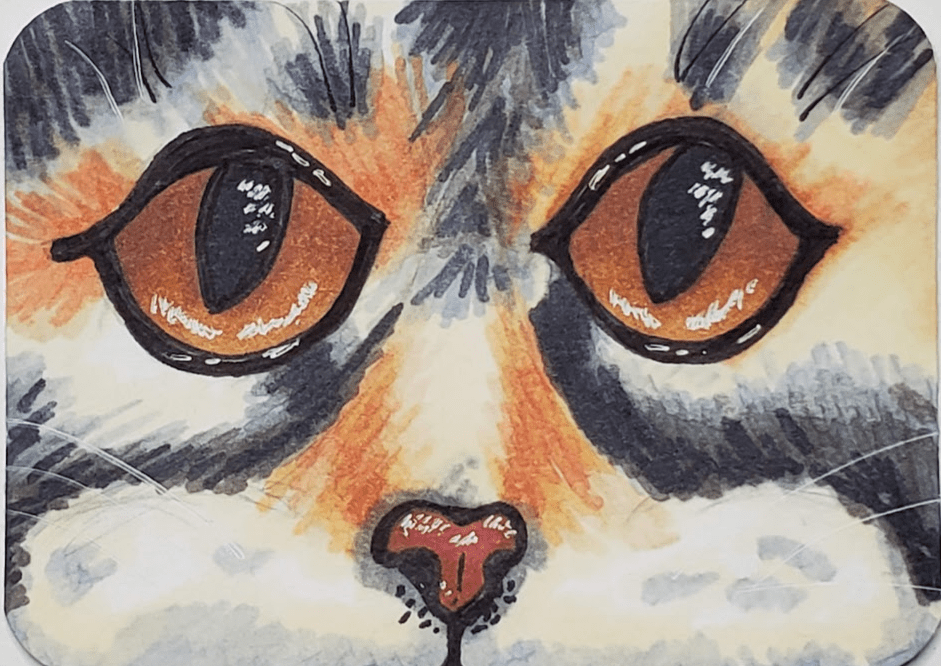
You can also use the Gelly Roll pen for whiskers and strands of fur.
Cat Eyes Drawing Tutorial – Conclusion
That’s it for this cat eyes drawing tutorial. I hope you feel inspired to make your own cat eyes drawings. If you do, let me know in the comments.
Remember that art and drawing are skills that anyone can learn and improve with practice. The more you practice, the better you will get.
So if you want to get really good at drawing cat eyes, practice making as many of them as you can. You can experiment with different media and colors. Try making eyes that are different colors and different types of fur.
Don’t forget to have fun and enjoy the process. Doing drawing challenges is a fun way to improve your skills.
Grab your FREE Guide to Better Art in 7 Days
