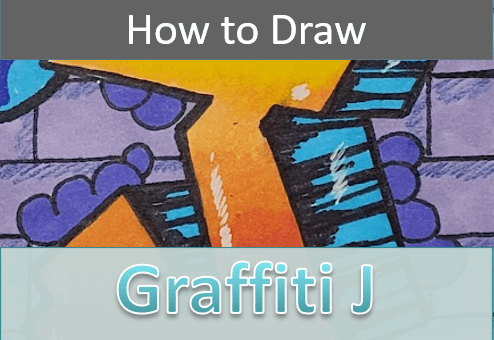
In this tutorial you’ll learn step by step how to do a graffiti J drawing with a 3D effect. This type of drawing is great for beginners, especially if you’ve never drawn any graffiti art before.
Focusing on only one letter is an easy way to practice the various elements that go into a drawing of this kind. Much simpler than focusing on a complete graffiti art design.
Let’s grab some art supplies and learn to do a graffiti J drawing.
* Some of the links in this post may be affiliate links. This means I receive small commissions for purchases made through these links at no extra cost to you.
Art Supplies
- Thin black marker
- Paper or cardstock
- Markers
- Pencil
- Click Eraser, Pink Pearl Eraser
- White Gelly Roll pen
About Graffiti Art
The underground art form is said to have originated in Philadelphia in the 1960’s. Writers would “bomb” the city with their names, as a way to gain recognition and attention by the community and media.
By the late 60’s it had moved into New York and gained momentum by the 1970’s. During this time people were going around ” tagging” the cities.
Modern graffiti has changed quite a bit from its original form. Although many people still tag, graffiti art has taken over as the more popular method for getting noticed.
And instead of simply scribbling a name on a wall the artwork has grown immensely. Not only are artists getting noticed, but they are also telling a story or making a point about society and politics.
How to Draw a Graffiti J Step by Step
When making your graffiti J drawing, or any letter of the alphabet, it’s easiest to begin with the flow of the letter. This is where you determine the overall style you want your letter to be.
To do this simply make a line drawing of your letter J. This is where you begin to determine the angles of your lines and if you’re going to have curved lines or only straight lines.
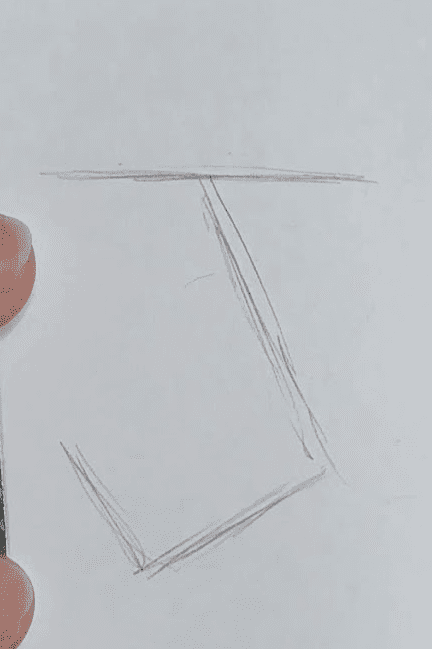
When doing this keep in mind you’re going to need some space for adding the thickness of your letter.
After you’ve finished your line drawing, you need to add the thickness of the graffiti J drawing and any additional details.
Use your line drawing as a guide to add the outside shape of your letter. Make any desired changes as you’re doing this.
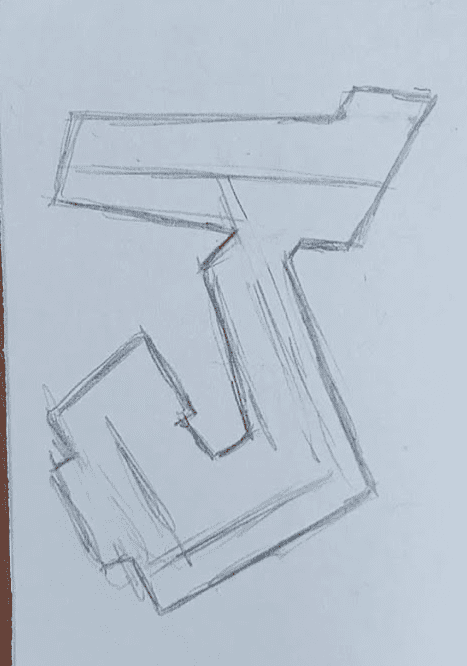
You can add some extra notches, cut outs, or additions to your graffiti letter J.
Graffiti J Outline
There are a ton of different ways you can do your outline for your letter J. You can use a thin pen, like I did. Or, you could use a thicker marker.
I prefer using a Sharpie pen for my outlines because I like how crisp the edges stay with it. But it does take a bit more time since it’s thinner which means you have to make multiple passes with the pen to get a thicker line.
I also prefer to use black for most of my drawings, but you can use whatever color you want for your drawings. It simply comes down to whatever works for your artistic style and the look you’re going for.
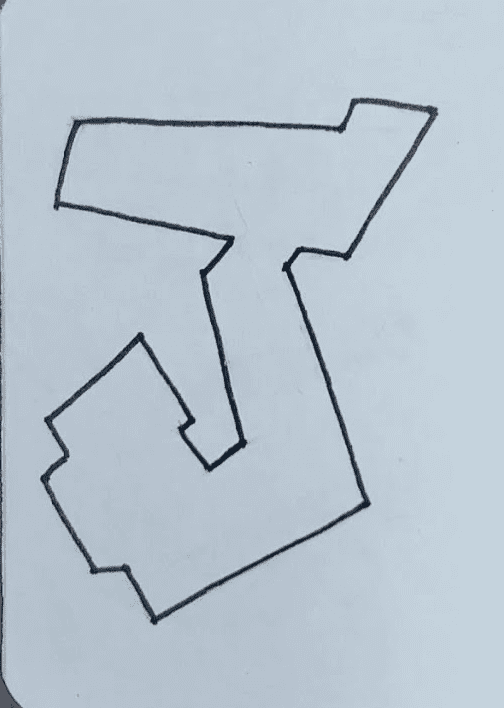
If you’re planning to make your letter 3D it’s best to wait until the 3d part is drawn out before adding a really thick line. When the outline is too thick it can make things more confusing when you’re lining up your points for your lines.
After you’ve added your outline you can use a big eraser to remove all of your pencil lines.
Drawing 3D Letters
For this graffiti J drawing I’ll be using one point perspective. So the first thing we need to do is draw a vanishing point. I made mine off to the side a bit (where the blue circle is you can see a dot), so my lines will be stretched out further.
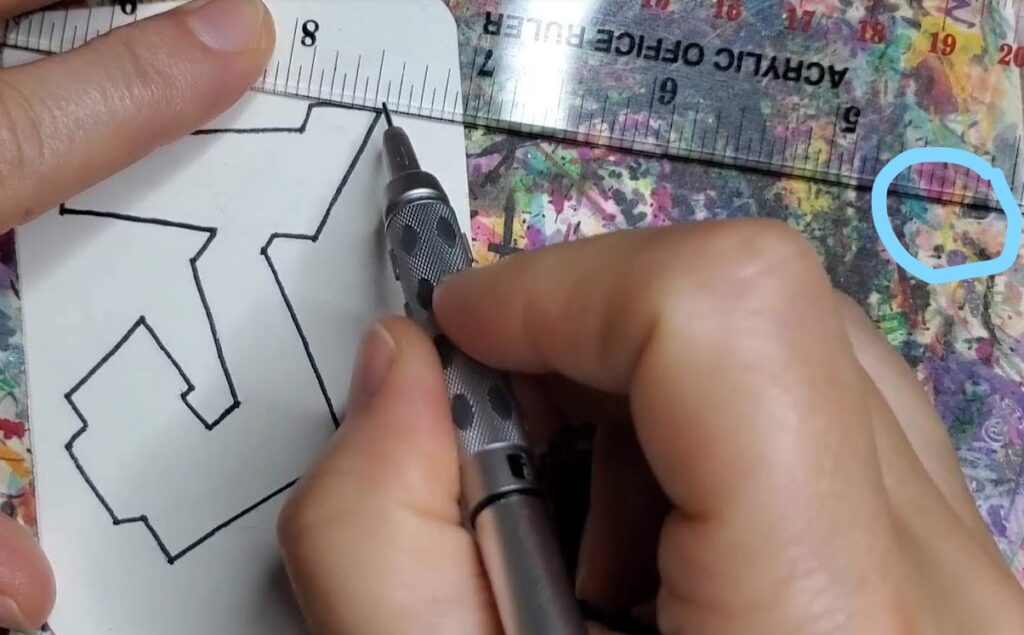
Next you want to start drawing lines from each corner to the vanishing point using a ruler or straight edge. Start with the easiest corners first. Then move onto the more difficult ones.
The corners of the opposite side of the letter face from the vanishing point would be considered more challenging to draw. Just do them the same way as the other ones, but stop drawing your line when you reach the face of the letter J.
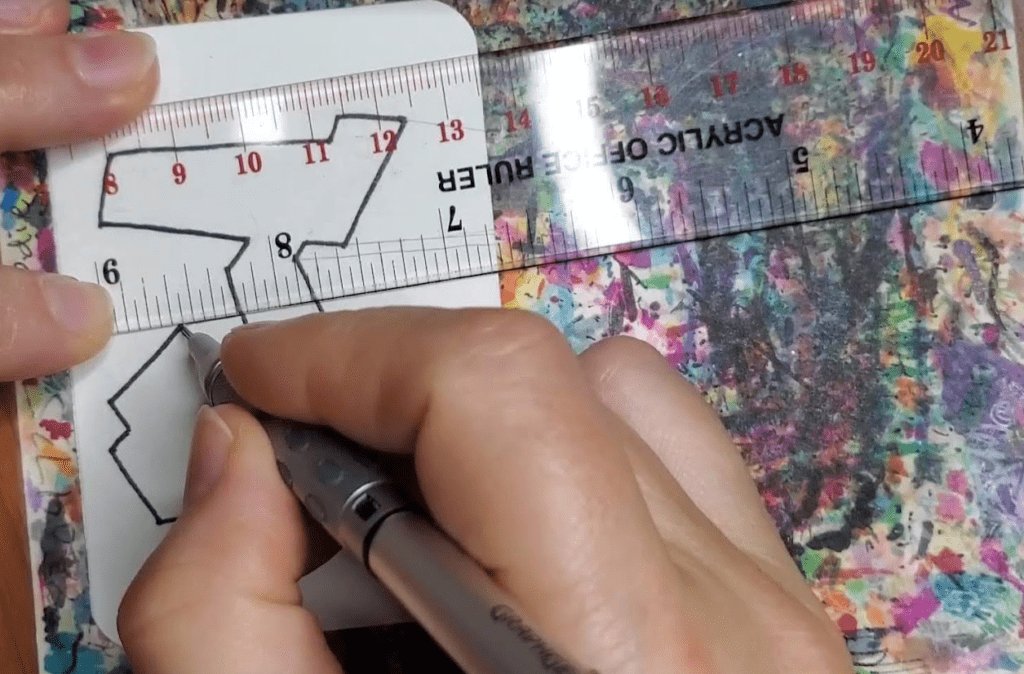
After you have all of your lines drawn to the vanishing point you need to decide how much depth you want your letter J to have. You can make it as thin or as thick as you’d like.
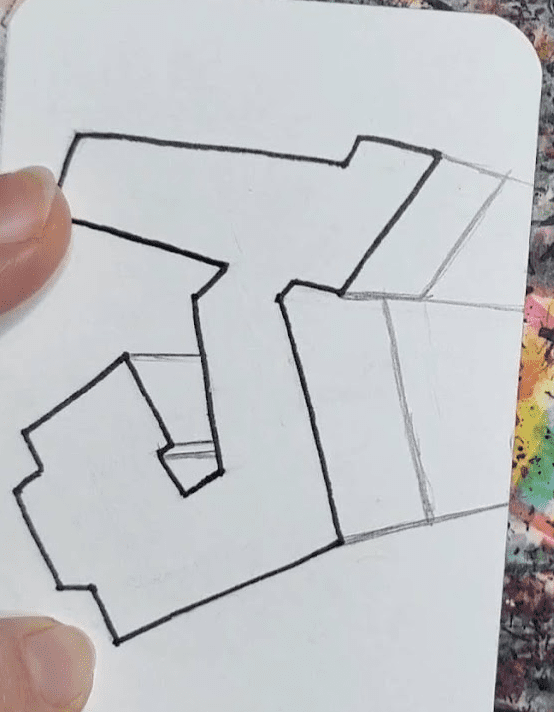
When you do this make sure the far edge of your letter matches the angle of the letter face.
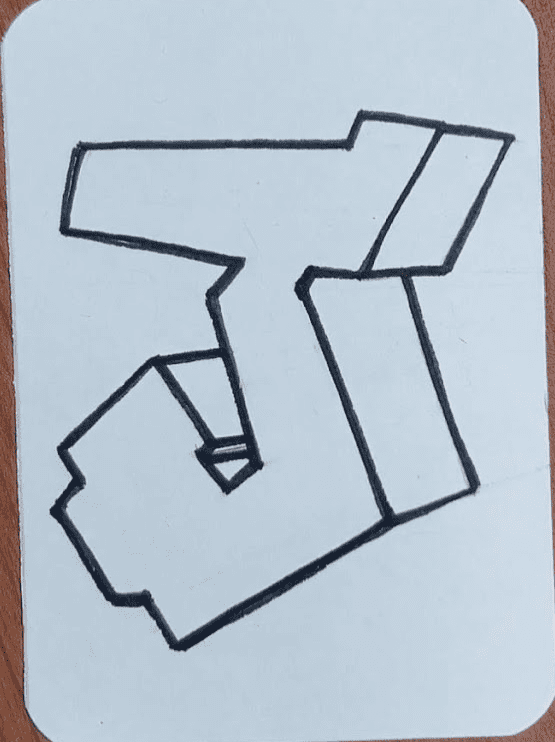
Then outline the rest of your letter and erase the remaining pencil lines.
How to Draw Graffiti Letter J with Markers
Your graffiti J drawing is not complete without some nice colors. Let’s go over how to add color with markers.
First, if you want to be able to blend your colors together you need to use alcohol based markers. Bic, Sharpie, and Copic for example. As well as many others.
Second, you need to work while the colors are still wet or they won’t mix together. This isn’t a big deal. Just make sure you work on a section at a time.
Third, you need to use colors that are similar to each other if you want to create a smooth transition of color. If your markers are too different they will leave a harder edge.
Choose a color scheme for your letter, as well as for your background. Then start filling in your letter. Make sure you’re working on small sections at a time to keep the paper wet if you’re blending your colors.
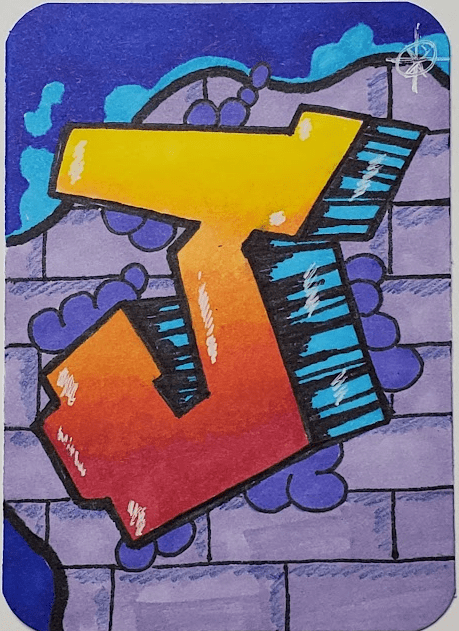
When you’ve finished adding color to your letter you could draw a background as well. This really brings the whole drawing together nicely.
A white Gelly Roll pen can be used to add highlights.
Final Thoughts and Next Steps
After you’ve made your first graffiti J drawing you might be wondering what the next steps are. Where do you go from here?
You can try doing a series of letter J drawings and see how many different color combinations and background designs you can come up with. Or you could try making a larger graffiti art piece.
Get your FREE Graffiti Guide and learn the steps to creating your own graffiti art.

