Brick Texture Drawing
In this tutorial you’ll learn how to draw brick texture. Doing this will take your brick walls to the next level.
Adding a brick wall to your drawings is a great way to fill in negative space and add a little more detail to your art. And they’re really easy to make, so beginners can draw them too. Adding a bit of texture is just the icing on the cake.
Let’s grab some supplies and get started.
* Some of the links in this post may be affiliate links. This means I receive small commissions for purchases made through these links at no extra cost to you.
Art Supplies
- Thin black marker
- Paper or cardstock
- Markers
- Pencil
- Click Eraser, Pink Pearl Eraser
- White Gelly Roll pen
About Brick Walls in Art
Brick walls have a rich history in art, often symbolizing various themes such as strength, division, and urban life.
In ancient art, they were depicted in murals and frescoes, showcasing architectural prowess. During the Renaissance, artists like Leonardo da Vinci and Michelangelo incorporated brick walls into their compositions, emphasizing realism and texture.
In modern art, brick walls became a symbol of urban decay, depicted by artists like Banksy and Keith Haring to comment on societal issues.
Today, brick walls continue to inspire artists across various mediums, serving as a canvas for expression and reflection.
How to Draw Brick Texture
For this step by step tutorial you need to have your bricks already drawn out. If you need help with this check out, How to Draw Brick Walls.
Bricks are great for filling in empty space in your drawings or for any type of graffiti art.
Step 1: Outline Your Bricks
After you have your brick wall drawn out you’ll need to outline the bricks. There are several different ways to do this, and each will give you a different look for your finished drawing.
The easiest way is to simply trace over your pencil lines with a black pen or marker. This will give you uniform and squared bricks. But it also looks a bit boring in my opinion.
How I like to outline my bricks is by doing each one separately. By doing this you’ll create a thicker line around your bricks that looks like the mortar you’d see on a brick wall. Therefore, your brick wall will look more natural and detailed.
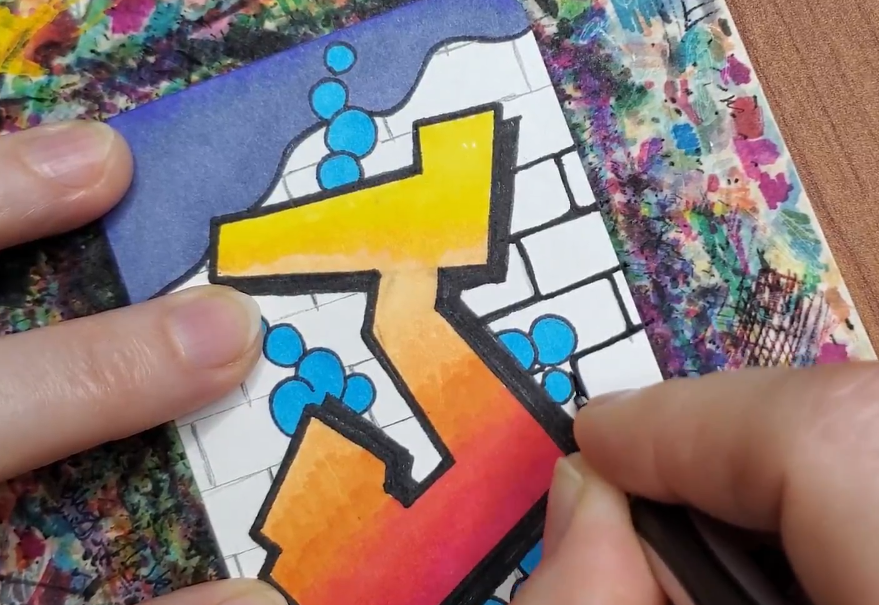
You could also use a color other than black. I’ve done brick walls that were blue, green, and purple. As well as many other colors. Don’t be afraid to experiment and try different colors for your brick walls.
Step 2: Add Texture
If you look at a brick wall in real life you’ll see that the surface is not perfect. There will be weather, surface, and human damage to the bricks. Even when new, bricks are not perfectly smooth.
Creating brick texture on your drawing is pretty easy though. All you have to do is add some small dots to some of your bricks to create those little imperfections. This can be done using black, gray, or whatever color you’re using for your wall.
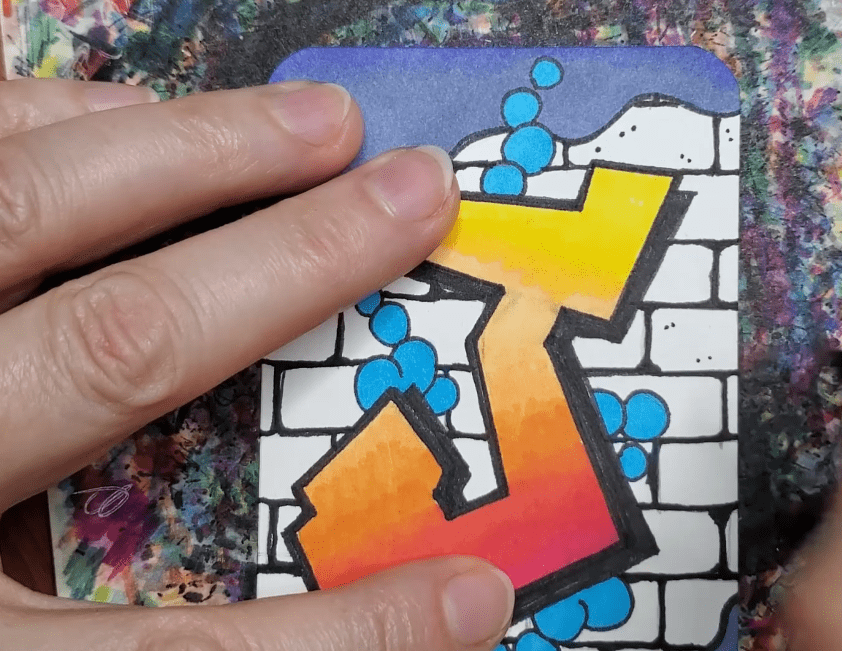
Make your brick texture random and vary the size of your dots. For my brick wall I used two different black pens, and a small gray marker.
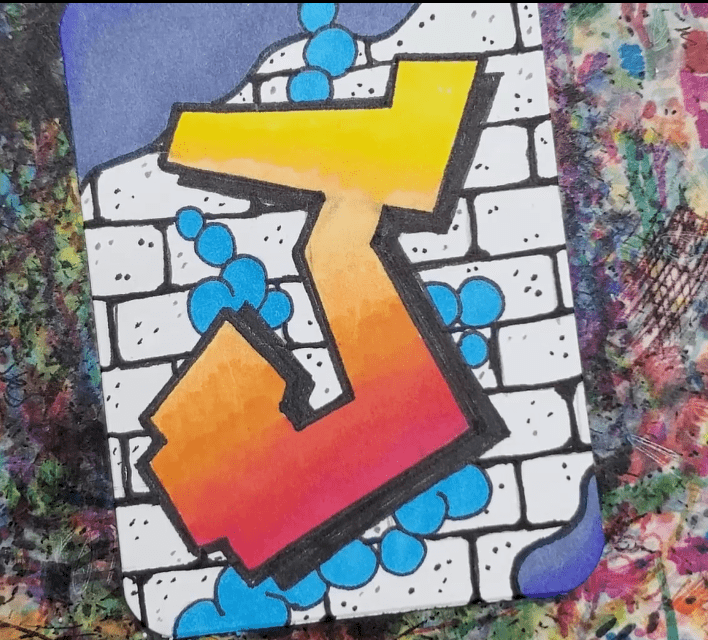
You can add some texture to each of your bricks, or just a few. Again, how you choose to draw your brick texture will determine the overall look of your drawing.
Step 3: Add Chips and Cracks
To finish your brick texture, add some chips and cracks to a few of your bricks. This will add another level of detail to your drawing.
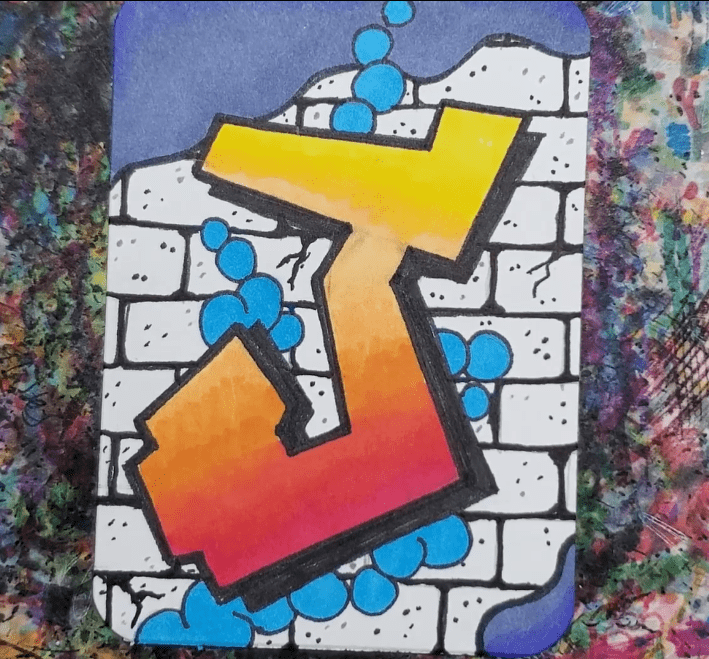
You can add as many cracks as you’d like, but I think it looks better with only a few. Too many takes away from the brick texture and makes the wall look cluttered.
How to Color with Markers
The final step to drawing your brick texture is to add a little color to the edges of the bricks. For this drawing gray was used around the edges of each brick. And also along the edge of the cracks.
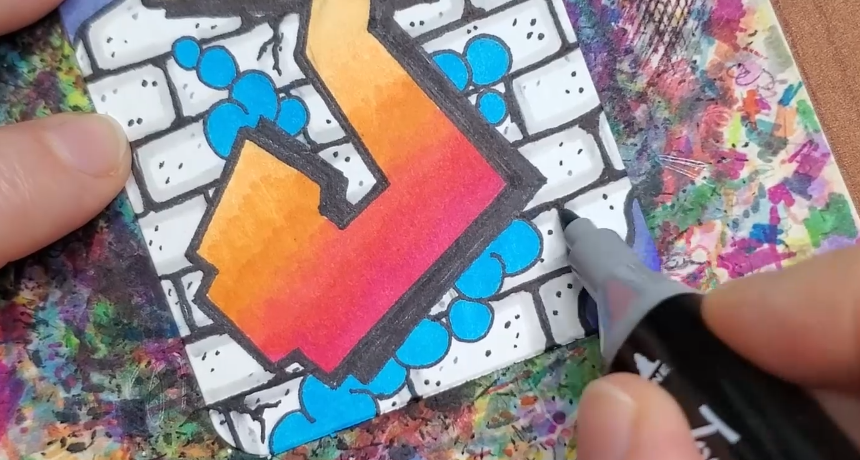
If you used a different color for your outline, use a lighter value of that color. For example, if you used green for your outline, use a light green for the edges of the bricks.
Another option is to use two markers, one a light gray, and one a medium gray. Then use the lightest gray to fill in the white areas of the brick.
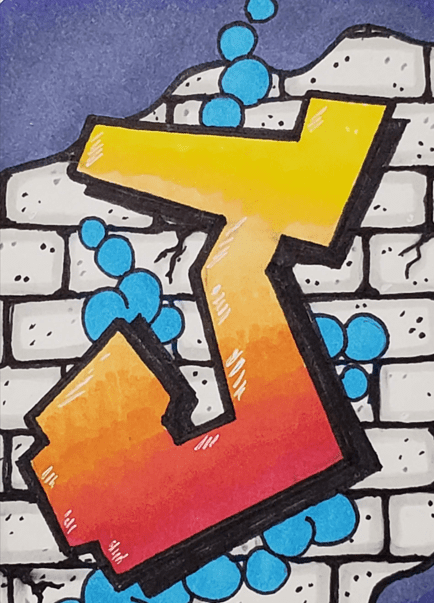
You could also experiment with some different ways to add a bit of color to your bricks.
How to Draw Brick Texture – Conclusion
Now that you’ve learned how to draw brick texture, what’s next? If you want to improve your art and drawing skills, you need to practice. The more you practice the better you will get.
This doesn’t mean you have to spend every spare moment working on your artwork. But you should try to dedicate a few minutes each day to develop your skills. Even ten or fifteen minutes each day will add up over time and you’ll see big results.
Working on Artist Trading Cards (ATCs) is a great way to save time and get more artwork done. And you can keep them in a binder and make your own portfolio of work.
Doing a 7 day challenge on ATCs is the perfect way to practice and experiment with your drawings. Give it a try and I bet you’ll be impressed with what you can do.
Grab your FREE Guide to Better Art in 7 Days

