How to Draw in One Point Perspective
Learning how to draw using one point perspective is not as difficult as you might think. If you following a few basic concepts you’ll be able to draw anything you want in 3D.
After you’ve mastered the technique of making one point perspective drawings, you’ll be able to make them freehand as well. Then you can decide if you want to use the method described in this drawing tutorial or just make your 3D art by hand.
There are different types of perspective that you can learn how to draw. Today we’ll only be looking at one point perspective, which is using only one vanishing point.
You would use one point perspective when looking straight on at an object, and is a type of linear perspective. Which has been around since the 1400’s.
What Is One Point Perspective
One point perspective means your drawing has one vanishing point where all of your lines will converge towards. There are three main components to doing a one point perspective drawing. They are horizon line, vanishing point, and frontal plane.
This method of drawing is used to show a third dimension in our drawings by illustrating how objects appear smaller as they get further away. This is called space and is one of the elements of art. It’s also how we show form in our artwork. Form is another of the Elements of Art. This makes one point perspective drawings very important to learn and understand.
This is the same method we used when drawing 3D Letters. In today’s lesson we’ll dig a little deeper into this method of drawing.
Let’s begin by taking a look at the supplies we’ll be using for this lesson.
* Some of the links in this post may be affiliate links. This means I receive small commissions for purchases made through these links at no extra cost to you.
Art Supplies
Get Your Free One Point Perspective Drawing Guide
Horizon Line and Vanishing Point
Doing a one point perspective drawing can be an extremely technical process. It can be a very precise way to create drawings. For today’s lesson, we are going to cover some basic concepts that are suitable for the beginner artist.
We will cover some more technical aspects in future lessons.
Let’s get started by getting our paper set up to do some one point perspective drawings. The first thing you need to do is draw the horizon line on your paper. Use a ruler when doing this.

Next, place a small dot somewhere along that horizon line near the middle of your paper. That dot is your vanishing point.

One Point Perspective Drawing Step by Step
Begin by drawing a square somewhere on your paper. Draw your square to the left or right of your vanishing point. As well as above or below it. Where you place your square will determine which sides are visible to the viewer.
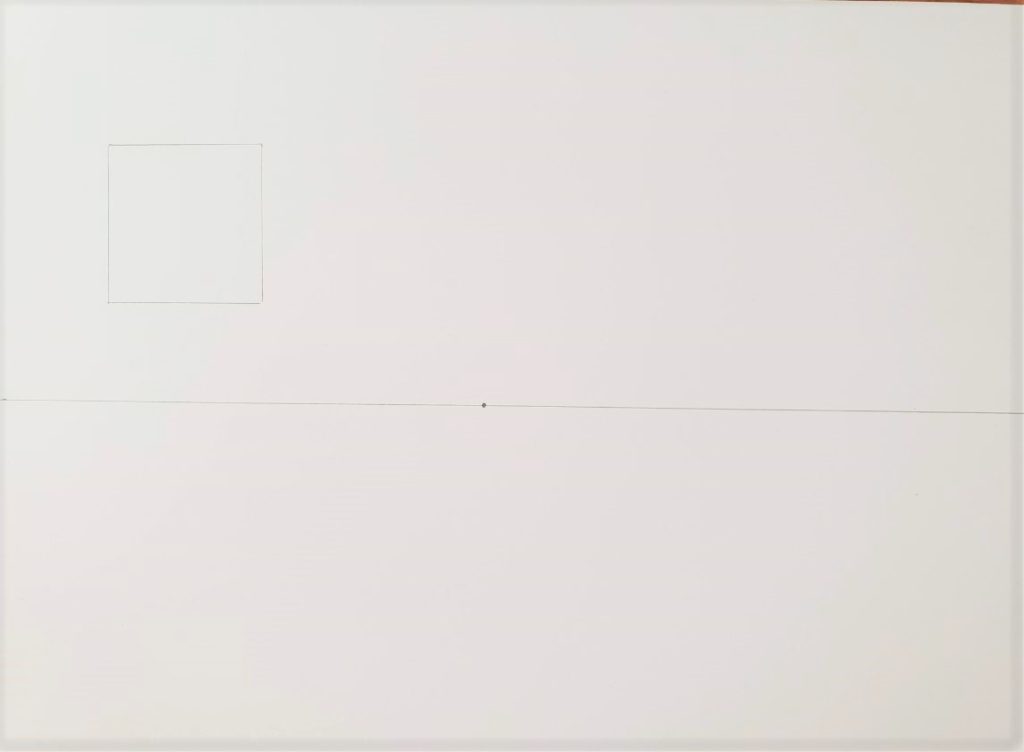
Using your ruler, line up each corner with your vanishing point.
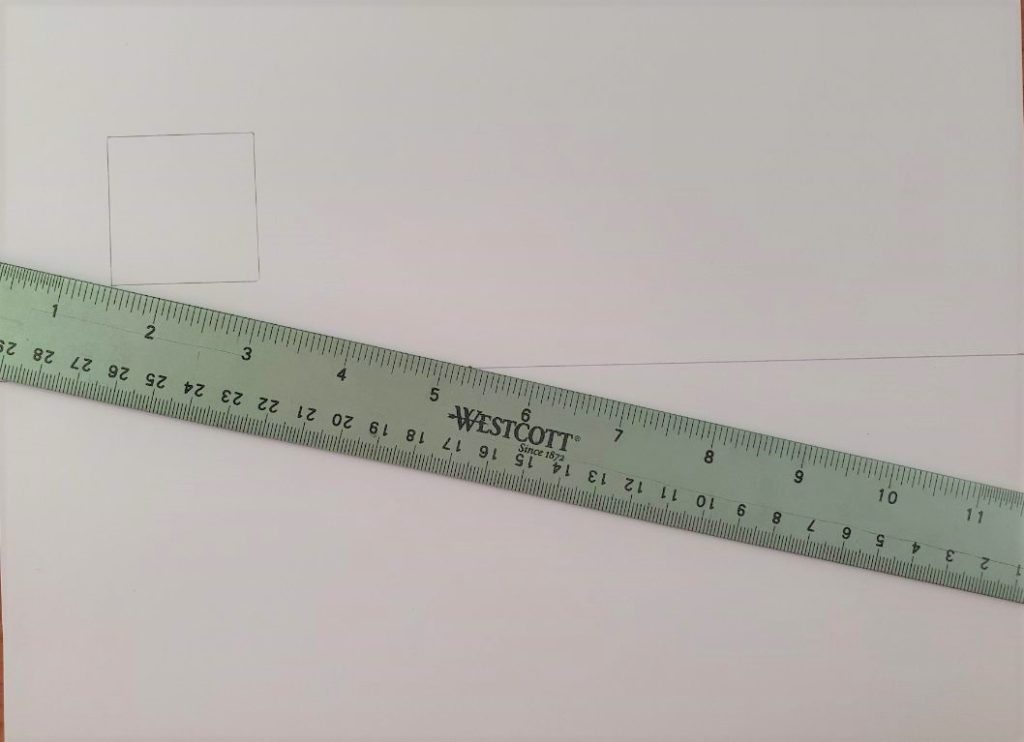
Then draw a line from the corners to the vanishing point.
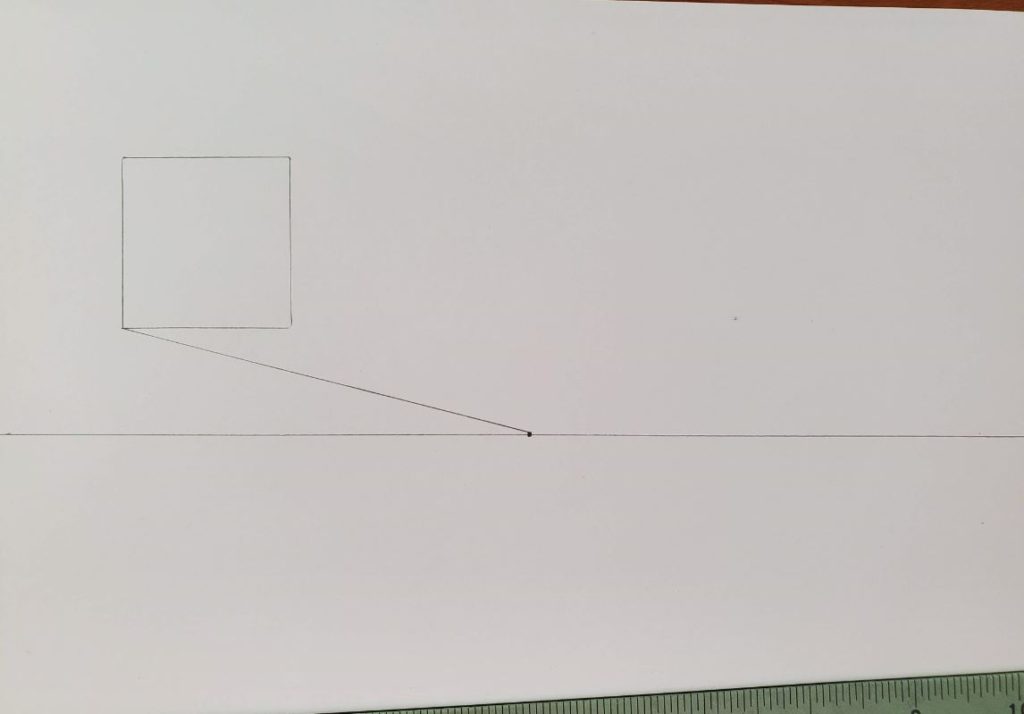
As you can see by this example, there will be three lines coming off of the square. The fourth corner won’t need a line because it is hidden by the square.
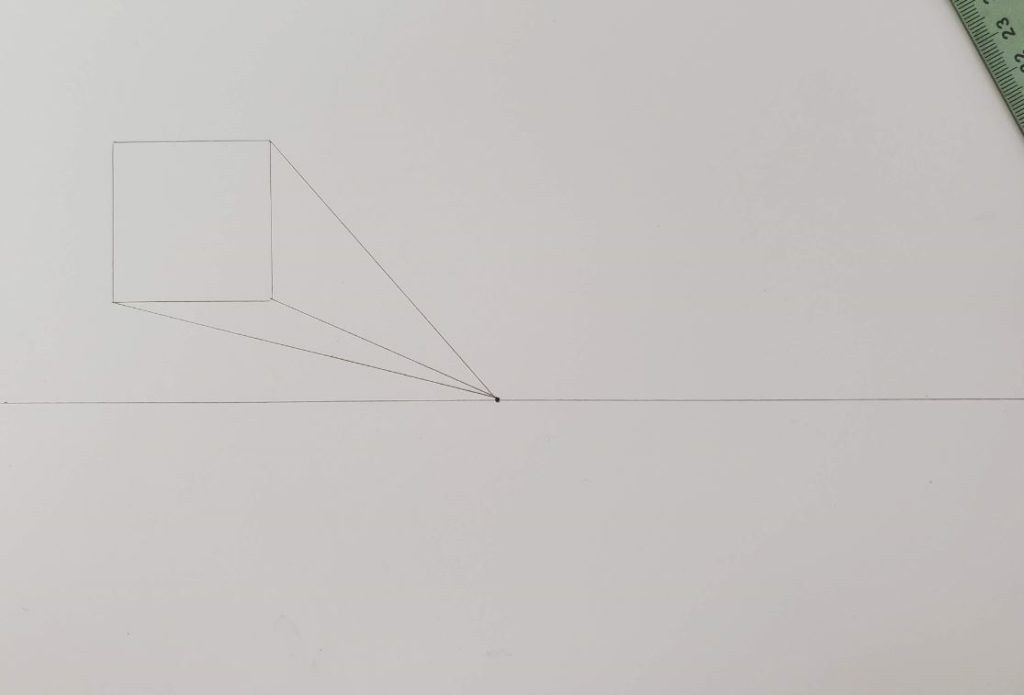
Remember, we are showing the illusion of space and depth in a two dimensional platform.
To finish up your first box you need to decide how much depth you want it to have. You can make it as thin or as thick as you want. To do this, draw lines that are parallel to the lines of your square.
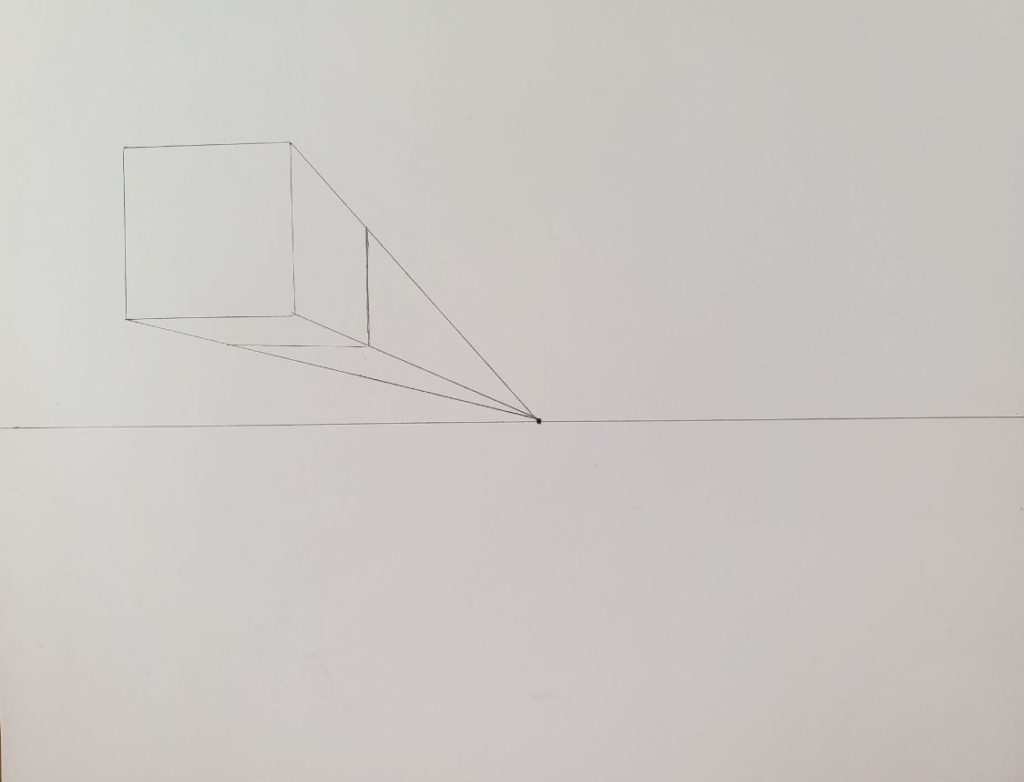
Now, let’s draw a few more boxes with a bit of a different look.
Drawing 3D Squares from Different Angles
You can vary how your shapes look by changing the placement of them in relationship to the vanishing point. Let’s draw another box to the right of where we drew the first one. Follow the same process as you did for the first one.
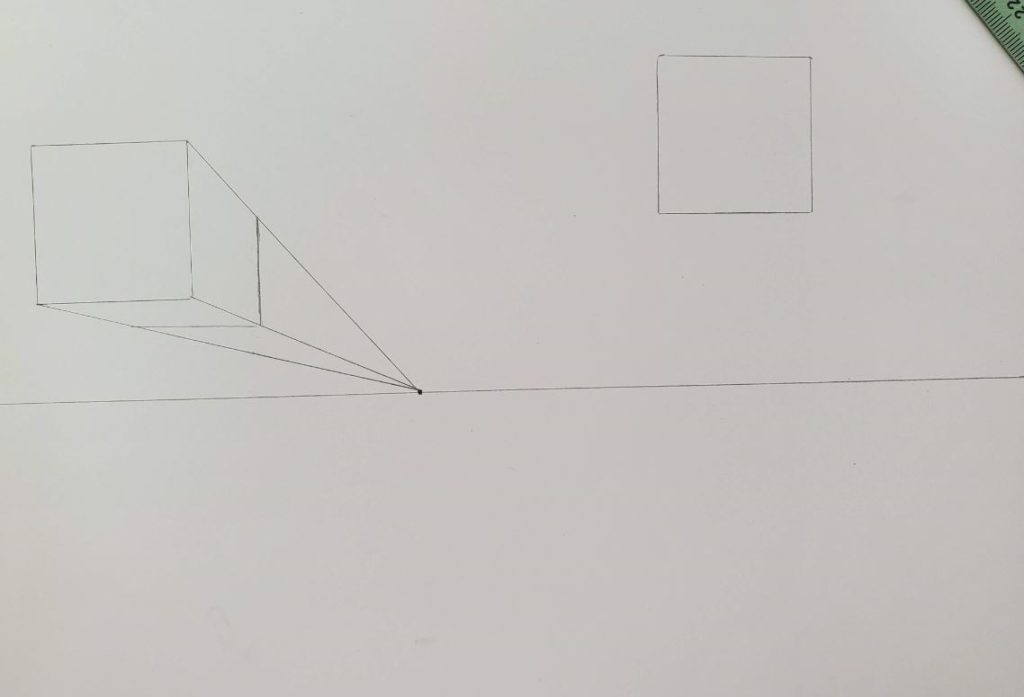
You should have three lines going to your vanishing point again.
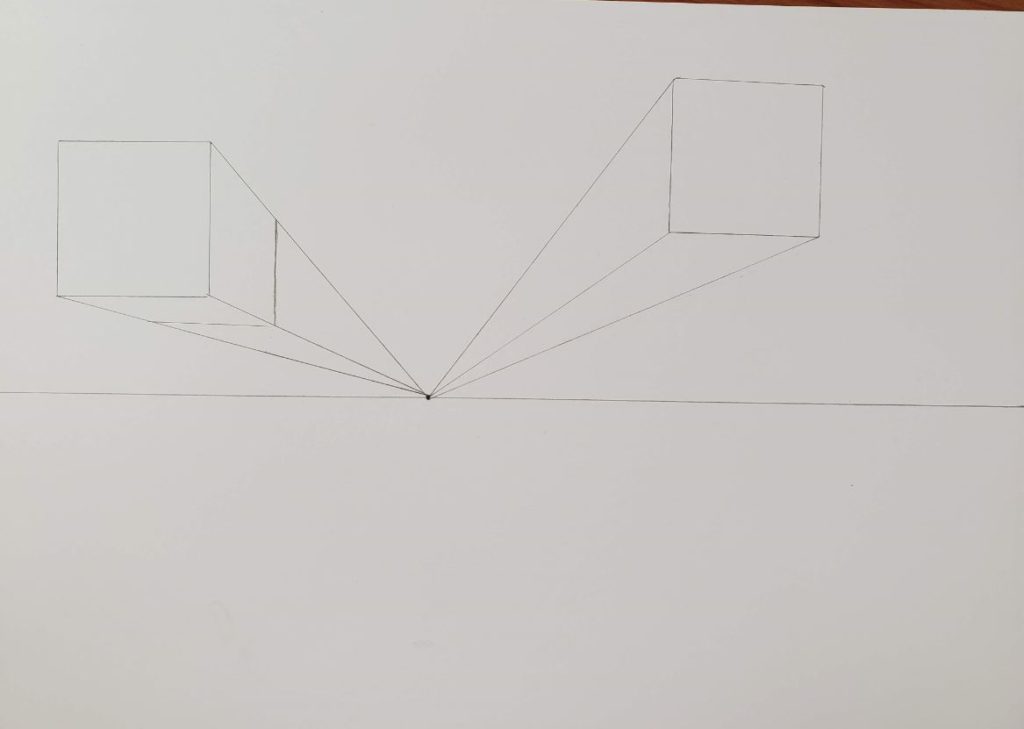
Finish your second box by drawing your lines for the depth of the box. You can make it the same thickness as your first box, or you can vary the thickness.
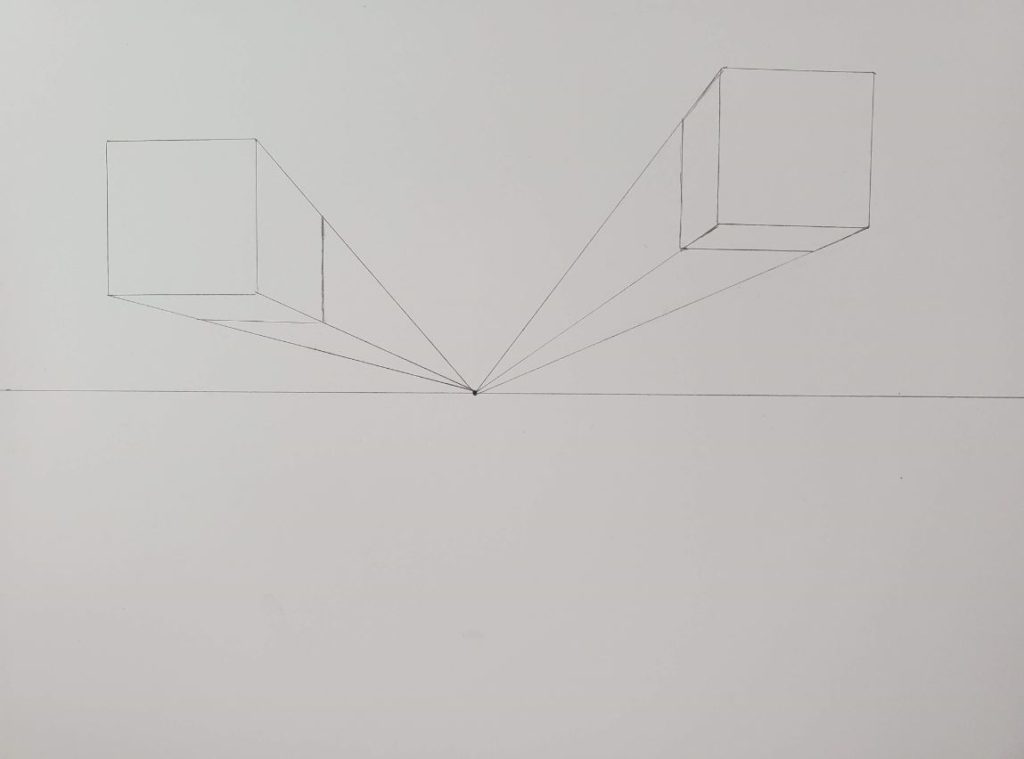
Drawing Boxes in Perspective from Multiple Angles
For the next one, let’s draw our box below the horizon line. And we will also draw it directly beneath the vanishing point.
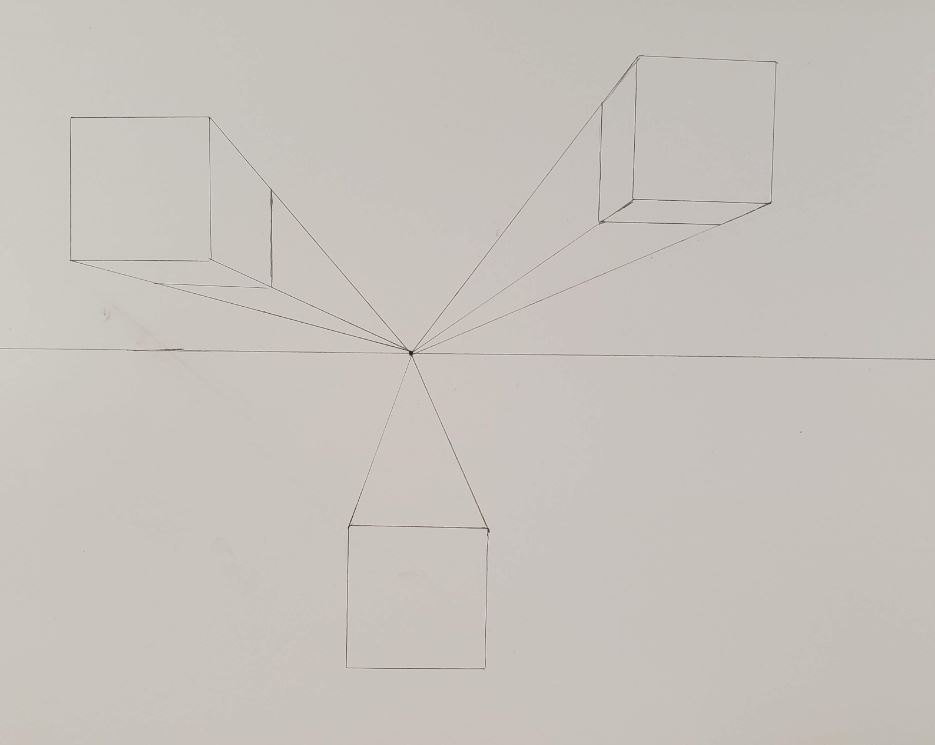
Because the box is directly beneath the vanishing point, you’ll only see one side of the box. So you’ll only need to draw two lines going to the vanishing point.
If you line up your ruler with the corner of your box and the vanishing point, and your line would go through the face of your box then you don’t need to draw that line.
Finish your third box by adding your depth line.
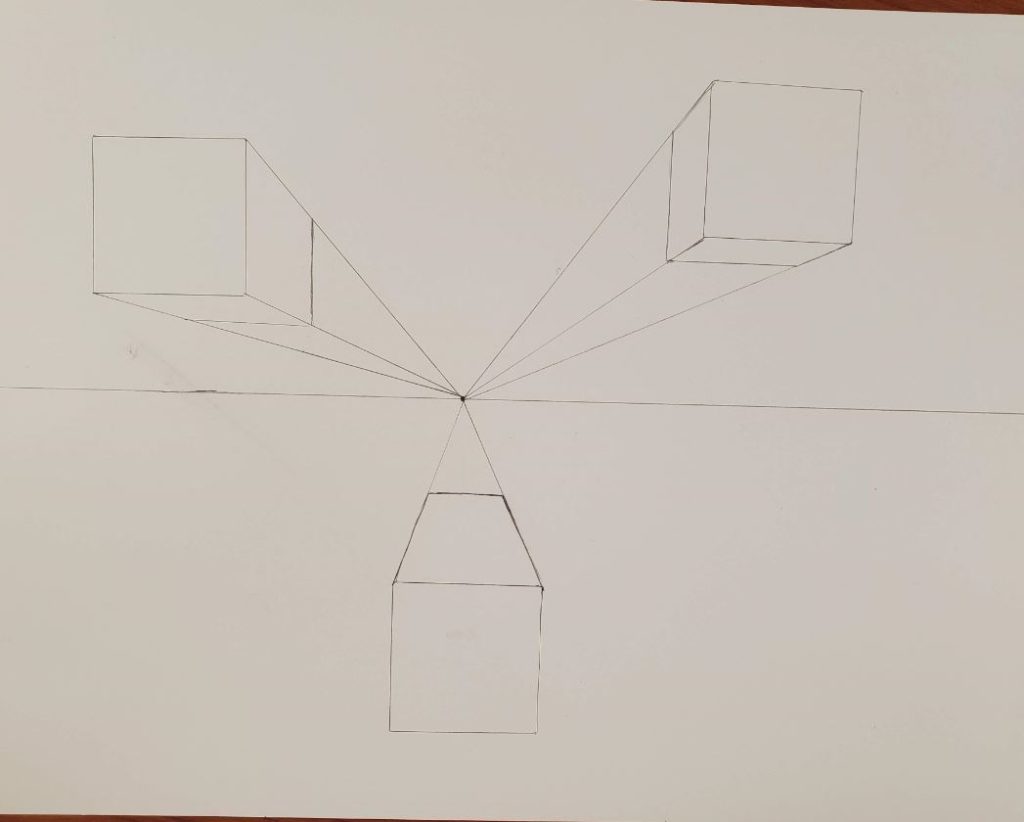
When you’re happy with how your boxes look, erase the extra lines going to the vanishing point.
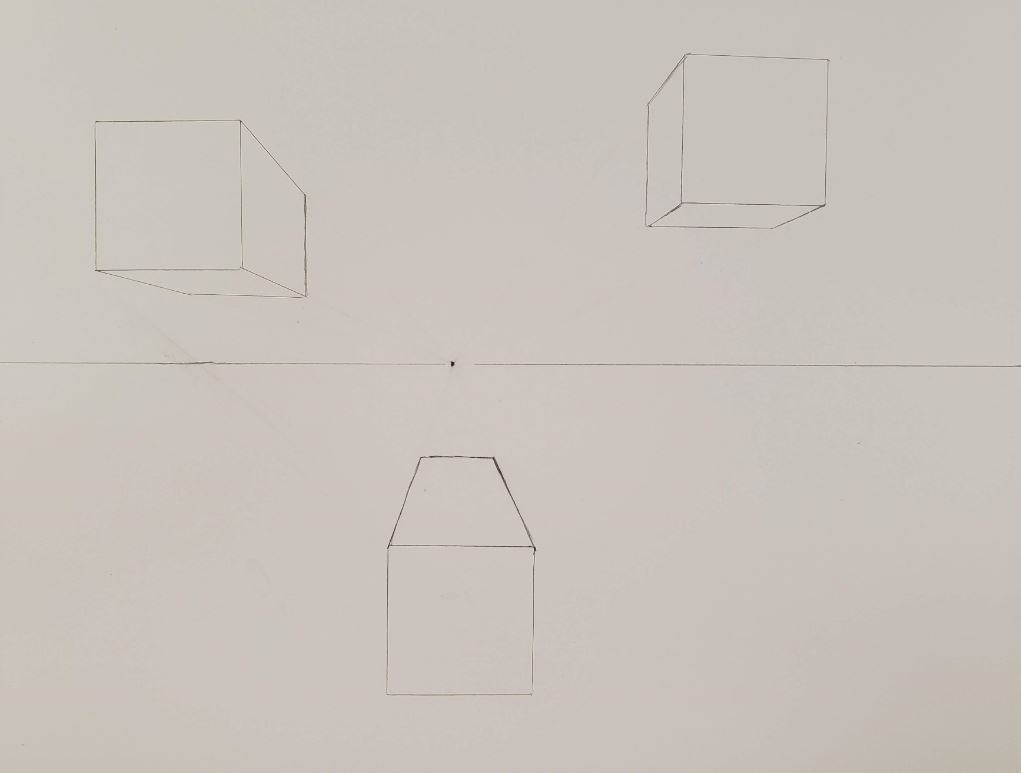
Let’s draw one more box, but this time a little bit closer to the horizon line. Follow the same process as you used for all the other boxes.
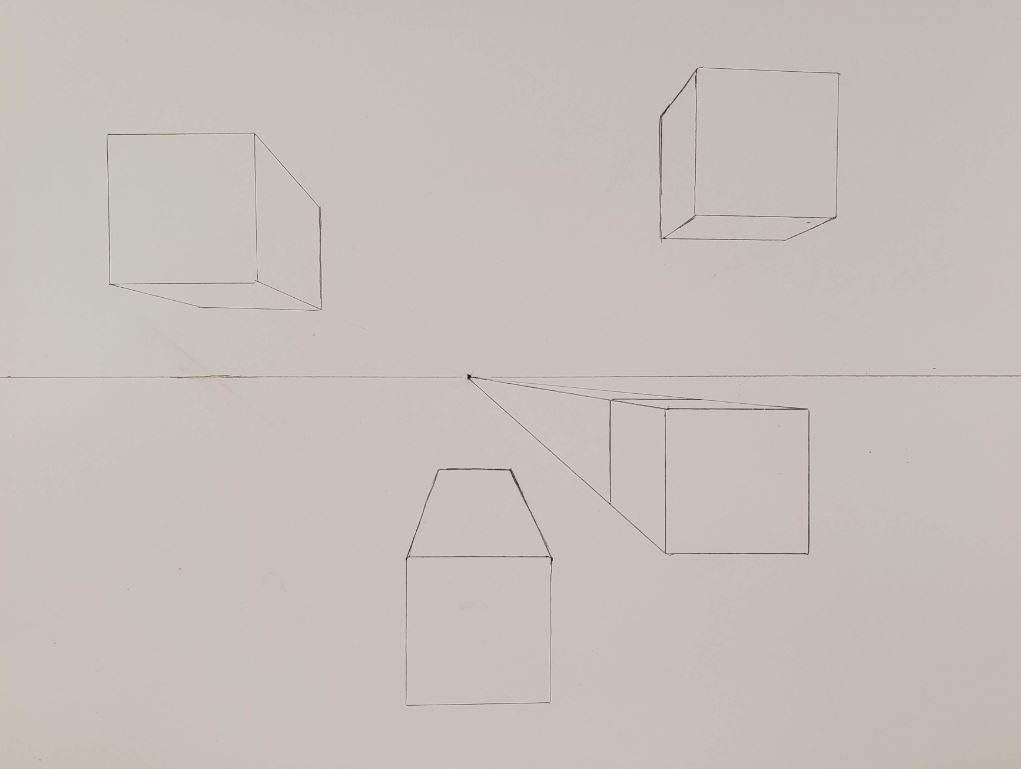
Erase your extra lines when you are done with your drawing.
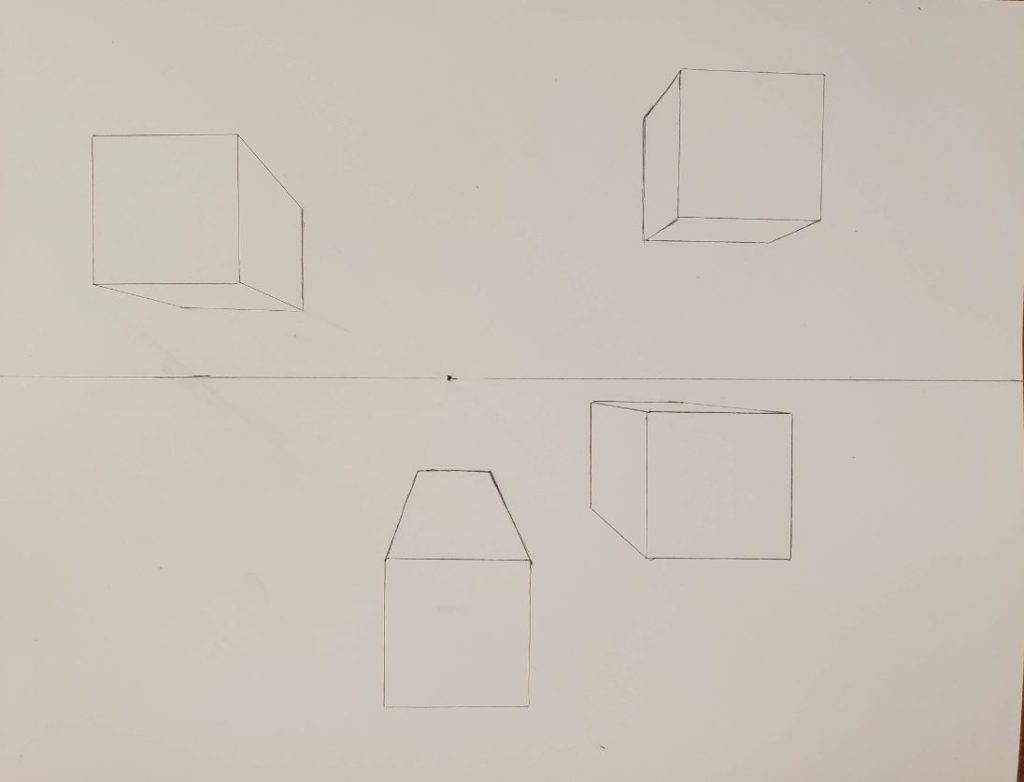
Look at the two boxes below the horizon line and notice how you can see more of the top on the box that is further away. And the one that is closer to the horizon line, there is less of the surface area visible on the top side.
One Point Perspective Drawing for Beginners
That’s it for today’s lesson on one point perspective basics. Feel free to play around with drawing boxes so you can get the hang of how they will look depending on the placement of the box in relationship to the vanishing point.
Stay tuned for more lessons on developing your skills for drawing one point perspective. There will be many more to come in the near future.


Hi Ro!
I’ve been hunting around for the download on one-point perspective. Can you assist me in finding it?
Thank you!
-Pam
All of the FREE downloads are in the Resource Library.