Dragon Eye Drawing Challenge
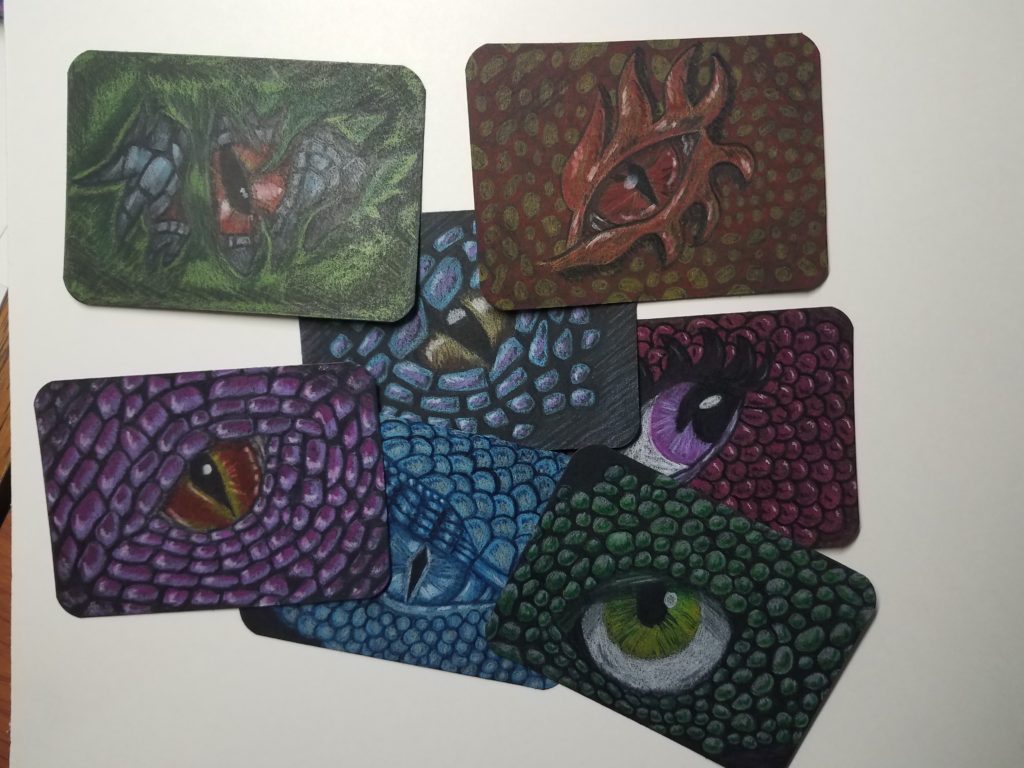
For the 7 day dragon eye drawing challenge, I once again used artist trading cards (ATC) for my drawings. I’ve been trading ATCs for years, and find I get a little obsessive over it. But using ATCs for my 7 day challenges allows me to kill two birds with one stone, so to speak. After I finish my challenge, I have 7 artist trading cards to trade.
I began thinking about different ways to draw dragon eyes while I was working on an art tutorial. Since starting this blog I’ve learned that I need to write all of my thoughts down so I can reference them later on. So I’m beginning this challenge with a prompt list to help me get started.
The rules I set for myself for this drawing challenge is to do all drawings on black artist trading cards. Since I’m doing them on black, and I need a decent amount of detail, I’ll be using Prismacolor colored pencils on all 7 drawings.
* Some of the links in this post may be affiliate links. This means I receive small commissions for purchases made through these links at no extra cost to you.
Getting Started
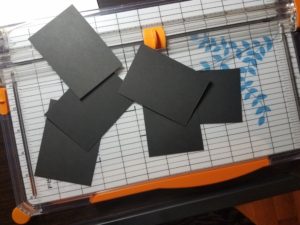
The first thing I did was use my paper trimmer to cut my black cardstock into 2.5 x 3.5 inch cards. After that, I used my corner punch to round off all of the corners. I love how the cards look with the corners rounded off.
Day 1- My First Dragon Eye Artist Trading Card
This is the finished drawing for the step by step tutorial. I guess I kind of cheat on the 7 day challenge since I keep using my drawing that was created for the step by step lesson for day 1. But since I have no intention of stopping at 7, I’m not worrying about it.
While doing these 7 day drawing challenges, I’ve found that I come up with more and more ideas as I progress through the week. I’m keeping a running list of all of my ideas so I can draw them out as I have time.
If you missed it, here’s the link on How to Draw a Dragon Eyes. I’m not going to say much about the actual drawing here. You can read all about it and see each step in the tutorial.
Day 2 – Cutesy Dragon on Black Artist Trading Card
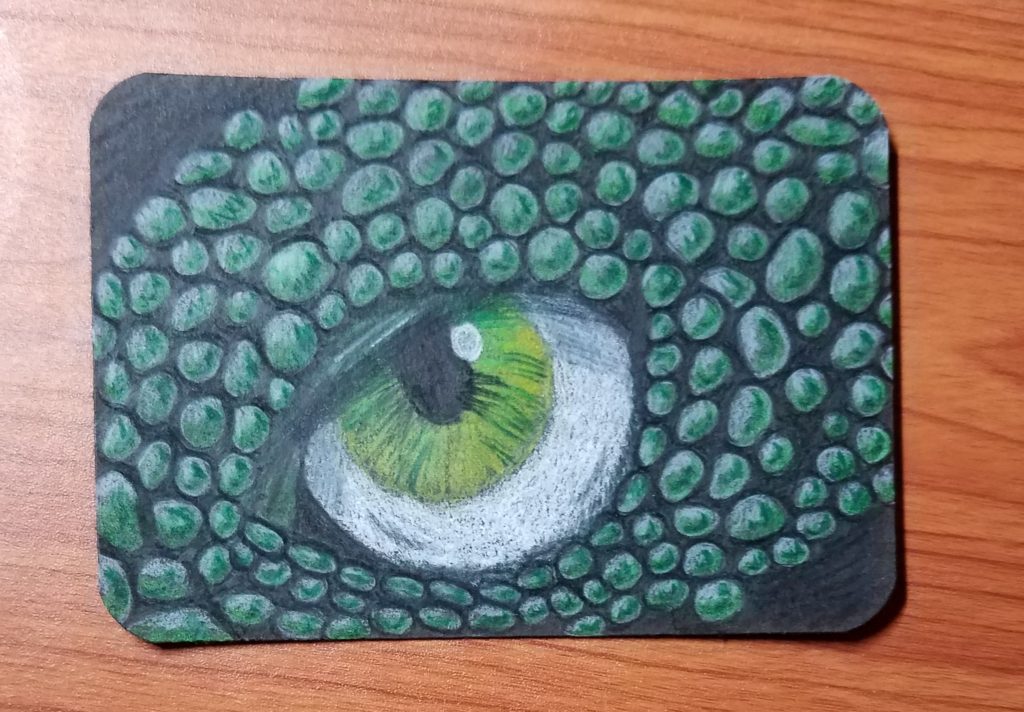
For this drawing I wanted to try making a cutesy looking dragon. To do this, I made the eyeball bigger, and the scales rounded. I’m not quite sure if I pulled it off or not. I don’t think he looks mean, but I don’t think he falls in the cute category either.
The colors I used for this were all Prismacolor colored pencils. For the iris I used Canary Yellow (pc916) and Spring Green (pc913), along with black and white. I began by putting in the yellow and then adding the green in various areas of the iris.
For his scales I used Cool Grey 50% (pc1063), Neon Green (pc1039), and Dark Green (pc908). I used the grey at the top and the neon green at the bottom of each scale. I went back and forth between the two colors adding the layers very lightly. Once I was happy with the coverage of those colors, I add the dark green to the lower right of each scale. I did this same pattern with each individual scale.
I finished each scale by tracing around the edges with black and filling in the areas between the scales with black as well.
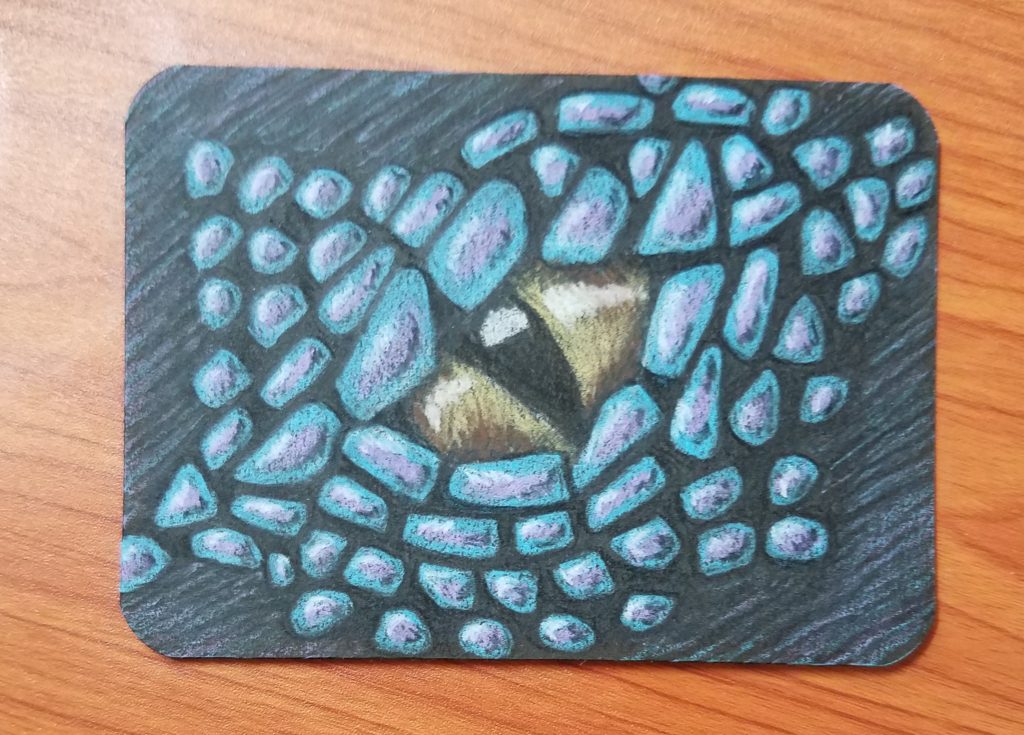
Day 3 – Dragon Eye on Black ATC
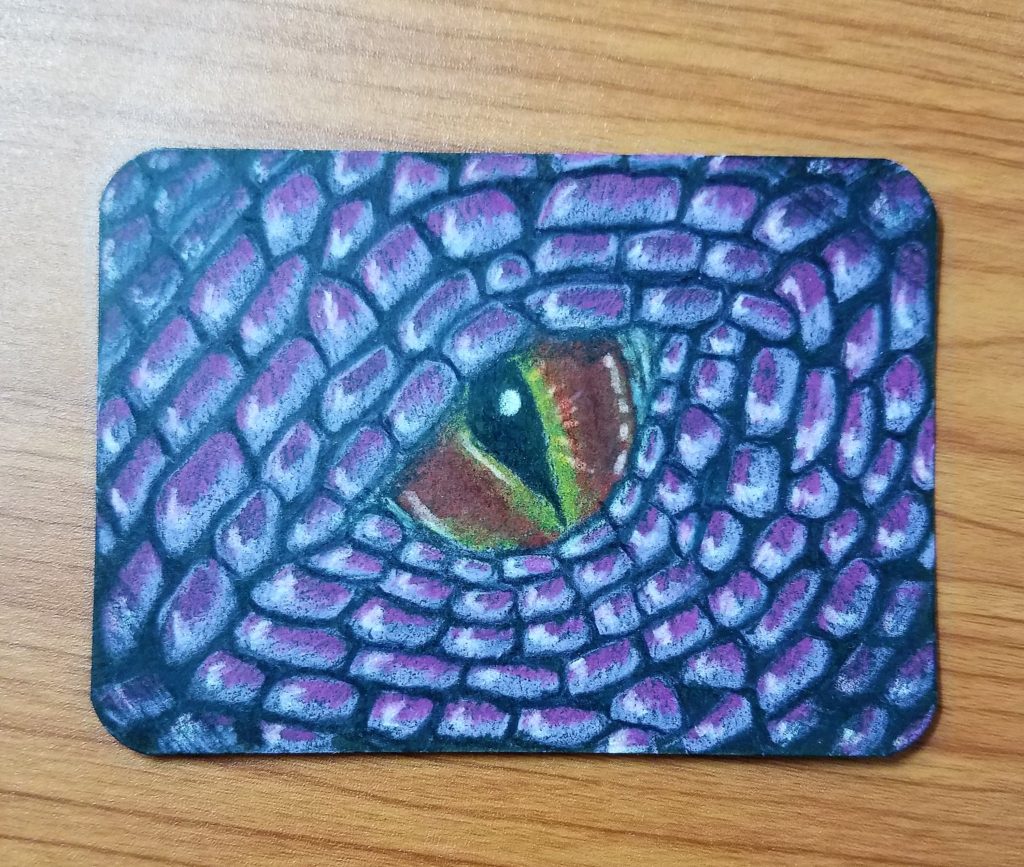
For this drawing I wanted to redraw a similar eye that I drew awhile back. It was something I had drawn on my black Post-It Notes. The reason I wanted to draw it again is because I’ve learned quite a bit about drawing dragon eyes since then. Things like drawing the eye slanted, instead of straight across.
I began by sketching out the eye and drawing the scales to slightly overlap the top and bottom of the eyeball. The scales closest to the eyeball were drawn larger than the ones further away from it. I used Non Photo Blue (pc919) to sketch in where my scales would go and how they would be shaped.
Using the blue, a lightly colored in around the edges of each scale. Next, I used Lilac (pc956) to fill in the center area of each scale. After the first layer of color was in the scale, black was used to trace around the edges. I then went back in with the blue and lilac to add another layer of each color. Each scale was finished off by adding in a little bit of black at the bottom right and white on the top left.
The eyeball was color using Sand (pc940) and Dark Brown (pc946). I used the dark brown to add in some shadows. White was added for some highlights and black for the shadows under the areas where the scales overlap the eyeball.
I didn’t want the scales to go all the way off the edges of the paper, so I left some negative space at some of the edges. Blue and lilac were used to get rid of some of the black.
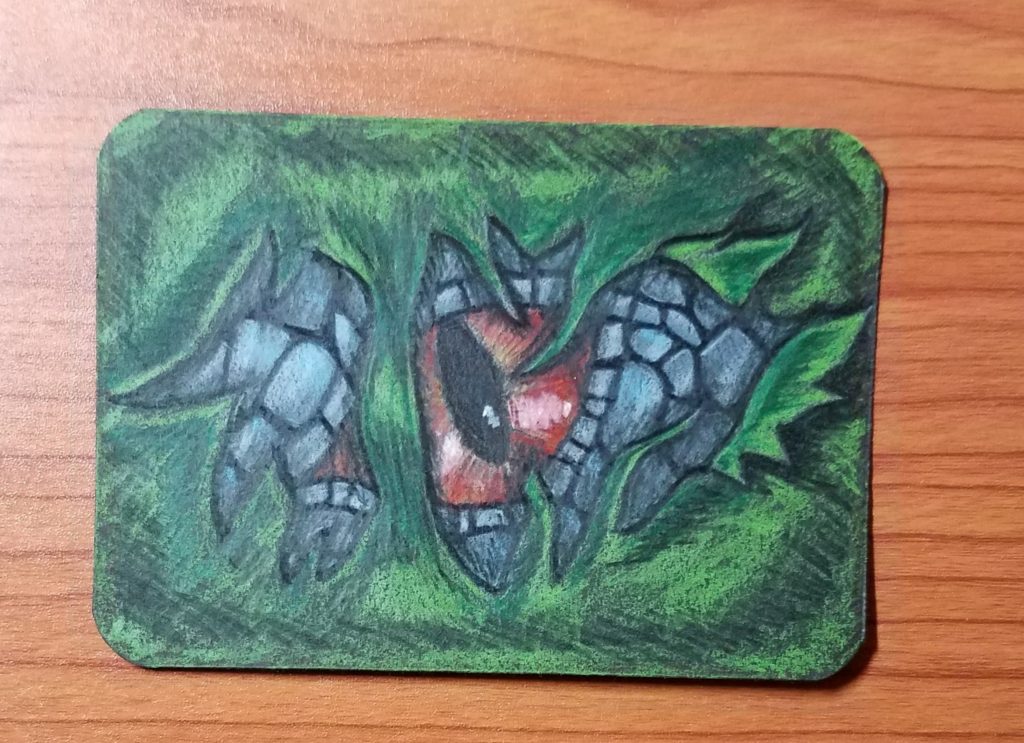
Day 4 – Dragon Eye Shredder ATC
This one was a little tough to figure out. I wasn’t sure what color I wanted to make the foreground. I knew I wanted to make it look like he was looking through a rip, but I wasn’t exactly sure how to do the colors so the dragon and the foreground had both contrast and unity.
Crimson Red (pc924), Orange (pc918), and Sand (pc940), were used for the eye. Non-Photo Blue (pc919), Cool Grey 50% (pc1063), Cool Grey 70% (pc1065), were the colors used for the scales. The foreground was filled in using Spring Green (pc913), Apple Green (pc912), and Dark Green (pc908).
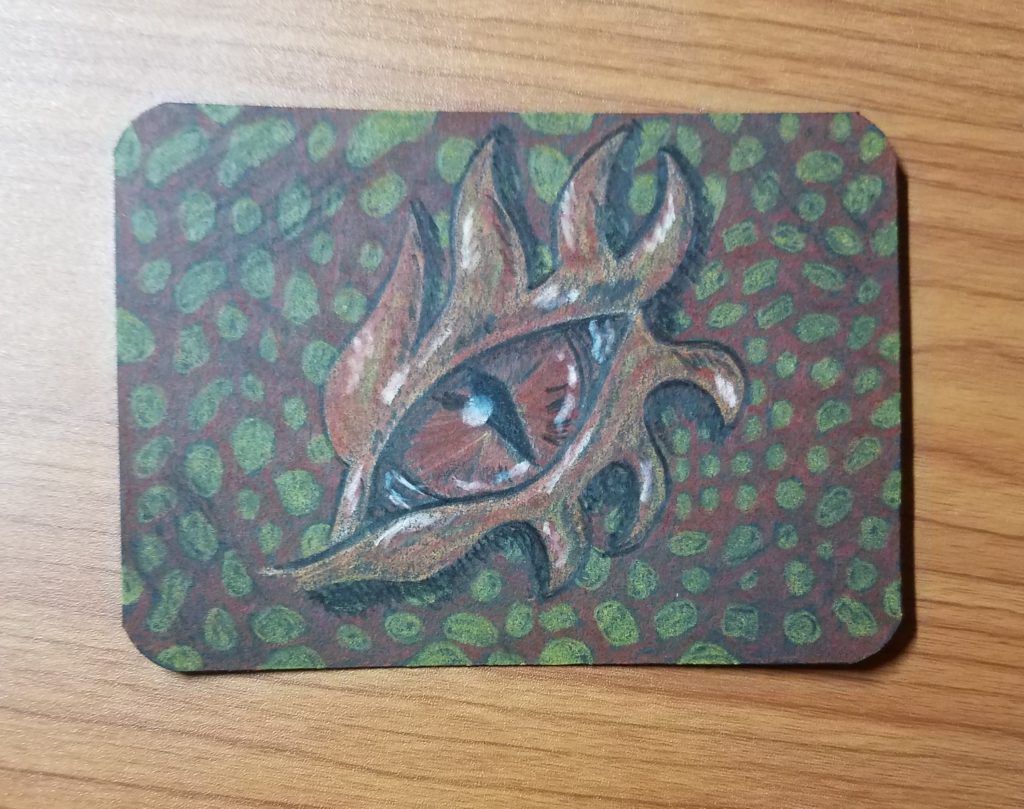
Day 5 – Ugly Dragon on Black ATC
I really struggled with this one. I wanted to do something a bit different. It ended up being a little more abstract than what I planned on. It sort of looks like an eye sitting on top of a patterned background rather than a dragon eye.
About half way through, I thought this one was going to be a complete failure. I was able to save it, sort of, but still not my favorite of the 7 for sure. The eye itself is ok, but I really don’t like how I did the scales. I think if I would have put more color variation in them, it would have looked better.
The colors I used are, Orange (pc918), Spanish Orange (pc1003), Scarlet Lake (pc923), Poppy Red (pc922). And of course, black and white.
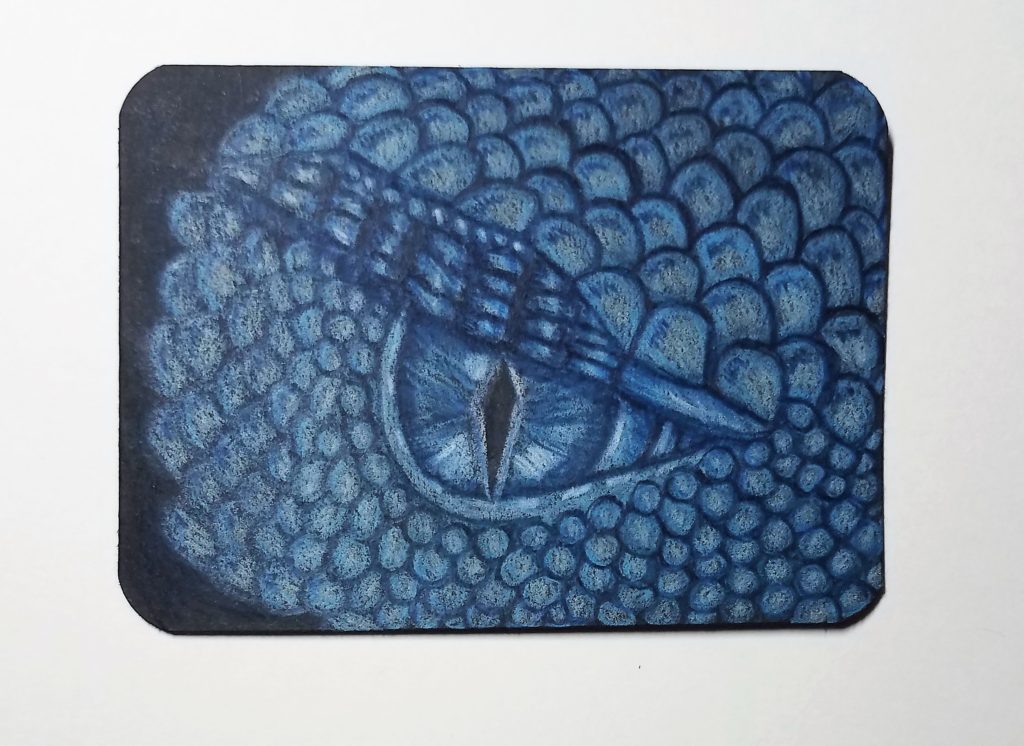
Day 6 – My Blue Dragon on Black ATC
In trying to draw something different each time, I went with a monochromatic color scheme for this one. For some reason, I don’t like the scales going all the way to all the edges so I stopped short on the left side. I’m not sure I like the eyeball and the scales being the same color. But overall, I like how this one turned out.
I wanted a softer look, so I used scalloped scales to achieve this, along with softer colors. Instead of using black to outline the scales, indigo blue was used. I wanted to try getting away from using black for the outlines. Using the blue resulted in a softer look. Colors used are, Deco Aqua (pc1016), Indigo Blue (pc901), Non-photo Blue (pc919), black, and white.
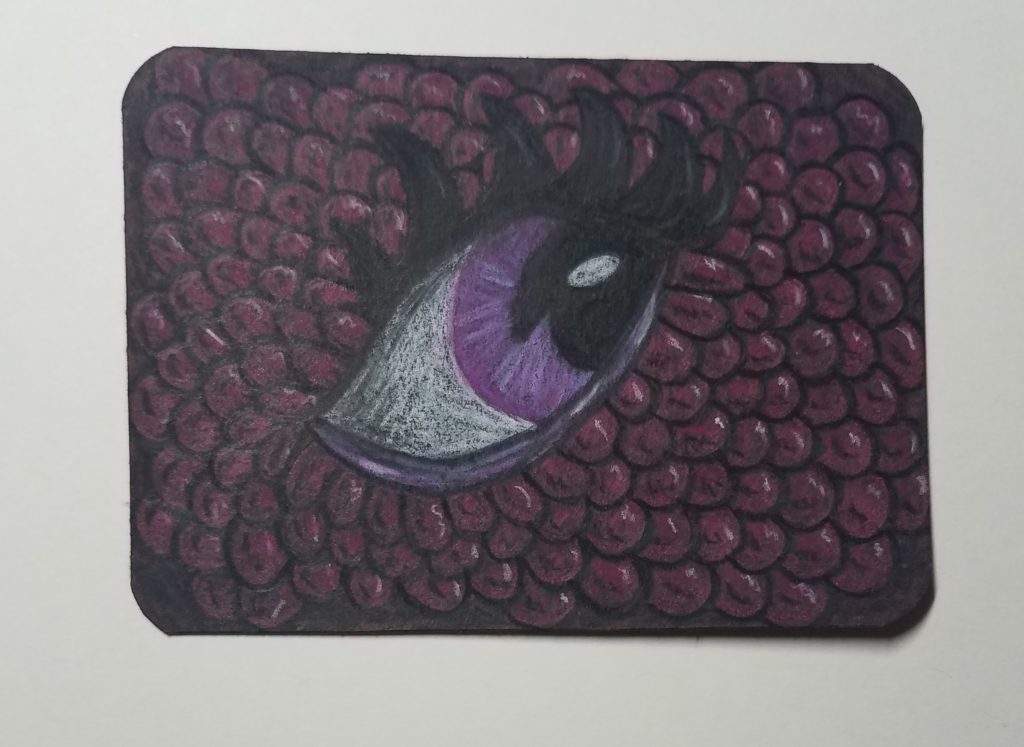
Day 7 – Pink Girly Dragon Eye on Black ATC
For the last drawing in this 7 day challenge, I wanted to try a female dragon. I used pinks and purples for the colors in both the eye and the scales. I added some big eyelashes to make her look more feminine. The scales were drawn using scallops again. I think the scallops make the dragon look friendlier than the type of scales I used for the first few drawings.
The colors used for this girl were, Rose Neon (pc1038), Magenta (pc930), Brite Purple (pc995), Black, and White.
Dragon Eye Drawing Challenge – Final Thoughts
This 7 day drawing challenge was by far my favorite to do. I still have a lot of ideas for different types of dragon eyes that I want to draw. I’ll continue working on these, and using artist trading cards for the format, so I can trade them for some cool artwork from other artists.
I learned a few things while doing this challenge. As tedious as it is, drawing each scale with its own details (highlights and shading), gives a much better result. I like how the black outline looks for the scales, but as I’ve mentioned in previous posts, I like how a thick black outline looks in drawings.
Doing an art challenge is a great way to improve your drawing skills in a short amount of time. And doing your artwork on artist trading cards is a great way to save time.
Grab your FREE Guide and do your own challenge today!
More Art Tutorials You’ll Enjoy
- Getting Started with Artist Trading Cards (ATCs)
- Creating Texture in Art
- Voodoo Doll Drawing Tutorial
- Mummy Eye Step by Step Tutorial

as someone called Ro who was looking up dragon images with the intention to make dragon ATCs I always do a double take when “artbyro” comes up! it happens quite often. I feel like you’re the alpha Ro! I love these dragon ATCs 🙂
You made my day with this comment! I’ve never been called the alpha Ro before.