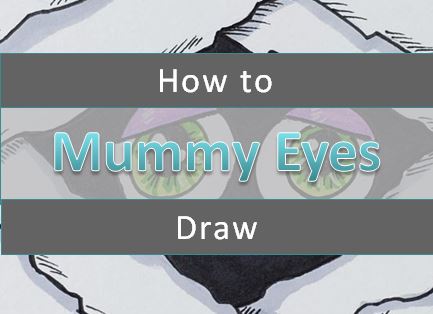
Easy Mummy Head Drawings
Learning how to draw a mummy head is really easy and fun. We’ll show you step by step how to draw, outline, and color your mummy head drawings with markers.
Art and drawing are learned skills. The more you draw the better you will get. Keep things relaxing and enjoyable so you’ll look forward to your creative time.
Let’s gather up some art supplies and get ready to have some fun learning how to draw a mummy head.
* Some of the links in this post may be affiliate links. This means I receive small commissions for purchases made through these links at no extra cost to you.
Art Supplies
- Thin black marker
- Paper or cardstock
- Markers
- Pencil
- Click Eraser, Pink Pearl Eraser
- White Gelly Roll pen
FREE Guide to improve your artwork
How to Draw a Mummy Head Step by Step
Learning how to draw a mummy head is really easy if you break things down into simple shapes and steps. Breaking complex objects down into simple shapes helps make the drawing process less intimidating. It also gets you past the fear of making the first mark on your paper.
These mummy eyes are so much fun to make and super cute. Let’s start layout out some guidelines for you drawing.
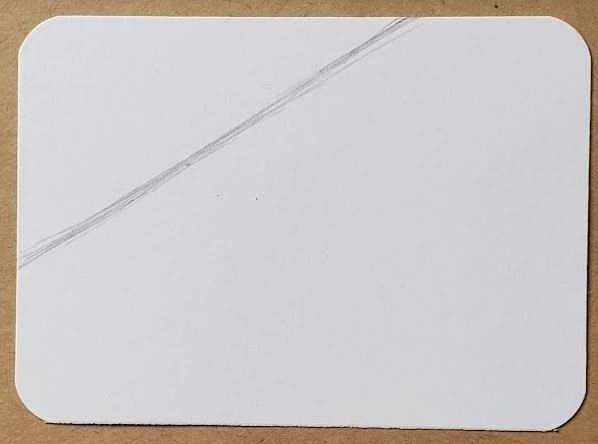
Step 1: Basic Shapes and Guidelines
We’re going to be making some mummy eyes peeking out of his bandages. So begin by drawing a line that goes from the left side of your paper to the top of your paper.
Then draw a couple more lines that go from that line to the bottom edge and right edge of your paper.
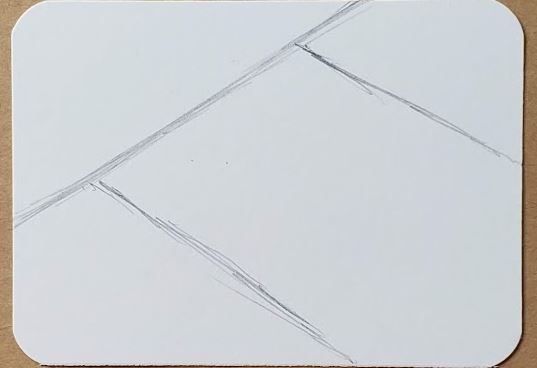
Next draw a fourth line between those last two lines that you drew on the lower right corner. Don’t worry about adding in any details yet. At this point we’re just trying to get everything laid out so we can see what things are going to look like.
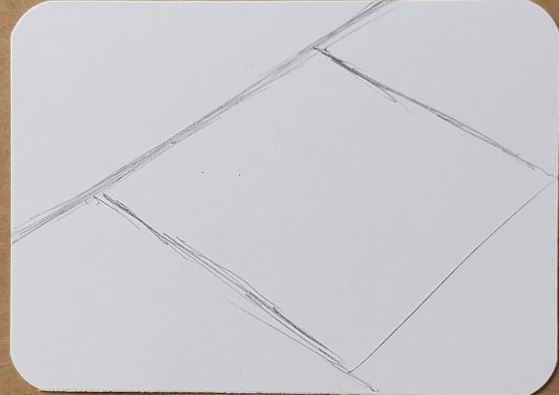
Now that you have your opening for the bandages drawn out, go ahead and draw a couple of circles for your mummy’s eyes. There are tons of different ways to draw the eyes. And they don’t have to be the same size.
Sometimes intentionally making eyes to different sizes will make your mummy drawing look cuter.
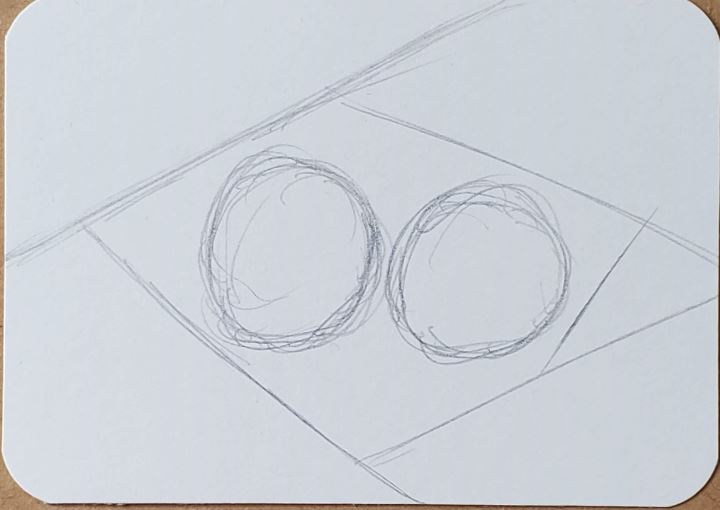
If you’re happy with the placement of everything you can start adding in more details for the eyes.
Step 2: Add Details
You can draw the eyes however you want to draw them. The reason I like using artist trading cards is because they are quicker to make so it allows you to do more drawings in less time.
Get more information in our Beginner’s Guide to Artist Trading Cards.
This will give you a bit more freedom to experiment without the extra stress of being afraid of wasting time.

Add in some additional lines for the bandages. You can draw them parallel with the other lines. Or, you can make them go in different directions.
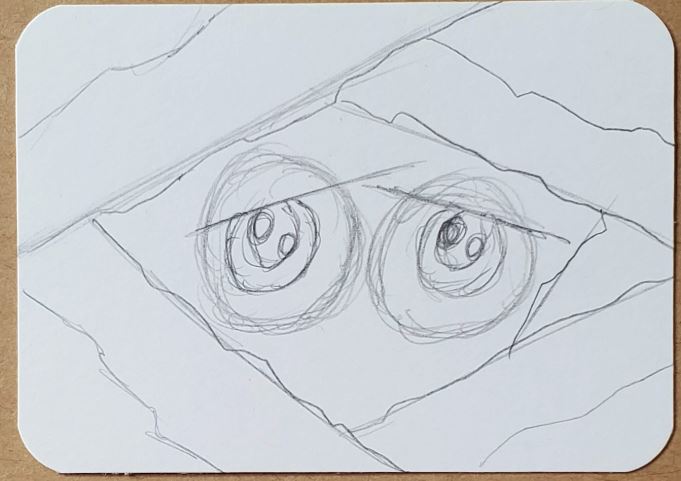
Feel free to draw any additional details you might want for your mummy drawing. Such as the highlights for the eyes. Or maybe some rips in the bandages.
Mummy Outline
Making your mummy outline is really easy. Simply trace over the pencil lines that you want to keep with a black pen or marker. You can also use a color other than black if that fits your style better.
You can make your lines all the same thickness, or you can vary your line weight. This can be done by using a brush pen or various size pens.
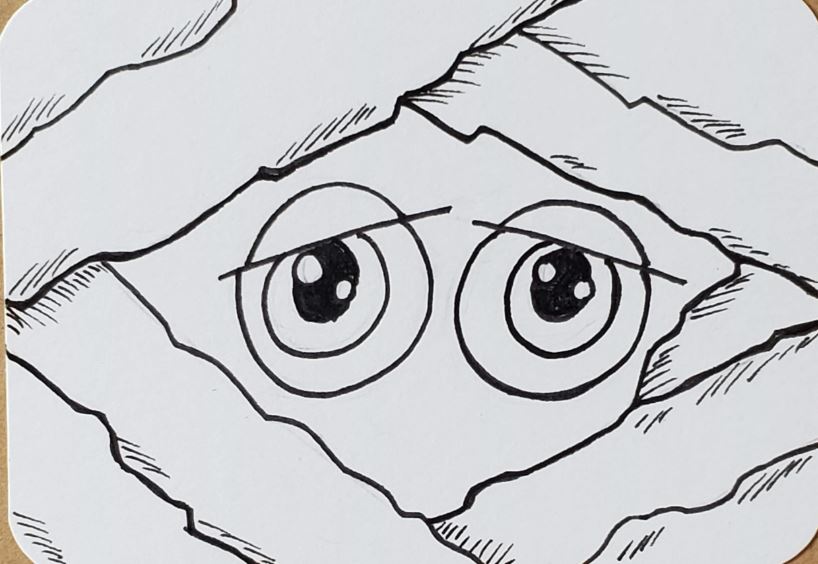
This is also a good time to add some shading with your pen. Fill in the pupils with black at this time as well. When you’re finished with your mummy outline use an eraser to clean up your drawing and remove any pencil lines.
Looking good so far. Now let’s add some color.
How to Draw a Mummy Head with Markers
Learning how to draw a mummy head with markers is really easy. And there’s only a few things you need to keep in mind when using them.
First, if you want to be able to blend your colors together you need to use alcohol based markers. Bic, Sharpie, and Copic for example. As well as many others.
Second, you need to work while the colors are still wet or they won’t mix together. This isn’t a big deal. Just make sure you work on a section at a time.
Third, you need to use colors that are similar to each other if you want to create a smooth transition of color. If your markers are too different they will leave a harder edge.
There are a lot of different ways to color your drawings. The method you use will depend on your artistic style.
I started with the eyes because I love how they look when colored. A light green and a middle green were used for this drawing. A light purple and pink were used for the eyelids.
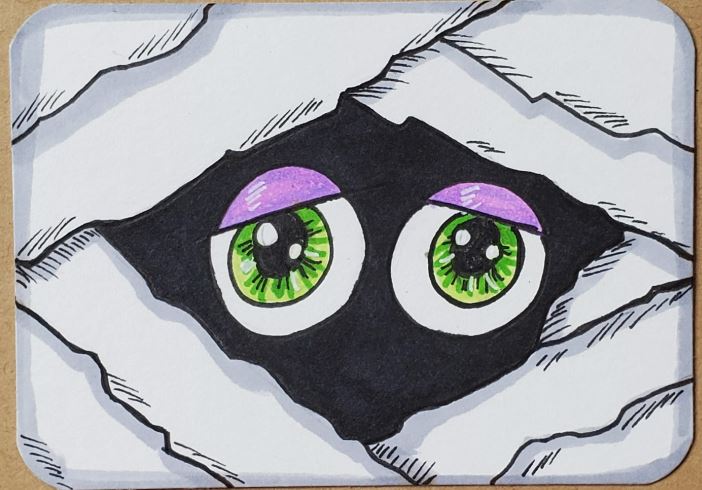
Then some light gray was used around the edges of the bandages.
A white Gelly Roll pen can be used to add highlights.
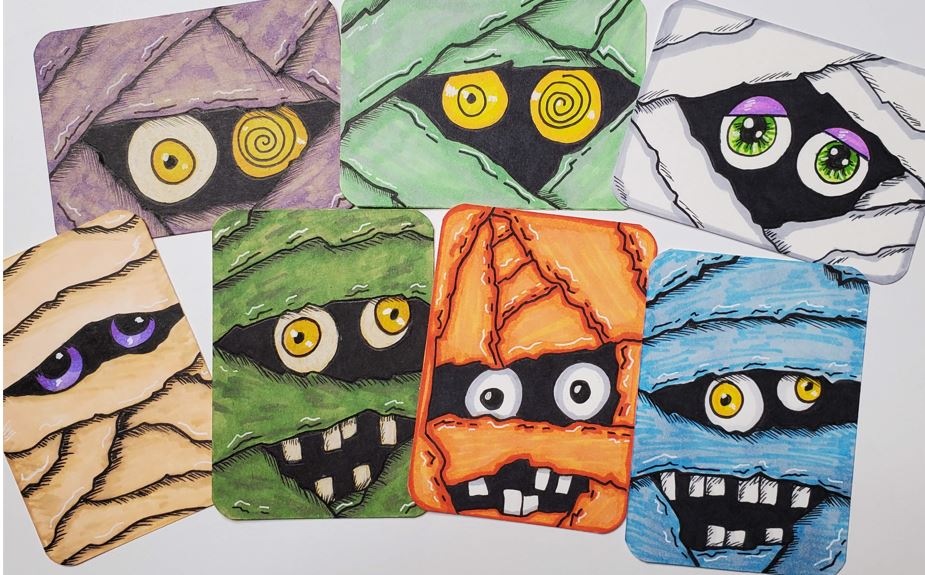
Mummy Head Drawing Ideas
When doing your mummy drawings you can try making different types of eyes. Or you can try adding in some teeth. Experiment and try some different styles, techniques, and accents.
You can also try using different colors to add some variation to your drawings. Try doing your drawings on Artist Trading Cards (ATCs) to save time.
Here’s a video I made during a Facebook Live showing how I do my mummy eye drawings.
Mummy Drawing Step by Step with Pictures
Learning how to draw is something anyone can do. It just takes practice and repetition. These mummy drawings are super cute and simple to make.
Experiment with different ideas and don’t be afraid to try new things. Drawing and creating art is supposed to be fun. So have fun and don’t stress out about how your drawings look. Just keep practicing and try to enjoy the process.
The next step is to draw several more of them and try some different styles. I always recommend doing a 7 day art challenge to help develop your style and to create original works of art.
Grab your FREE Guide to Better Art in 7 Days

why only do one step by step for the white one.
There are more tutorials on my YouTube channel. I just finished one for the green mummy eyes.