How to Draw a Witch Hat for Beginners
Learning how to draw a witch hat is easy if you break this down into simple steps. And there’s a lot of different designs you can create for your drawings and artwork.
You’ll learn step by step how to draw a witch hat. And I’ll show you several different witch hat drawing ideas to help get you started and inspired.
Let’s get started by gathering up the supplies we need for the drawing.
* Some of the links in this post may be affiliate links. This means I receive small commissions for purchases made through these links at no extra cost to you.
Art Supplies
- Thin black marker
- Paper or cardstock
- Markers
- Pencil
- Click Eraser, Pink Pearl Eraser
- White Gelly Roll pen
Beginner guide to learning to draw
How to Draw a Witch Hat Step by Step
Learning how to draw a witch hat is really easy if you break things down into simple steps and shapes. This is helpful for many reasons. First of all, it makes the drawing process less intimidating. The second thing is that you can easily take that first step and make some marks on your blank paper.
Starting with basic shapes also helps you get everything roughed out so you can see the size and placement before investing too much time. It’s a horrible feeling when you’ve put hours into a drawing and get almost finished when you realize something isn’t right.
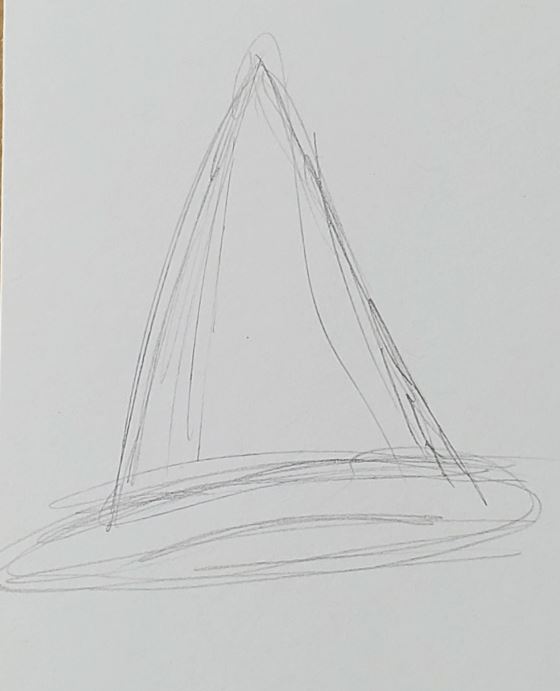
Step 1: Basic Shapes
So for our witch hat drawing the first step is to draw a triangle with a foreshortened (squished) circle on the bottom. Even if you know you want the top of your hat to bend to the side, you can sill draw a regular triangle.
This first step is to help get some basic ideas on paper. It gives you a starting point.
Step 2: Add Details
Then start sketching out the shape of your witch hat. You can make it all one continuous line. Or break it up by adding in some folds and bends like I did here.
There are a lot of different ways to draw each section of your witch hat. Don’t feel like you’re limited in any way by the basic shapes you drew in step 1. They are only there to serve as some basic guidelines.
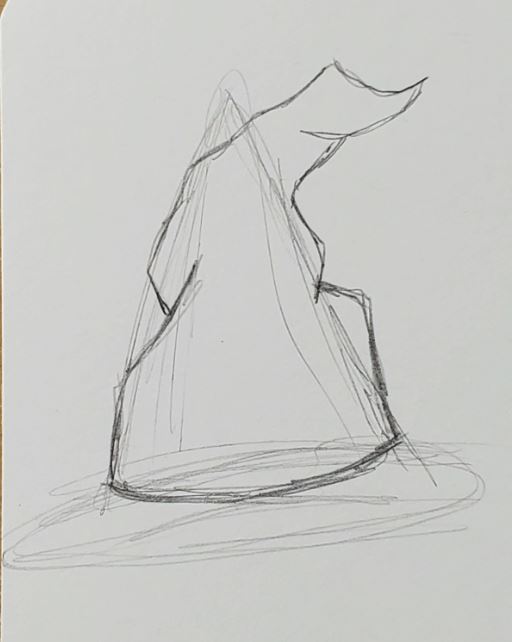
Next, draw the bottom rim area of the hat. There are a lot of options on how to draw this part as well. I think it looks better to add some curves to the lines. You can make them more or less curved. Just do whatever you think looks good and fits with your artistic style.
You could also add some rips and tears to your drawing if you wanted it to look older or damaged. As I mentioned earlier there are a lot of different ways you could draw your witch hats.
Add a band around the base of the hat as well. Make sure this line is curved and not straight. Drawing it straight won’t look right. You can add a buckle to the band if you want.
Keep working on your sketch until you’re satisfied with how it looks.
Witch Hat Outline
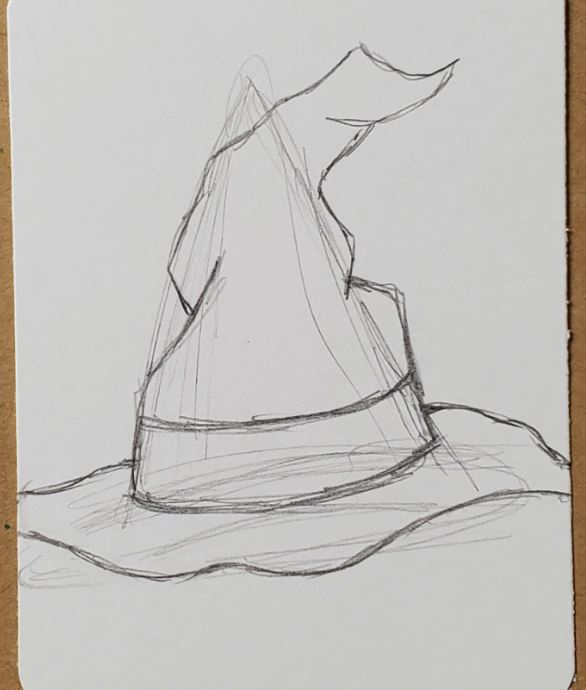
Step 3: Make Outline
Making a witch hat outline is really easy. Simply trace over the pencil lines you want to keep with a black pen or marker.

Of course you don’t have to use black. You could try a different color and see how that looks.
You can also change the way your finished drawing looks by changing the thickness of your lines. A wider outline will give a different look than a thin outline.
Or you could go with no outline at all. How you finish your witch hat drawing is entirely up to you.
How to Draw a Witch Hat with Markers
Step 4: Add Color
Learning how to draw a witch hat with markers is really easy. And there’s only a few things you need to keep in mind.
First, if you want to be able to blend your colors together you need to use alcohol based markers. Bic, Sharpie, and Copic for example. As well as many others.
Second, you need to work while the colors are still wet or they won’t mix together. This isn’t a big deal. Just make sure you work on a section at a time.
Third, you need to use colors that are similar to each other if you want to create a smooth transition of color. If your markers are too different they will leave a harder edge.

Regardless of which medium you use, you’ll want to use your colors to add some depth. This can be done by using more than one color. For example, if you want to make your hat purple you can use two or three different purples (light, mid, and dark).
Or, you could use purple and blue. Experiment and try some different color combinations and see which ones you like the best.
Witch Hat Drawing Ideas
If you want to get good at drawing, creativity, and developing your own style, you’ll need to practice as often as possible. Everyday is the best way to improve. Even if it’s only for 5 or 10 minutes a day.
You’d be amazed by how much you can improve over time in only a few minutes a day. Just stay consistent.
I love doing 7 day drawing challenges on artist trading cards. It’s a really great way to improve your art skills. And it’s what I recommend to all of my students.
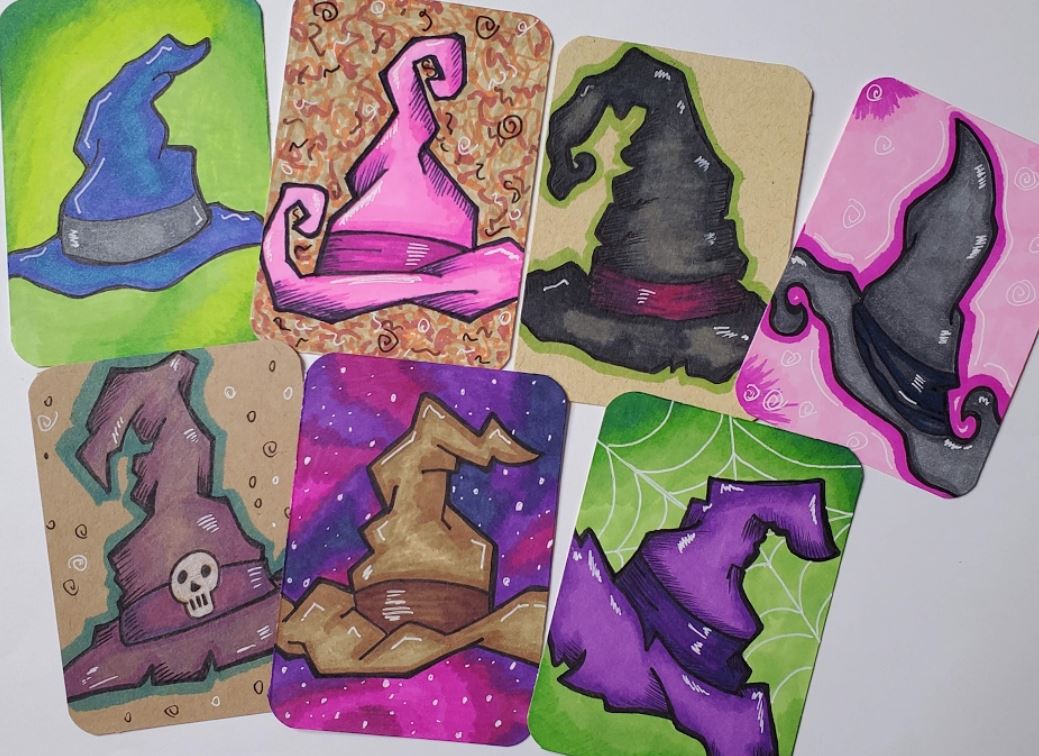
How to Draw a Witch Hat and 7 Drawing Ideas
As you can see, learning how to draw a witch hat is pretty easy. But there are tons of different ways you could make them. Add in some cool backgrounds, and you’ve got yourself some interesting, yet simple, drawings.
Drawing everyday will help you improve and you’ll start seeing big results in no time. If you really want to get good at drawing witch hats, do a 7 Day Drawing Challenge and see where your creativity leads you.
Grab your FREE Guide to Better Art in 7 Days
