
Ribbon Lettering Name
Drawing ribbon names are so easy and so much fun. Today you’re going to learn a technique that makes it super simple to draw the ribbons and make them look 3D. This is a drawing tutorial that all skill levels can follow along with. And as you develop your artistic skills you can improve your 3d effect for your ribbon names.
This is a great way to practice adding value to a drawing. You can work on highlights, shadows, and mid-tones. The lesson was originally done using a graphite pencil, but any medium could be used to complete your drawing.
* Some of the links in this post may be affiliate links. This means I receive small commissions for purchases made through these links at no extra cost to you.
Art Supplies
- Paper
- Two pencils (regular no. 2)
- Electric pencil sharpener
- Graphite drawing pencils (6B optional)
- Tape or rubber bands
- Eraser
- Blending stump (optional)
- Kneaded eraser (optional)
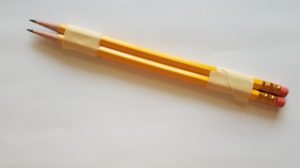
Preparing the Pencils
The first thing you need to do is prepare your pencils. To do this, you need two pencils that are the same, or very similar. Next you will need to sharpen both pencils to the same point. I use an electric pencil sharpener which has an automatic stop function on it.
The last thing you need to do is tape the pencils together. When you tape the pencils together, make sure the points are lined up with one another. I stood my pencils up on their points and taped them while they were upright.
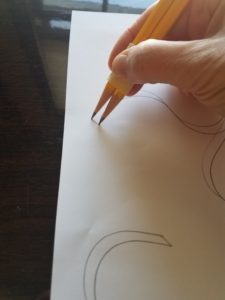
How to Hold the Pencils
The angle at which you hold your pencils will determine how your lettering will look. The most important part of this lesson is to hold your pencil at a consistent angle throughout the entire drawing.
Before beginning your drawing, make some practice letters on a piece of scrap paper first. Holding the pencil at the same angle will take a little bit of practice. Make flowing strokes by moving your pencils from your shoulder, not your wrist.
How to Draw a Ribbon Name – Step by Step
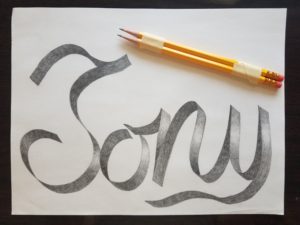
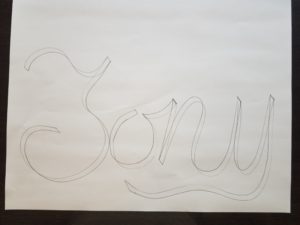
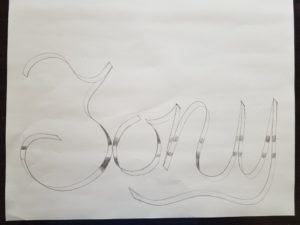
Before you can begin, you need to decide what name, or word, you are going to draw. I chose the name Tony, my youngest sons name. You also need to decide how you want the size of your letters to look. I wanted the letter T to be larger than the other letters. To make the name more interesting, I knew I wanted the Y to wrap down along the bottom of the name.
However you decide to do your drawing, be sure to plan it out before you begin. Once you start drawing your letters, you need to keep moving in a slow, flowing movement. Remember to keep your pencils at exactly the same angle throughout the drawing. Since my T is not connected to the other letters, I am able to pause for a moment after drawing it.

Ribbon Name Drawing
If you stopped after drawing your first letter, you need to make sure you put your pencils back to the same angle you had them at for the first letter. Know where you’re going to next, before you get there. You want to avoid stopping and starting.
If your pencils miss any areas while you’re drawing your letters, keep going. Don’t stop or you won’t get a nice flow of your letters. You can go back and fix the letters later on.
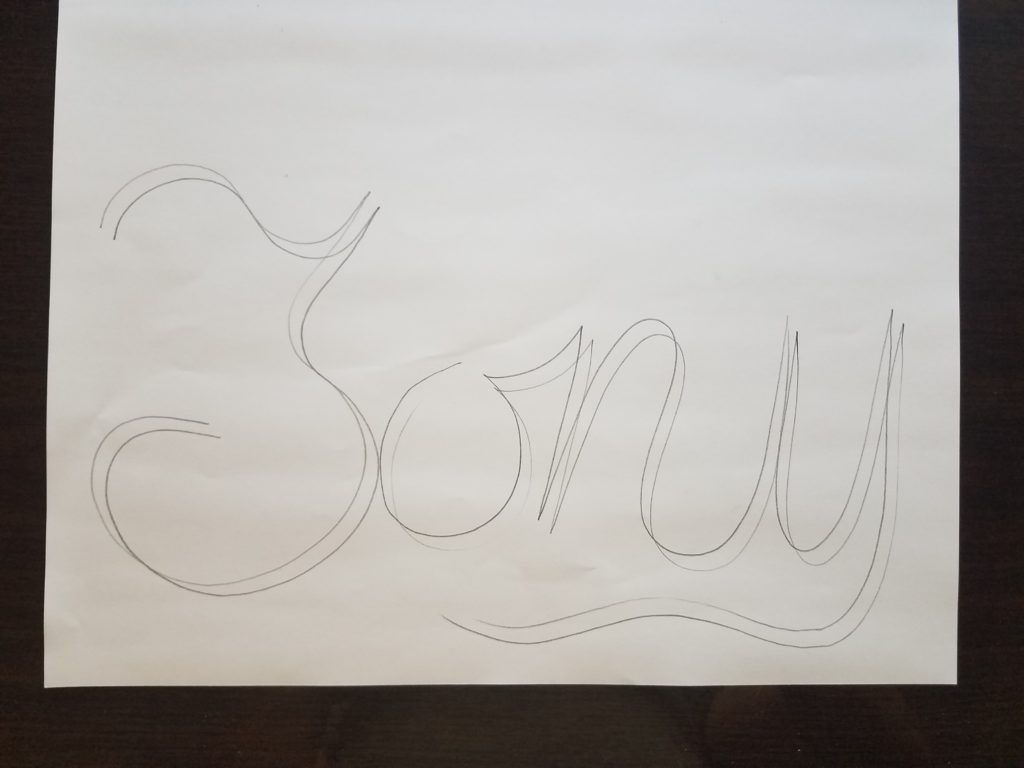
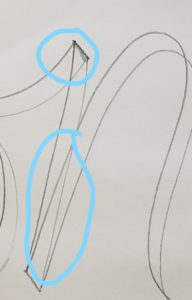
Connect the Open Ends
Connect all of the open ends by drawing an angled line between the two ends. Be sure to keep the angles the same throughout your drawing.
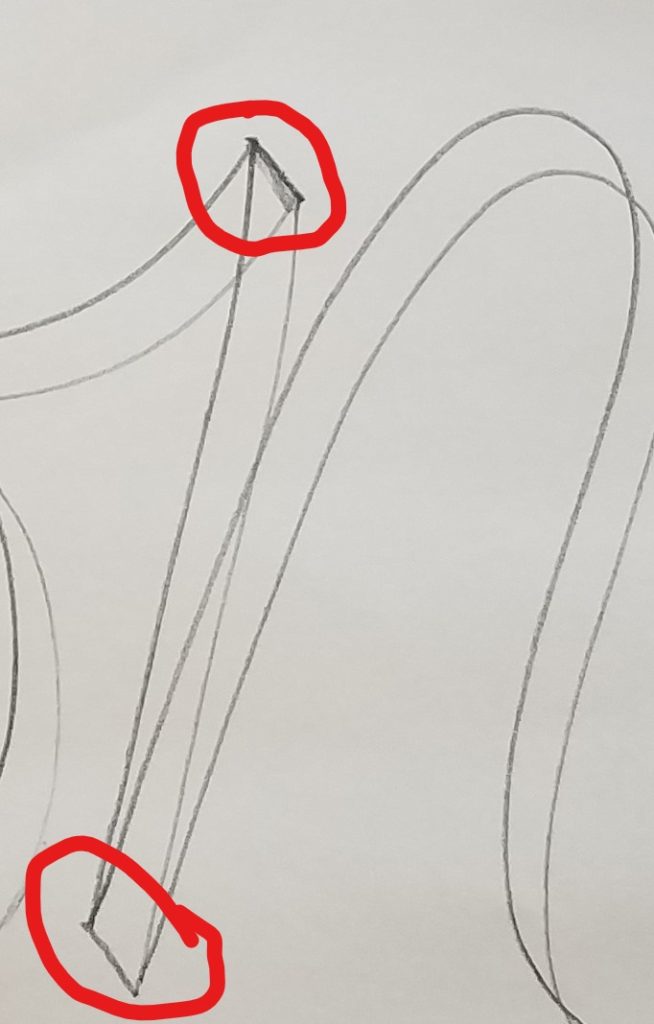
If some of your lines fall short, you will need to add some extra length to the line. Darken up any lines that are difficult to see or areas that got missed.
Cleaning Up the Drawing
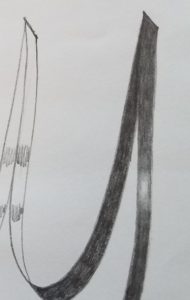
The next step is to go in and clean up any extra lines with an eraser. When doing this, you need to determine which part of the ribbon is in front, and which part is behind.
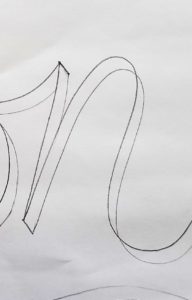
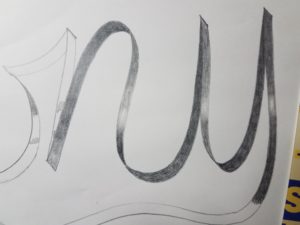
As you can see here, I’ve made the upward stroke of the N in front of the straight downward stroke. And the straight downward stroke of the N is in front of the stroke that connects the O to the N. Which lines you erase should be deliberate. If you erase the wrong lines, your letters will look twisted, and unnatural.
Adding Highlights
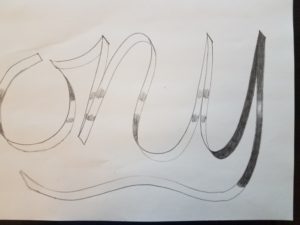
Now it’s time to start adding some value to the letters. In the photo below, I marked out where the highlights are going to go. Keep your highlights consistent across each letter.
How to Shade Your Ribbon Name
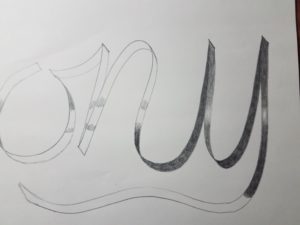
The final step is to add in the shadows and mid-tones of the letters. The darkest areas will be the shadows between the ribbons where light wouldn’t reach.
Take a look at How to Draw a Value Scale if you need some help with creating different values.
The highlights that were roughed in during the previous step were drawn in only as a guide. Some of them will get covered up, like it did on the Y.
Continue working your way around your letters. I find it easier to fill in the darkest areas first and then do the mid-tones after. When working with graphite it’s important to make sure you are not smudging your drawing.
The best way to prevent ending up with a sloppy looking drawing is to keep a piece of scrap paper underneath your hand. Rest your hand on the paper while doing your shading rather than on the drawing itself.
If you are having trouble getting smooth shading, use a blending stump to get a smoother tone. The blending stump can be used to add value to the lighter areas as well.
For areas that are too dark, use a kneaded eraser to lift some of the graphite from the paper. To do this, simply push the kneaded eraser onto the graphite and lift back up. Keep doing this until you have reached the value you wanted.
To get your shadows darker, try using a 6B pencil. It’s always best to build up your dark areas slowly, so don’t worry about getting your shadows as dark as you want them with the first layer. Continue working back and forth between your shadows and mid-tones until you are happy with your values.
Ribbon Name Drawing Tutorial – Final Thoughts
Congratulations on making your 3D ribbon name. Keep practicing and working on developing your art skills, and you’ll continue to see improvements. Drawing and art are skills that anyone can learn. Make sure you’re having fun and enjoying the process.
Grab our FREE Graffiti Guide and start drawing amazing name art
