3D Stairs Optical Art
This 3D stairs drawing is a really cool optical illusion and is actually very easy to draw. Op art is among our most popular content. And this drawing is one of the most impressive illusions we’ve featured so far.
The fun thing about creating optical art drawings and illusions is that they aren’t nearly as difficult to draw as they look like they should be.
By following a few simple concepts, you can draw a convincing illusion and learn how to draw 3D stairs in no time.
What is Anamorphic Art
Anamorphosis is a distorted perspective that requires the viewer to look at the artwork from a specific vantage point. The two main types of anamorphic art are perspective and mirror.
Perspective anamorphosis are the works of art that require the viewer to look at the drawing from a certain angle. Today this is most commonly seen in 3D street art. These are the chalk drawing that are done on sidewalks and roads that often give the illusion that there is a swimming pool in the middle of the street, for example.
Mirror anamorphosis requires a curved mirror to view the artwork without distortion. With this type of art, the image is drawn using angles and appears distorted on the paper. However, when a curved mirror is placed in front of the drawing, the image on the mirror is no longer distorted and the image appears.
Both types of anamorphic art have been around for centuries. These techniques appear as early as in the prehistoric cave paintings of Lascaux. And have been seen in various ways throughout history.
* Some of the links in this post may be affiliate links. This means I receive small commissions for purchases made through these links at no extra cost to you.
Art Supplies
- Paper or cardstock
- Pencil
- Ruler
- Black marker
Get Your FREE Op Art Challenge Guide
How to Draw 3D Stairs
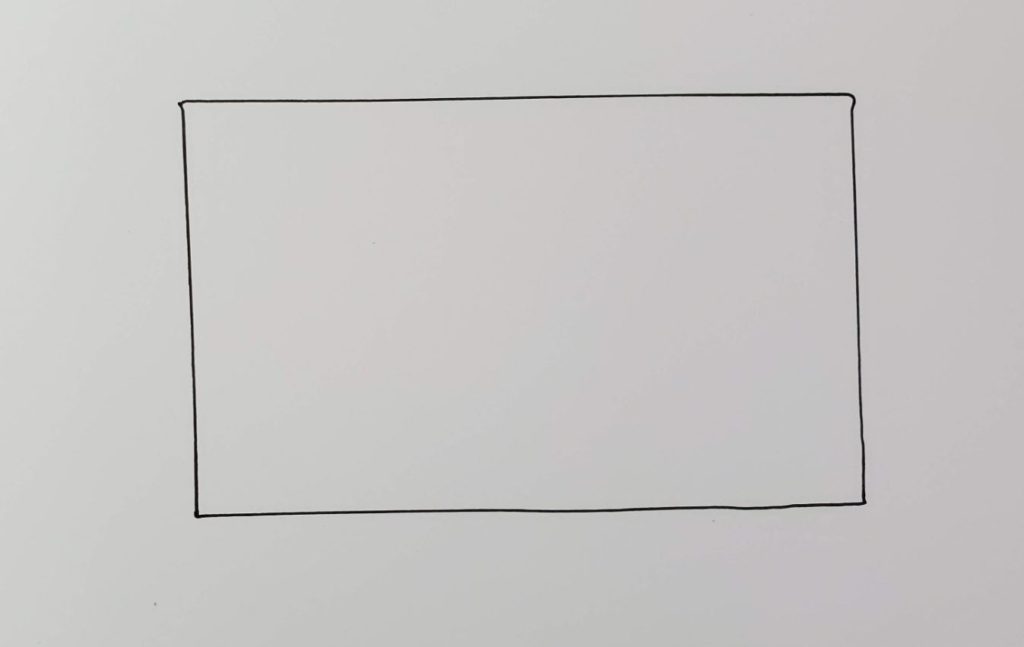
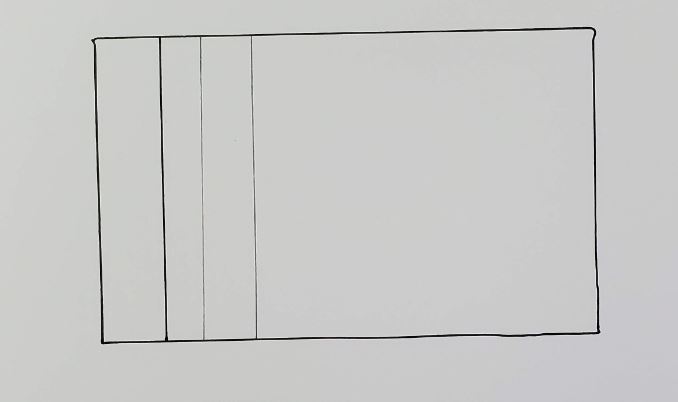
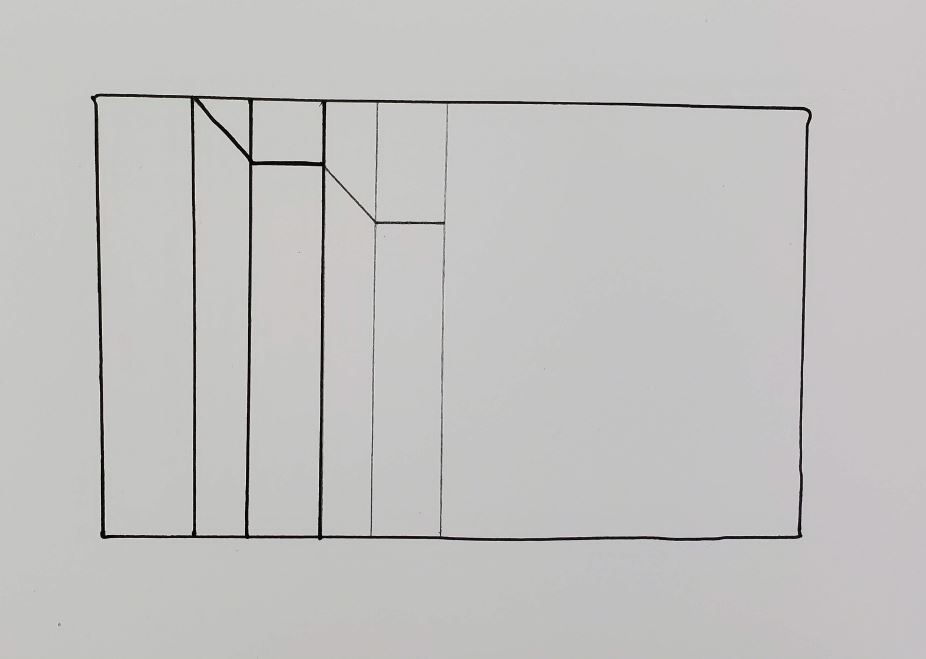
Start by drawing a rectangle. I’m using a marker so it’s easier for you to see, but a pencil would probably be a better choice for this type of op art drawing.
Next, draw a line across the width of your rectangle. This will be the top (horizontal) part of your stair where you would step.
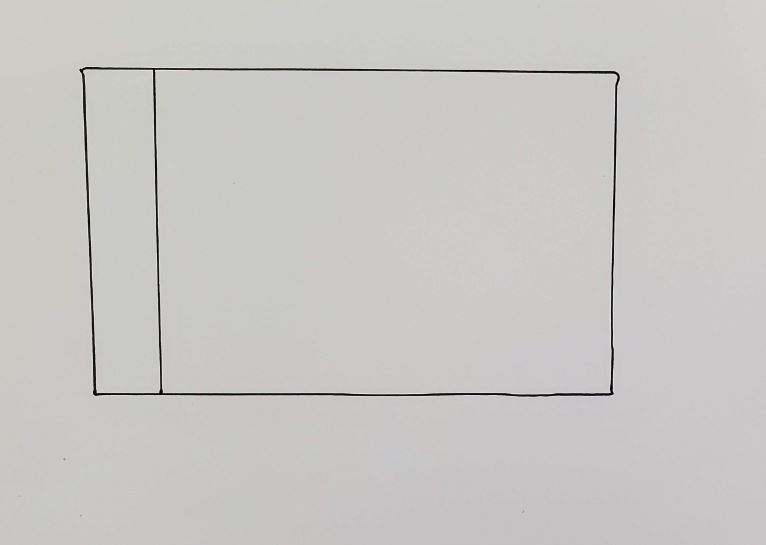
Draw another line next to the first line that you drew. This line needs to be slightly closer than where you drew the previous line. This gap represents the toe board (vertical) area of your stairs.
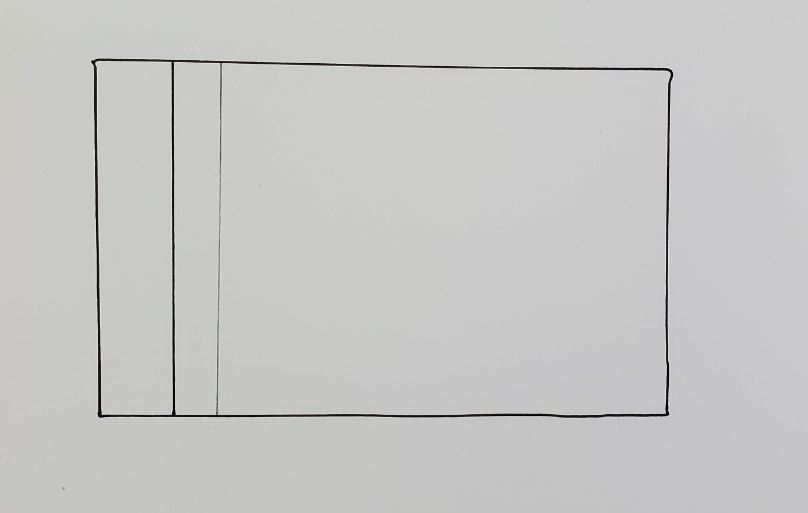
Now draw another line that is parallel to those lines. The space between the lines should be the same as the first one. This is your next step (horizontal surface) for your stairs.
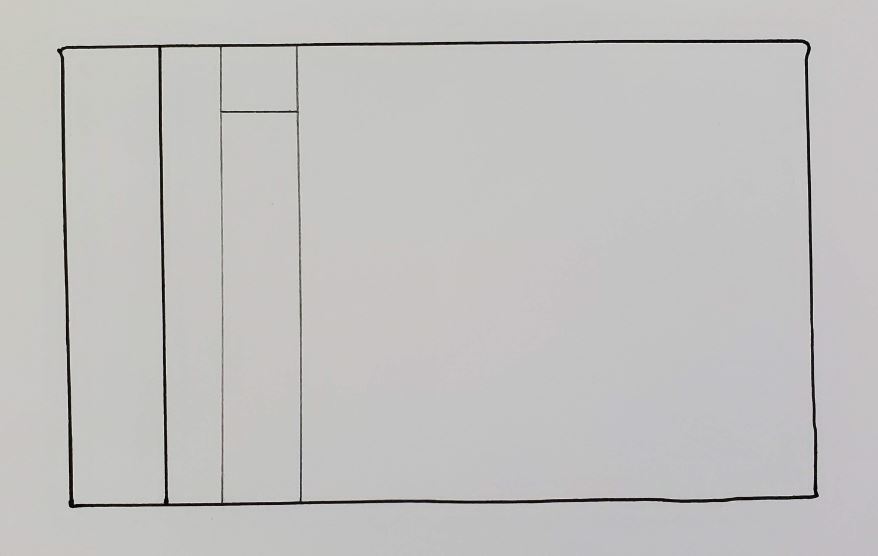
Come in from the edge of your rectangle and draw a line that is parallel to the length of your rectangle. This is where that step is going to end.
Next, draw a diagonal line from the edge of the step to the edge of your top step.
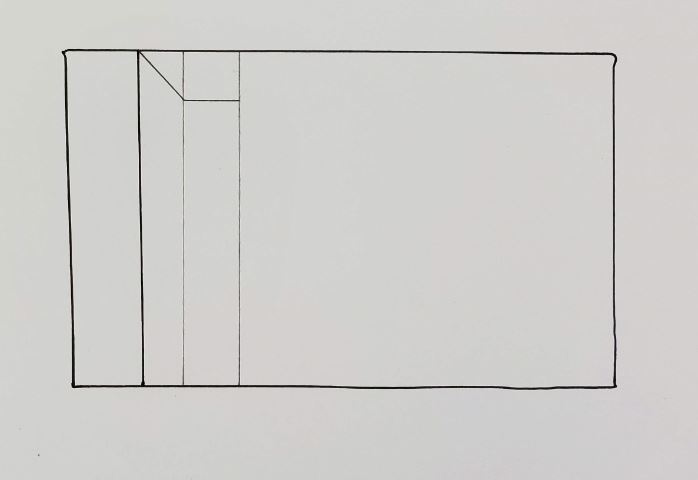
All of your other diagonal lines need to be parallel to this one.
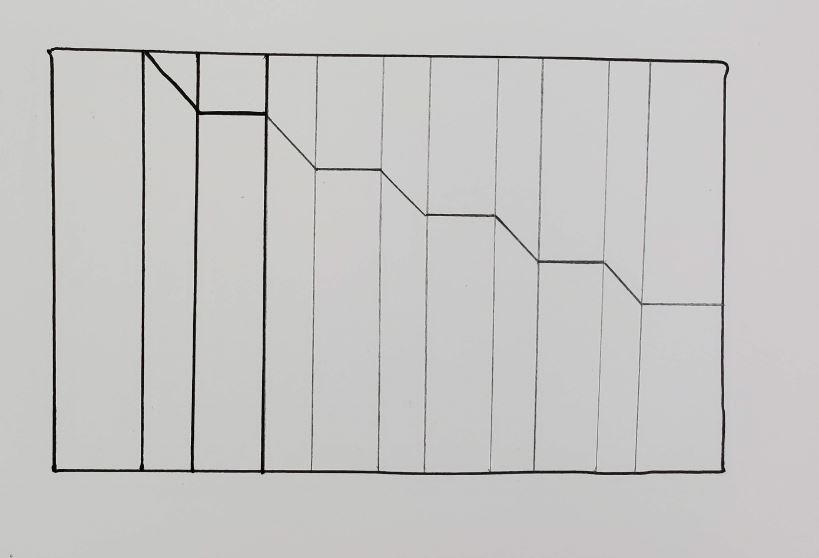
3D Stairs Optical Illusion
Draw additional sets of steps by drawing pairs of wider and narrower gaps. Use your ruler or straightedge and line it up with your first diagonal line. Then slide it down to where your next set of steps are.
These are the critical steps in the process to drawing your optical illusion. Your angles need to be the same on each set of steps. And you need to have a pattern of wider and narrower areas.
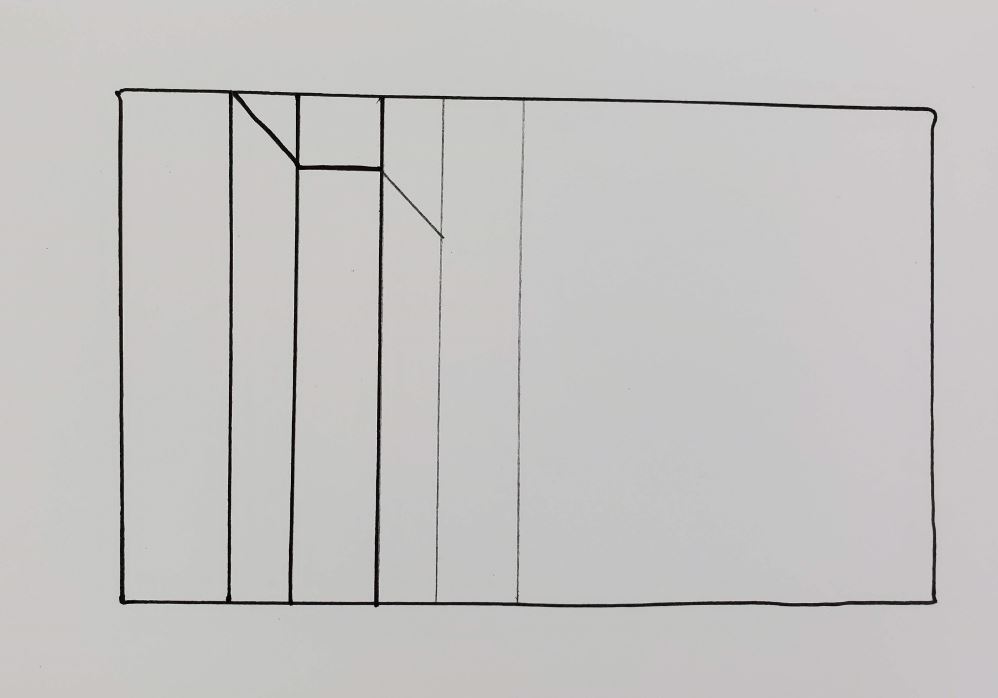
Each set will have a straight line for the edge of the top of the step. And a diagonal line for the edge of the toe board.
Use your additional diagonal lines to determine where your next step will end. Which will tell you where your next straight line should be drawn.
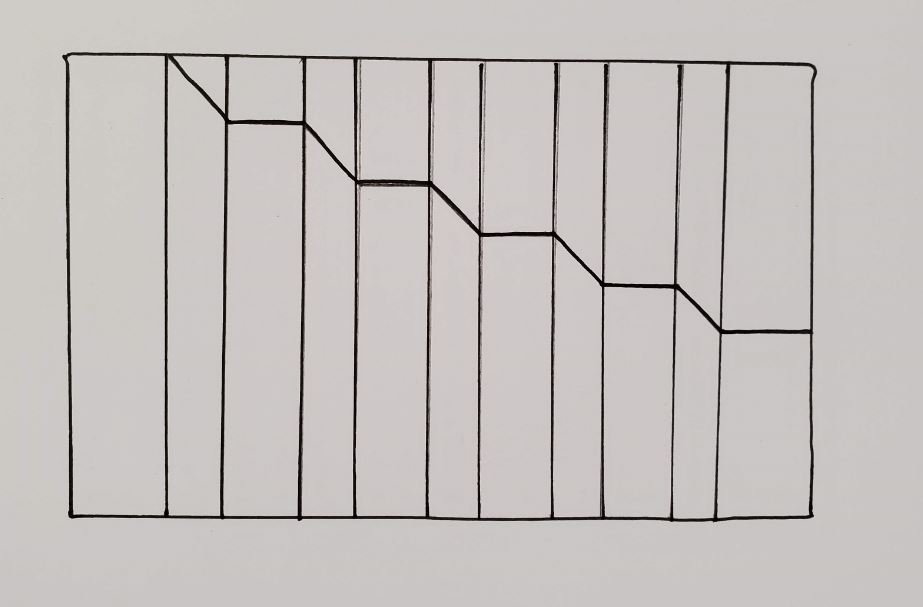
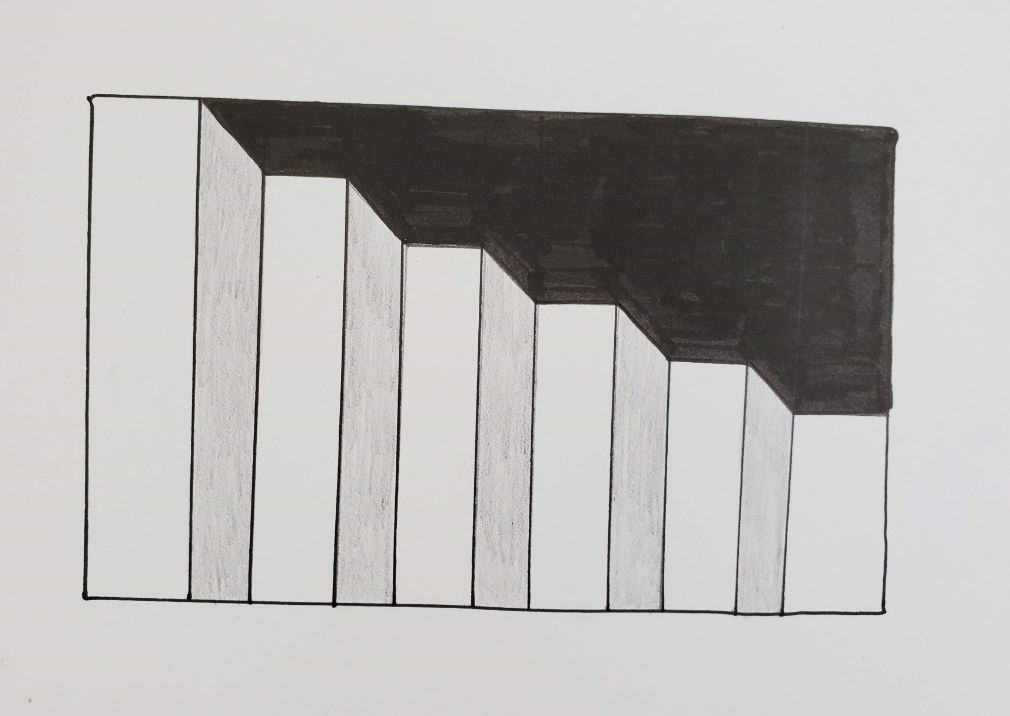
Continue working in this pattern until your rectangle is filled. Notice how to space between the steps and the edge of your rectangle gets wider as it moves towards the bottom.
If you’re drawing your 3D stairs with a pencil, trace over all of your lines with a black marker or pen.
Fill in the area outside the steps with a black marker.
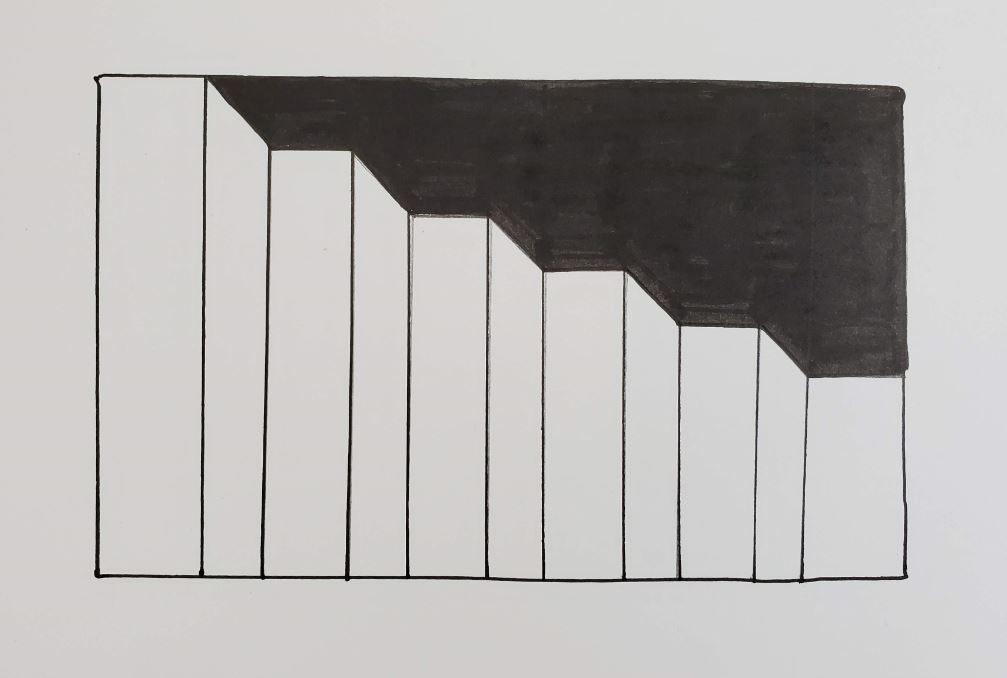
Use a pencil to shade in the toe board areas of your 3D stairs. This will be every-other section, starting with the second section.
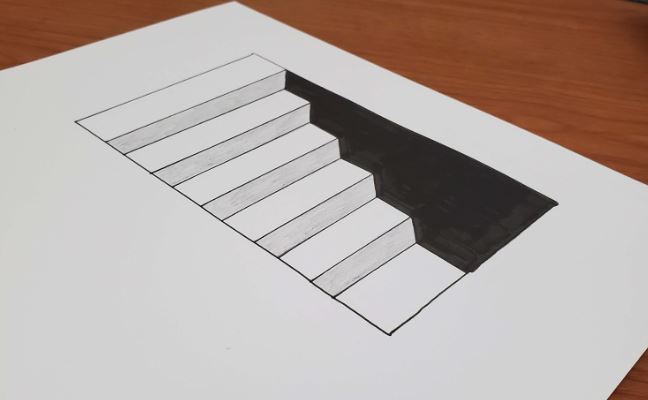
You have to turn your drawing so you are viewing it at the correct angle to be able to see the optical illusion. When you get your paper turned the right way, it will appear that your steps are going into a hole.
Final Thoughts and Next Steps
Learning how to draw 3D steps is easy and fun. And creating optical art drawings can be extremely rewarding. So what’s the next step? Practice creating optical illusions and art.
Art and drawing are skills that anyone is capable of learning. It just takes time and practice. The more you draw the better you will get. Even if it’s only for a few minutes each day, if you do it consistently.
Have fun and enjoy your creative time. And try working it into your daily schedule.
Grab your FREE Op Art Challenge Guide

i love this t is perfect
Thank you! I’m glad you like it.
Thank you , I cannot get it right.anne
I’m working on putting a video together to help if you’re struggling.
I love this drawing! It took a few tries, but it worked! I am going to make a big one on waterproof paper and put it on the bottom of my family’s pool. I think it might fool my brother!
I’m glad you liked the tutorial and could follow along with it! Good luck pranking your brother.
yup bro
Thanks for checking out the tutorial
Mine came out really good.She explains it perfectly
I’m so glad you were able to follow along!