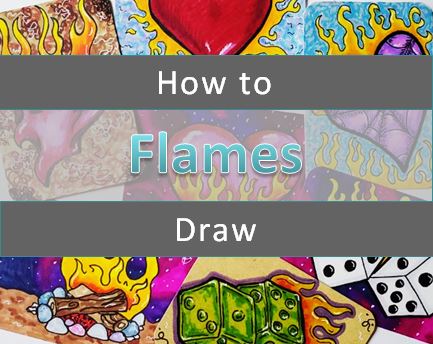
Flame Drawing Tutorial for Beginners
Learning how to draw flames is pretty easy if you follow some basic principles. We’ll show you step by step how to create a simple flames drawing that you can use to accent your artwork.
There are many different uses for drawing flames. You can add them to the side of a car. Or maybe make some flaming letters.
Maybe you want to draw a campfire or a lit fireplace. All of these things will be simple once you learn my easy way to draw flames.
This is a drawing I did for one of my students where flames were added to the background. And there’s a lot of different ways you could incorporate flames to your drawings.
Let’s grab some supplies and get ready to make some easy to draw flames.
* Some of the links in this post may be affiliate links. This means I receive small commissions for purchases made through these links at no extra cost to you.
Art Supplies
- Paper or cardstock
- Pencil
- Eraser
- Black outliner
- Markers (Bic)
Flame Drawing Basics
When drawing your flames, you want to be sure you follow some basic techniques. This is the key to drawing good flames.
You want the tips of your flames to be narrow and pointed at the top, and wider at the bottom.
A single flame, like what you would see on a candle, is the shape of a tear drop. This is a really easy way to draw flames.
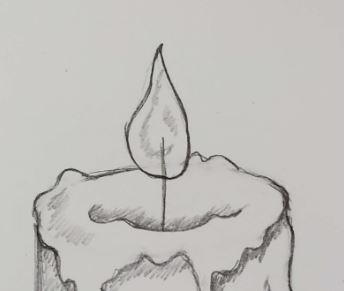
But today we are going to make our flames more complex and a bit fancier than a candle flame. If you want to learn How to Draw a Candle, check out this tutorial.
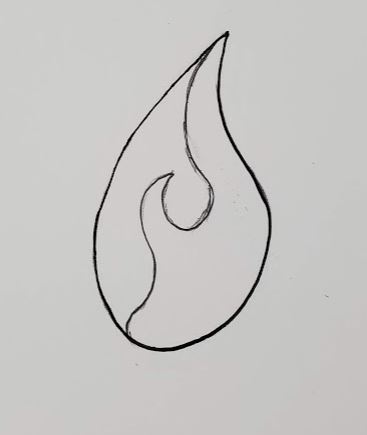
You could still think of your flame shape as being a tear drop, but we are going to add some extra curves to it as well. And then we’ll repeat that process with some variation to make our flame drawings.
How to Draw Flames – Step by Step Tutorial
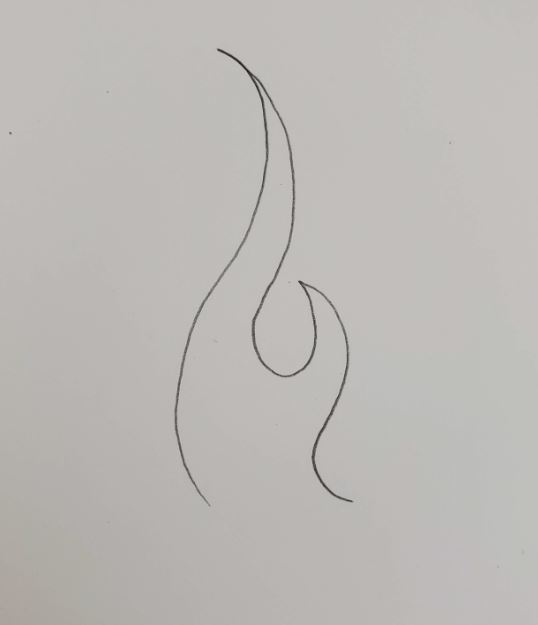
To make a simple sketch of flames, start with your basic flame shape. You can draw a tear drop to help you get started if you need to.
Draw two curved shapes. One longer, and one shorter. They should both be narrow and pointed at the top. And rounded and wider at the bottom. If you wanted a simple way to draw flames, you could just repeat this pattern.
Draw the same type of lines next to that flame, but bring it down a little lower on the paper. You want to keep the same type of lines with your flames, but you can vary the way your flames curve.
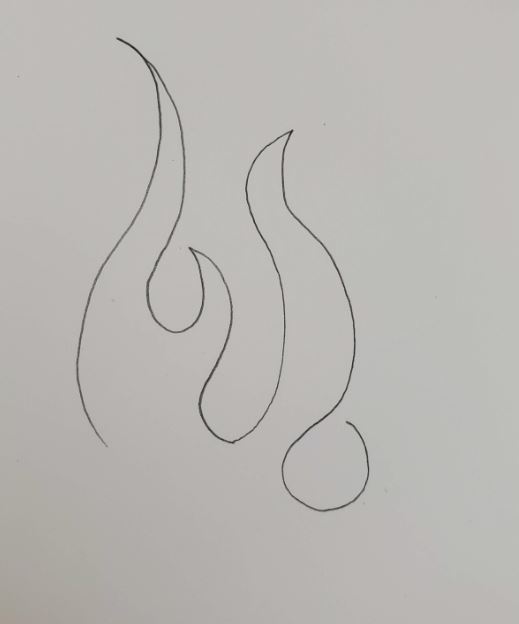
Repeat this process a third time, again making your flame slightly smaller than the one next to it. Notice how the overall shapes are still tear dropped, both for each individual section of the flame and the overall combined shape.
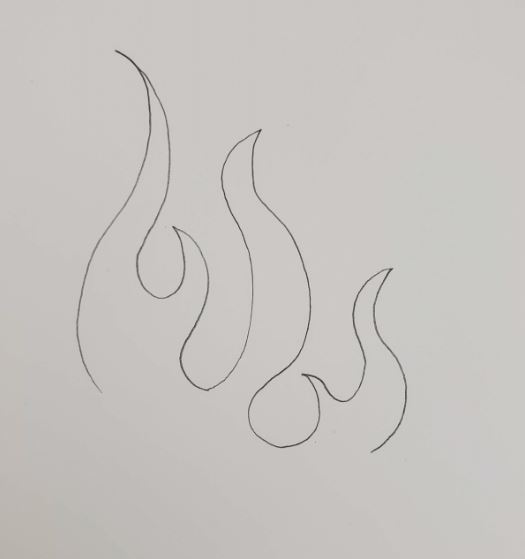
Do the same thing to the left of your original flame, keeping in mind there’s no need for perfect symmetry. However, you do want your flames to look balanced. You will notice if it feels off when looking at it.
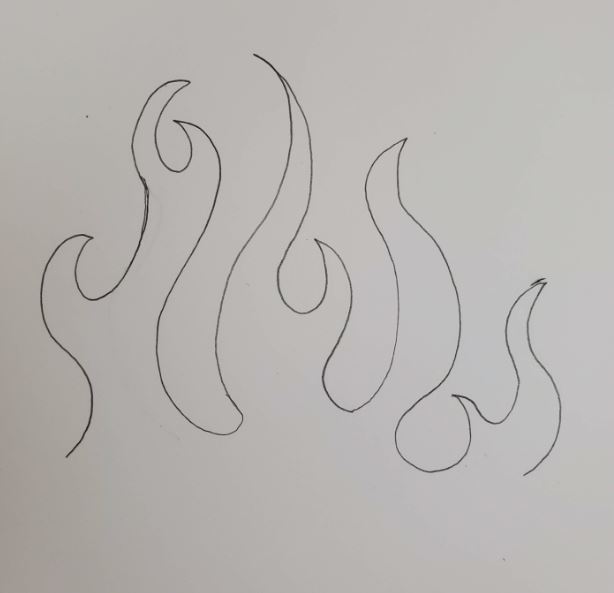
Add in some small pieces of leaping flame. These can be randomly placed, and of no particular shape. You do want to keep them pointed at the ends though, and used the same type of curved lines.
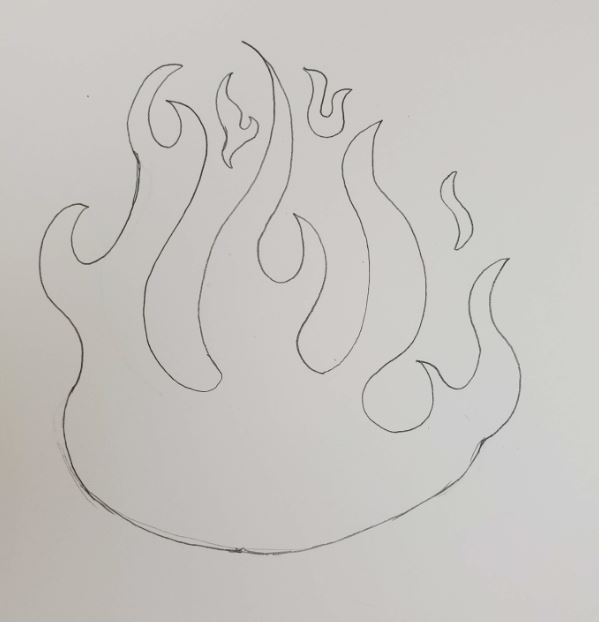
Flame Outline
After you have finished making your sketch of flames, you’re ready to move onto adding some color. There are many choices when it comes to coloring your flames. The two most popular are markers or colored pencils.
For this lesson I’ll be showing you how to use Bic markers to color your flame drawings. Any brand markers will work for your drawings. But if you want to blend your colors together, make sure you’re using alcohol based markers.
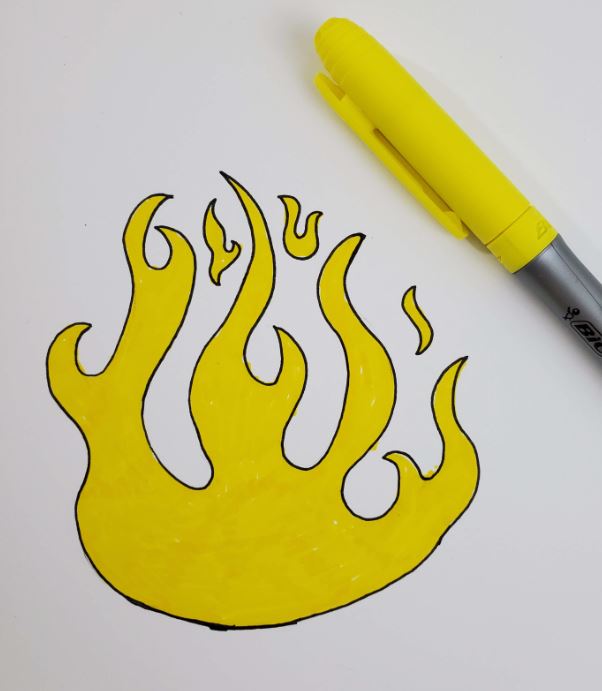
Begin by tracing over your pencil lines with a black outlining marker or pen. This step is optional and depends on your artistic style.

How to Color Flames with Markers
Next, fill in the entire flame with yellow. Optionally, you can fill in only the lower areas. But my preference is to fill it all in to make it easier to blend colors.
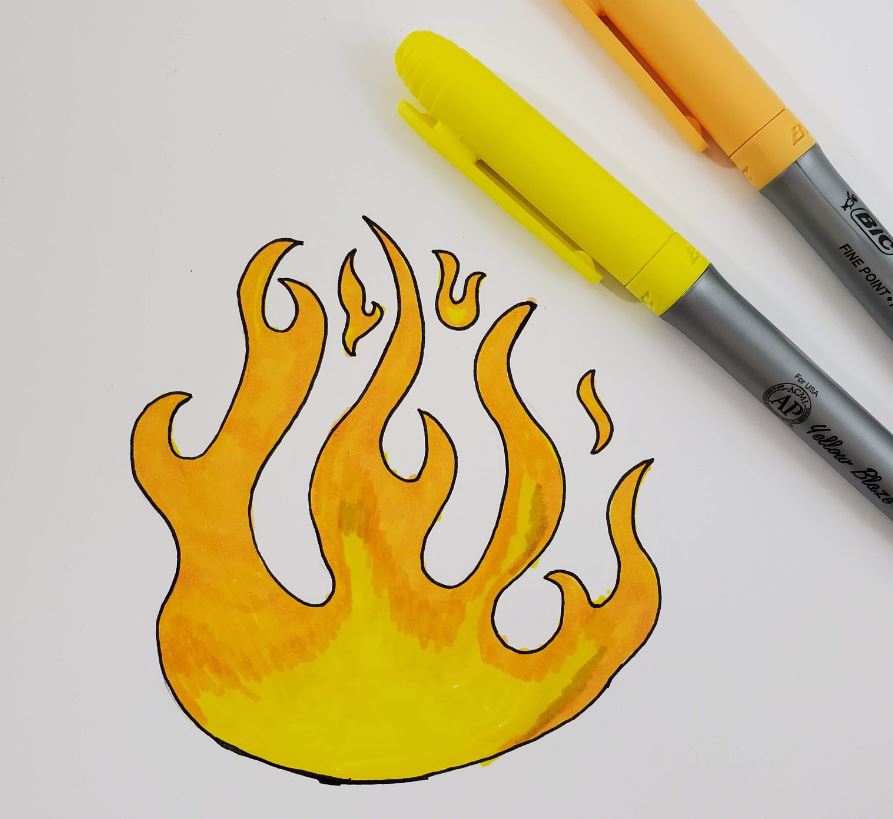
Using orange, color in the top part of each part of the flame. You can leave more yellow if you prefer. Do what looks good to you.
Use red to add color around the edges of your flame drawing. Again, you can make adjustments to how much red you add. Don’t feel like you have to stick with these colors. I’ve seen a lot of really cool looking flames drawings where blue, green, or purple were used as well. Don’t be afraid to experiment with the colors you are using to draw your flames.
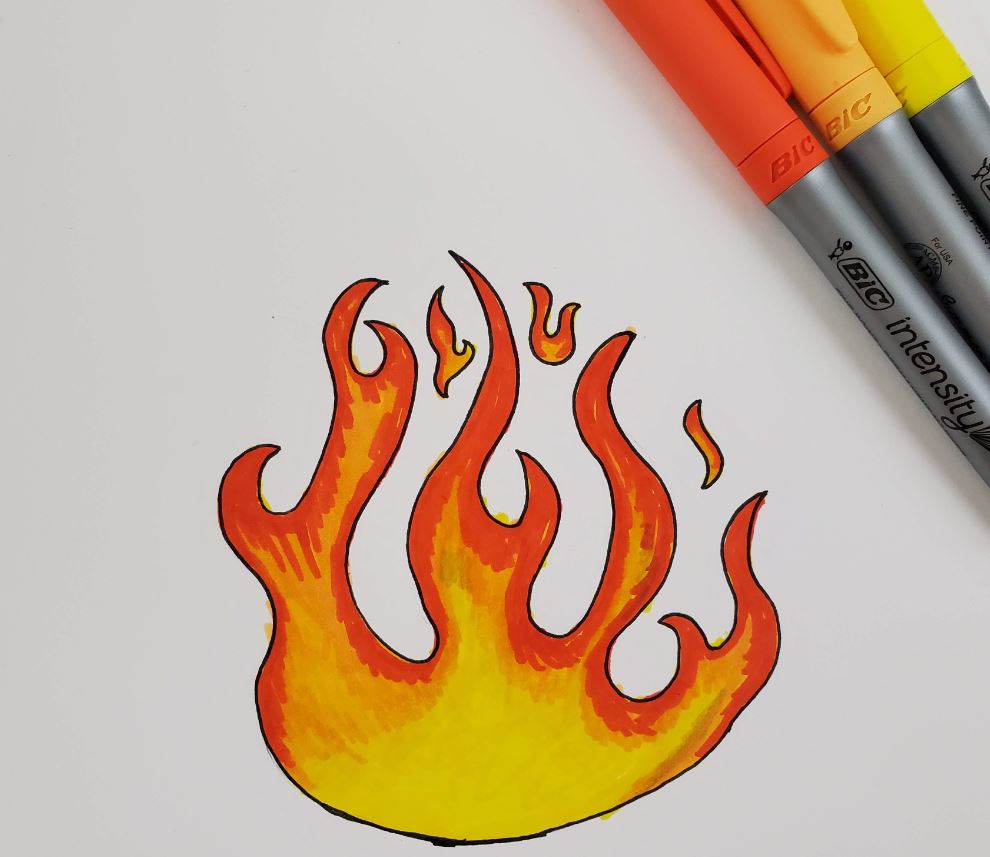
As you’re working, go back in with the lighter colors to help blend your markers together. If you need more help with this, go to our marker blending guide.
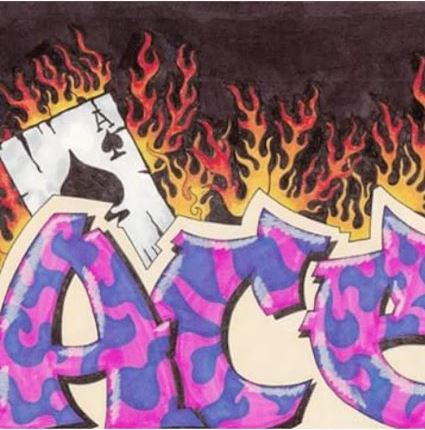
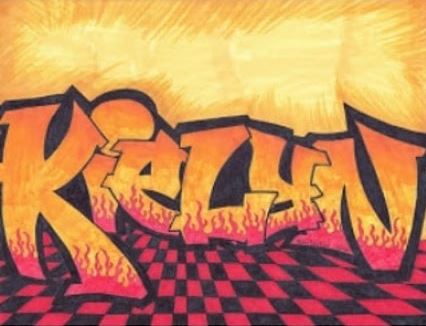
There are many ways to incorporate flames into your artwork. Here’s another drawing I did for one of my students where flames were added to the bottom of the letters. Graffiti art is really fun to make and is great for gift giving. Check out our tutorial on how to draw graffiti art.
Flame Drawing Ideas
I always encourage my students to do several drawings of the same thing. You can do a drawing a day for seven days. Or, work on your drawings for a little bit each day for longer. The goal is to practice repetition with your artwork.
By doing these challenges you’ll find your creativity begin to increase. And you’ll also begin to develop your artistic style while creating original works of art.
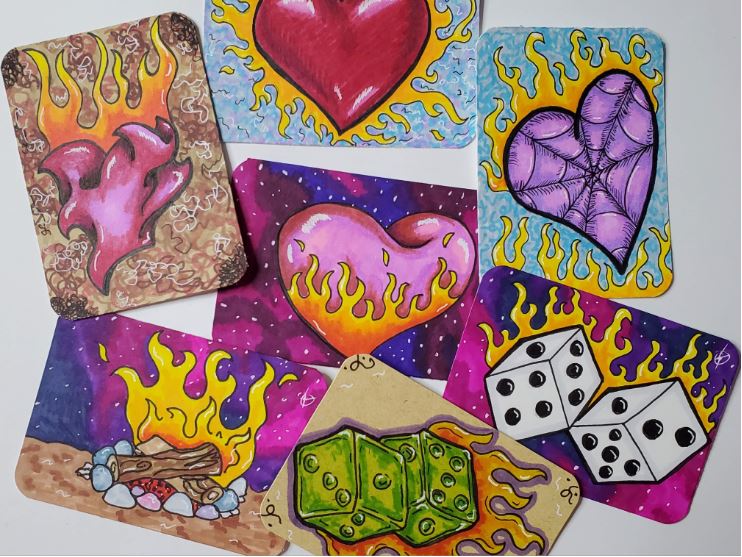
These are the results of my flames drawing challenge. But there are so many other ways to add some flames to your drawings. You can add them to just about anything. Here’s some examples of easy to draw flames, and how to add them to some other images.
Conclusion & Final Thoughts
Play around with how you draw your flames and add color to them. Discovery is made through experimentation. And now that you know the process to draw a simple sketch of flames, you have everything you need to get started.
Learning how to draw flames, or anything else, should be fun and relaxing. And anyone can learn how to draw with practice and repetition. Grab your Drawing Challenge Guide and get started today!

can you please draw catra from shera
I’ll see what I can do.
I love it thanks alot helps me a lot!
I’m glad you enjoyed the tutorial
This really helped me with Art hwk ! Thanks so much
You’re welcome. I’m glad you like it!
Amazing! My daughter who loves to draw loved this! It’s simple and also creative in a way! Thank you for uploading this. I would love to see more videos for simple art!
I’m so glad you enjoyed the lesson. Videos are coming soon!