Easy Gnome Drawings
Learning how to draw a gnome is easy and fun. We’ll show you step by step how to draw, outline, and color your gnome drawings with markers.
There are many, many, ways to draw a gnome. You can draw them with or without the face showing. In our gnome drawing tutorial we’re going to teach you how to draw both types of gnomes.
You’ll learn how to build your drawing from basic shapes. And then we’ll talk about ways to improve your drawing skills and how to come up with original ideas for your gnome drawings.
If you need some ideas or inspiration for colors or poses, take a look at some gnome reference photos.
* Some of the links in this post may be affiliate links. This means I receive small commissions for purchases made through these links at no extra cost to you.
Art Supplies
- Thin black marker
- Paper or cardstock
- Markers
- Pencil
- Click Eraser, Pink Pearl Eraser
- White Gelly Roll pen
Step by Step Gnome Drawing Tutorial
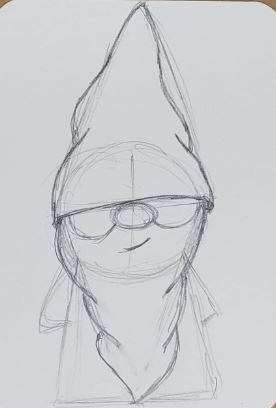
The first thing you want to do is draw your basic shapes to use as guides and to build off of.
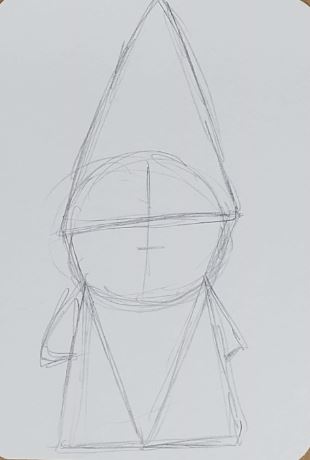
Draw a circle for the head. A rectangle for the body. And a triangle for the hat. Add some small squares for the hands and feet as well.
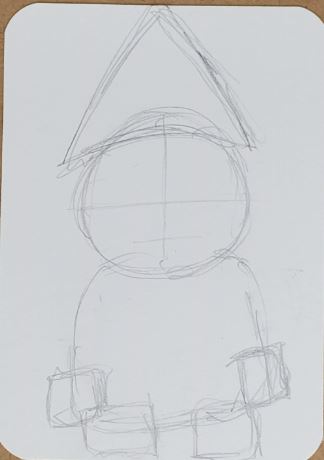
You can quarter the circle to help with the placement of his facial features. But this step isn’t really required.
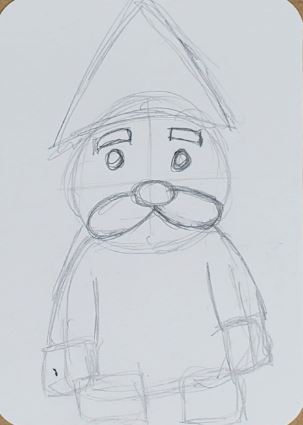
Start adding in the details of the face beginning with the nose. Then draw the eyes, eyebrows, and a mustache. There are many different ways to draw each of these. Draw lightly and experiment with how you draw yours.
All of us have our own style and you need your artwork to reflect your personal artistic style.
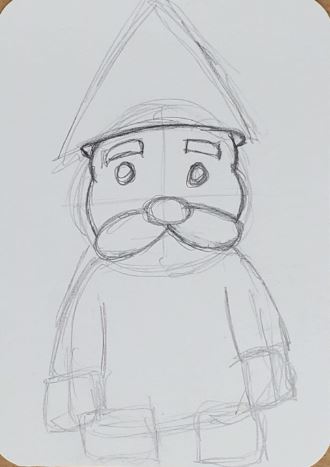
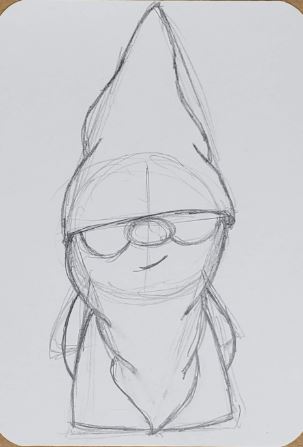
Next draw the shape of the head and the top of the hat. Be sure to curve the line for the edge of his hat.
Now draw the mouth and his beard. There are a lot of different ways to draw the beard. Lightly sketch it out until you have something you like.
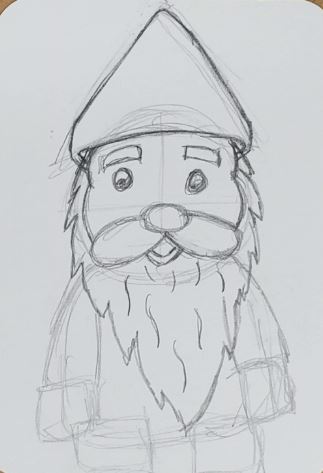
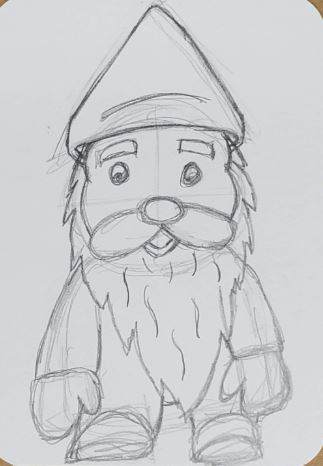
Draw the hands and feet. And then draw in the lines for his arms and legs. I drew mittens on his hands for the example but you could draw the hands any way you like.
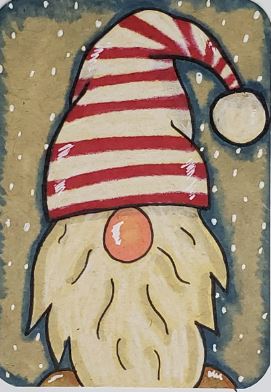
How to Draw a Gnome without a Face
What if you don’t want your gnome’s face to show? These make for some really cute drawings and also leaves a lot of room for variation.
Again, start with some basic shapes. This time you need a circle with a triangle for the hat. And an upside down triangle for the beard.
Draw the hat so it comes down to where the nose will be.
Draw the nose, beard, and add some details to his hat.
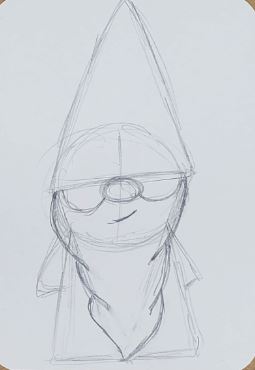
Make sure the lower edge of the hat follows the curve of his head.
Finish up your sketch by drawing the arms and the rest of the body.
Gnome Outline
Use a thin black marker or pen to outline your gnome drawing. Adding some variation to the thickness of your line will make it more interesting.
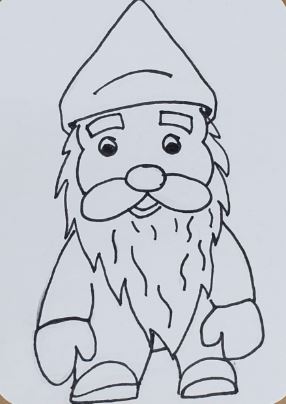
How thick your lines are will depend on your personal artistic style. You can draw them all thin, all thick, or a combination of the two. Outline your gnome drawing in whatever way looks good to you.
How to Draw a Gnome with Markers
Learning how to draw a gnome with markers is really easy. And there’s really only a few things you need to keep in mind when using them.
First, if you want to be able to blend your colors together you need to use alcohol based markers. Bic, Sharpie, and Copic for example. As well as many others.
Second, you need to work while the colors are still wet or they won’t mix together. This isn’t a big deal. Just make sure you work on a section at a time.
Third, you need to use colors that are similar to each other if you want to create a smooth transition of color. If your markers are too different they will leave a harder edge.
When adding color using markers you’ll want to use two or three colors in each section to add a bit of depth to your drawing.
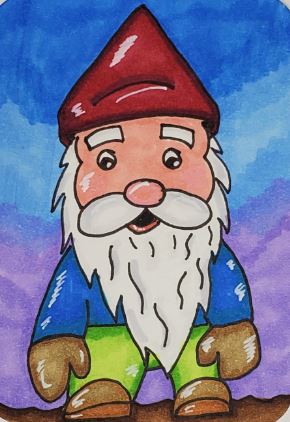
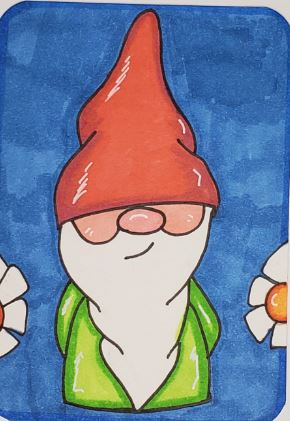
If you’re making his hat red, you can add some purple to the edges.
You’ll probably want to keep the beard white, but you can add some shadows using gray, or even another color.
A white Gelly Roll pen can be used to add highlights.
You can also use a combination of colored pencils and markers. Colored pencils work especially well if you’re using toned paper.
You can color your background with solid colors. Or blend two or three colors together. Or your can get creative and add some decorations such as flowers, mushrooms, or blades of grass.
How to Improve Your Gnome Drawings
Learning to draw doesn’t require natural talent. What it does require is practice and repetition.
If you want to get good at drawing gnomes you need to practice. And the more you practice the better you will get.
A good way to do this is with a 7 Day Drawing Challenge done on artist trading cards. You’d set the intention to draw seven gnomes in seven days.
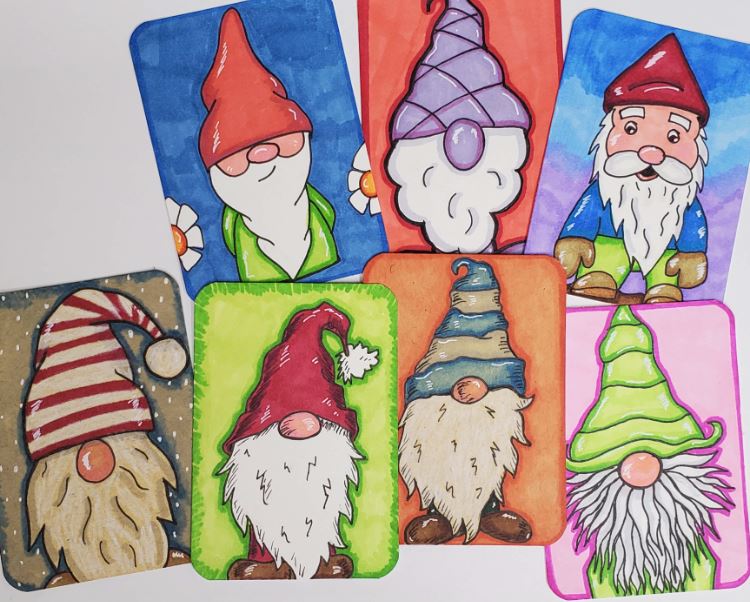
Drawing them on artist trading cards is a good way to save time. Even if you’re not interested in trading them, it’s still a good way to practice and improve your creativity and drawing skills.
Download your FREE Gnome drawing guide with tips and ideas.
Final Thoughts and Next Steps
Now that you know how to draw a gnome, what’s the next step? If you want to improve your art and drawing skills you need to practice. And the more you practice the better you will get.
This doesn’t mean you have to draw for hours every day. But practicing for a few minutes each day is a great habit to develop. Make your creative time part of your daily routine and make sure you’re keeping it enjoyable.

These are great ! Thanks for sharing this tutorial!
One suggestion , I ‘m thinking about how easy it has been to over look the kids of color
in art. Perhaps just a simple and easy thing with this lesson is to have some of the gnomes
in skin colors other than white. in the teacher products. A Just a simple way to be more inclusive. Thanks ! Much apperciated
Thank you for pointing that out. I’ll definitely work on that.