Learn How to Draw a Bee
Learning how to draw a bee is easy and fun. We’ll show you a really simple process that you can follow to make your bee drawings, or anything else as well.
We’ll show you how to break things down into basic shapes to use as guides. Then from there you’ll sketch, outline, and color your bees.
So let’s grab some supplies and get ready to have fun learning how to draw bees. Because your creative time should be relaxing and enjoyable.
* Some of the links in this post may be affiliate links. This means I receive small commissions for purchases made through these links at no extra cost to you.
Art Supplies
- Thin black marker
- Paper or cardstock
- Markers
- Pencil
- Click Eraser, Pink Pearl Eraser
- White Gelly Roll pen
Bee Sketch Practice
The very first thing you should do is get warmed up and ready for your art session. Doing a bee sketch exercise is a great way to do this.
Before you can learn how to draw a bee, you need to get familiar with what a bee actually looks like. Because learning to draw is really about learning to see.
Bring up some reference photos to look at while you’re doing your bee sketches. And get a piece of paper and something to draw with.
We’re going to be doing quick sketches, so this will only take you a few minutes to complete. But the benefits will be massive.
Set a timer for three or five minutes. And do as many quick bee sketches as you can before the timer goes off. Don’t spend too much time on specific details. Just get the basic shapes and proportions down.
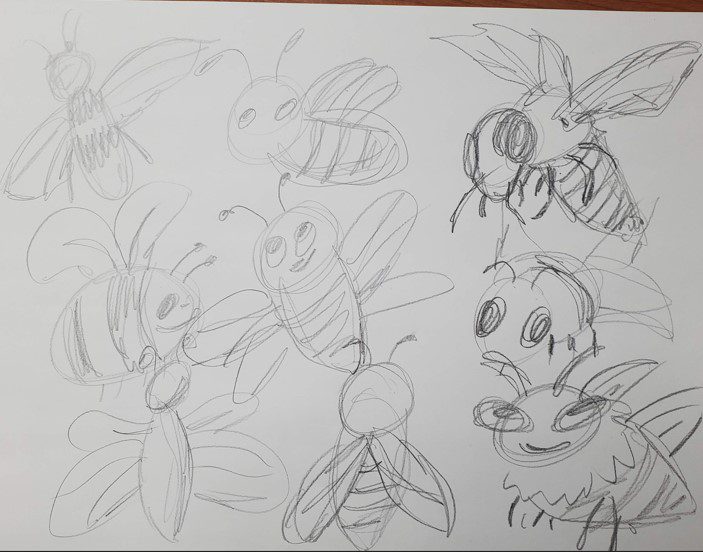
You can also skip using a timer and simply sketch until you run out of room. Just be careful not to get too hung up on all the details. Keep your lines quick and flowing.
How to Draw a Bee Easy Step by Step
As mentioned earlier, the first step is to draw out some basic shapes of the bee. This will help with the size and proportions. And, to make sure it’s placed properly on your paper.
There’s nothing worse than spending a bunch of time on a drawing just to realize there’s something fundamentally wrong with it.
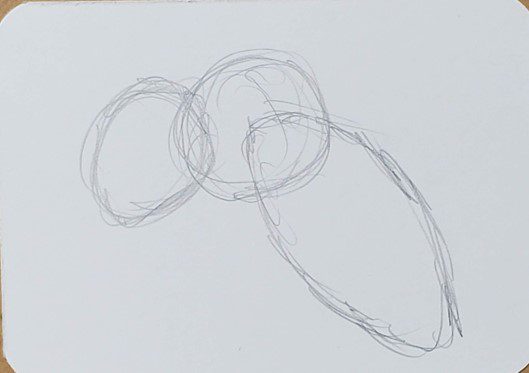
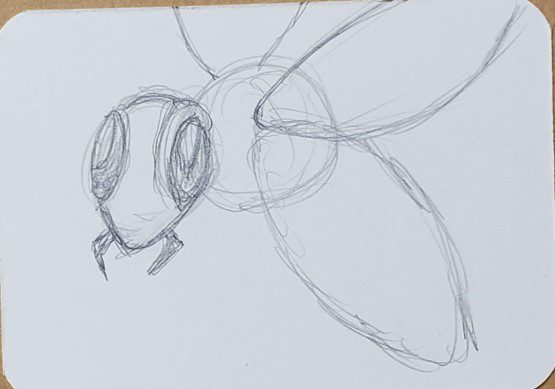
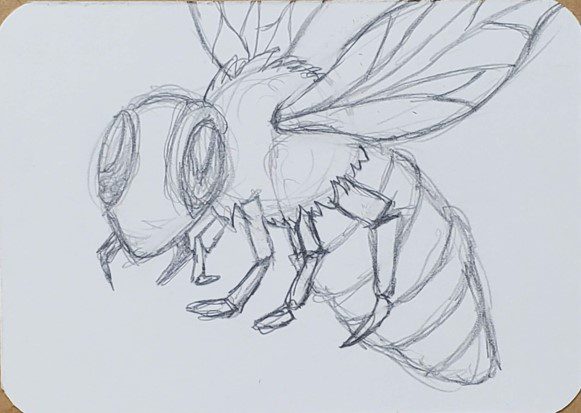
Step 1: Basic Shapes
Start by drawing an oval for the abdomen, and circles for the thorax and head.
Next, add a couple of wings. Just draw the basic shape, size, and placement at this point.
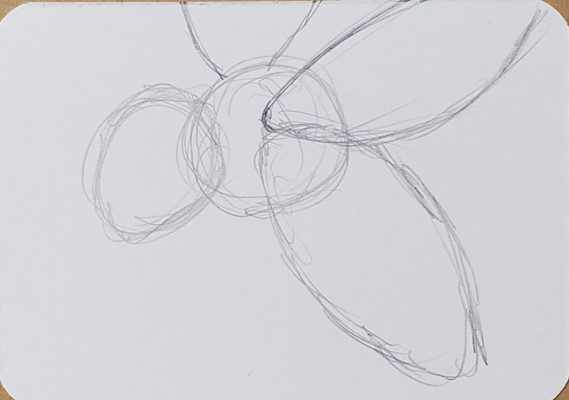
Before moving on, look at the guidelines you’ve drawn out. This represents what your bee drawing is going to look like. If you want to change something, now’s the time to do it.
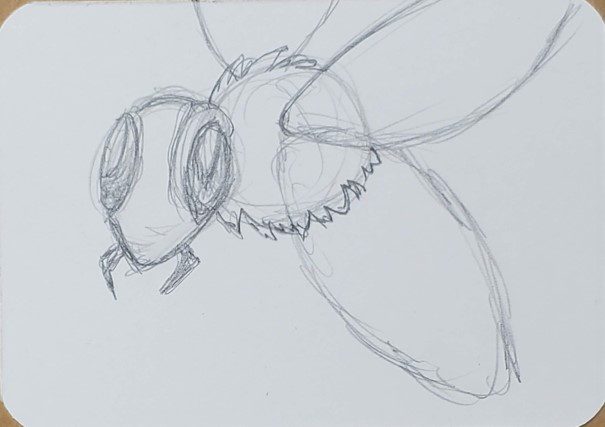
Step 2: Add Details
Start adding in the details for the head by drawing in the eyes and refining the shape of the head. And don’t forget to add the mandibles.
Now let’s add some fur texture to the body. Adding texture to your drawings will make them much more interesting to look at.
Check out our tutorial on How to Use Texture in Art for more information on how to do this.
Let’s work on the wings now. Start refining the shape of the wings. And drawing in some lines inside of the wings themselves.
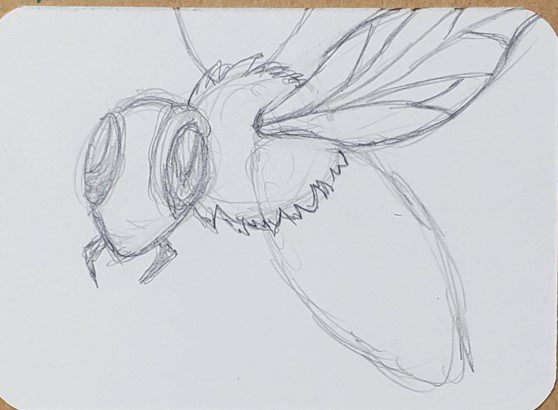
Then draw the colored rings for the thorax. Be sure to make these lines curved to show the contour of the shape and create depth in your bee drawing.
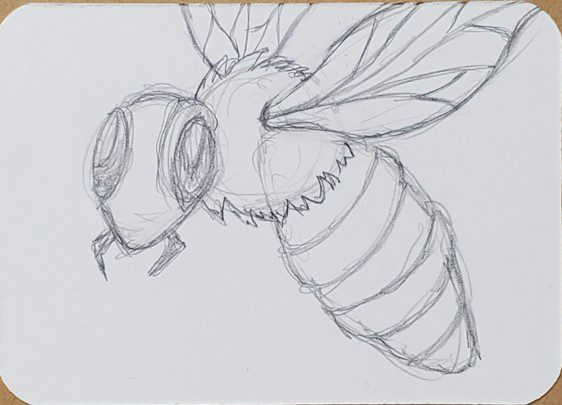
The last step in drawing your bee is to add some legs. Keep in mind that the legs are made up of three sections. And they come off of the body of the bee.
Bees have six legs, but you don’t necessarily have to draw all of them. You can use some artistic liberty with your drawings. For this example, I drew four legs. The other two legs would actually be visible, but I felt it would make the drawing too crowded so they were left off.
Before moving on to the next step, make sure your bee drawing looks the way you want it to. Make any changes you need to make.
Bee Outline
Making a bee outline is really easy. Simply trace over the pencil lines you want to keep with a black pen or marker. You can make your lines thin, thick, or a combination of line weights.
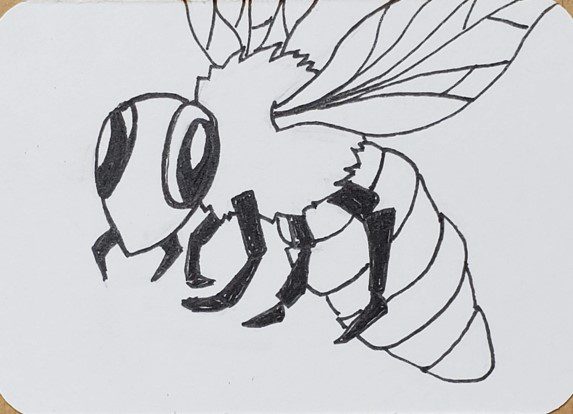
You could try using a different color for your outline. Or you can experiment with the line weights. There’s a lot of opportunity for variation with most drawings.
How you choose to make your outline will be determined by your artistic style. If you don’t know what that is yet, don’t worry. It will develop over time and with practice.
When you’re done making your bee outline, use an eraser to remove any pencil lines and clean up your drawings.
How to Draw a Bee with Markers
Now let’s learn how to draw a bee with markers. Using markers is not as difficult as you may think. And they’re really nice for blending colors and making smooth transitions.
The most important thing to keep in mind is that the colors you choose need to be fairly similar to each other. Which sometimes means using several different colors to get a smooth blend.
But, it’s a good idea to use several different colors on your drawings anyway. If you fill in areas with one solid color your drawings will look flat and boring.
For the yellow parts of my bee drawing I used yellow, orange, and tan.
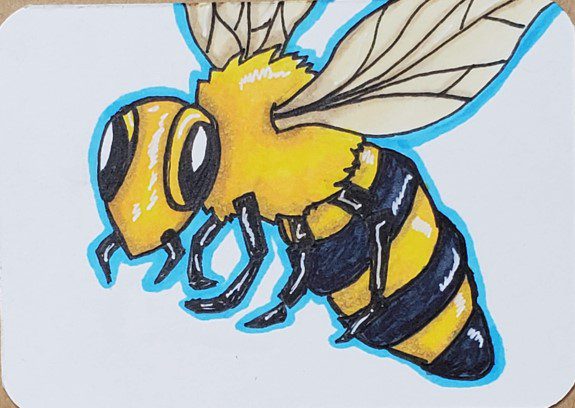
For the black areas I used a medium gray, dark gray, and black.
And for the wings I used a light tan and a light brown.
Then white highlights were added with a Gelly Roll pen.
Final Thoughts and Next Steps
Now that you know how to draw a bee, what’s next? The next step is to practice. Learning to draw, and create art, are skills that anyone can get better at.
To improve it takes time, practice, and repetition. The more you draw, the better you will get.
And the more you draw with markers, the better you will get at using markers.
The more you draw bees, the better you will get at learning how to draw a bee.
This doesn’t mean you have to spend every spare moment creating art. A few minutes each day will help you improve. Challenge yourself to draw everyday for a week and see what happens.
Grab your FREE Guide to Better Art in 7 Days
