How to Draw an Easy Cow
Learning how to draw a cow is both easy and fun. Whatever you choose to draw should leave you feeling relaxed and should be an enjoyable experience.
If you’re not having fun, or if your art time feels stressful, you need to focus less on the outcome and more on the process.
Your artwork doesn’t have to be perfect. Everything you create is a part of your journey. So embrace your artistic journey and let’s have some fun.
* Some of the links in this post may be affiliate links. This means I receive small commissions for purchases made through these links at no extra cost to you.
Art Supplies
- Thin black marker
- Paper or cardstock
- Markers
- Pencil
- Click Eraser, Pink Pearl Eraser
- White Gelly Roll pen
Cow Sketch Warm Up Exercise
Doing some quick warm up sketching is a great exercise to do prior to your drawing sessions. It’s a good way to loosen up your drawing muscles. And an even better way to get a rough idea of how to draw your subject matter.
Just set a timer for a specific length of time. Three or five minutes is plenty of time. And then do as many quick sketches as you can in that amount of time.
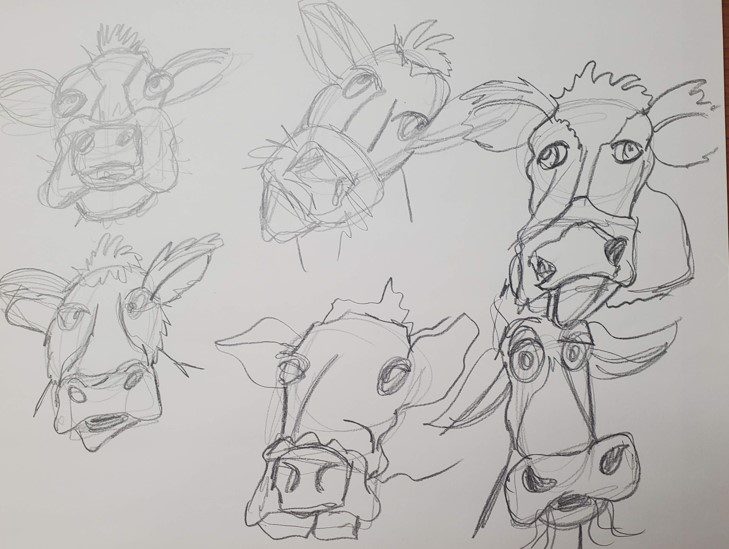
Or, you can just sketch until your paper is filled. That’s how I usually do my quick sketches. You still want to be finished in well under ten minutes though.
Be sure to keep your cow sketches quick and loose. And you don’t have to worry about any specific details yet.
How to Draw a Cow Head Step by Step
Learning how to draw a cow is really easy if you break things down into easy to follow steps, starting with simple shapes. There are other benefits to doing this as well.
It will help you get over the blank page barrier that many artists face. And it will allow you to get a rough idea of what your finished drawing will look like before spending too much time on your cow drawing.
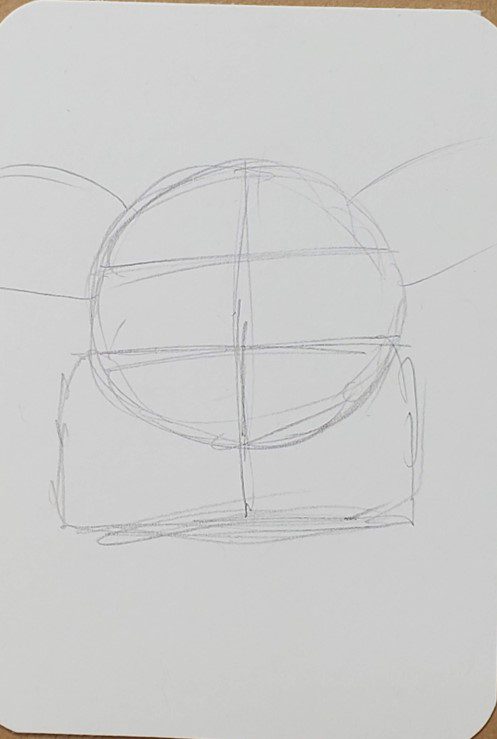
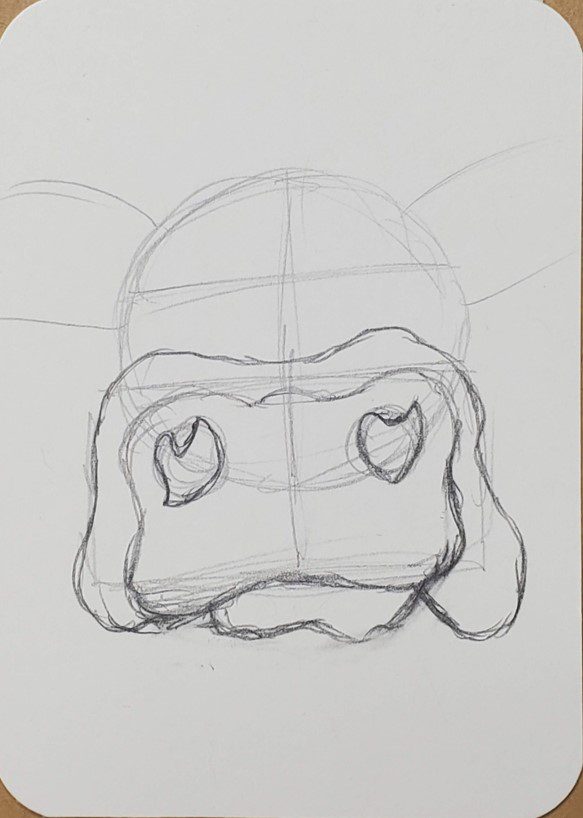
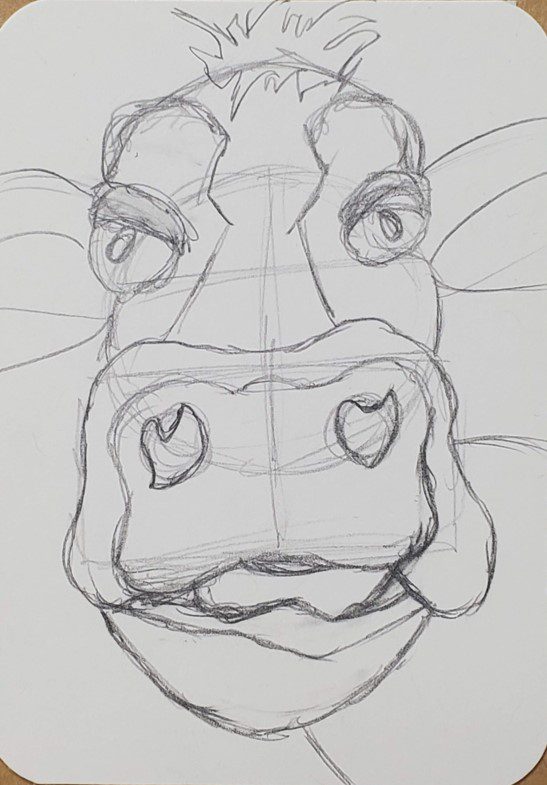
Step 1: Basic Shapes
So for the cow head we’ll need a circle for the top of the head. And a square or rectangle for the nose and mouth. You can also add a couple of ears to the circle.
Beginning with basic shapes will make your drawings much easier to do.
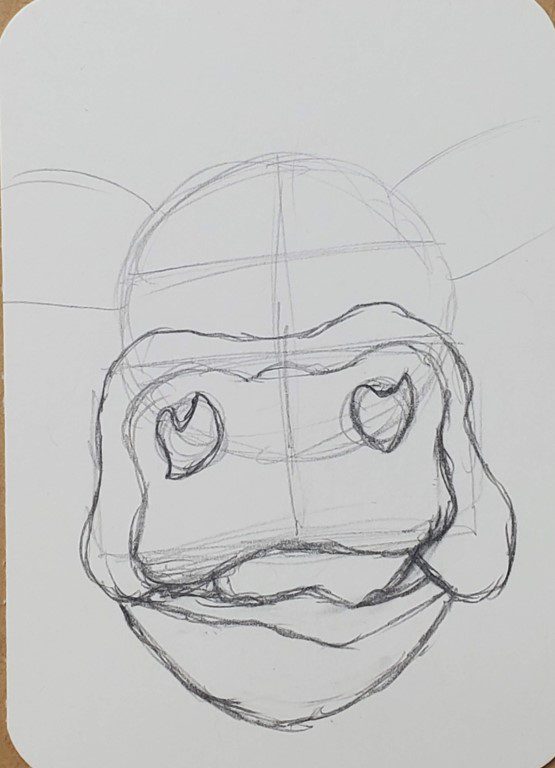
Step 2: Add Details
Next, draw out the shape of the nose and nostrils. Use a reference photo if you need to. It will make things easier.
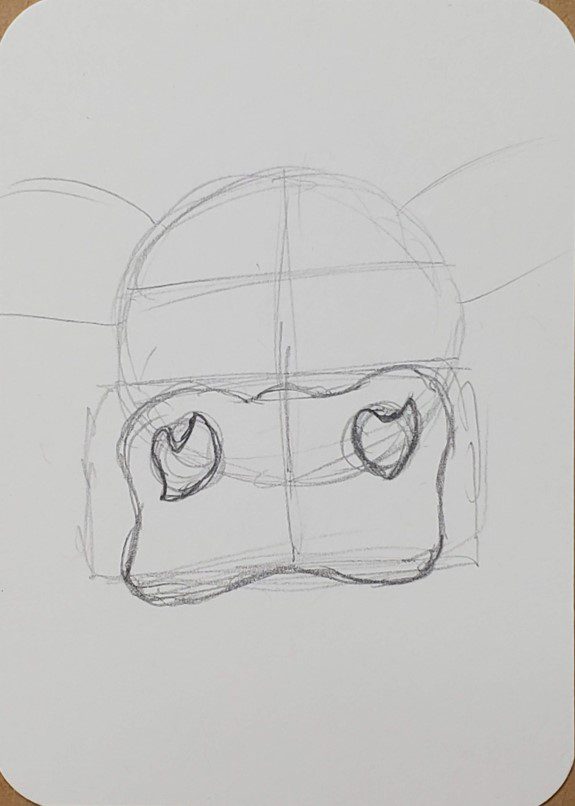
Then draw the tongue and the area around the nose.
Now draw the lower lip. And then the chin.
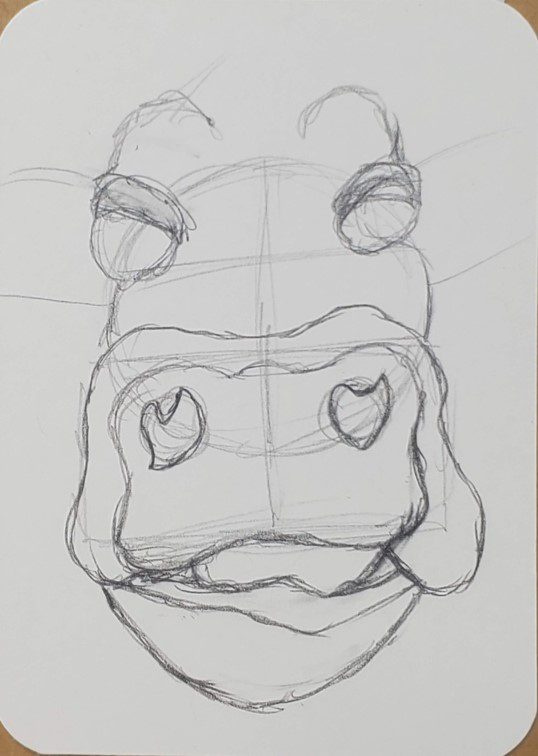
Next we’re going to work on drawing the eyes and the top of the cow’s head. Start by drawing a couple of circles for the eyes.
Then add some eyelids and brow lines.
After that you can finish drawing the shape of the cow head. And add in some lines where the fur will be different colors.
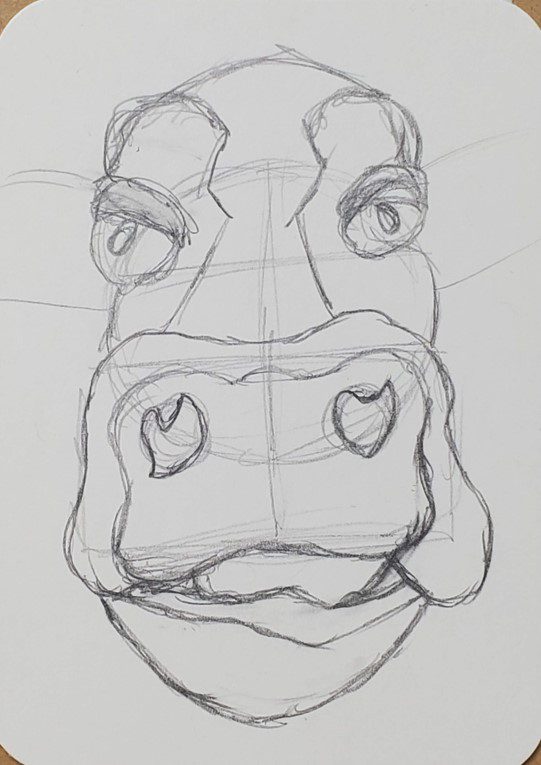
Finish up your cow drawing by adding in some hair on the top of it’s head and defining the shape of the ears. You can add a body as well, just so you don’t have a floating cow head drawing.
Cow Outline Drawing
What you do next will depend on your style and how you want to finish your cow drawing. I like using markers to add some color to my artwork. So for me the next step is to add an outline using a black pen.
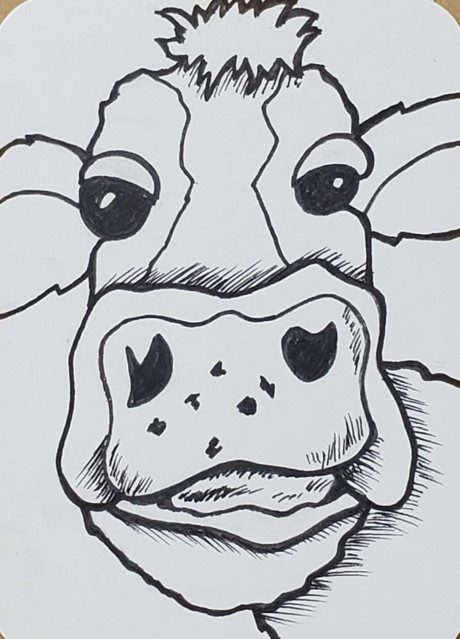
This could also be done using a different color or a thick black marker. Or not at all if that’s your preference.
When making your cow outline, you can use thin lines, thick lines, or a combination of the two.
You could also add in some shading with the black pen as well.
This is a good time to experiment and try new things. Using artist trading cards for your artwork is a great way to give yourself some freedom to experiment and try new things.
Learn all about them in our Beginner’s Guide to ATCs.
When you’re finished making your cow outline use an eraser to clean up your drawing and remove any pencil lines.
How to Draw a Cow with Markers
Learning how to draw a cow with markers is really easy. And there’s only a few things you need to keep in mind when using them.
First, if you want to be able to blend your colors together you need to use alcohol based markers. Bic, Sharpie, and Copic for example. As well as many others.
Second, you need to work while the colors are still wet or they won’t mix together. This isn’t a big deal. Just make sure you work on a section at a time.
Third, you need to use colors that are similar to each other if you want to create a smooth transition of color. If your markers are too different they will leave a harder edge.
When adding color to your cow drawings you want to use at least two colors for each area to keep it from looking flat and boring. For example, on the nose, you can use a light pink and a medium pink.
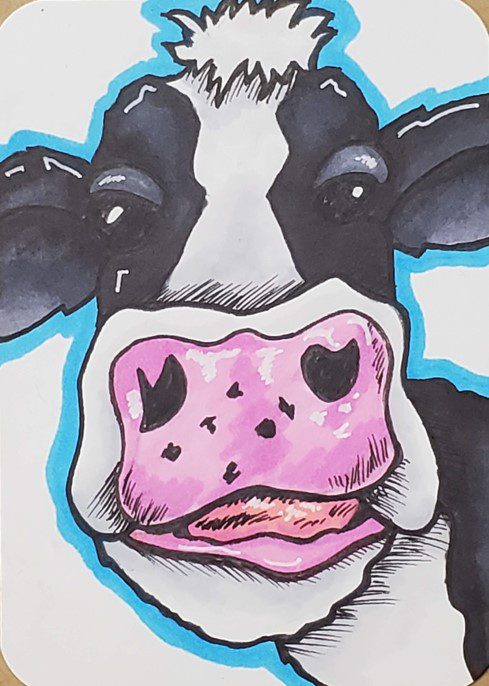
Or, for the black areas of fur you can use black and a dark gray. You could even add in another color such as blue or purple.
Avoid just filling in an area with one solid color.
White can be added using a Gelly Roll pen for some highlights.
How to Draw a Cow Head Final Thoughts
Congratulations on learning how to draw a cow step by step. So what’s next? Well, the next step should be to practice. Because getting good at art and drawing takes practice and repetition.
The more you practice the better you will get. This doesn’t mean you have to practice for hours and hours every single day. But working on your artwork consistently each day for a few minutes will give you good results.
Consistent practice and repetition are the best ways to improve your art and drawing skills.
Repetition will also help improve your creativity. So it really is one of the most beneficial things you can do. Try challenging yourself to do a series of cow drawings this week. See how many cool drawings you can come up with.
Grab your FREE Guide to Better Art in 7 Days

I am laying in bed today not feeling good. so I decided to draw. I was going to share my picture with you but I don’t see a place to upload it
I’ll have to look into that. I’m not sure how to set it up for picture uploads.