
Grim Reaper Cartoon Drawing
Learning how to draw a grim reaper is easy and fun. We’ll break things down into simple steps for you to follow along with to draw your own cartoon grim reaper.
I’ll show you how to bring this iconic character to life with simple shapes and bold lines—perfect for beginners and Halloween fans alike!
You’ll learn how to sketch, draw, outline, and color your artwork with markers.
Drawing and creating art are skills that anyone can learn. It just takes time and practice.
So let’s grab some supplies and have some fun.
* Some of the links in this post may be affiliate links. This means I receive small commissions for purchases made through these links at no extra cost to you.
Art Supplies
- Thin black marker
- Paper or cardstock
- Markers
- Pencil
- Click Eraser, Pink Pearl Eraser
- White Gelly Roll pen
About the Grim Reaper
The Grim Reaper is a symbolic figure representing death, often depicted as a skeletal figure in a dark hooded cloak carrying a scythe. This image evolved in Western Europe during the 14th century, especially during the Black Death, when death became an all-too-familiar presence.
The Reaper’s scythe symbolized the harvesting of human souls, much like a farmer harvesting crops. The association with a skeletal figure emerged from the medieval fascination with death and decay, capturing the fear and inevitability of mortality.
In earlier traditions, different cultures personified death with varied figures. Ancient Greeks, for example, had Thanatos, the gentle death-bringer, while the Celts had the “Ankou,” a skeletal reaper-like figure. As religious and folkloric elements merged over centuries, the Grim Reaper became the enduring, haunting icon of death we recognize today.
Grim Reaper Cartoon Sketch
Doing some quick sketching is a great way to warm up your drawing muscles, and work through some rough ideas for your grim reaper drawings.

Doing some quick sketching should only take you a few minutes to do, but the benefits will be enormous. Because learning to draw is really about learning to see, you can learn a lot about your subject matter in five minutes or less.
To do a quick sketch session just set a timer for three or five minutes. And then do as many rough sketches as you can before the timer goes off.
Another option is to sketch until you fill your paper. This would be a great way to fill up some of your old sketchbooks.
Regardless of which method you choose, you want your lines to be loose and flowing. The idea is to capture the essence of your grim reapers, not get all the little details.
How to Draw a Grim Reaper Step by Step Cartoon Drawing
I’m going to be drawing my cartoon grim reaper on an artist trading card (ATC). I love doing my drawings on ATCs. You can do your drawing on any size or type of paper.
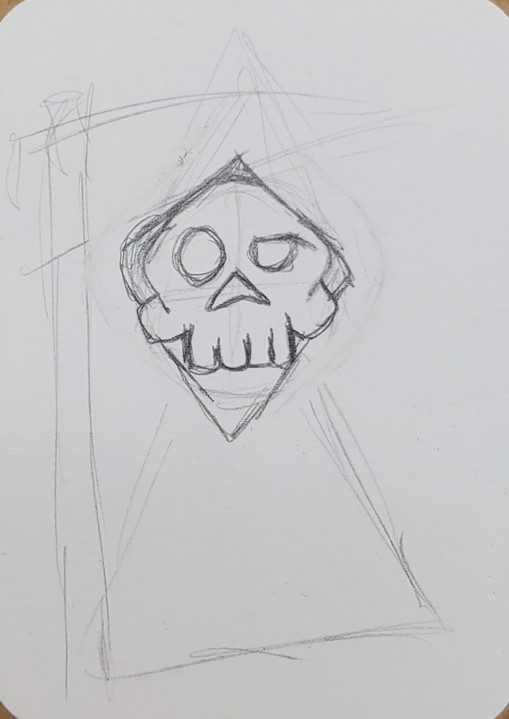
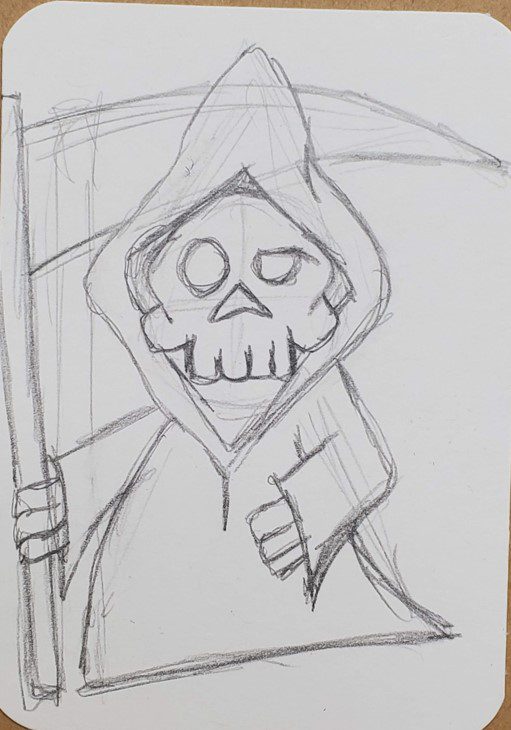
Step 1: Basic Shapes and Guidelines
The first step when learning how to draw a grim reaper is to rough out some basic shapes. This will help you get the proper placement and proportions right for your drawings. And it will help you get past that intimidating blank page.
Start with a circle for the head. And then draw out the rough shape for the cloak.
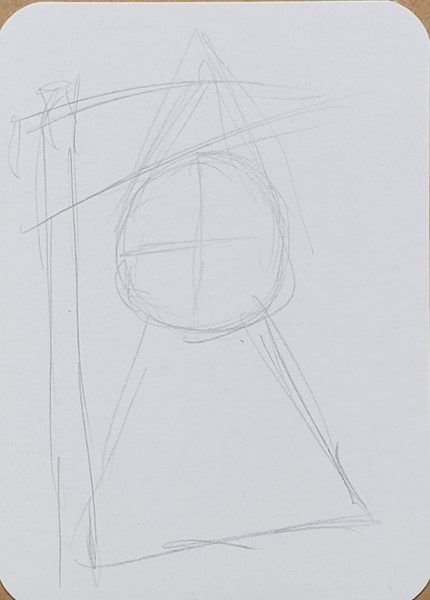
You can also add a scythe if you want him to be holding one.
Step 2: Add Details
Next, draw the eyes and the nose. There are a ton of different ways you can draw your skulls. And they can be anywhere from totally cute to super scary. It’s completely up to you on how you want your grim reaper to look.
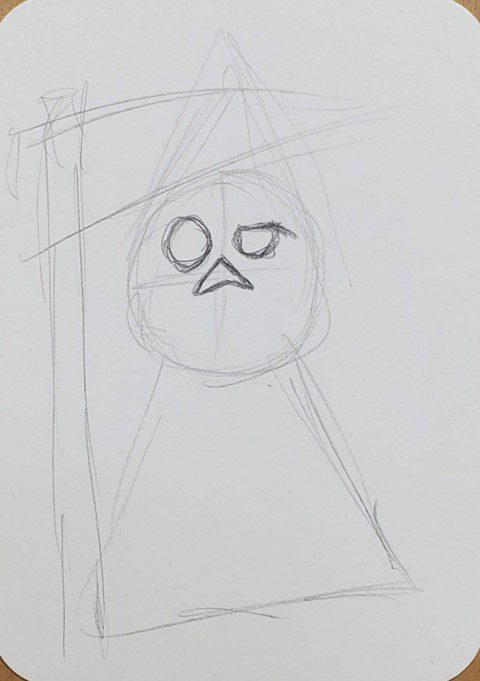
We have a post on How to Draw Skulls if you need some ideas.
Now draw the teeth and the sides of the head.
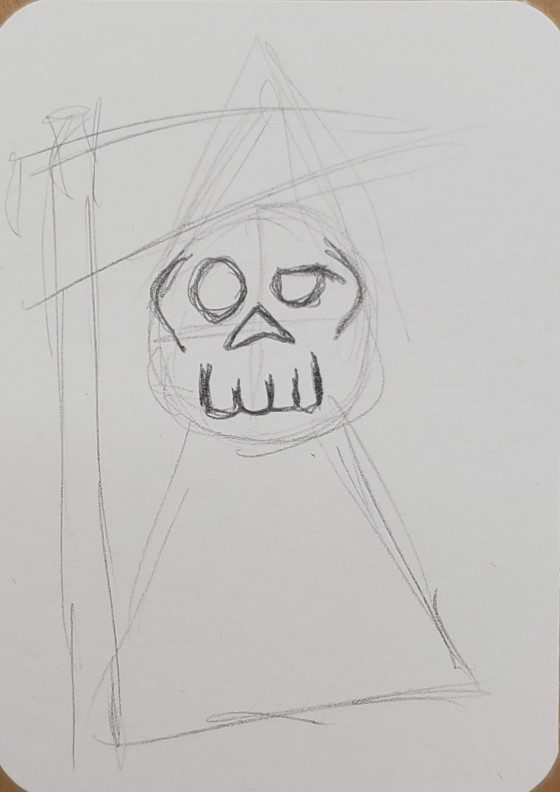
Next, draw some cheek bones.
Then start drawing out the details for the hood. Do the area at the top of the skull first.
Draw the sides and the bottom of the hood to finish framing the skull of your grim reaper drawing.
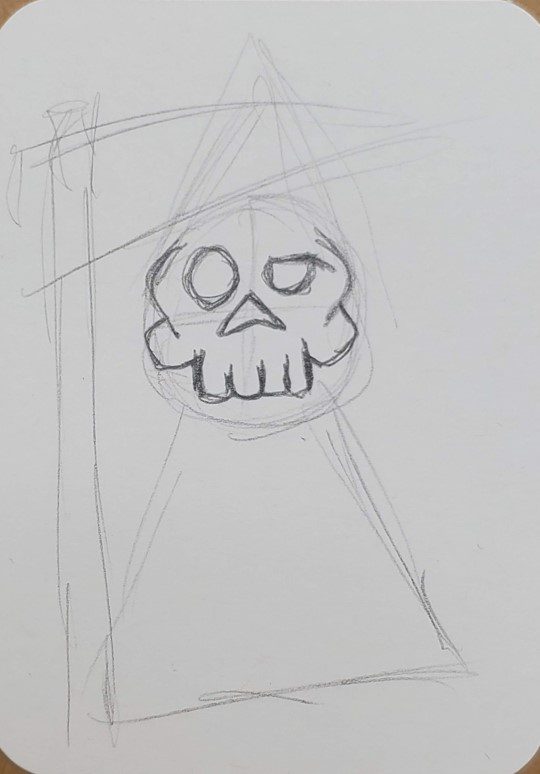
After you have the inside of your hood all drawn out, move onto the outside of the hood. Like with everything, there’s many different ways to do this.
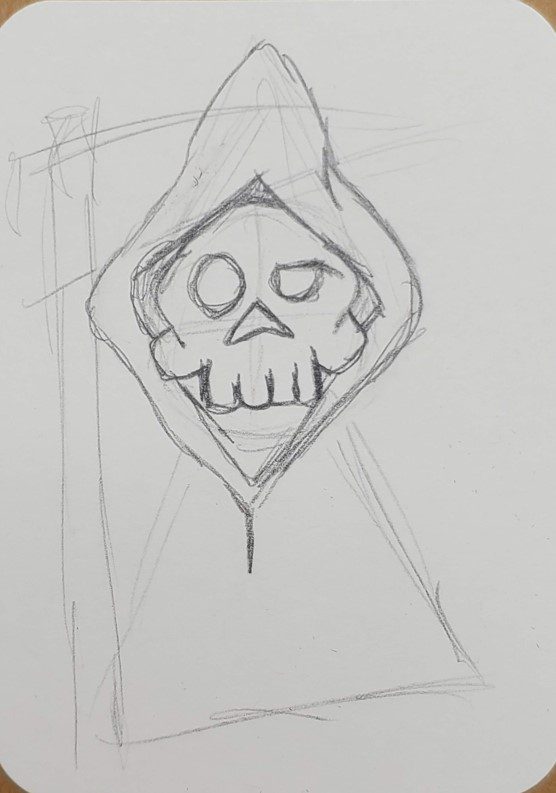
You can make the hood come to a point at the top. Or you can make it fold over at the top.
Now start drawing out the bottom of the cloak and the arms. Sketch everything out lightly so you can make changes as needed.
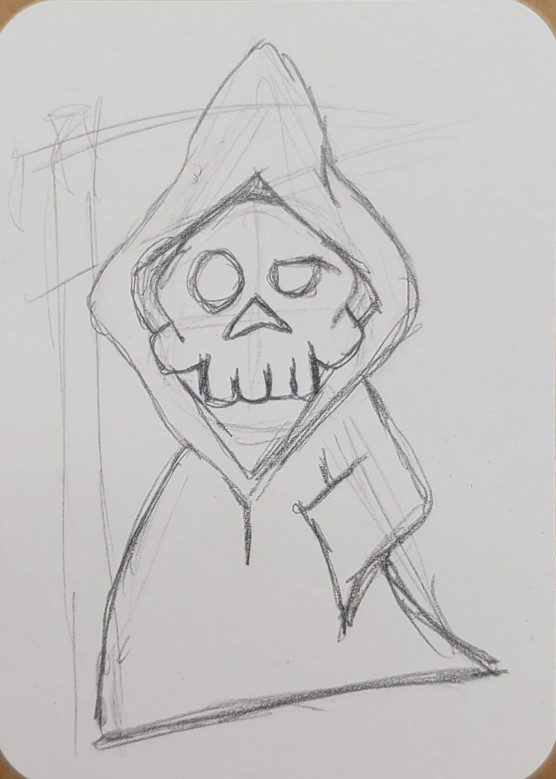
Draw the other arm, and add some hands. The hands can be detailed or not detailed at all.
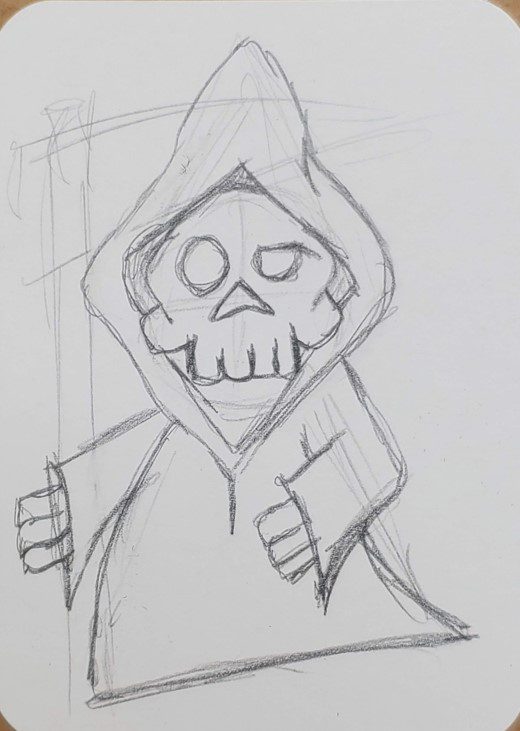
Step 3: Final Details.
Finish your grim reaper drawing by adding in some details for the scythe and any additional items you want to add. You could also add a background design for your drawing.
Maybe add some flames or additional skulls in the background.
When you’re satisfied with how your drawing looks you can go to the next step l which is adding an outline to your drawing.
Grim Reaper Outline
Making a grim reaper outline is really easy to do. Just trace over the pencil lines you want to keep with a black pen or marker.
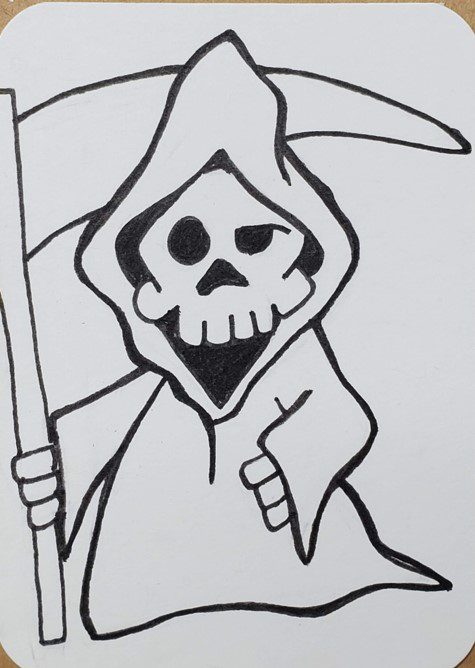
You can make your lines thin, thick, or a combination of the two. This is a matter of personal preference and will be determined by your artistic style.
If you’re not sure what your style is yet, don’t worry. This will develop over time and with practice.
You could also use a different color for your outline and see how that looks. Don’t be afraid to experiment and try new things. Make your drawings on Artist Trading Cards to save time.
This is a good time to fill in any areas that are going to be solid black. And you can add some shading at this time too.
When you’re finished outlining your grim reaper use an eraser to clean up your drawing and remove any pencil lines.
How to Draw a Grim Reaper with Markers
Learning how to draw a grim reaper with markers is really easy. And there’s only a few things to keep in mind when using them.
First, if you want to be able to blend your colors together you need to use alcohol based markers. Bic, Sharpie, and Copic for example. As well as many others.
Second, you need to work while the colors are still wet or they won’t mix together. This isn’t a big deal. Just make sure you work on a section at a time.
Third, you need to use colors that are similar to each other if you want to create a smooth transition of color. If your markers are too different they will leave a harder edge.
Regardless of the medium you use, you’ll want to add two or three colors for each section. This will help to create the illusion of depth and make your drawings more interesting to look at.
For your grim reaper’s cloak, you can use black and a dark gray. Or, you can add in some other colors such as purple or blue.
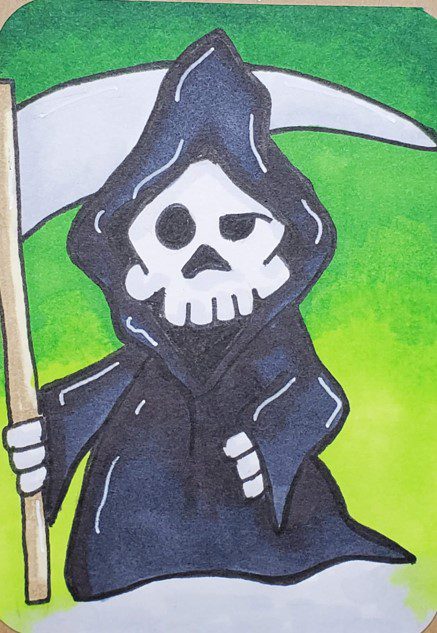
What you want to avoid is filling it in with solid black. That will make your drawing look flat and boring.
Start by adding gray or blue to the various cloak areas. Then add darker gray or black over that in the areas that you want to be darker. Then use the lighter color or a colorless blender to smooth out the transition.
For the background you can add a scene or just fill it in with some color. I used a gradient of greens that fade down from top to bottom.
A white Gelly Roll pen can be used to add highlights.
Final Thoughts and Next Steps
So now that you know how to draw a cartoon grim reaper, what’s next? Since drawing and art are learned skills, the next step is to practice.
The more frequently you practice, the better you will get. Even if you only have a few minutes each day to dedicate to your artwork, those minutes will add up to big improvements.
If you enjoy drawing and creating art, make it part of your daily routine. And make sure you’re having fun and enjoying your creative time.
If you want get really good at drawing grim reapers, try doing a weekly challenge and see how many you can get done in seven days. You’ll be amazed by how much you can improve in a short amount of time.
Grab your FREE Guide to Better Art in 7 Days
