3D Dice Drawing Tutorial
Learning how to 3d draw dice is easy and fun. We’ll show you how in this step by step art tutorial that’s perfect for all ages and skill levels.
You’ll learn how to create the illusion of depth in your drawing by starting with some basic forms. Learning to draw 3D isn’t as hard as you might think.
After you’ve learned how to 3D draw dice, you can practice and try new ideas. I’m sure you’ll come up with some really amazing dice drawings.
Let’s gather up some supplies and get ready to have some fun creating art.
* Some of the links in this post may be affiliate links. This means I receive small commissions for purchases made through these links at no extra cost to you.
Art Supplies
- Thin black marker
- Paper or cardstock
- Markers
- Pencil
- Click Eraser, Pink Pearl Eraser
- White Gelly Roll pen
How to Draw 3D Dice Step by Step
We’re going to learn how to draw a dice in 3D since that’s much cooler looking than a flat 2D drawing. Learning how to make three-dimensional objects will help you take your artwork to the next level.
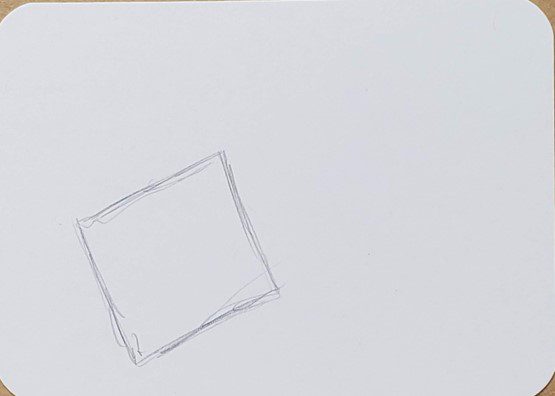
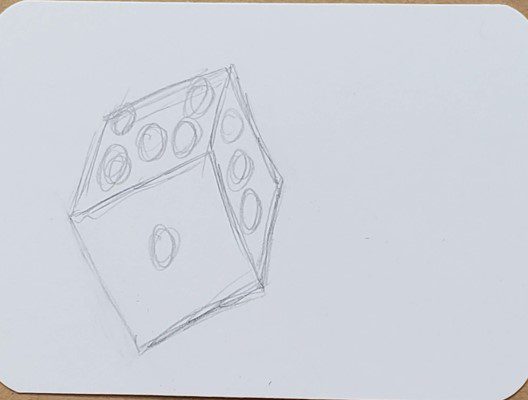
Since our dice will be 3D we want to start by drawing a cube. So begin by drawing a square that will be the front of the dice.
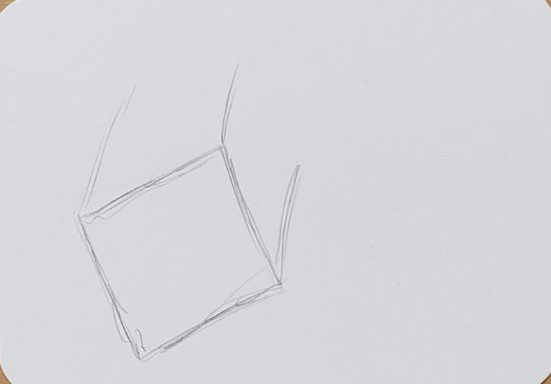
Then draw three parallel lines for the sides. This is an easy way to draw a freehand cube without using vanishing points and a ruler, which I don’t enjoy doing.
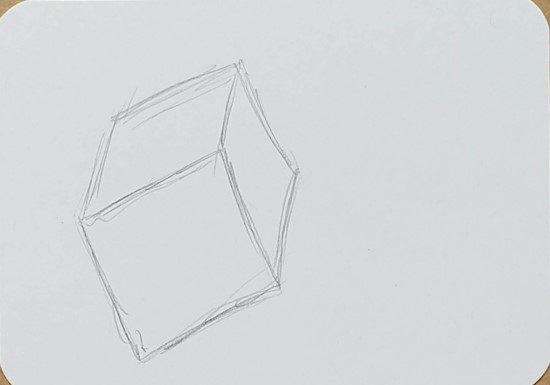
And then draw the lines for the back of the dice. Keep those lines parallel with the lines for your square. Take a look at our post on Drawing Freehand Cubes for more detailed instructions on how to do this.
Next, add in some circles for the numbers on your dice. These can be whatever you want them to be. You could also add a small image of something if you wanted.
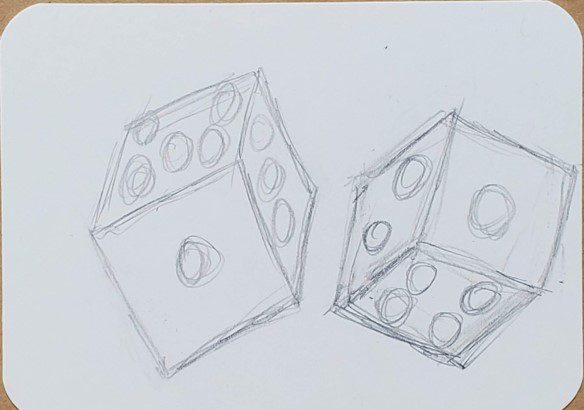
Follow these same steps to draw your second dice. And that’s it. You now have an awesome 3D dice drawing.
How to Draw Dice on Fire
Add some flames or something different for the background. Or you can leave it blank if you want.
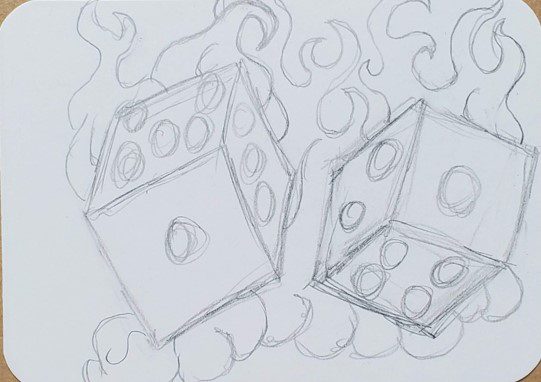
We have a step by step drawing tutorial for How to Draw Flames if you need some help with those.
Dice Outline
After you’ve finished drawing out your dice you’ll need to decide how you want to finish your artwork. I like adding a black outline to my drawings using a black pen.
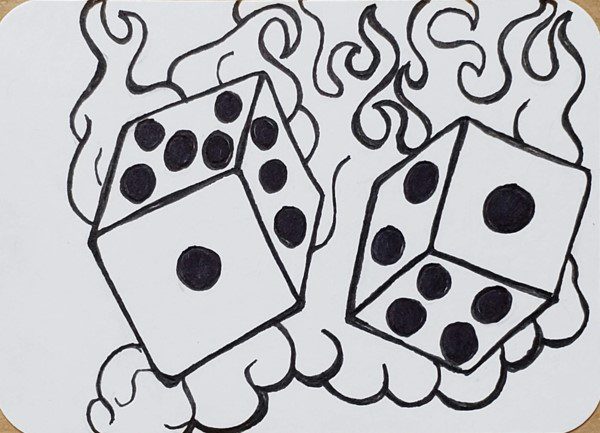
You could also use a different colored pen or marker as well.
When making your dice outline you can use thin lines, thick lines, or a combination of the two. Don’t be afraid to experiment and have fun.
I like doing my drawings on artist trading cards. They save me a lot of time so I can do more drawings. We have a Beginner’s Guide to Making ATCs if you want to learn more.
This is a good time to add some shading as well. You can use a thin pen to add in some shadows using hatching or cross hatching techniques.
3D Dice Drawing with Markers
Most of my artwork is colored using markers. I love how bold and vibrant the colors are. And they can be blended together to create smooth transitions.
Whether you’re using markers or another medium for color, you should try to use at least two colors in each section of your drawings.

For this dice drawing I used a medium blue, a dark blue, and a light purple for the colors. And then yellow, light orange, medium orange, and dark orange for the flames.
White can be added for the highlights using a Gelly Roll pen.
Final Thoughts and Next Steps
Congratulations on learning how to draw 3D dice step by step with markers. So what’s next? If you want to get good at drawing and creating art you need to practice. Making art a part of your daily routine will result in big benefits in no time.
Even if it’s only for a few minutes each day. Being consistent will help you improve.
Make sure you’re having fun and not stressing out about your drawings being perfect.
If you look at the dice drawing in this tutorial, the one on the left is crooked. This was something I didn’t notice when I was drawing it. But sometimes the angle you’re viewing it from can make things look different.
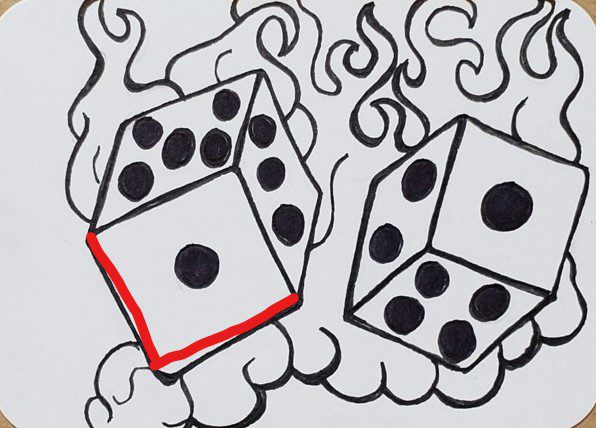
I could choose to tell myself all sorts of stories about how I’m now good enough. Or, I can be happy with the enjoyment I got from making the drawing. Which is the reason I love creating art.
I decided to leave the drawings as is for the tutorial and show above where it’s off. Too many beginner artists beat themselves up over things not being perfect. Try not to do this and just embrace your love for creating art.
Practice, practice, practice. But above all else , have fun!
Grab your FREE Guide to Better Art in 7 Days
