How to Draw a Hibiscus
Learning how to draw a hibiscus flower is easy and fun. We’ll show you a simple process you can follow for anything you might want to draw.
In this step by step drawing tutorial we’ll show you how to draw, outline, and color your hibiscus drawing with markers.
The goal is to keep your creative time fun and relaxing. Never stressful or boring.
So let’s gather up our supplies and get ready to have some fun learning how to draw a hibiscus.
* Some of the links in this post may be affiliate links. This means I receive small commissions for purchases made through these links at no extra cost to you.
Art Supplies
- Thin black marker
- Paper or cardstock
- Markers
- Pencil
- Click Eraser, Pink Pearl Eraser
- White Gelly Roll pen
Hibiscus Sketching Exercise
I love doing these quick sketch exercises before working on my artwork. They are a great way to warm up your drawing muscles.
But I’ve recently discovered many other benefits of doing them as well. For starters, learning to draw is really about learning to see. And most of us try to develop our ability to see on the fly.
Let me explain what I mean by this. You want to learn how to draw something you’ve never drawn before. So you bring up some photos and get started on your drawing.
Maybe you will finish the drawing. Or maybe you quit half way through because it’s not turning out the way you had hoped.
When we draw things we’re not familiar with, we really don’t know what it is we’re looking at. That’s why doing a quick sketch session prior to your drawing is so powerful.
So here’s how you do a hibiscus sketch exercise session…
All you have to do is grab a pencil and paper. Then set a timer for three or five minutes. Now do as many hibiscus sketches as you can before the timer goes off. Using a reference photo is a good idea as well.
Another option is to simply draw until you fill your paper. But make sure if you’re using this method to keep your sketching session short. Five minutes is around where you want to stay.
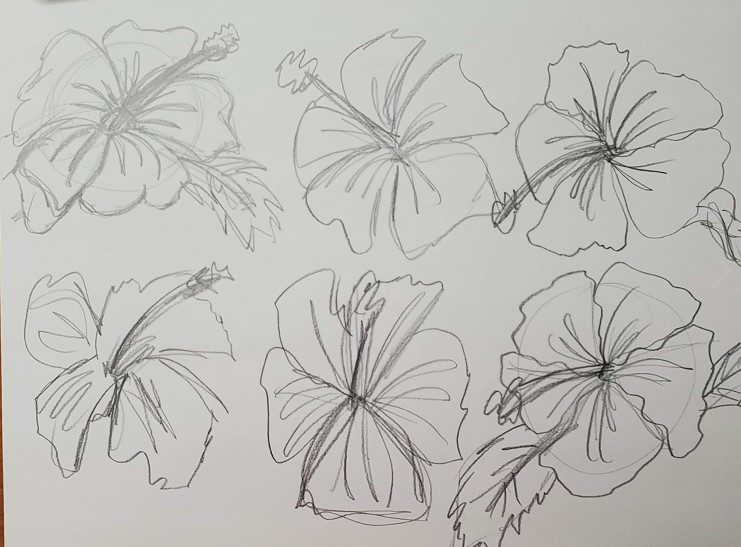
This is an easy, low pressure, way to get familiar with drawing a hibiscus flower before working on your actual artwork.
How to Draw a Hibiscus Step by Step
Learning how to draw a hibiscus is really easy if you break things down into simple shapes and steps. Like with most of our drawing tutorials, we’re going to start with some basic shapes to use as our guides.
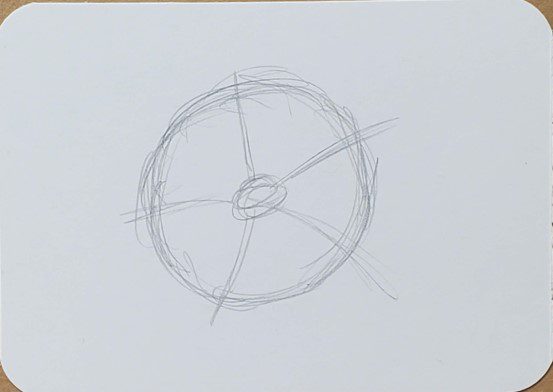
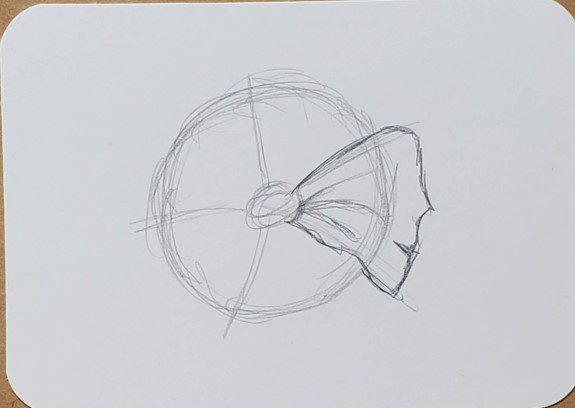
Step 1: Basic Shapes
Draw a circle, slightly smaller than what you want your overall hibiscus drawing to be. Then draw a smaller circle in the center as well.
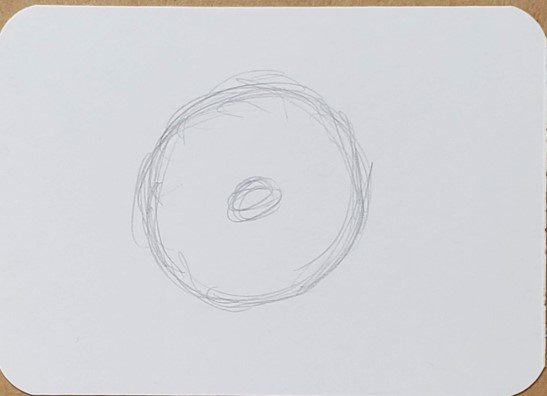
Next, draw five lines in sort of a star shape. These will be our guidelines for drawing the individual petals of our hibiscus flower.
Step 2: Add Details
Now we can start drawing the individual petals of the flower. Use a reference photo to help with the shapes of your petals. Or you could use your quick sketches from earlier.
Draw your next petal behind the first one you drew. Keep in mind that your petals will need to overlap.
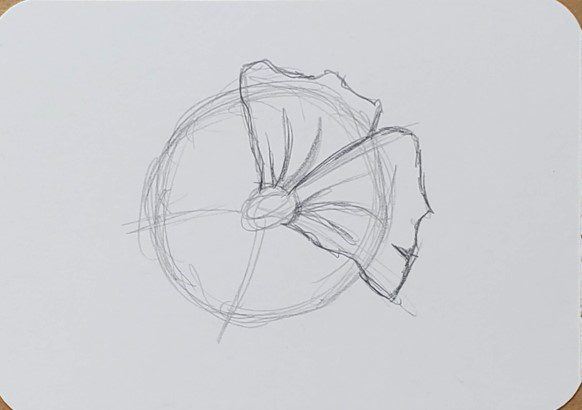
For the next one you can continue drawing them around the circle, or you can skip around. Either way is fine.
Continue drawing your petals until all five are drawn.
Now draw the pistil in the center of your hibiscus, and a couple of leaves.
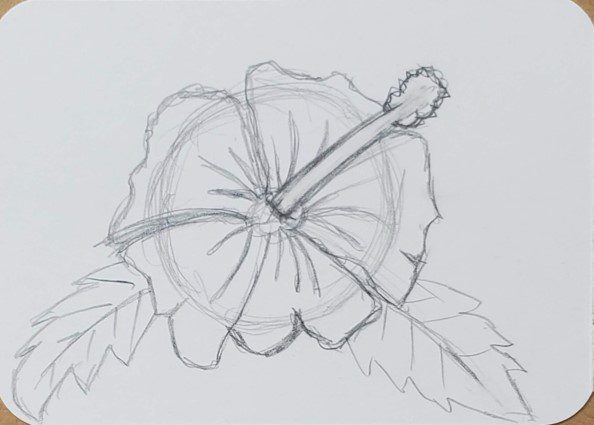
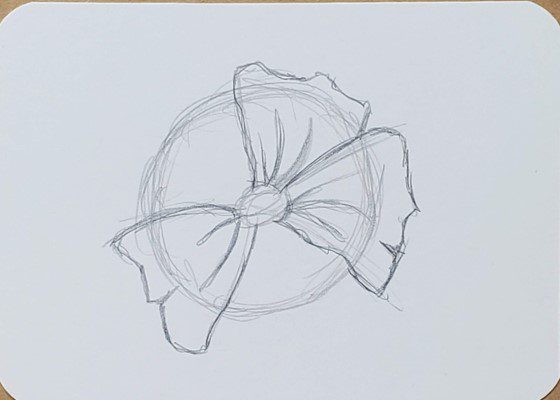
Keep working on your hibiscus drawing until you’re satisfied with how it looks.
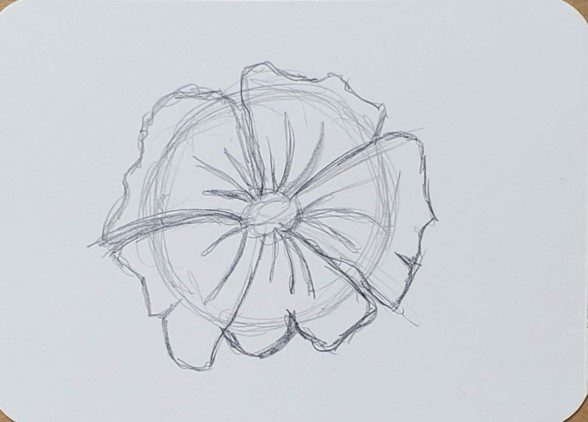
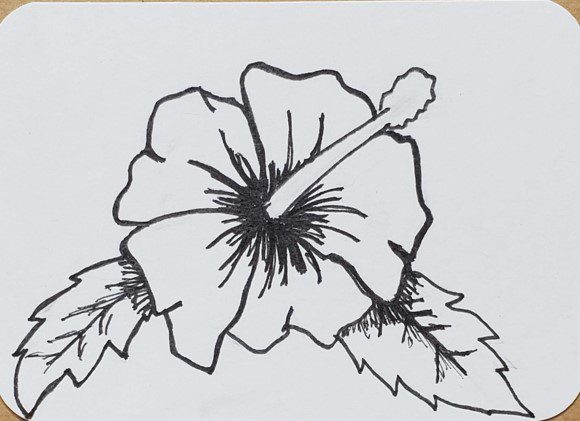
Hibiscus Outline
Making a hibiscus outline is really easy. Just trace over the pencil lines you want to keep with a black pen or marker.
When making your outlines, you can use thick or thin lines. Or you can use a combination of line weights. Do whatever fits your artistic style.
You could also try using a color other than black. There are many possibilities when it comes to creating your artwork.
This is a good time to add in any shading you want to include in your hibiscus drawing as well.
Experiment and try new things. Doing your artwork on artist trading cards is a great way to save time and do more drawings.
Learn all about what they are and how to make them in our Beginner’s Guide to ATCs.
Developing your own style will take time and practice. So if you feel like you haven’t discovered what your style is yet, just keep practicing and you’ll find it.
When you’re finished with your hibiscus outline use an eraser to clean up your drawing and remove any pencil lines. Be sure to hold your paper down when doing this so it doesn’t get wrinkled.
Hibiscus Drawing with Markers
Learning how to draw a hibiscus with markers is really easy. And there’s only a few things you need to keep in mind.
First, if you want to be able to blend your colors together you need to use alcohol based markers. Bic, Sharpie, and Copic for example. As well as many others.
Second, you need to work while the colors are still wet or they won’t mix together. This isn’t a big deal. Just make sure you work on a section at a time.
Third, you need to use colors that are similar to each other if you want to create a smooth transition of color. If your markers are too different they will leave a harder edge.
Avoid filling in areas of one solid color. Instead, use two or three colors for each section. For the flower three different purple markers were used (light, medium, and dark). They were then blended together using the lighter marker.
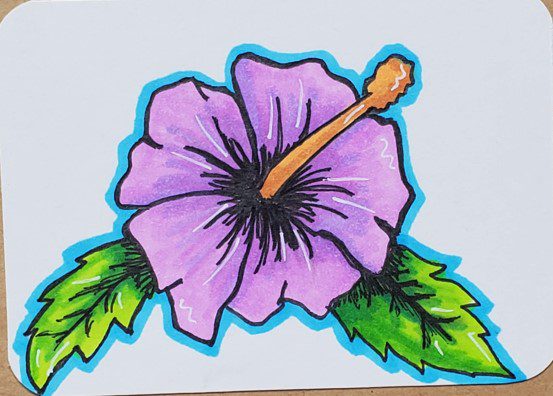
For the leaves, three different greens were used.
Using more than one marker will help add dimension to your drawings and keep them from looking flat and boring.
A white Gelly Roll pen can be used if you want to add in some highlights.
Final Thoughts and Next Steps
Congratulations on learning how to draw a hibiscus flower. Are you in love with your artwork? If not, you should be.
You should always focus on the process and not the final outcome. Your creative time is supposed to be relaxing and enjoyable.
If you want to get good at drawing a hibiscus, or anything else, you need to practice. A few minutes each day will help you improve your art skills.
Doing a series of hibiscus drawings will help you improve your art and drawing skills, as well as your creativity. I always recommend doing a series of drawings. The benefits will be huge.
Grab your FREE Guide to Better Art in 7 Days

Type here..so nice