Learning How to Draw Angel Wings
It’s pretty easy to learn how to draw angel wings. But you can also make them very detailed and much more complex.
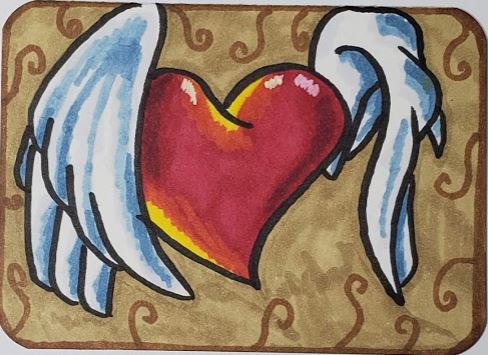
You could add them to people, animals, or other subject matter such as hearts.
How you make your angel wing drawings and what you do with them will be entirely up to you. But today you’ll learn some basic concepts and techniques to help you get started.
Let’s begin by looking at some art supplies we’ll need to get started.
* Some of the links in this post may be affiliate links. This means I receive small commissions for purchases made through these links at no extra cost to you.
Art Supplies
Symmetrical Art
Before we get started with our step by step how to draw angel wings let’s take a moment to talk about symmetry in art.
Symmetrical refers to an object that is the same on both sides, a mirror image of itself when split down the middle.
If you’re going to draw your angel wings symmetrical you’ll need to understand this concept. But you could choose to draw them asymmetrical instead, like in the heart with wings example you’ll see in a little bit.
There is no right or wrong way. How you draw anything is up to you.
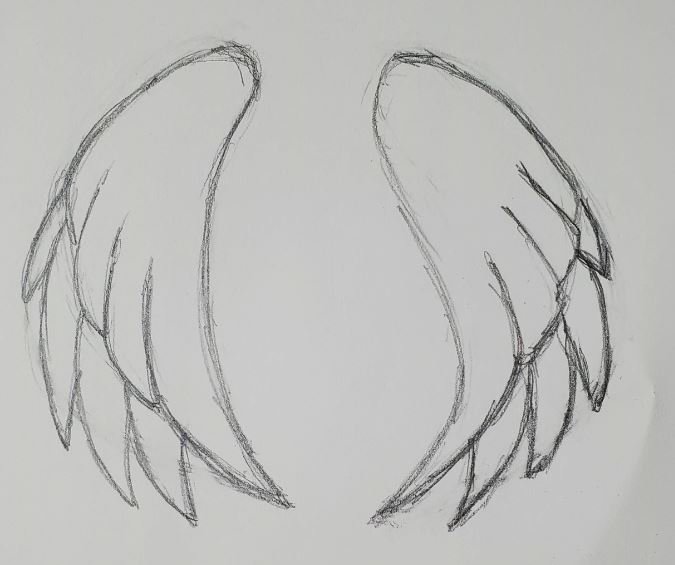
How to Draw Angel Wings Step by Step Easy
Like usual, we will begin by sketching out some basic shapes to use as our guides. This serves many purposes when creating works of art.
For starters it simplifies the drawing process and makes complex drawings easier and less intimidating. But it also helps you get your drawing positioned correctly and the sizing right.
It’s a good idea to get in the habit of roughing out your drawings with basic shapes, or forms, first.
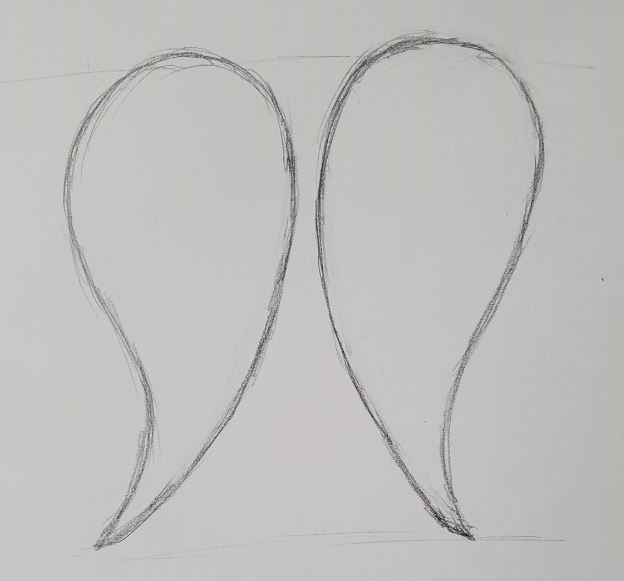
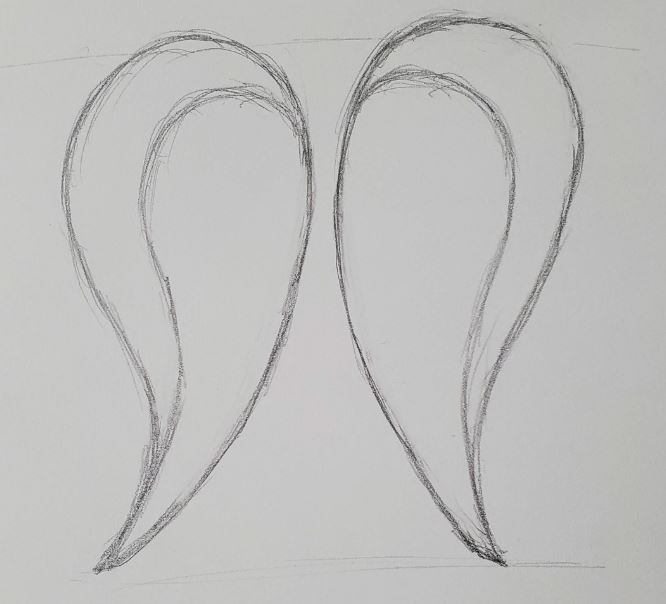
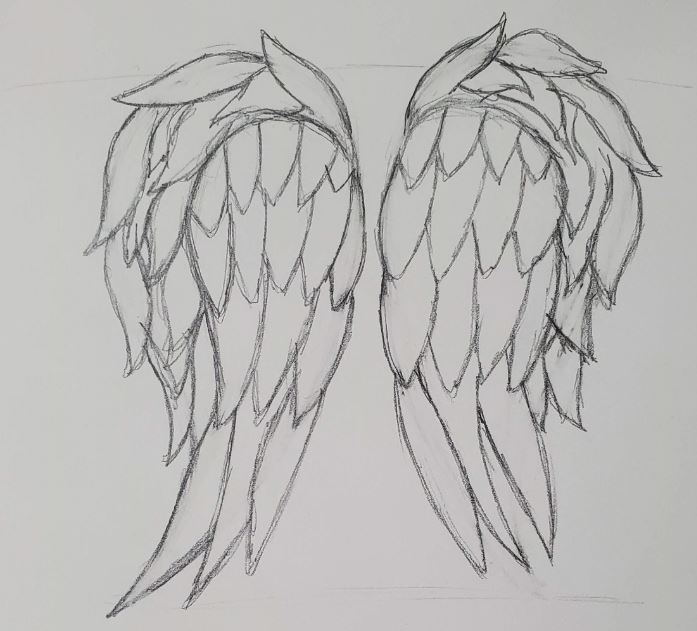
Step 1: Basic Shapes
Begin by drawing a curved teardrop shape for your rough outline.
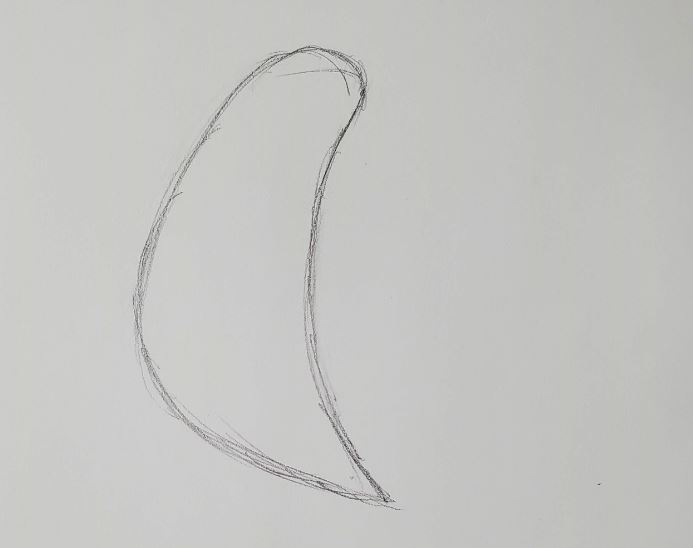
Next draw the other angel wing shape a mirror image of the first one so your drawing will be symmetrical.
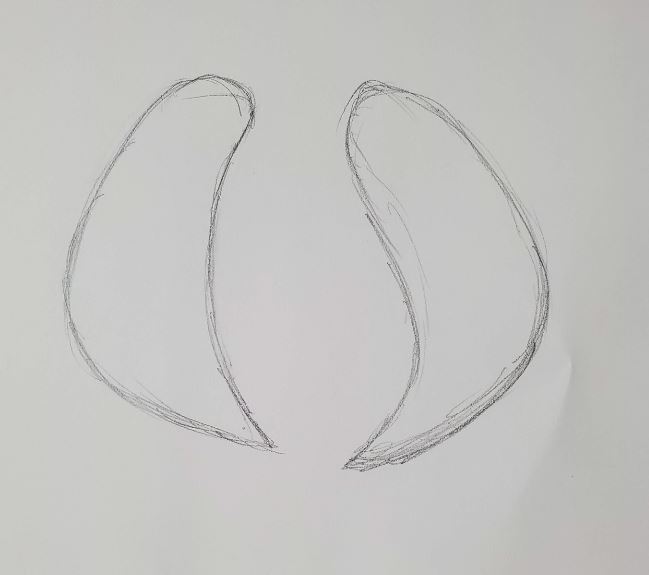
Don’t stress too much about it being perfect. Drawing should be fun and relaxing.
Most wings have different layers for the feathers. So the next step is to add another guideline to indicate where the two layers will meet.
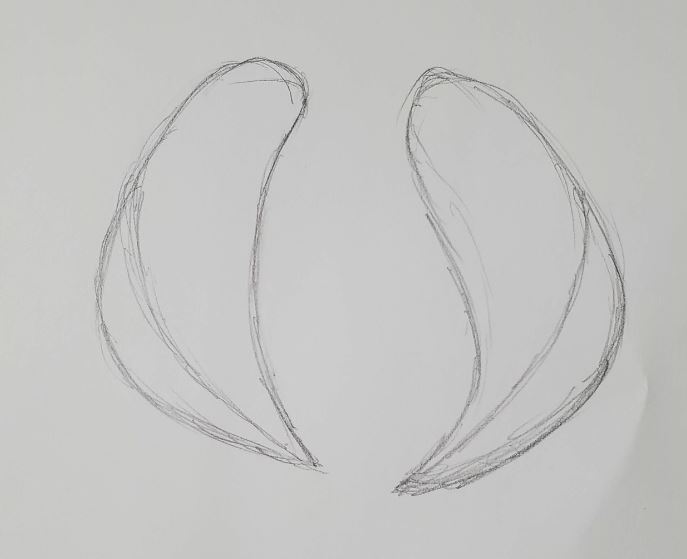
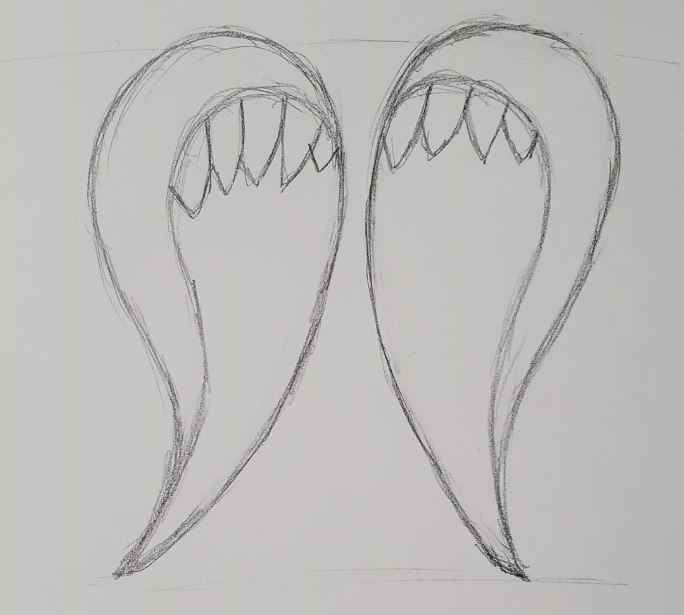
Step 2: Add Details
Now draw in the top layer of feathers for your angel wings. Follow along the guideline you just drew. Make your feathers small at the top and longer at the bottom, so they follow along the guideline that you drew.
There are a lot of different ways you can draw your feathers. Don’t feel limited to doing yours the same as mine.

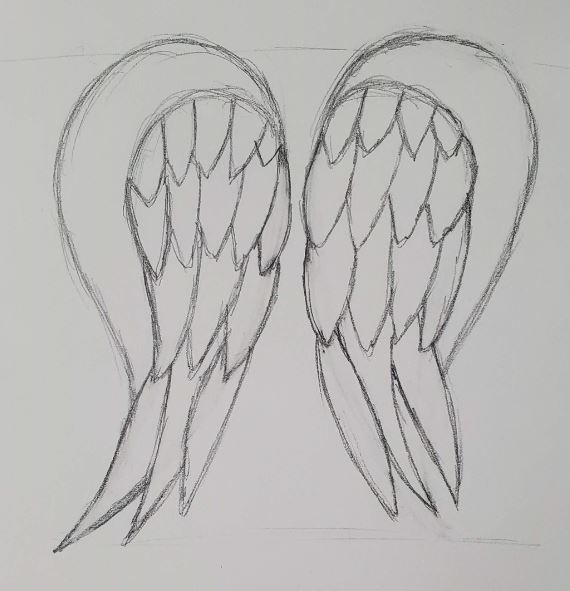
Next add the lower section of feathers. Notice how they are more defined and drawn individually. Use overlapping to make your drawing look more interesting and to show depth.
Finish up your angel wings by drawing your feathers for the other side. You can make your wings symmetrical or asymmetrical. It just depends on the look you’re going for. You could also add an additional row of feathers at the bottom by drawing more in the negative space at the ends.
If you make your drawing symmetrical, don’t feel like it has to be perfect. Just do the best you can.
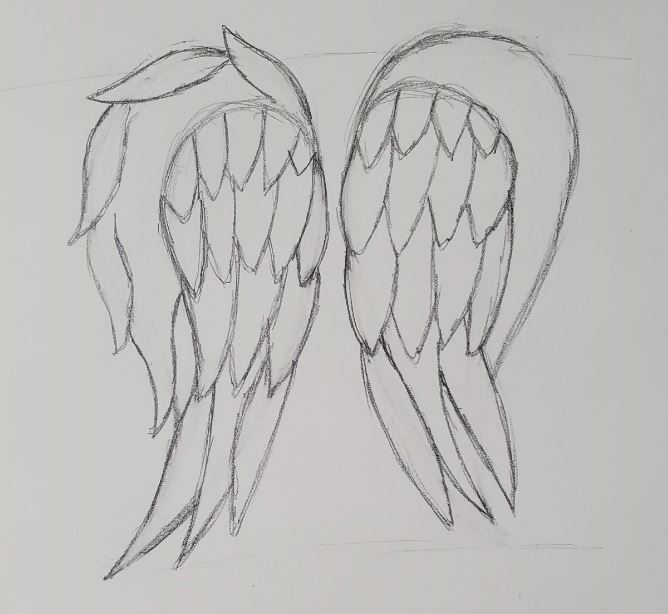
This style of angel wings looks really good on hearts. And you can change up the way you draw the other wing, or you could draw them symmetrical. These are really just a lot of fun to make and experiment with.
In this example the wings were drawn asymmetrical.
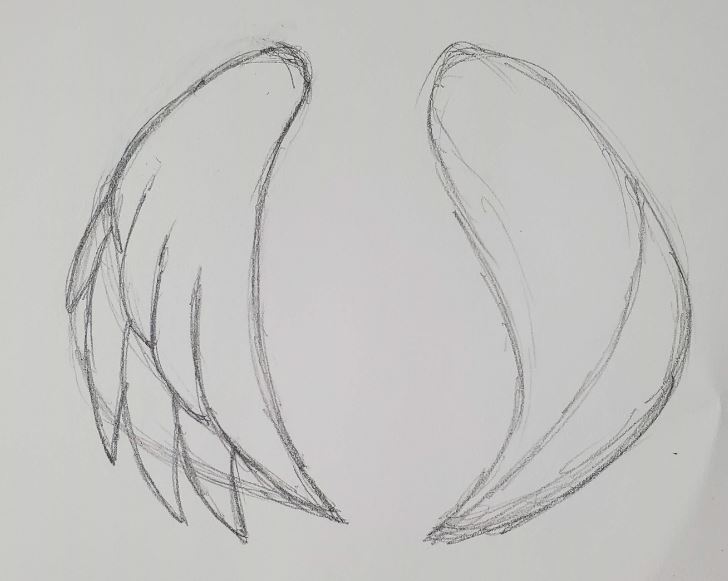
How to Draw Angel Wings Realistic
This next set of instructions is for drawing angel wings that are less stylized and more realistic. But they are also a little tougher to draw. This won’t be a problem though because we’re going to break things down into easy to follow steps.
Step 1: Basic Shapes
Again, begin with your teardrop shapes for the basic guidelines. Remember to draw them symmetrical.
Add in your line where the two layers of feathers will go. There are many different ways to draw your feathers. Don’t be afraid to experiment a little bit.
Step 2: Add Details
Start by drawing in your first row of feathers. The main section is easier to draw so start there. Draw out each individual feather across the top of your wings.
Make your feathers wider at the top, and coming to a point at the ends. There are a lot of different ways to draw out your feathers. Just do whatever feel and looks right to you.
Next add the second row of feathers. And then continue row by row until you reach the bottom. Again, use overlapping to show depth and to make your drawing look more interesting.
Notice how the final row of feathers are longer and more spread apart.
Now draw some feathers along the outside edge of your angel wing. Overlap these feathers as well.
Add more feathers until the entire section is filled in.
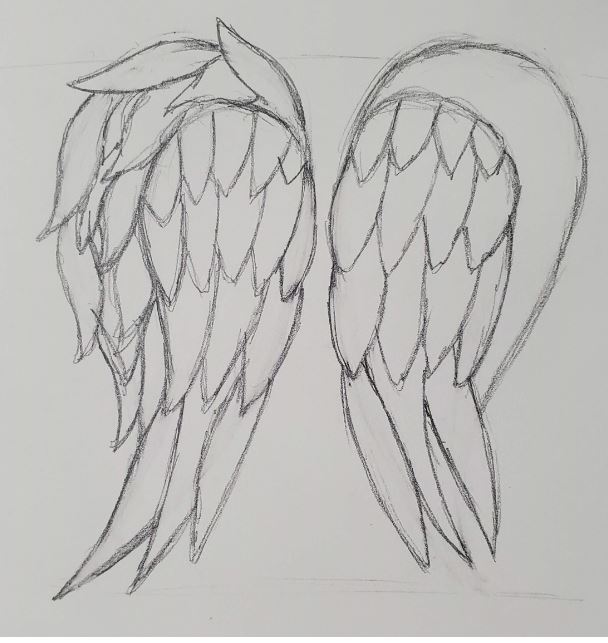
Then do the same thing for the other side.
Step 3: Shading
You can finish up your drawing by adding in some shading under the layers of feathers. The areas where the feathers overlap should be shaded.
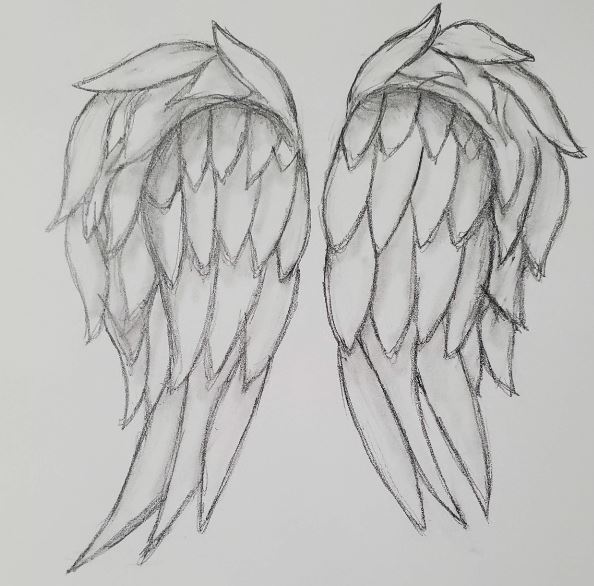
If you need more help with this step, check out our tutorial on How to Shade with Pencil.
How to Draw Angel Wings | Easy Art Tutorial for Beginners
There you have it. Two different ways on how to draw angel wings in two different styles. I personally like the first style the best.
I find the more stylized method more fun and relaxing. Plus there are more ways to use them in your drawings, depending on your artistic style that is.
Whichever way you prefer drawing your angel wings is fine. Just be sure to have fun and practice as often as possible.
And make sure you find opportunities to experiment and have fun, without worrying about the outcome.
Don’t ever forget… art should be fun!
