How to Draw a Feather
Learning how to draw a feather is easy and fun. We’ll show you how in this step by step drawing tutorial. You’ll start with some basic shapes and guidelines and build your artwork from there.
You’ll learn how to sketch, draw, outline, and color your feathers with markers.
Art and drawing are skills that anyone can learn. It just takes time and practice. And you’ll be much more likely to draw more if you’re having fun.
So let’s grab some supplies and get started learning how to draw an easy feather.
* Some of the links in this post may be affiliate links. This means I receive small commissions for purchases made through these links at no extra cost to you.
Art Supplies
- Thin black marker
- Paper or cardstock
- Markers
- Pencil
- Click Eraser, Pink Pearl Eraser
- White Gelly Roll pen
Feather Sketch Practice
Doing a feather sketch practice exercise is a great way to warm up and get familiar with what you’re going to be drawing. And it only takes a few minutes to complete.
All you need is paper, something to draw with, a timer, and some reference photos of feathers.
To do your feather sketch practice session, just set the timer for three or five minutes. Then sketch out some feathers until the timer goes off. Your sketches should be loose and quick.
Don’t spend too much time worrying about all the small details. Just get the basic idea of what feathers look like.
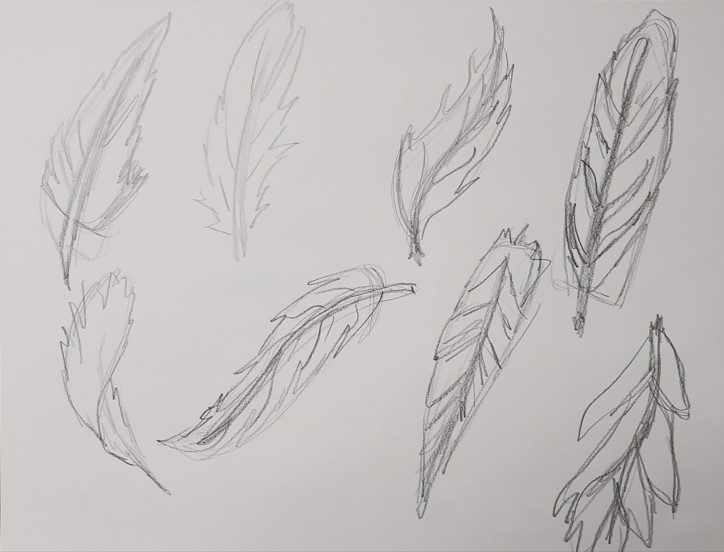
You can also do your quick sketches by working until you fill your paper and run out of room. This is the method I usually use. Just make sure you don’t get too hung up on the details and spend a bunch of time on the exercise. It shouldn’t take you longer than five or ten minutes to fill your paper.
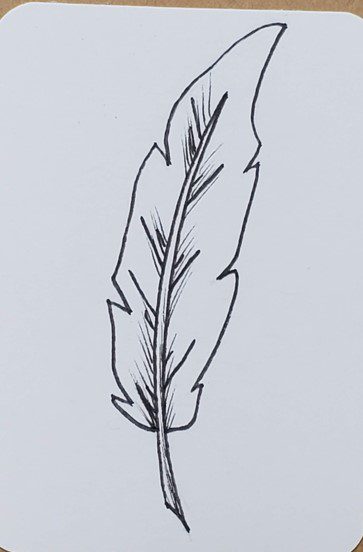
How to Draw a Feather Step by Step
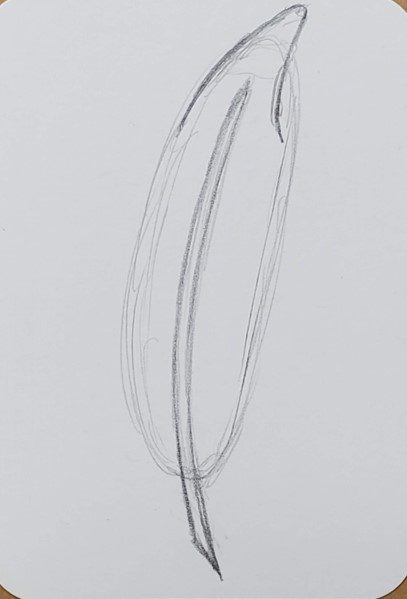
Learning how to draw a feather is really easy if you start off with some basic shapes. So let’s begin by drawing a line for where the quill will be. And then draw an oval shape around that.
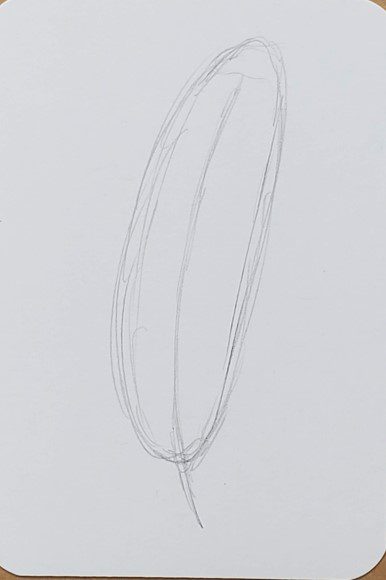
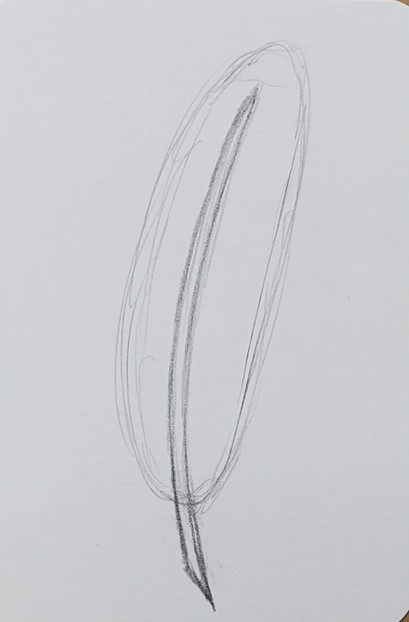
Now let’s draw out the quill. You want it to extend past where the feather will be. And it should come to a thin point at the top, and be wider at the bottom.
Starting at the top, let’s work on drawing the outside shape of the feather. Your feather should come to a point at the top, so draw that first.
Using your oval shape as your guide, start drawing the side of your feather. As you bring your line down, create a notch to indicate where the feather pulls apart a little bit. You could draw your feather without the indents as well, but that looks kind of boring.
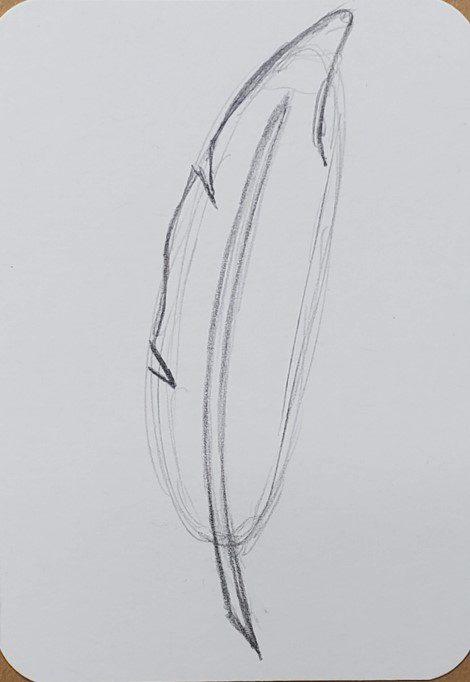
Finish the left side of your feather drawing by the bottom section. Notice how it curves towards where it meets the quill.

Now follow that same process for the other side of your feather. Your indents don’t need to match and be symmetrical. Just add a few in on the right side wherever you think they look good.
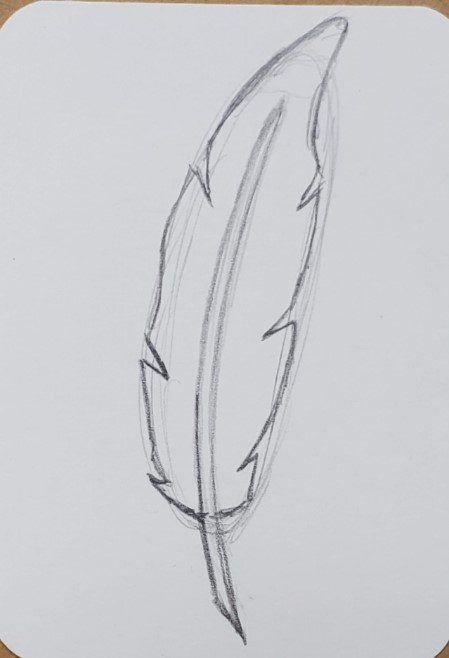
To finish up your feather drawing, add some lines to the inside of your feather along the quill. These can be added randomly throughout your feather.
Feather Outline
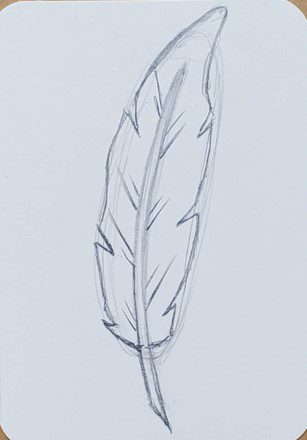
After you’ve finished getting your feather drawn out and looking nice, we can add an outline. Use a black pen or marker to go over your pencil lines and create your feather outline.
You can make your lines thick, or you can make them thin. Or, you can do a combination and vary your line weights.
How you create your feather outline will depend on your artistic style and what you think looks good. This will be different for everyone. If you don’t know what your artistic style is yet, don’t worry, it will develop over time. Just keep practicing.
Try different things and don’t be afraid to experiment. Start off making your lines thin. Then go back over any areas that look like they need to be thicker.
You can also try using different colors for your feather outline. Or try not making an outline at all.
Use an eraser to remove and pencil lines and clean up your drawing.
How to Draw a Feather with Markers
Learning how to draw a feather with markers isn’t as difficult as you may think. Learning to use markers is really pretty easy. And like with most things, all you need to do is practice working with them.
If you use alcohol based markers, you can blend the colors together to create smooth transitions of color. This is what I use.
When blending your markers you want to choose colors that are similar to each other so the transition is smooth. But, you want to use more than one color for your drawings anyway. Filling in your artwork with one solid color will make it look flat and boring.
For my feather drawing today I decided to add a galaxy type theme instead of just adding color. To do this I used a bright pink, magenta, purple, and a dark blue. Take a look at our tutorial on How to Draw a Galaxy with markers for a step by step on how this was done.
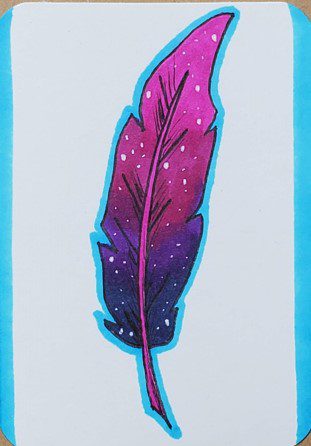
To blend the colors together, just go back over the area where the two colors meet with the lighter color.
A white Gelly Roll pen was used to add in some stars.
Final Thoughts and Next Steps
Now that you know how to draw a feather and color it with markers, what’s the next step? As I mentioned earlier, art and drawing are skills that anyone can learn. So the next step is to practice.
The more you practice, the better you will get. Drawing for a little bit each day will provide you with the biggest benefits. Even if it’s only for a few minutes. Try to schedule your creative time into your daily routine. If you can commit to even ten minutes a day you’ll see improvements in no time.
Try doing a challenge to see if you can make seven feather drawings in a week. Work small and have fun.
Grab your FREE Guide to Better Art in 7 Days
