
How to Draw Candy
Learning how to draw candy is easy and fun. We’ll show you step by step how to sketch, draw, outline, and color your candy drawing with markers.
Art and drawing are skills that anyone can learn. These skills require practice and repetition to improve them. And if you keep things fun and enjoyable, you’ll be more likely to spend time on them.
So let’s grab some supplies and get ready to have some fun learning how to draw candy.
* Some of the links in this post may be affiliate links. This means I receive small commissions for purchases made through these links at no extra cost to you.
Art Supplies
- Thin black marker
- Paper or cardstock
- Markers
- Pencil
- Click Eraser, Pink Pearl Eraser
- White Gelly Roll pen
- Colored Pencils
Candy Sketch Practice
Doing a sketch practice exercise prior to working on your drawings is extremely beneficial. And it only takes a few minutes to complete.
Start by bringing up some reference photos to look at. Get yourself some paper and something to sketch with. Then set a timer for three or five minutes. Do as many quick sketches as you can before the time runs out.
When doing your candy sketch practice, keep your lines loose and quick. Don’t worry about getting all the little details in. The goal is to warm up your drawing muscles and get familiar with what you’re going to be drawing.
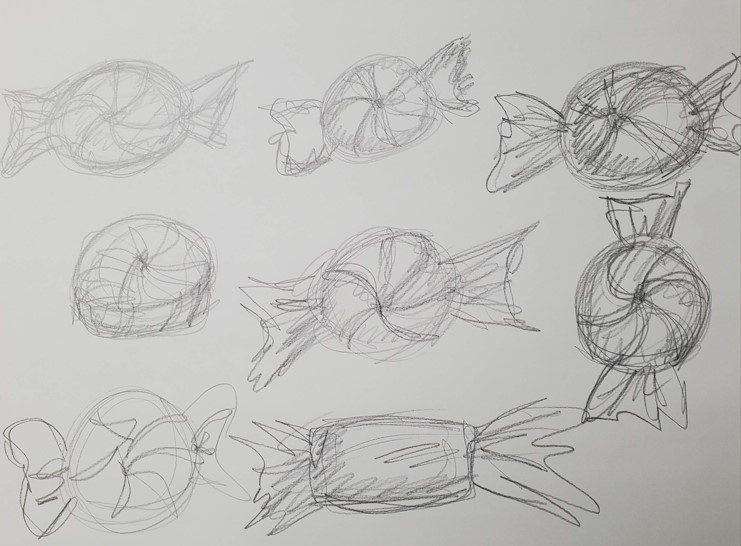
Another option is to sketch until you run out of room on your paper. If you choose this method, be careful not to spend too much time on this exercise. It shouldn’t take you much longer than five minutes to fill your paper up.
How to Draw Candy Step by Step
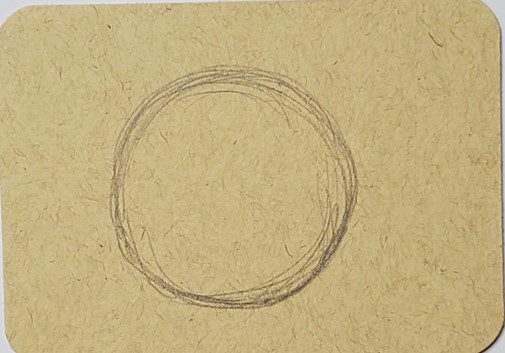
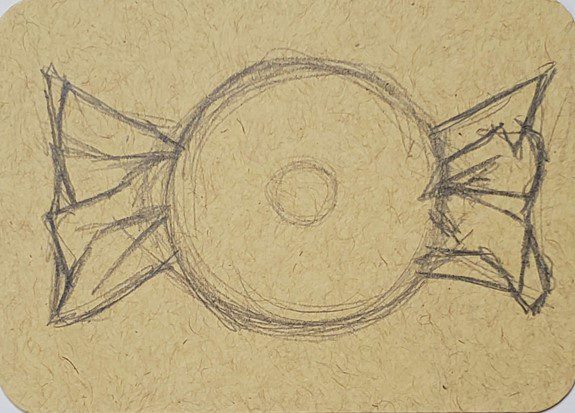
When learning how to draw candy, or anything else, the easiest way is by breaking things down into basic shapes. So let’s start by drawing a circle.
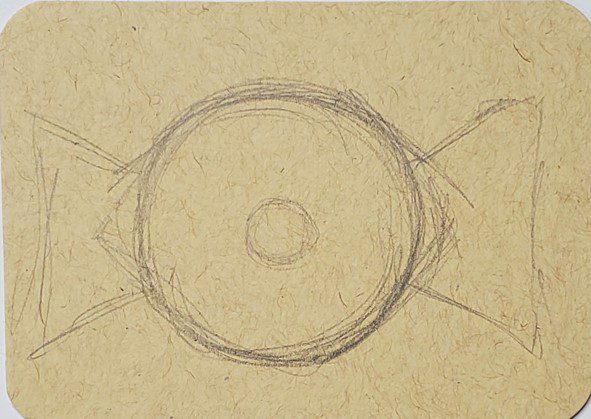
Next, add a couple of triangles on the ends for the wrapper. You can add a smaller circle in the center as well to help with shading and identifying where the center is.
Let’s start adding in some of the details. Draw some folds in the ends of the wrapper. Make them a little random and uneven.
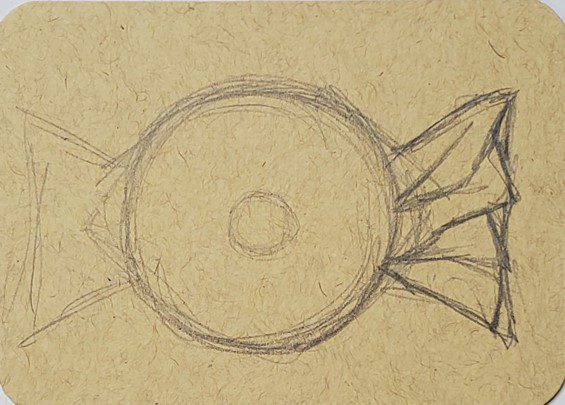
Then repeat the same process for the other side of the wrapper.
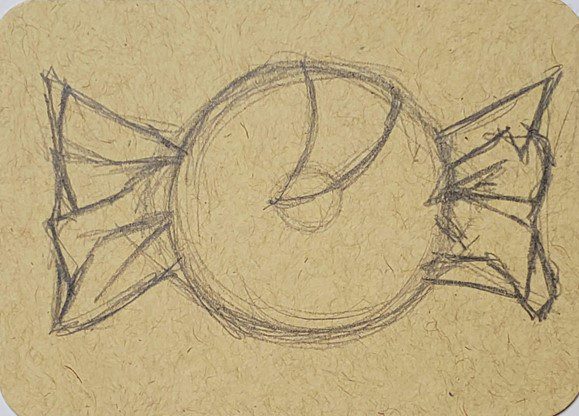
Now let’s start drawing the stripes on the candy. For this piece of candy we’re going to draw some swirls. Drawing from the center area of your circle, make a curved line. Then draw another curved line next to that one, making it wider as it moves towards the outside of the circle.
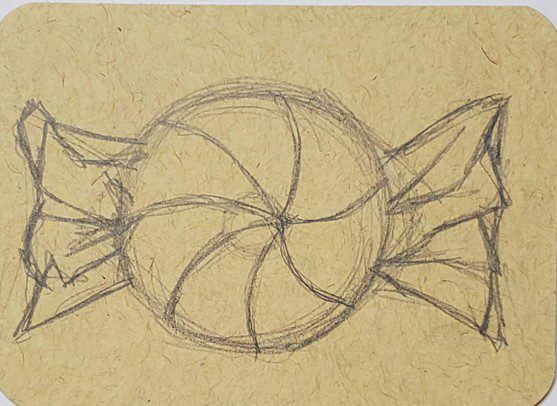
Repeat this process all the way around your piece of candy. Make sure you have an even amount of sections when you’re finished or your color pattern won’t work out.
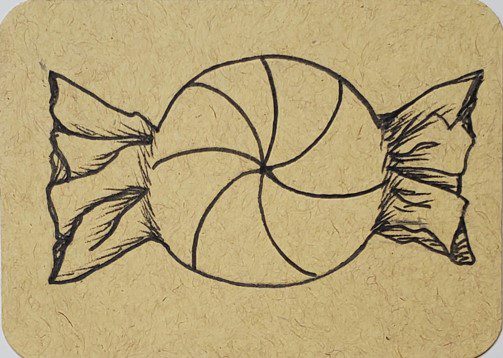
Candy Outline
After you have your candy drawing completed, the next step is to outline your drawing. And maybe add some shading.
To create your candy outline you can use a black pen or marker. Or, you could try using a different color and see what that looks like. There are a lot of options when it comes to finishing your drawings. Do whatever fits your artistic style.
You can make your lines thick or thin. Or, you can use a combination of line weights for your candy outline. Again, just do whatever fits your style.
If you’re not sure what your style is, don’t worry. It will develop over time with practice. Try new things and experiment. And don’t forget to have fun.
To finish up your candy outline you can add a bit of shading to make it look more interesting and illustrate depth.
How to Draw Candy with Markers
Learning how to draw candy with markers is easier than you may think. If you want to learn how to use any medium, it is absolutely possible. All you need to do is practice using it. Before you know it, you’ll be completely comfortable using it.
I love using markers because they are bold and bright. And, the colors can be blended together to create smooth transitions. You just need to make sure you’re using alcohol based markers.
When adding color to your candy drawing, or anything else, you should avoid filling it in with one solid color. This will make your artwork look flat and boring.
Instead, try getting into the habit of using two or three colors for each area of your drawings. For the red areas of the candy, I used red and a medium gray. You could also use two different reds. Or red and another color.
Again, experiment and try new things with how you color your candy drawing.
Because I used toned paper, the white areas were filled in with a colored pencil. But gray was also added to create some shadows.
For the candy wrapper, a white colored pencil was used. And then gray and blue were added to make it look more interesting and show some reflections.
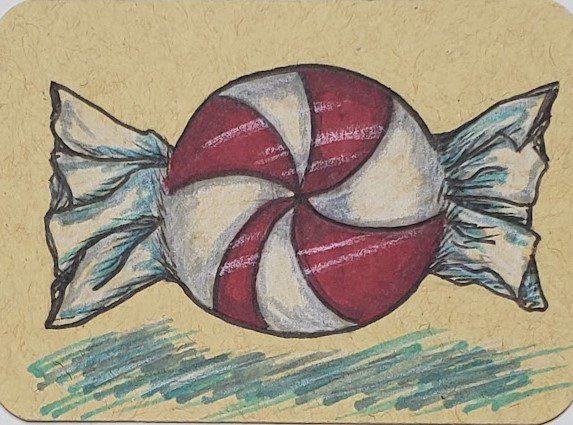
You’ll also want to add some reflections across the piece of candy itself so it gives the appearance of being wrapped in plastic.
Final Thoughts and Next Steps
Now that you know how to draw candy, what’s the next step? Well, as I mentioned earlier, practice is required to get better at art and drawing. But the good news is that it’s something anyone can learn to do.
If you want to get really good at drawing candy, you need to draw several pieces of candy. Or if you want to get really good at drawing with markers, you need to do a lot of drawings using markers.
Repetition and practice will help you in many different areas with your artwork. Try fitting your creative time into your daily routine. Even if it’s only for ten or fifteen minutes a day. That time will start to add up and you’ll see improvements in no time.
Challenge yourself to see how many candy drawings you can do in the next week. Not only will your art skills improve, but your creativity will increase as well.
Grab your FREE Guide to Better Art in 7 Days
