Step by Step Donut Drawing with Markers
Learning how to draw a donut is easy and fun. We’ll show you step by step how to draw, outline, and color your donut drawings with markers.
Donuts, or doughnuts, come in a variety in brightly colored toppings and an assortment of flavors. They are one of the most popular pastries that exist today, and have been around since 1750.
There are so many cute and colorful ways to decorate your donut drawings. So have fun and experiment with new ideas for your art.
The best way to get better at drawing donuts, or anything for that matter, is with practice and repetition. So do as many donut drawings as you can. Challenge yourself to do seven drawings in seven days and see how much you improve and how creative you can be.
Let’s have some fun learning how to draw a donut.
* Some of the links in this post may be affiliate links. This means I receive small commissions for purchases made through these links at no extra cost to you.
Art Supplies
- Thin black marker
- Paper or cardstock
- Markers
- Pencil
- Click Eraser, Pink Pearl Eraser
- White Gelly Roll pen
How to Draw a Donut Step by Step
Learning how to draw a donut is really easy if you break things down into easy to follow steps.
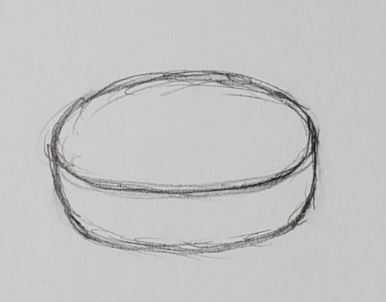
The first thing you need to do for your donut drawing is to lay out the basic shape. Since this will be a three-dimensional donut drawing, we will begin by drawing a cylinder shape.
This shape will act as a guideline for your donut drawing. It’s much easier to draw complex objects by breaking them down into basic shapes and forms first.
Since we’re drawing a donut, which isn’t very tall, you want your cylinder to be short.
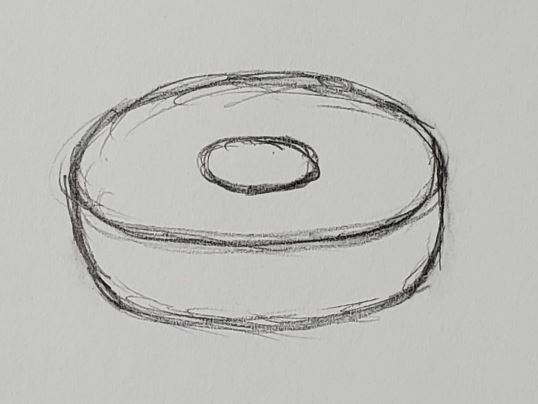
The next step to drawing your donut is to add a circle in the center for the donut hole. Think about what a real donut looks like to get the size right.
Of course there are many different types of donuts that you could draw. And they come in all kinds of shapes and sizes. We’re looking at only one of them in this step by step drawing today.
Now, let’s make the inside of your donut drawing look 3D by adding another line. Notice how the curve of the line matches the curve of your donut hole circle that you drew in the previous step.
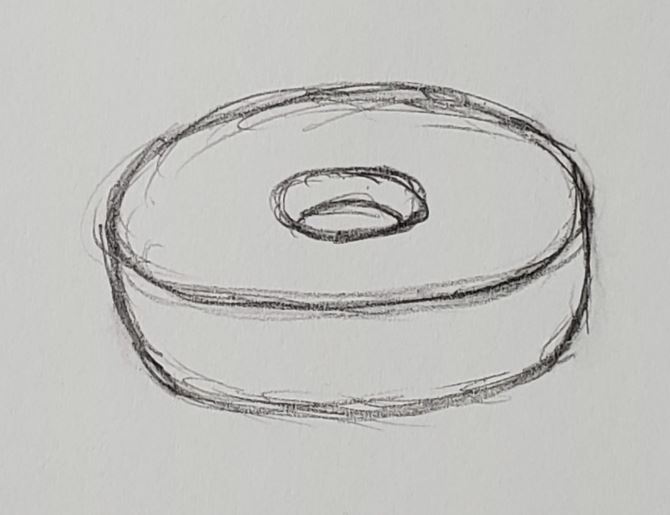
Good job. You just learned how to draw a donut using concepts to make objects appear three-dimensional. Next we’ll look at how to add some icing and decorations to your donut drawing.
How to Draw a Donut with Icing and Sprinkles
Donut drawings are pretty boring without icing and decorations. So let’s add some fun stuff to your donut.
Start by drawing some icing on your donut. You’ll want to draw it so it’s dripping down the sides and the center of your donut.
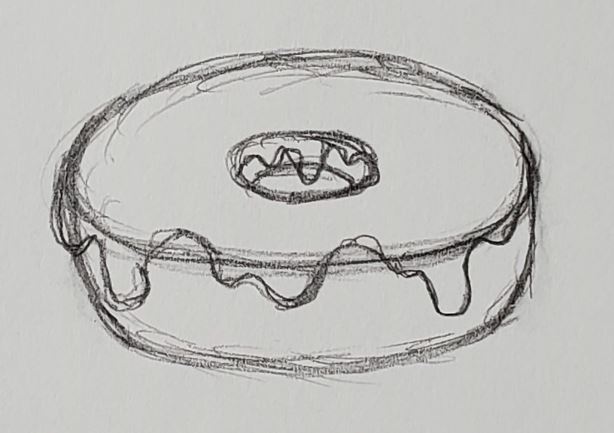
Don’t forget to add some drips to the center of your donut hole too. And keep your lines curved, avoiding sharp corners to your icing.
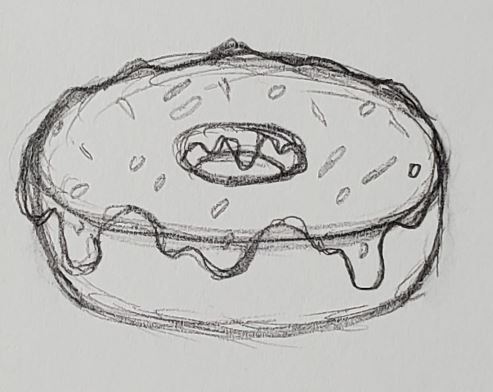
Finish up your decorations by adding in some sprinkles.
Donut Outline
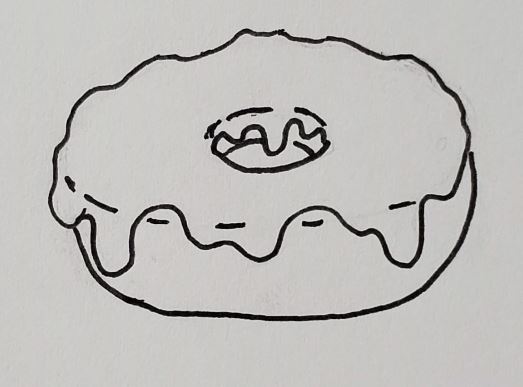
Now that you have your donut drawing all sketched out and have some fun decorations added to it, it’s time to finish up your drawing. Use a black marker or pen to outline your drawing.
Simply trace over your pencil lines. You can trace over your sprinkles too, or add them back in later using only color. Either way is fine, it just depends on what your style is and how you like your drawings to look.
If you’re doing several donut drawings you can experiment and try it both ways to see which one you think looks better.
After you’ve made your donut outline you can use an eraser to remove any pencil lines and clean up your drawing.
How to Draw a Donut with Markers
Learning how to draw a donut with markers is really easy. And there’s only a few things you need to keep in mind when using them.
First, if you want to be able to blend your colors together you need to use alcohol based markers. Bic, Sharpie, and Copic for example. As well as many others.
Second, you need to work while the colors are still wet or they won’t mix together. This isn’t a big deal. Just make sure you work on a section at a time.
Third, you need to use colors that are similar to each other if you want to create a smooth transition of color. If your markers are too different they will leave a harder edge.
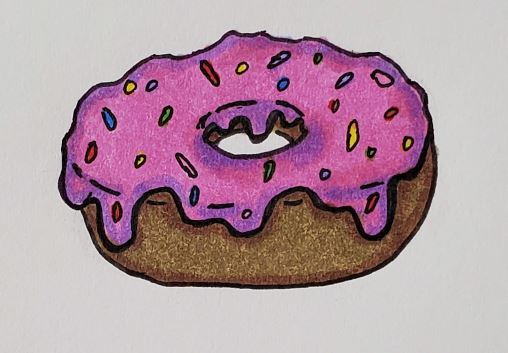
Begin by adding color to the part of your donut drawing that isn’t covered with icing. When choosing your colors think about what flavor your donut is.
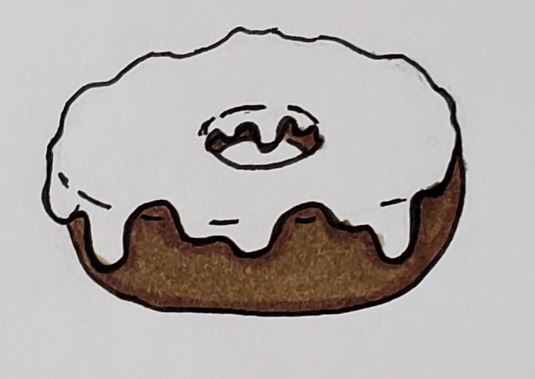
To make your drawing look more interesting and less flat, use two or three colors for each section of your drawing. In this example I used a light brown and a medium brown.
Choose some fun colors for your icing and decorations. Again, using two or three colors for your icing. Add in some colorful sprinkles to your donut drawing.
Finally, use a Gelly Roll pen to add some white highlights to your donut drawing.
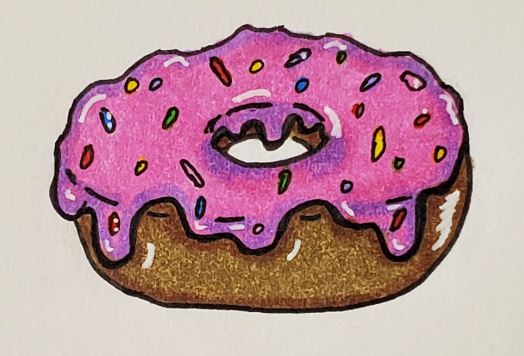
That’s it. Your donut drawing is finished. How did you do?
How to Draw a Donut Step by Step Conclusion
Now that you know how to draw a donut, step by step, what’s the next step? If you want to get good at art and drawing you need to practice. The more you practice the better you will get.
But you don’t have to draw for hours at a time. I you spend a few minutes each day, you’ll art skills will improve. The more consistently you can work on your artwork the better your results will be.
Experiment and have fun. Working on your artwork should never feel stressful.
If you want to get really good at drawing donuts, challenge yourself to do a series of them. Not only will your art skills improve, but you creativity will as well.
Grab your FREE Guide to Better Art in 7 Days

I love it thanks!
I’m so glad you enjoyed the tutorial