How to Draw a Cherry Blossom Flower – Easy & Fun
Art and drawing are skills that anyone can learn. It just takes consistent practice over a period of time. A few minutes a day is really all you need, if you’re consistent.
Keeping things relaxing and enjoyable will make you more likely to want to practice. So try not to stress out too much about your artwork.
Let’s gather up some supplies and get ready to have some fun learning how to draw a cherry blossom flower.
* Some of the links in this post may be affiliate links. This means I receive small commissions for purchases made through these links at no extra cost to you.
Art Supplies
Cherry Blossom Sketch Practice
Doing a sketch practice exercise is super beneficial. It will help you loosen up and get familiar with what you’re going to be drawing.
And it only takes a few minutes to do. Here’s how you do a cherry blossom flower sketch exercise…
- Get some paper and something to sketch with
- Pull up some reference photos
- Set a timer for three or five minutes
- Then do as many sketches as you can before the timer goes off
Or, you can quickly sketch as many cherry blossoms as you can before you run out of space on your paper. Either way is fine.
When doing your sketches, try a variety of styles and images. There are many different ways you can draw your cherry blossom flowers. This is a great opportunity to discover which ones you like for your finished artwork.
Will you add leaves, branches, or multiple flowers? This is where you can work through those ideas.
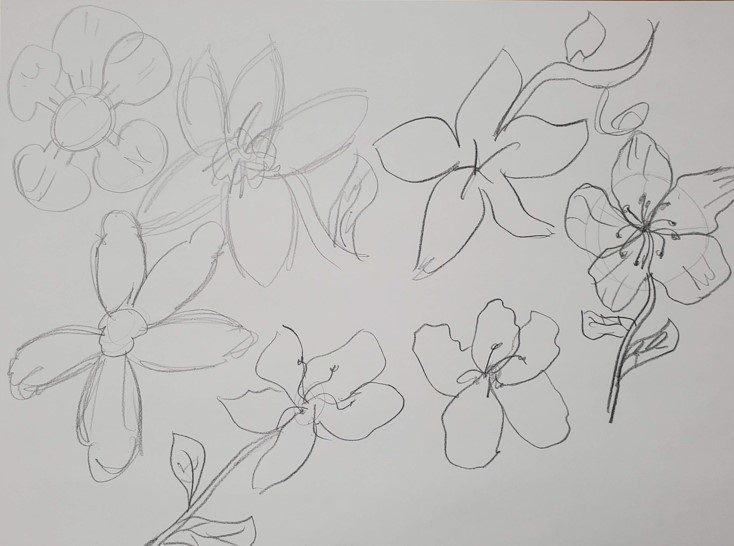
Normally we draw what we think we see. Not what we actually see. Doing some quick sketches will help you pay closer attention to what’s actually there. It really is a great exercise to do.
How to Draw a Cherry Blossom Flower Step by Step
Learning how to draw a cherry blossom flower is pretty easy. Even though they’re not very complex, it’s still helpful to break things down into basic shapes and lay out some guides.
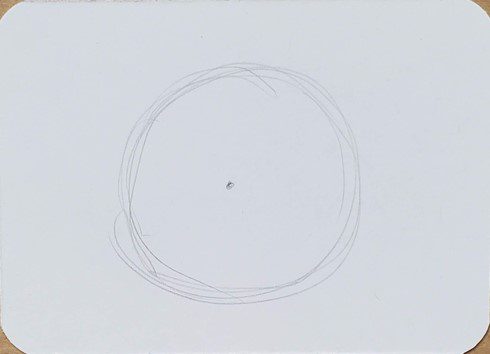
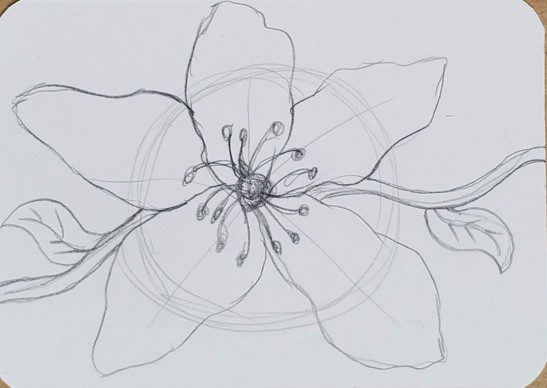
Let’s start by drawing a circle that is roughly the same size as you want your flower to be. And make a small dot to mark where the center is.
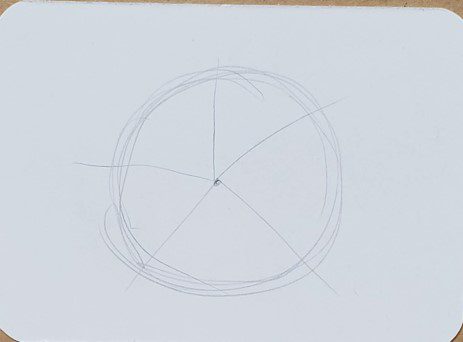
Now draw five lines coming out from the center. These lines will represent the placement of your petals.
Next, draw the first petal of your cherry blossom flower. It should be wider in the middle, and narrower at both ends.
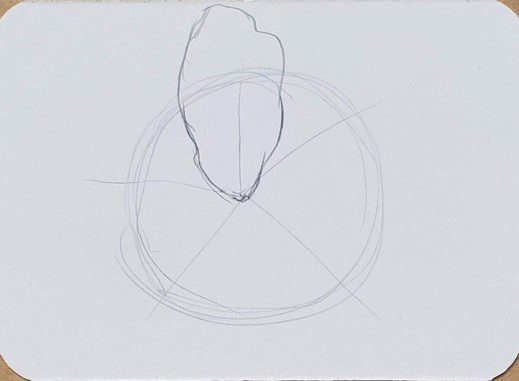
Then draw another petal next to the first one. Let the petals overlap where they come out of the center.

Continue working your way around the flower, drawing each petal.
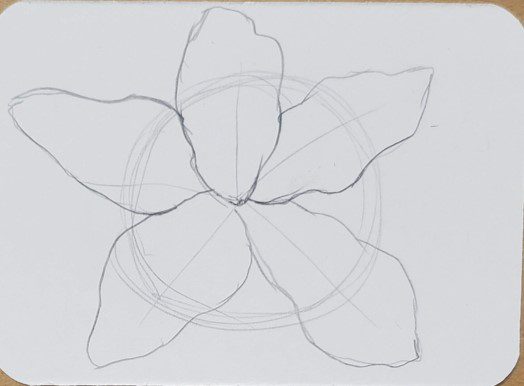
There are a lot of different ways you can draw the petals. You could make your lines wavy or more smooth. Don’t be afraid to experiment and try different things.
For the center of the flower there are also many different ways to draw it. For this example we’re just going to fill it in with black.
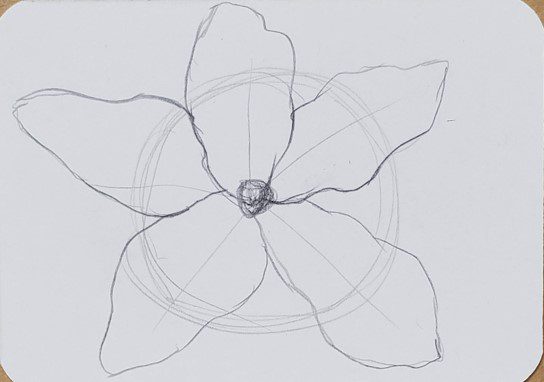
Then you can add some stamen. You can draw as few or as many as you want.
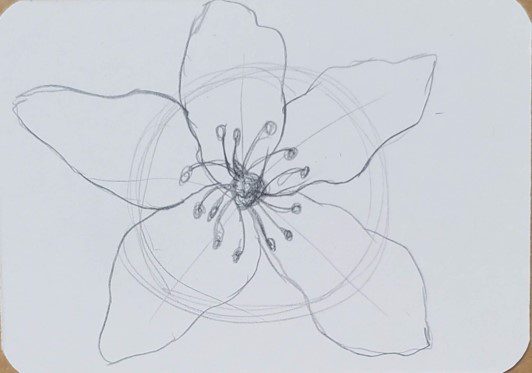
We can finish up our cherry blossom flower drawing by adding a branch and a couple of leaves.
Cherry Blossom Flower Outline
Making a cherry blossom flower outline is really easy. All you have to do is trace over the pencil lines you want to keep with a black pen or marker.
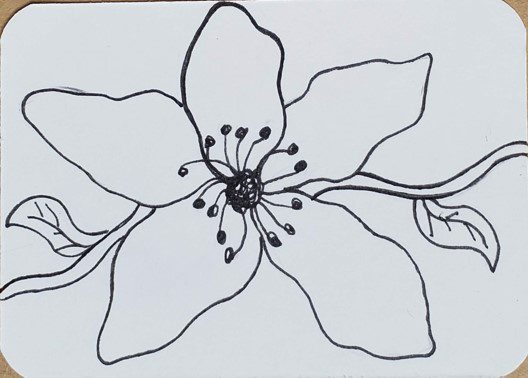
You can make your lines thick, thin, or a variation of line weights. How you make your outline will depend on your artistic style.
Just do whatever feels right to you. Another option is to use a different color other than black. Experiment and try new things. Figure out what you think looks good.
If you’re not sure what your artistic style is, don’t worry. It will develop over time and with some more practice. Just keep having fun and enjoying your creative time.
After you’ve finished your cherry blossom flower outline, use an eraser to remove any remaining pencil lines and clean your drawing up.
How to Draw a Cherry Blossom Flower with Markers
Learning how to draw a cherry blossom flower with markers isn’t as difficult as you might think. It’s really quite easy.
But you do need to keep a few things in mind.
First, if you want to be able to blend your colors together you need to use alcohol based markers. Bic, Sharpie, and Copic for example. As well as many others.
Second, you need to work while the colors are still wet or they won’t mix together. This isn’t a big deal. Just make sure you work on a section at a time.
Third, you need to use colors that are similar to each other if you want to create a smooth transition of color. If your markers are too different they will leave a harder edge.
You can get more detailed information in our Beginner’s Guide to Using Markers.
You’ll probably want to stick with pink for your flowers. But you can do whatever you want for your artwork. There’s all sorts of interesting color combinations you could use. They don’t have to be realistic.
For this cherry blossom flower drawing I stuck with traditional pink colors. A light pink and a medium pink were used. They were blended together to help keep them smooth.
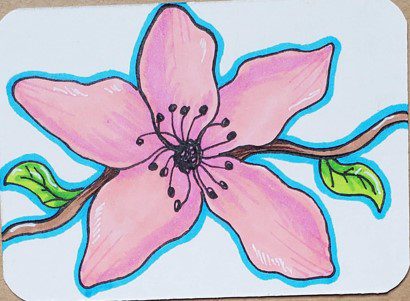
A light green and a yellow-green were used for the leaves. And a couple of browns for the branch.
A white Gelly Roll pen was used for the highlights.
Final Thoughts and Next Steps
Now that you know how to draw a cherry blossom flower, what’s the next step? The next step is to practice drawing more of them.
The more you draw, the better you will get. And the goal is to improve and get better. So practice, practice, practice. Then practice some more.
Challenging yourself to do a series of drawings is a great way to get really good at drawing something. And it will improve your creativity as well.
Grab your FREE Guide to Better Art in 7 Days
More Art & Drawing Tutorials
- How to Draw a Frog
- Learn to Draw a Cup of Tea
- Step by Step Unicorn Drawing
- How to Draw a Daisy
- Learn to Draw a Hibiscus Flower

