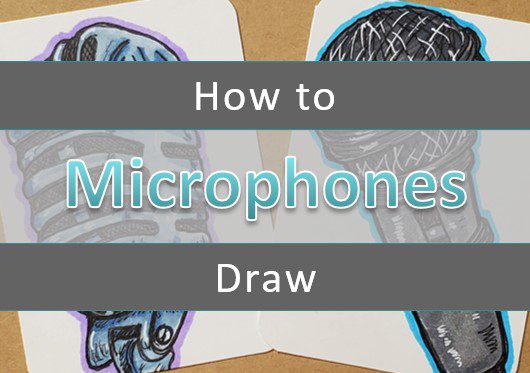
Step by Step Microphone Drawings
Learning how to draw a Microphone is easy if you follow some basic steps. We’ll show you the process of breaking it down into simple shapes and forms to create some 3D microphone drawings.
After you’ve learned how to draw a microphone, you can practice drawing more to see what kind of unique and original ideas you can come up.
Art and drawing should be fun. So make sure you’re always enjoying your creative time.
* Some of the links in this post may be affiliate links. This means I receive small commissions for purchases made through these links at no extra cost to you.
Art Supplies
- Thin black marker
- Paper or cardstock
- Markers
- Pencil
- Click Eraser, Pink Pearl Eraser
- White Gelly Roll pen
Quick Sketch Warm Up
Starting with a few minutes of quick sketching is really beneficial to the drawing process. It not only loosens up your muscles and warms them up, but it also helps you work through some rough ideas.
And it helps you to understand what you’re seeing more easily. Because, drawing is more about how you see things than anything else. You need to be able to see the angles, shapes, and forms before you can draw them convincingly.
There are three common ways to complete a quick sketch session.
- Three minute timed session
- Five minute timed session
- Stop after your paper is filled
To do some quick sketches of microphones, grab a piece of paper and something to draw with. You can use anything.
Then find some references to draw from. Google works fine for this.
Pick a method from the above list, or use your own.
Set your timer and start sketching.

You want to keep your lines loose and flowing. Don’t focus as much on the details as on the overall size and shape of your sketches. The details will come later.
If you’re using the timed method, try to do as many sketches as possible in that time. If you’re filling your paper, try to fill it as quickly as possible.
This doesn’t seem like much, but it really is a great exercise to do.
How to Draw a Microphone in 3D
Like with everything, we want to begin by breaking things down into basic shapes to use as our guides. Since we’ll be drawing 3D microphones today we’ll be using forms.
A standard microphone is made up of a cylinder for the handle. And a sphere for the receiver part at the top where you talk into.
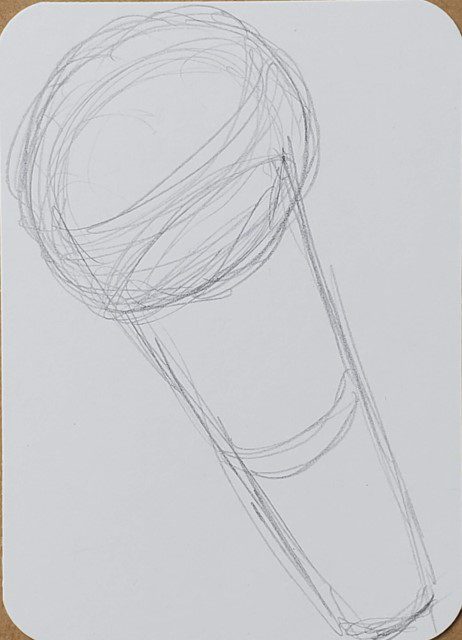
So let’s begin by lightly sketching those out. We do have a complete tutorial on how to draw and shade cylinders if you want to check that out.
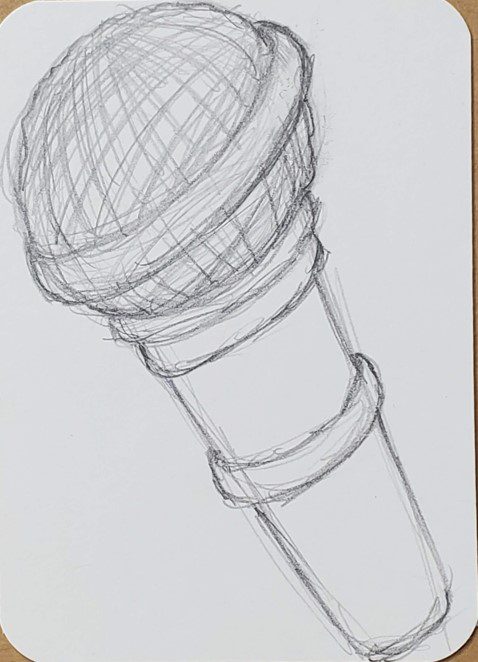
Add in some rings for more detail. It might be helpful to use a reference photo for ideas on what to add. When drawing the rings be sure to curve the lines to match the contour of the part you’re drawing it on.
I’d also like to point out that your drawings don’t have to be perfect. Creating art should be relaxing and fun. If you’re always worrying about things being perfect, it won’t be that much fun.
And if it’s not fun you won’t be too motivated to spend time doing it.
Continue sketching out your microphone drawing, adding in any extra details you want to include.
You can add some lines for the screen and a power switch too. When drawing the screen try to keep your lines the same as the contour of the sphere. This is pretty difficult to do though so I wouldn’t worry too much about getting it perfect.

It really just depends on how much time you’re willing to invest in those details. Which will be determined by the purpose of your drawings. I draw as a way to relax. Therefore nothing needs to be perfect and exact.
Keep working on your microphone sketch until you are comfortable with your results. Your sketches should always be done lightly so you can erase as needed.
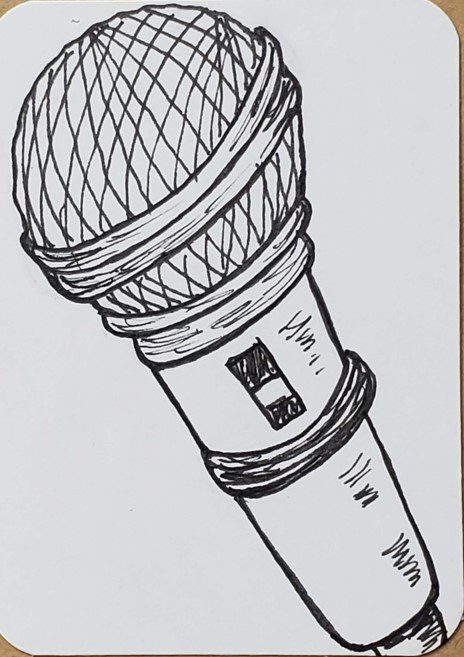
Microphone Outline
After you’ve finished your microphone drawing you’ll need to decide how you want to finish it. You can add some shading with a pencil. Or you can add some color.
Since I’ll be using markers to color my microphone drawings, I’m going to add a black outline to mine. This is done using a thin black pen.
When adding an outline you can use thin lines, thick lines, or a combination of the two. You could also use a color other than black.
This is a good opportunity to experiment and have fun. Don’t be afraid to try new things.
I do most of my drawings on Artist Trading Cards because it saves me a ton of time. Plus I can trade them to other artists. Or, I can save them in a binder portfolio to look at later.
Drawing with Markers
When using markers, or any other medium, try to use two or three colors for each section of your drawing. This will help add dimension to your artwork and keep it from looking flat.
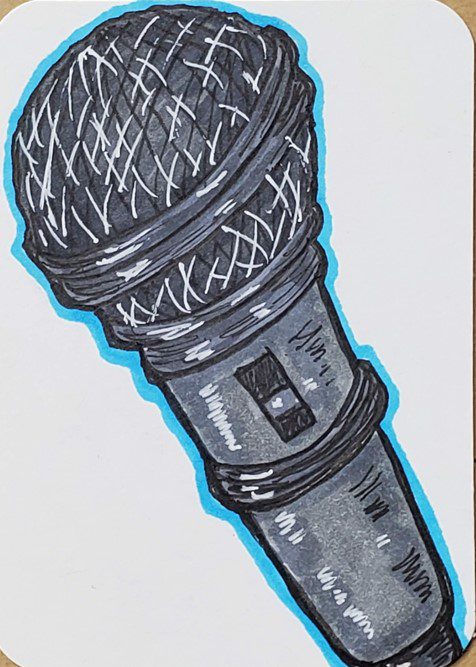
For your microphone you’ll probably want to use grays and maybe some blue. You want to avoid coloring it solid black. Objects in real life reflect the colors around them. Black objects aren’t completely black.
You can use the white of your paper to show the highlights. Or you can use a white Gelly Roll pen to add white over the markers.
How to Draw an Old Fashioned Microphone
Now we’re going to look at how to draw an old fashioned microphone. These are a little more complicated to draw. But we’re going to break it down into basic shapes again to make things easier.
Begin by drawing a cube to use as your guideline. Cubes are the 3D version of a square. You can learn more about cubes in our tutorial on How to Draw Cubes.
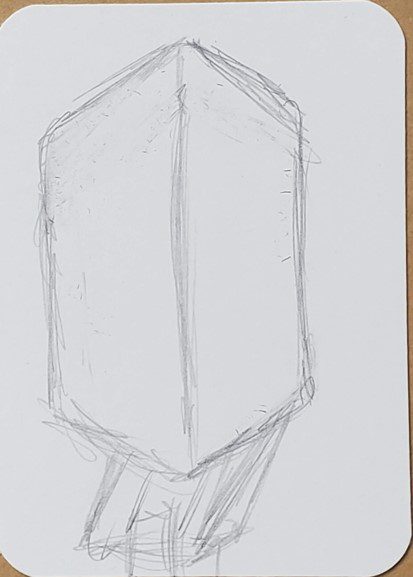
Don’t forget to sketch in the stand where it connects to the microphone.
The angle at which you are viewing your old fashioned microphone will determine how to draw your cube. Again, you will probably benefit from using a reference photo for your drawing.
Now start to refine the overall shape and round off the corners. Add in some lines where the mic receiver sections will go.

These should follow the shape of the microphone and bend with the cube.
Next you want to add in the individual sections, following those guidelines.
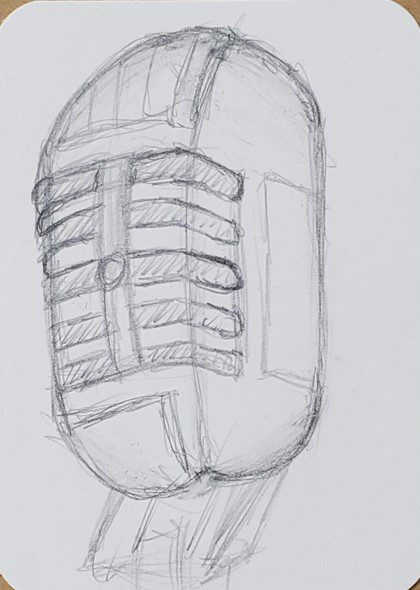
Then do the same thing for the top, bottom, and side.
Finish your sketch by adding in any extra details that are needed.
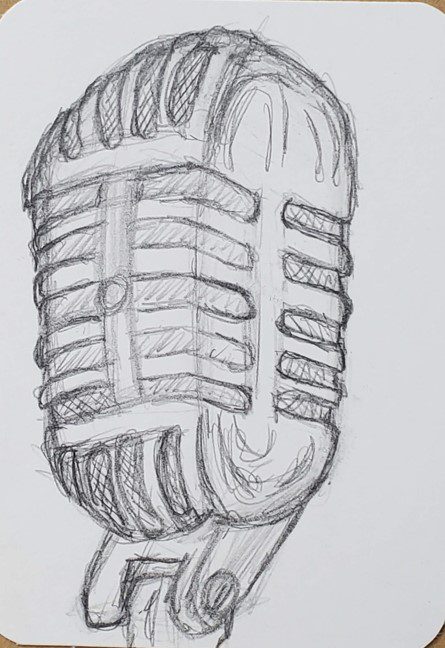
When you are satisfied with how your sketch looks, finish your old fashioned microphone drawing by adding an outline and some color.

Conclusion
Congratulations on learning how to draw a microphone. From here the next step should be to draw several more microphones. The more you practice drawing, the better you will get. Your creativity, art skills, and artistic style will all develop through practice and repetition.
Challenge yourself to do a series of drawings in the next 7 days and see how much you improve. Even if it’s only for a few minutes each day, drawing consistently will help you improve.
Keep things fun and enjoy the process. Creating art should be a relaxing experience.
Grab your FREE Guide to Better Art in 7 Days
