How to Draw a Pumpkin – Easy Drawing Tutorial
Learning how to draw a pumpkin is easy. Especially if you break things down into basic shapes. For your finished pumpkin drawings you can use any medium you enjoy using. They can be added to an existing drawing as part of the background. Or it could be a stand alone work of art.
Pumpkins are fun and easy to draw for all ages, including adults. So let’s grab some supplies and get started on some easy pumpkin drawings.
* Some of the links in this post may be affiliate links. This means I receive small commissions for purchases made through these links at no extra cost to you.
Art Supplies
Free Guide – How to Improve Your Drawing Skills
How to Draw a Pumpkin (Easy)
Begin by drawing a circle that is roughly the size you want your pumpkin to be. Don’t worry if your circle is not perfect. After all, pumpkins are not always perfect. And as a matter of fact, odd shaped pumpkins quite often have more character than perfect ones.
Don’t be afraid to draw an “ugly” pumpkin. They can be a lot of fun to draw all the little details of them.

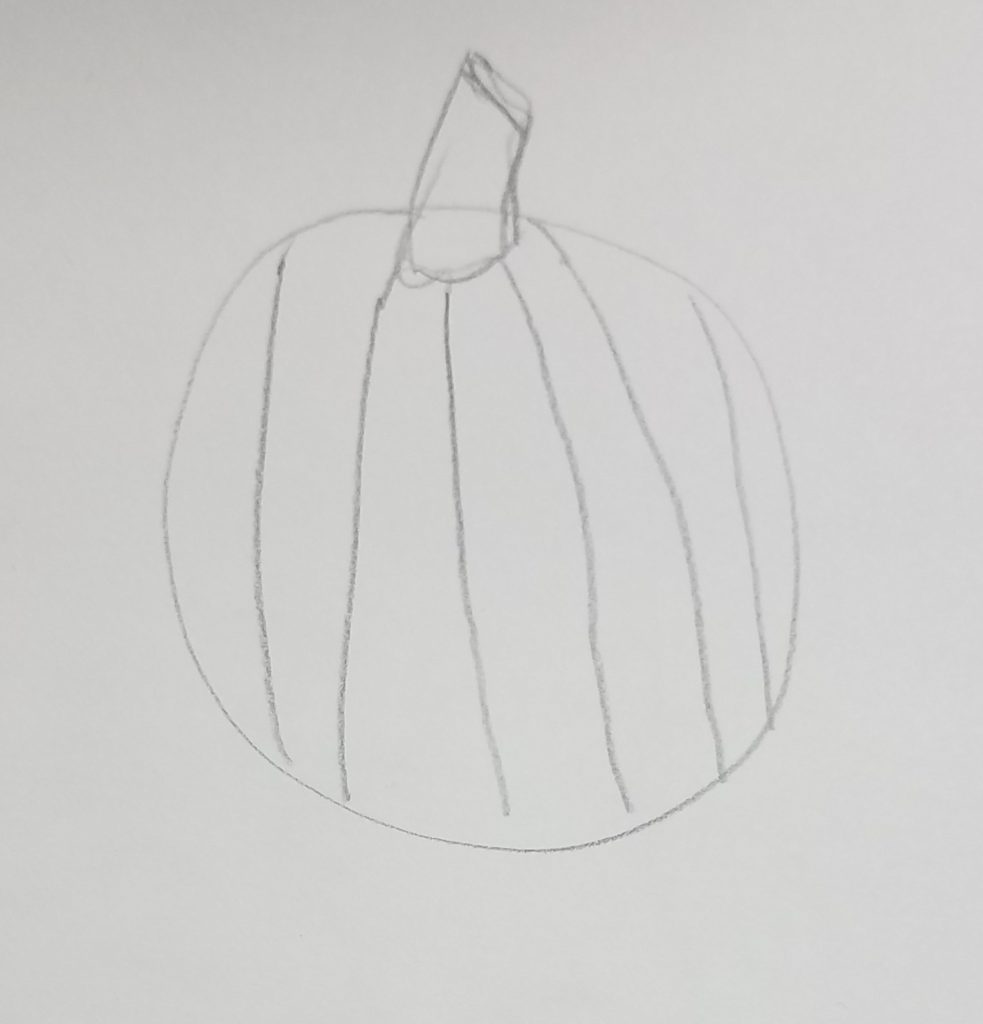
Pumpkin Stem Drawing
Next, draw the pumpkin stem. To do this, begin by drawing a curved line towards the top of your pumpkin. And then draw your stem coming out of that curved line. At this stage of your drawing you can make your stem just a rough sketch.
You’ll be refining the details a little later in the process.
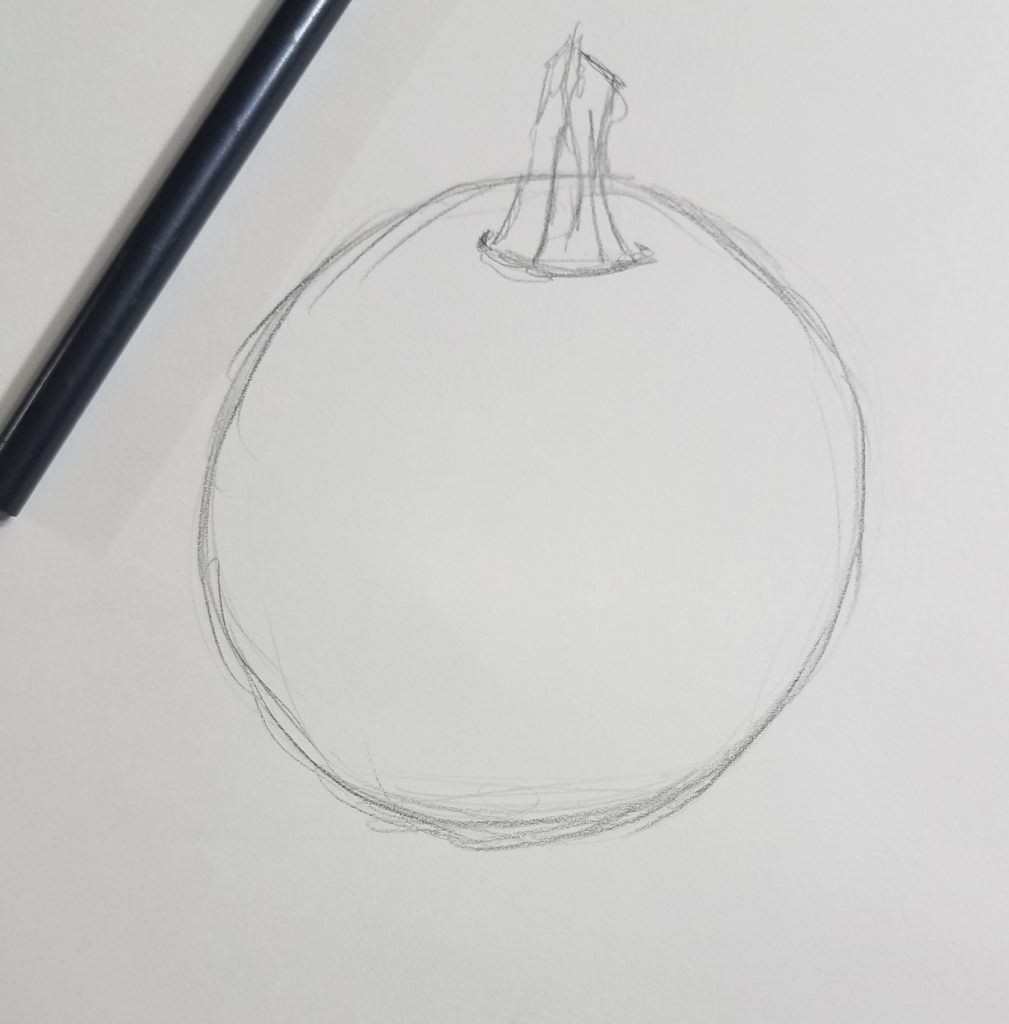
There are all sorts of stems you could draw. It could be tall and thin, or short and wide. It could be broken off or not there at all. The choice is all yours.

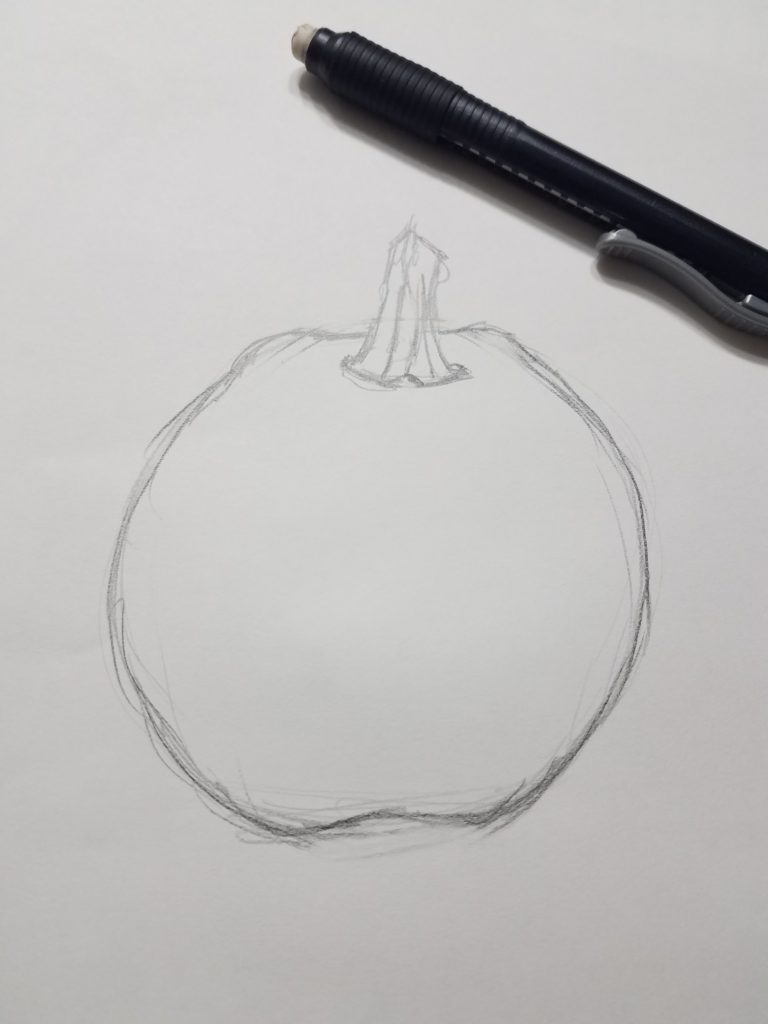
At this time you can also start drawing out the shape of your pumpkin. Most pumpkins are not going to be perfect circles, that was just a guide. To do this, make the top and the bottom of your pumpkin slightly flatter and curved a little bit.
If you’re using a real pumpkin, or a reference photo, just use that as your guide for getting the overall shape of your pumpkin. Make sure to add in any bumps or uneven areas of your pumpkin to make it look more realistic.
Pumpkin Drawing – Contour Lines
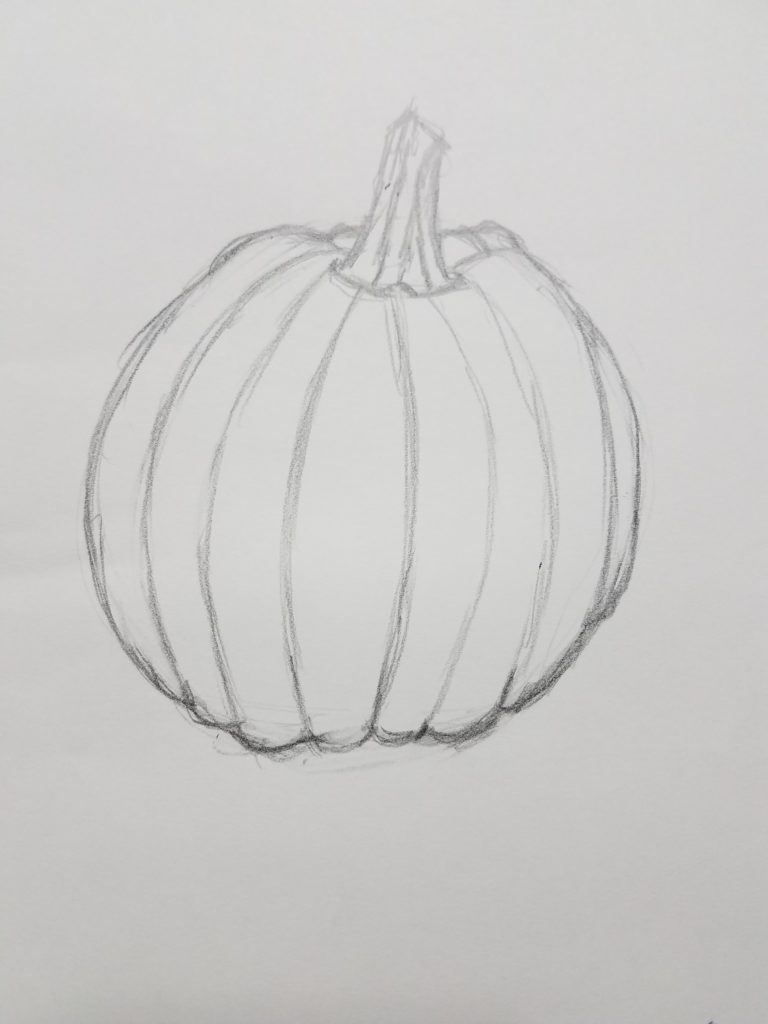
Now draw in some contour lines on your pumpkin. I started in the middle when I drew mine, but you can begin wherever you’d like. Make sure your ribs follow the shape of your pumpkin.
The lines should be curved, not straight. If the lines are on the left side of your pumpkin, they will curve towards the left. And the right half will curve towards the right.
These are the contour lines that will create a 3D pumpkin drawing, instead of one that looks flat.
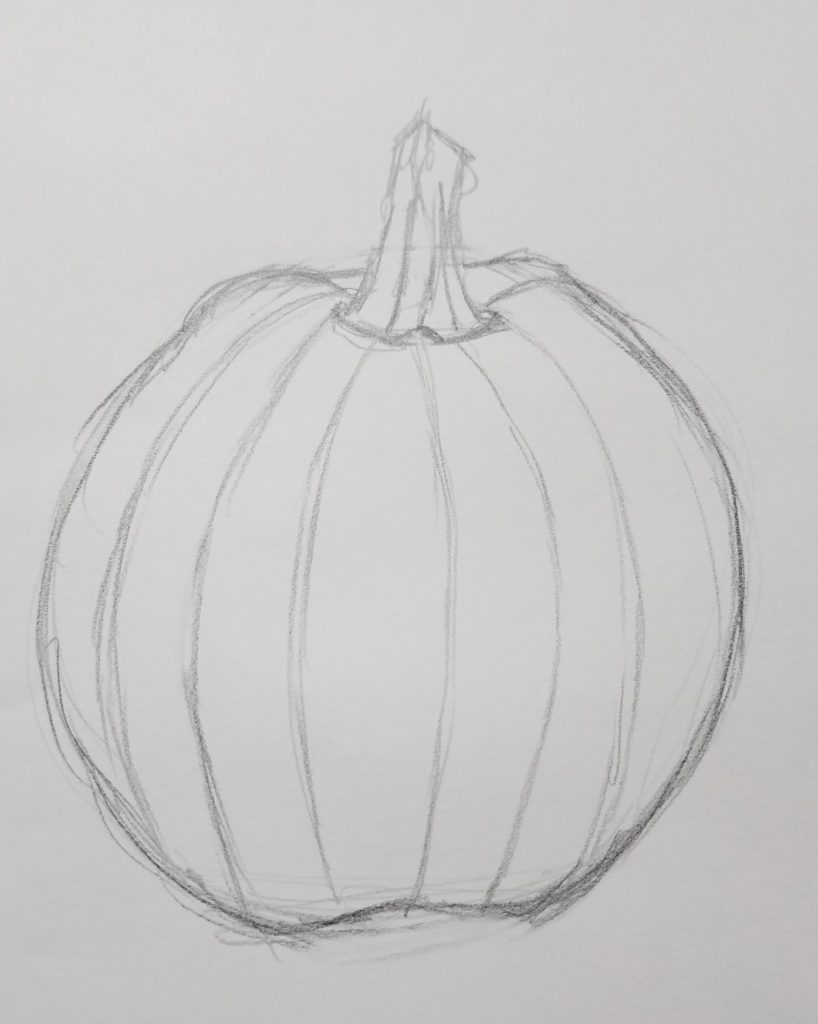
If you make your rib lines straight, your pumpkin won’t look round. So don’t do this. Make sure your lines follow the curve of your pumpkin.
Next, add in the ridges at the top and bottom of your pumpkin where the ribs end. You want to draw curved lines connecting your rib lines to the ones adjacent to it. This will add some depth to your drawing and make it look more realistic.
These small details may seem like they’re not important. But it’s actually the small details that matter the most.
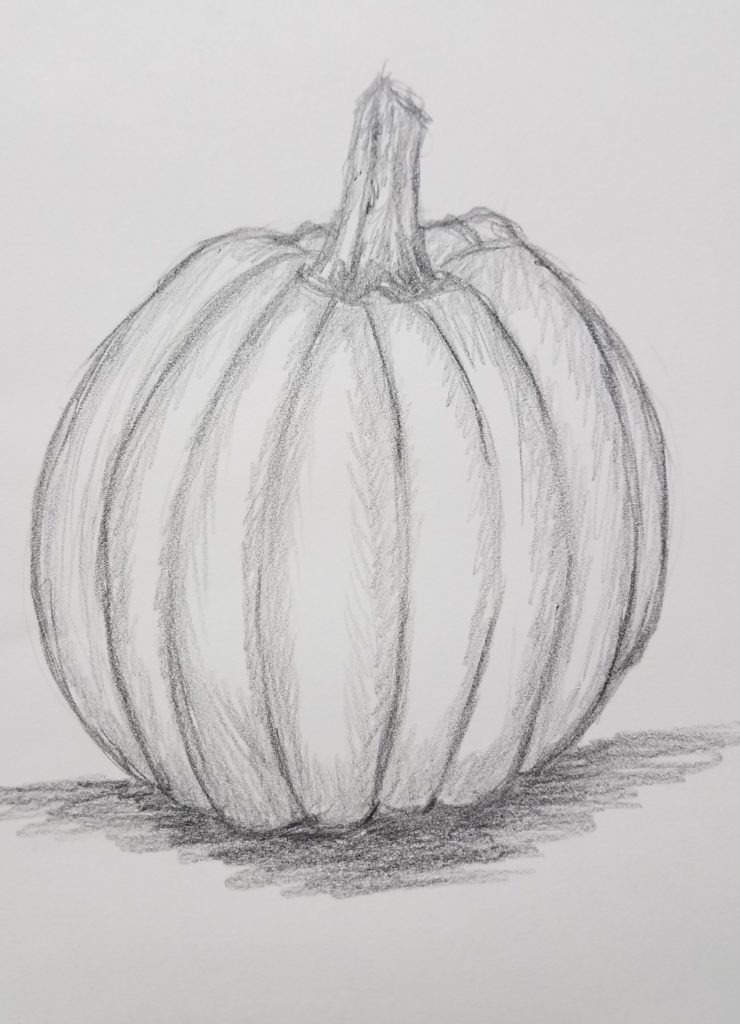
How to Shade a Pumpkin Drawing
The final step is to shade your pumpkin, if you’re using a pencil for your drawing. Add a darker shadow underneath your pumpkin. And shade around each of the ribs. When shading your pumpkin, keep in mind that each of the ribs is a raised section. The indented parts will be darker and the part that sticks out the most will be lightest.
Don’t forget to add some shading to your stem as well and make it darker towards the bottom of the stem.
Learning to Draw Takes Practice
Now that you know how to draw a pumpkin, what’s next? To get better at anything requires practice. To get better at drawing, requires practice and repetition. An easy way to get in a lot of repetitions is by filling up a couple of sketchbook pages with pumpkins. To do this, draw 100 pumpkins in your sketchbook of all different shapes and sizes.
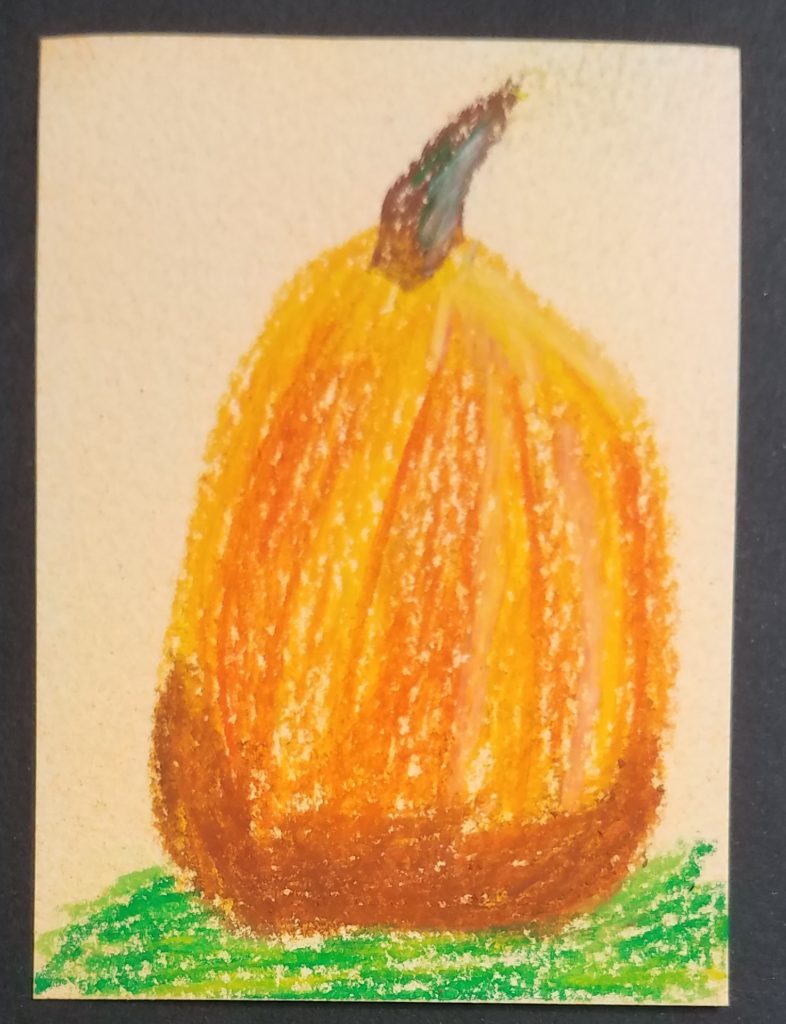
One of my favorite ways to practice drawing something is by doing some artist trading cards. Because of their smaller size they are a bit quicker to finish than a full-size work of art. I will typically start making these after filling a couple of sketchbook pages. I’ve found that practicing first helps get my creativity juices flowing and my cards will turn out better.
Typically I will do a 7 day drawing challenge. During these challenges, I’ll do an artist trading card every day for 7 days, sticking with the theme. Which is in this case would be pumpkins. These can be done using the same style or technique for all 7 cards. Or, you can challenge yourself to try 7 different techniques. I will do whichever one I’m in the mood for at the time.
Final Thoughts
Although learning how to draw a pumpkin is easy if you follow some basic guidelines, you’ll probably still need to practice a bit to develop a style that feels like your own. There is a lot of opportunity for variation in your pumpkin artwork.
With all the different size and shapes, along with how you choose to put your own personality into them. Art is a skill that is developed through practice and repetition, and is something anyone can learn.
Practice as often as possible, and keep things easy and relaxing as much as possible.
Grab your FREE Guide to Better Art in 7 Days

good
I’m glad you liked it.
It helped me and I tried it.
Oh, good. I’m glad it was helpful!