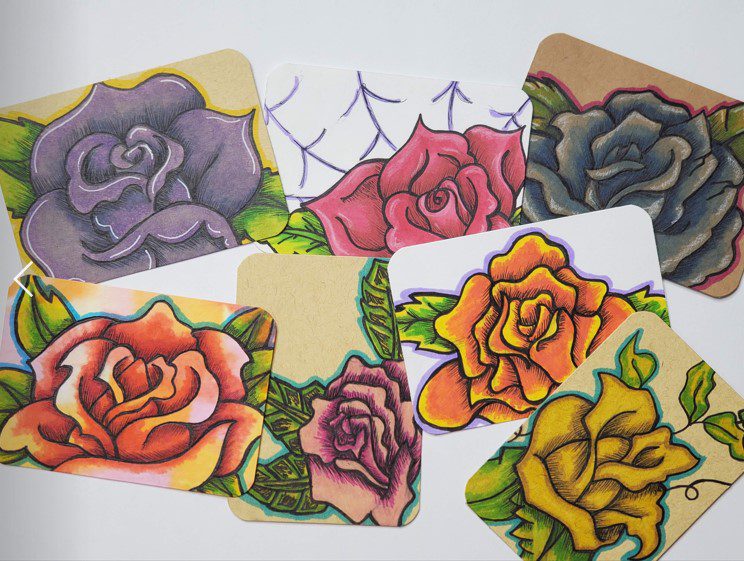
How to Draw a Rose Art Tutorial
Today you’re going to learn how to draw a rose. A few weeks ago we learned about drawing a rose bud. Today we are going to look at drawing a rose that is fully bloomed.
But don’t worry, we will be using a process that breaks it down into easy to follow steps.
Also, today’s lesson will be slightly less realistic and will have a bit more of an artistic look to it.
Let’s begin by taking a look at the supplies that were used to create the rose drawings. If you want a rose reference photo, have one ready before starting your drawing.
* Some of the links in this post may be affiliate links. This means I receive small commissions for purchases made through these links at no extra cost to you.
Art Supplies
How to Draw a Rose for Beginners Step by Step
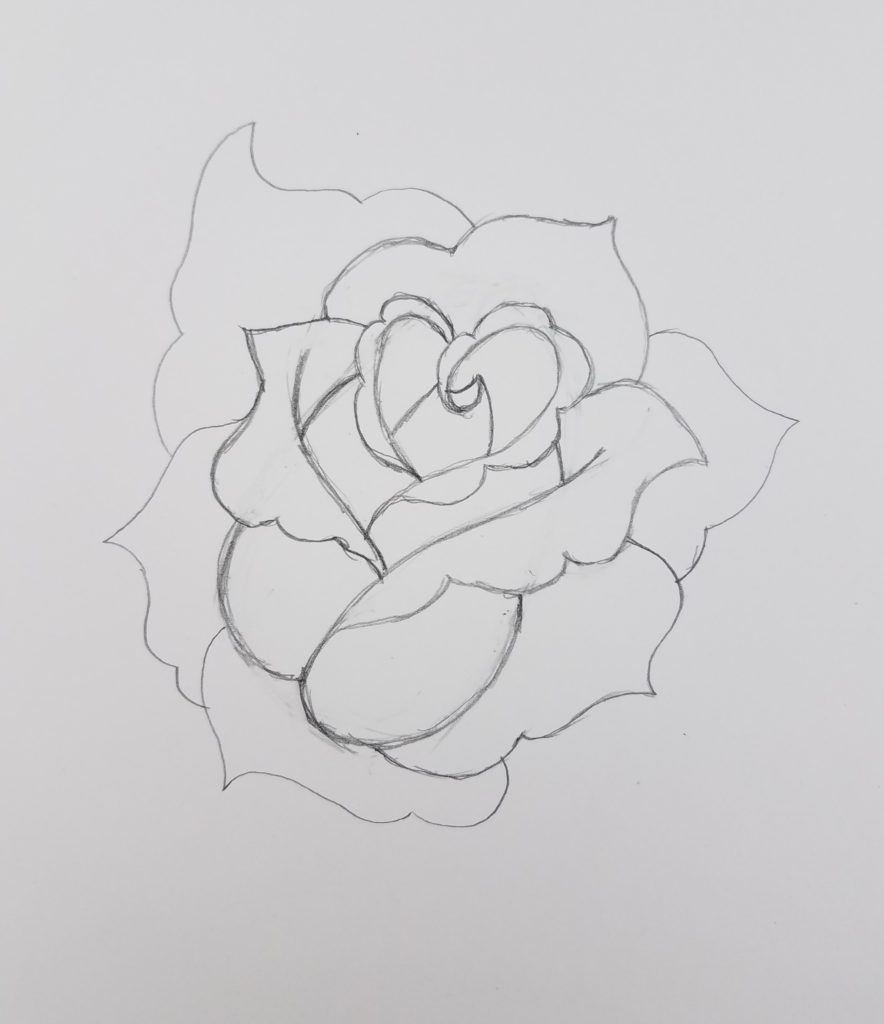
If you think about a rose and it’s different states of bloom, you know that all roses start off as a bud. And from there they open up.
For this reason, our basic shape to build off of is similar to the shape we drew for our rose bud drawing.
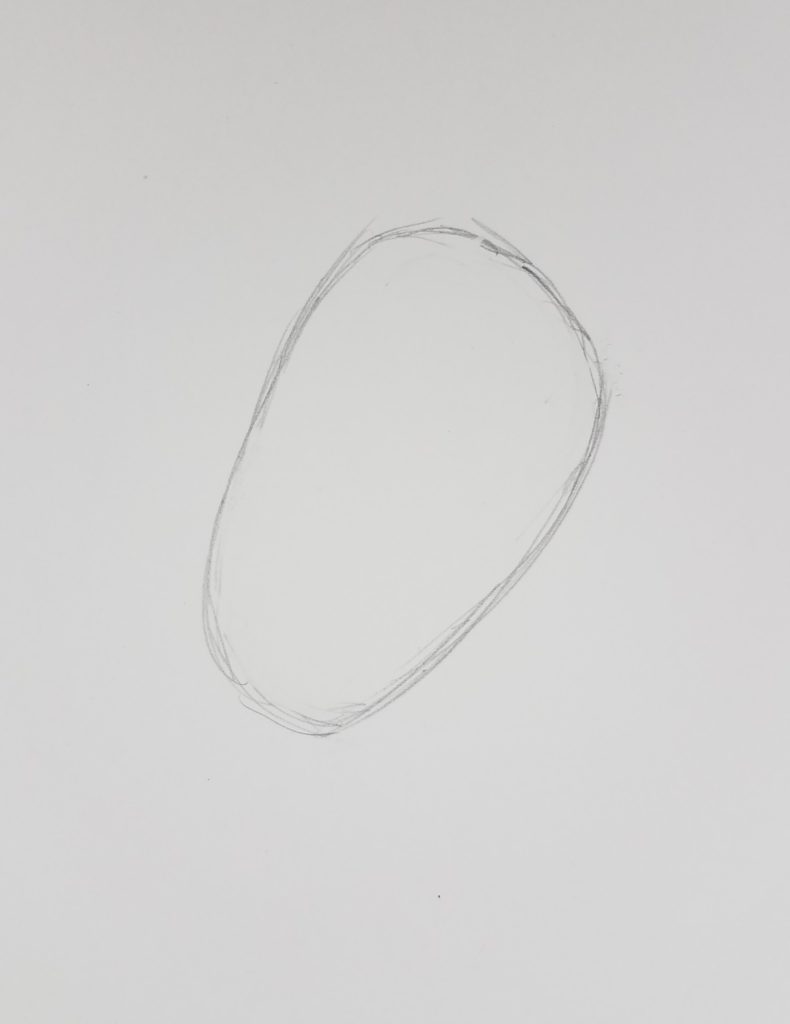
Remember, we always want to use basic shapes to draw whenever we can. It helps us understand what we are drawing. And it forces is to take a better look at what we are seeing. For more information check out How to Use Shapes to Draw.
Starting from the bottom of your basic shape, draw a couple of lines that will start to form your flower. Your lines should look like a curved Y.
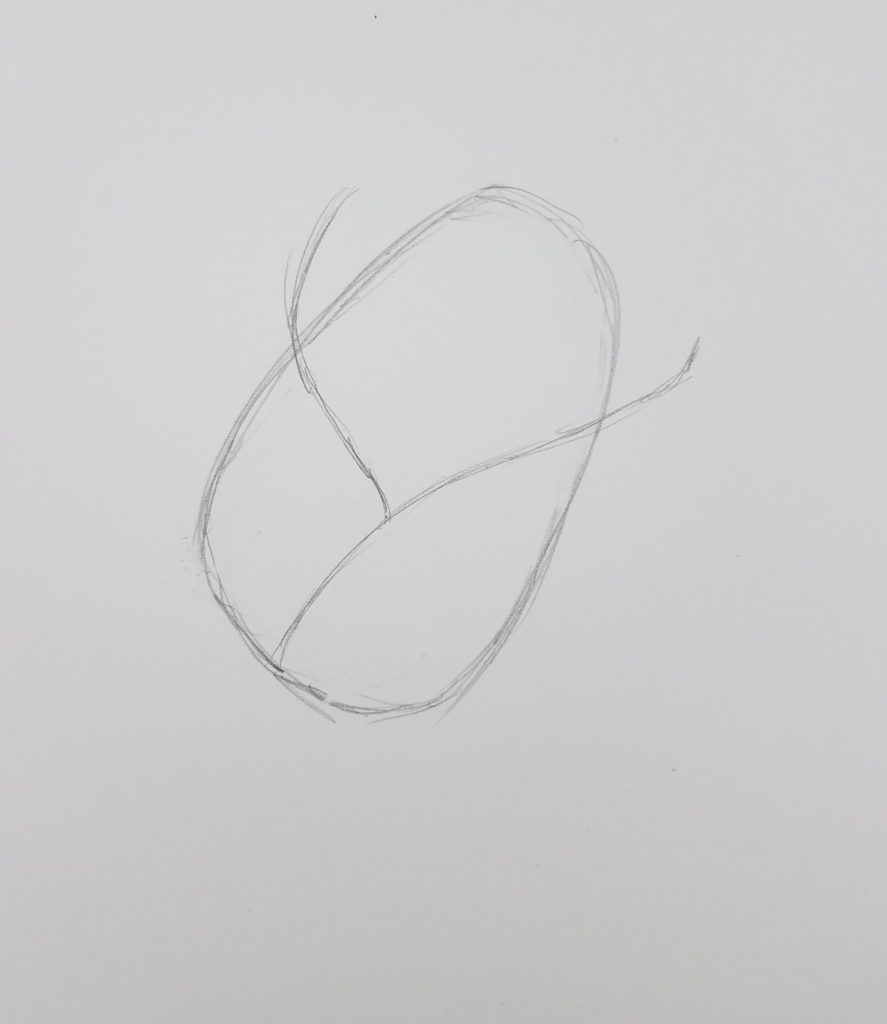
When drawing your rose, notice where the lines start and stop in relation to the other lines.
Next, draw a line that looks sort of like half of a curly S shape. This will represent the center of our rose drawing.
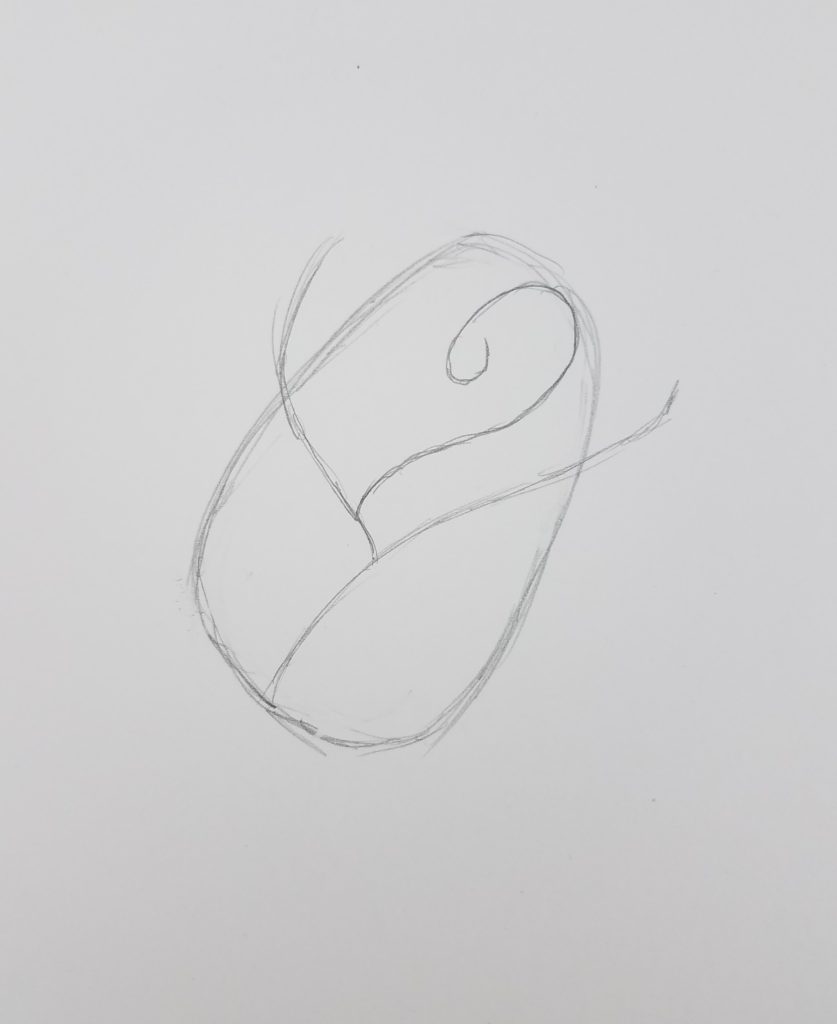
Now draw the left side of the rose’s center. Notice how the two lines in the center form what looks almost like a heart.
Also, notice that the center of our rose drawing extents to the top of our initial shape.
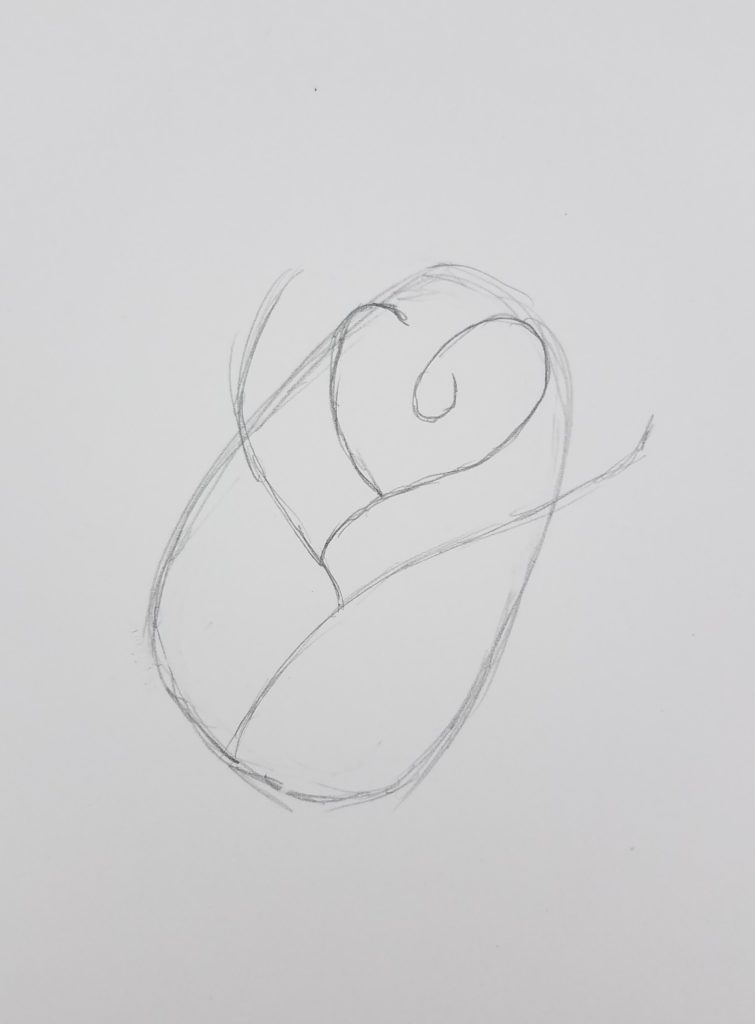
How to Draw Rose Petals
As a rose blossoms, the edges of the individual petals will begin to curl. You want to make sure you add in some details of the curled edges on your rose drawing.
Draw in some curled edges on the center portion of your rose.
Notice the shape of how I drew mine and how it gets narrower as it gets closer to the main body of the rose. You want to have variation in your lines to make your drawing more interesting.
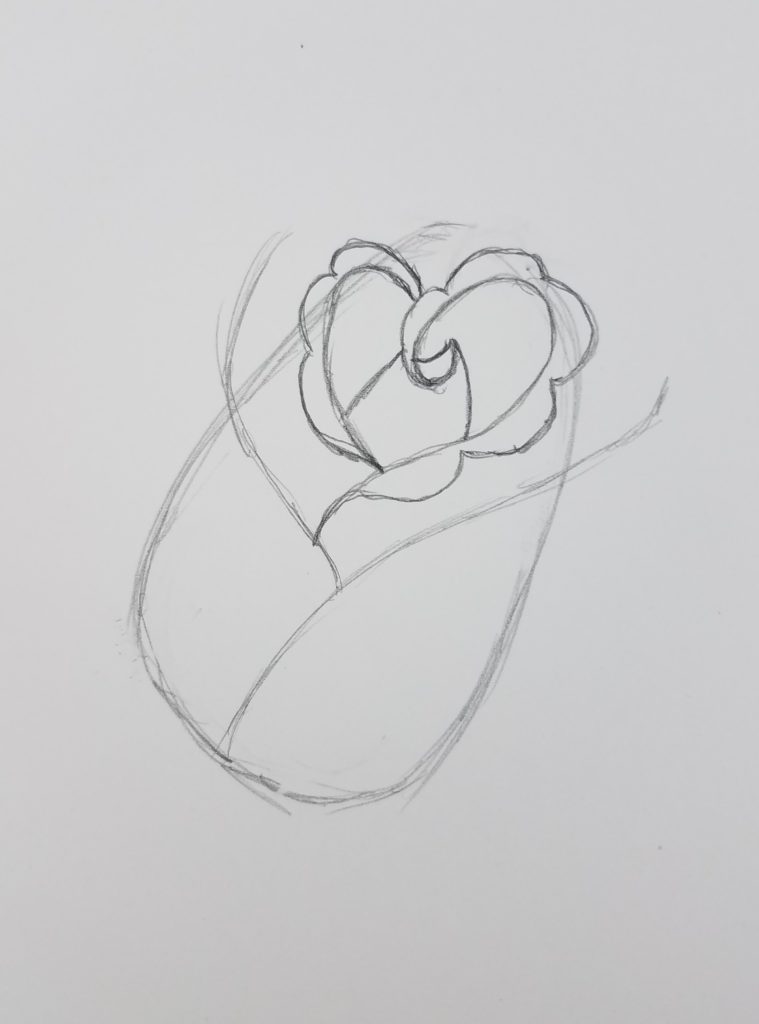
Now do the same thing for the next layer out. I drew mine with a little bit of a pointed edge. You can make yours more rounded if you think it looks better.
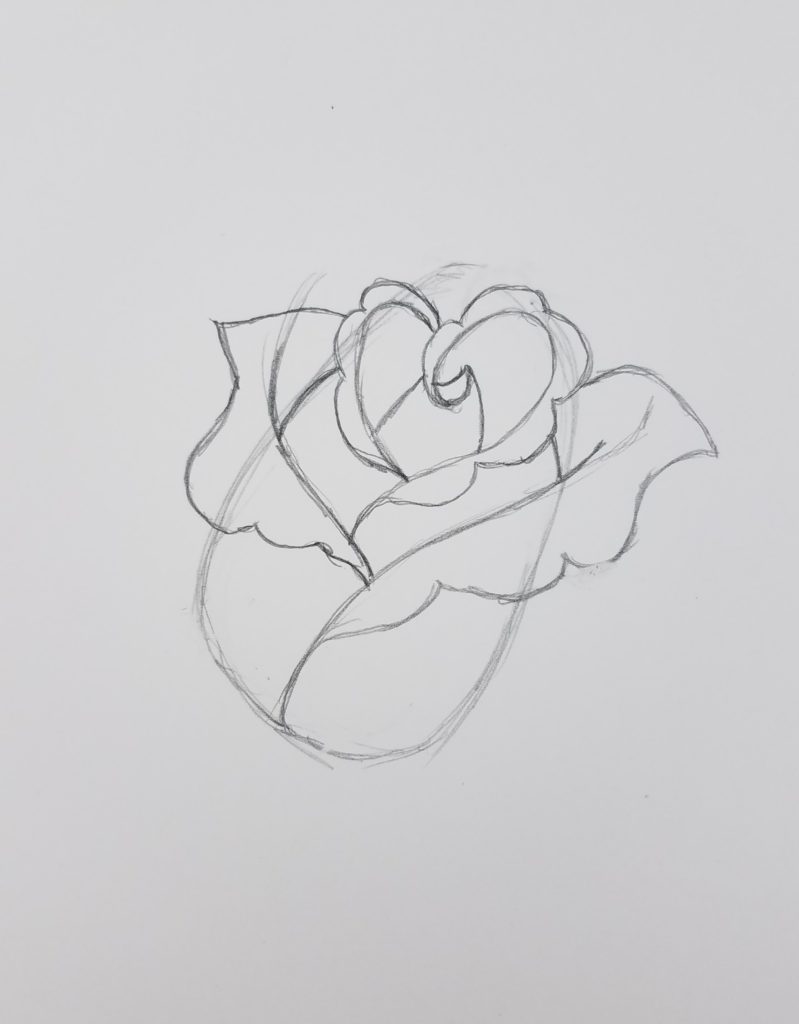
Don’t be afraid to experiment with your lines a little bit. Draw lightly and if you don’t like it, just erase it and redraw that line.
From there, start building out the rose by adding in additional layers of petals.
Allow your rose petals to overlap each other at the edges. This will make your final draw look much better.
When you are happy with how your rose drawing looks, finish it up by drawing in a few leaves. Don’t forget to add in some overlapping lines here too.
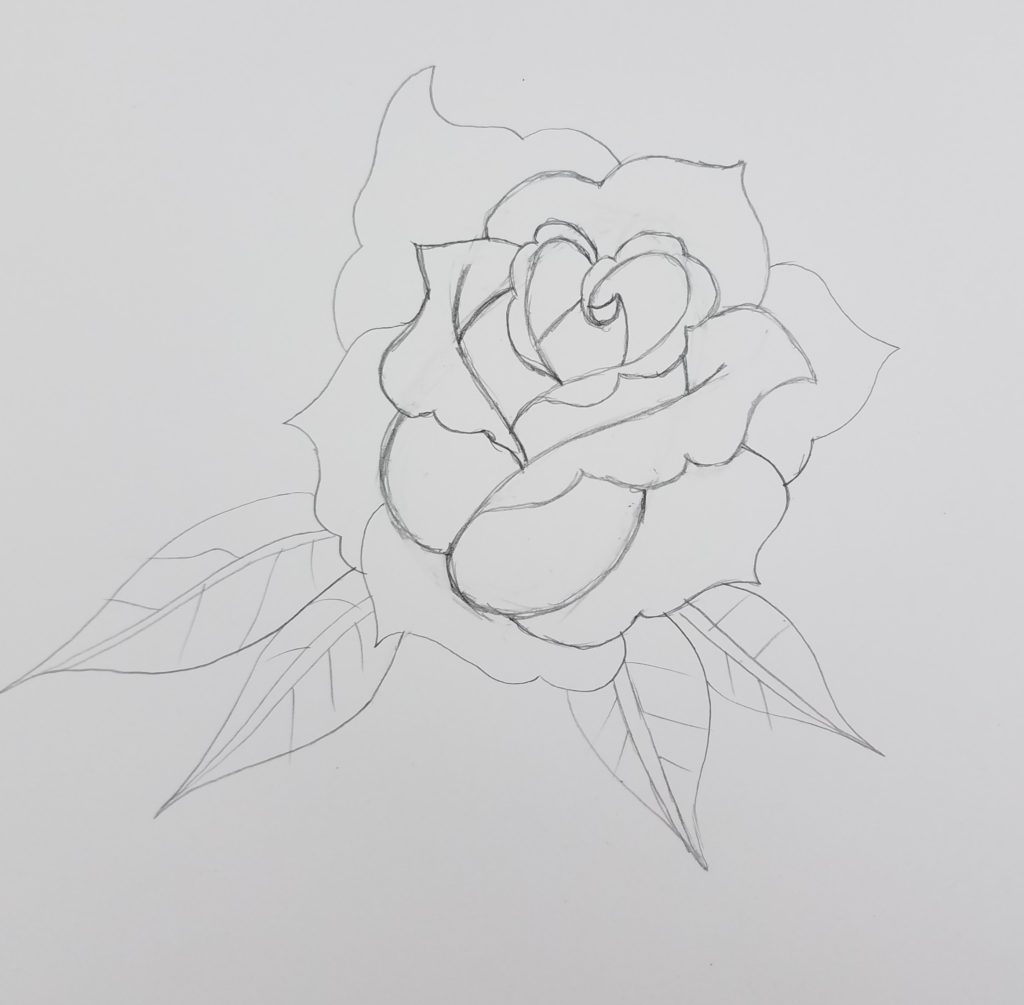
By overlapping our lines, we show depth in our drawing. This makes it look more interesting and less flat as well.
Rose Outline
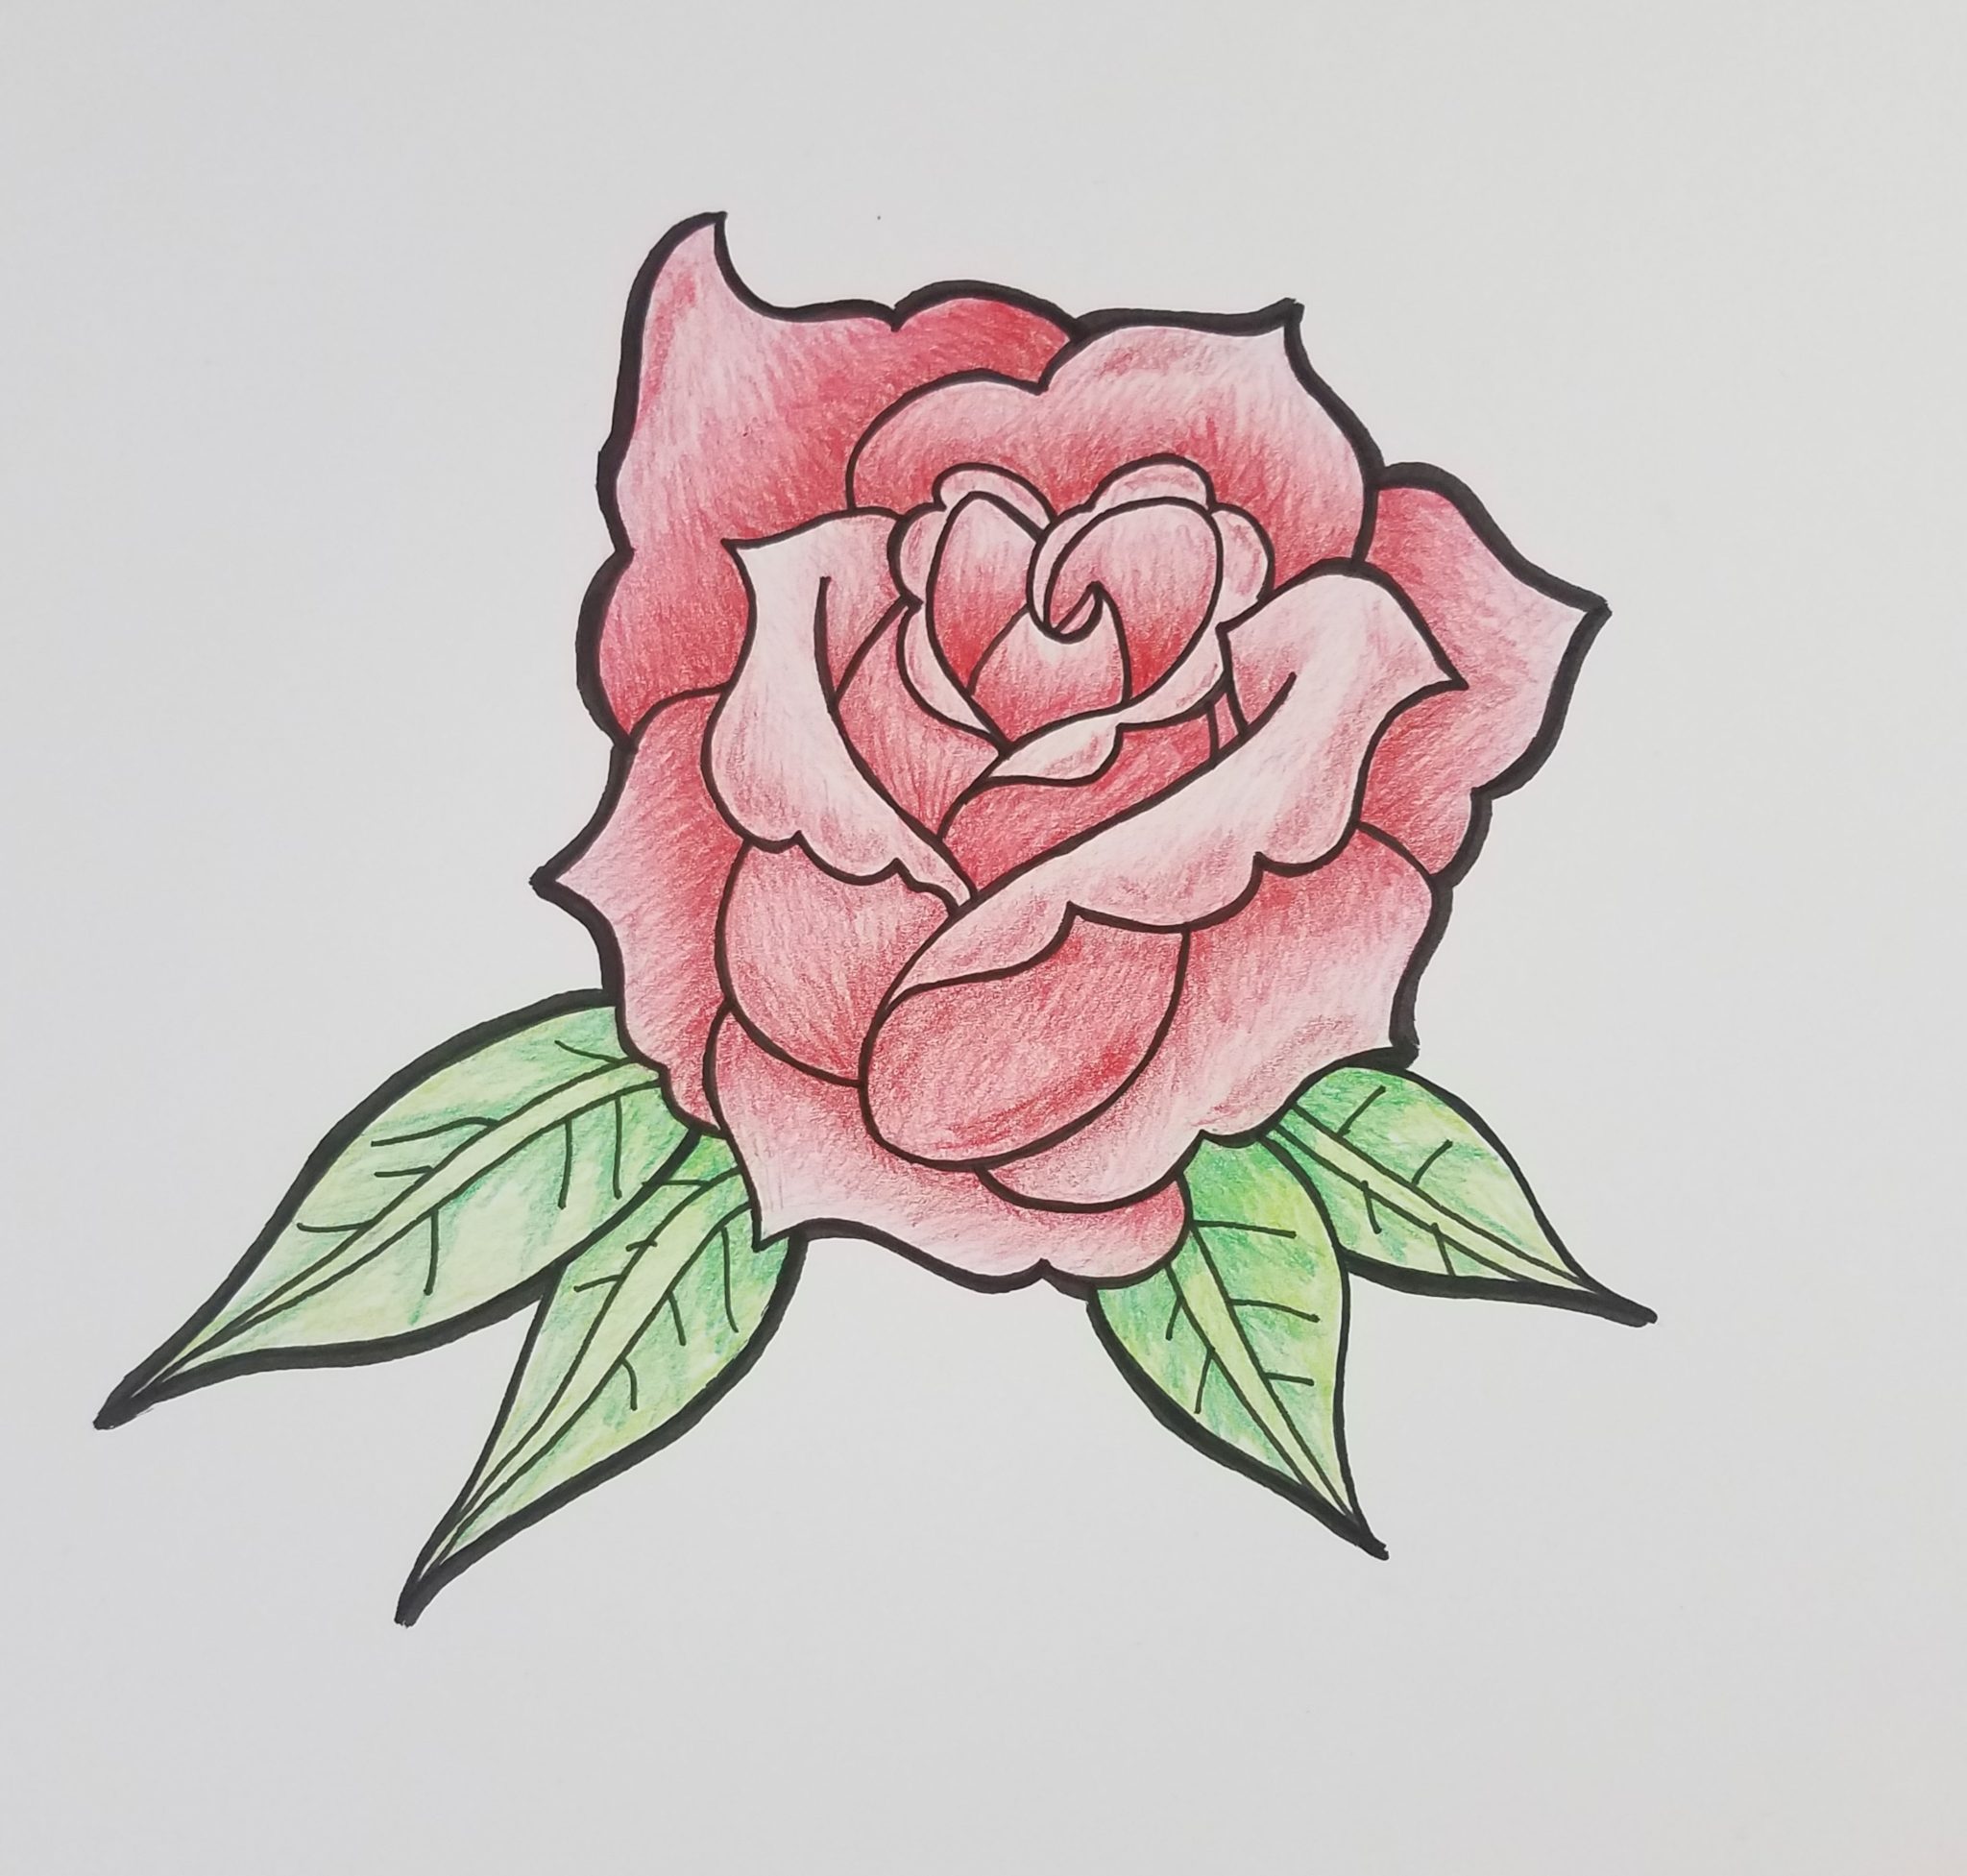
I use my set of Pitt artist pens for just about all of my drawings. Start by drawing over all of the pencil lines you want to keep. I typically use the medium nib pen for this.
For most of my drawings, I prefer a heavy outline around the outside edge. However, if you don’t like how that looks you can outline your rose drawing how you prefer.
After using the medium nib pen, I went back in with the brush pen to thicken my outline. I went around the entire outside edge of my rose drawing.

How to Draw a Rose with Color
When adding color to your artwork there are almost an endless number of options. For the rose drawing in this example I decided to use Prismacolor colored pencils.
Start by filling an area of your rose drawing with Carmine Red (pc926). Use light pressure when applying your colors to get a smooth look.
When adding color to my drawings, I tend to work on one area at a time. This is a personal preference. You can choose to work this way or color in your entire rose with the first color before moving onto the next color.
After I have my first area filled in, I go in with Crimson Red (pc924) and add in some areas of shadow.
You always want to use at least two colors in each section of your drawings. If you’ve always used just one color in your work, you should start practicing with using more colors.
Follow the same method for your leaves. Begin with your lighter green first. And then add in some areas of shadows with the darker green. For the leaves, I used True Green (pc910), Grass Green (pc909), and Dark Green (pc908).
Shading Your Rose Drawing
The center of your rose drawing should be darker towards the center and lighter towards the outside edges. I had to go back in and darken my center up a bit.
This was more noticeable when I stood back and looked at it. To fix this, I just went back in with both of my reds and added more layers to my rose drawing where it needed to be darker.
I also added in some of the greens to the red areas and some of the red to the green areas. Because red and green are complementary colors, they work really well for shading.
Rose Drawing Backgrounds
You can add in some type of background to your drawing, or leave it blank. A nice blue would look good or you could add in some extra designs and details.
Adding in backgrounds can be difficult but with practice it will get easier. The best way to improve at your drawing and art is my practicing. Even just a few minutes a day will help you improve in no time. Doing a 7 day art challenge is a great way to practice without needing to spend hours.
Get Your FREE Guide to Better Art
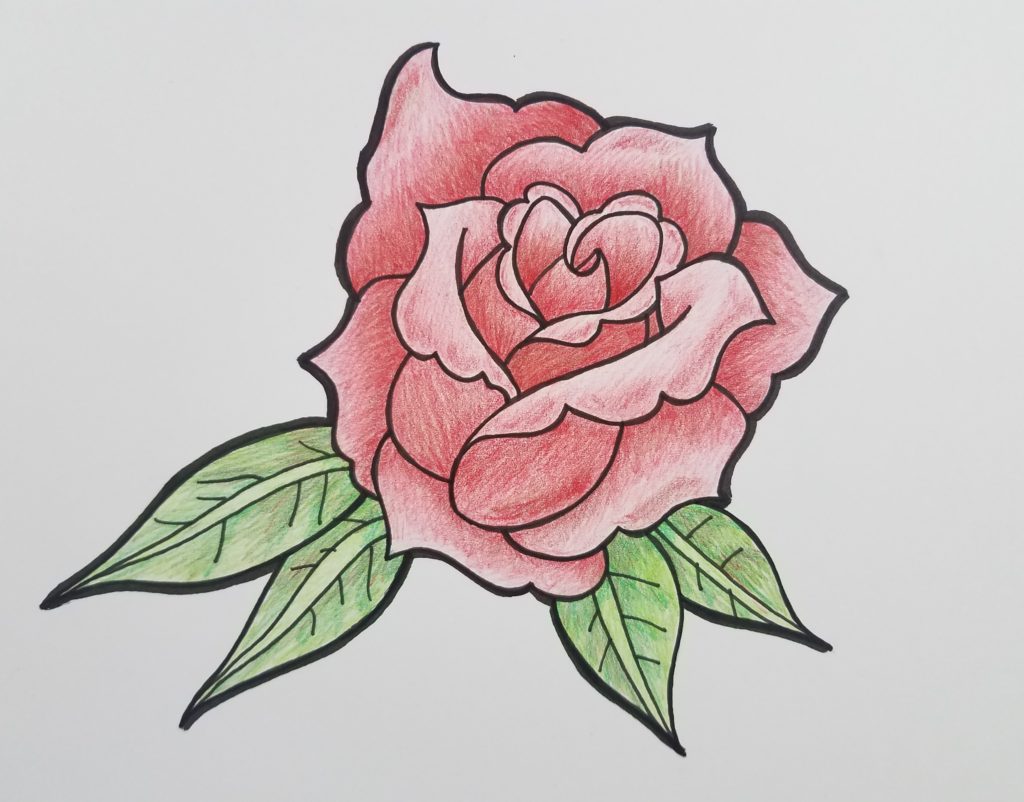
How to Draw a Rose for Beginners Step by Step
I hope you enjoyed our how to draw a rose for beginners art tutorial. Drawing and creating art are skills that anyone is capable of learning. Practice and repetition will get you going in the right direction.
Have fun and enjoy the process of creating art. Experiment and try new things. Try drawing a series of roses and see what you come up with.