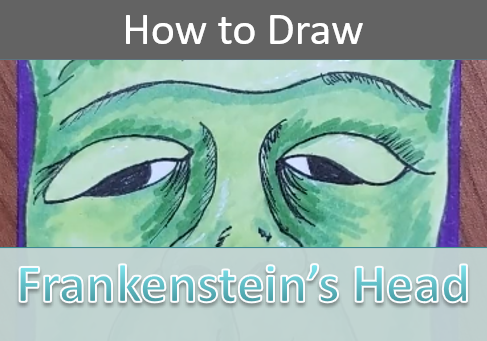
How to Draw Frankenstein’s Head Tutorial
Whether it’s for Halloween, or just for fun, making this Frankenstein head drawing will give you joy.
They’re super fun, and easy to make. And great for artist trading cards (ATCs).
Let’s grab some supplies and get started with the tutorial.
* Some of the links in this post may be affiliate links. This means I receive small commissions for purchases made through these links at no extra cost to you.
Art Supplies
- Thin black marker
- Paper or cardstock
- Markers
- Pencil
- Click Eraser, Pink Pearl Eraser
- White Gelly Roll pen
About Artist Trading Cards
Artist Trading Cards (ATCs) originated in Switzerland in 1997, created by artist M. Vänçi Stirnemann as a way to foster creativity and community among artists. Inspired by sports trading cards, Stirnemann produced a series of small, hand-crafted art cards measuring 2.5 x 3.5 inches (64 x 89 mm) and encouraged artists to create and trade them freely. He hosted the first ATC trading session in Zurich, where artists gathered to exchange their miniature artworks rather than buy or sell them.
The idea quickly caught on globally, and ATC trading events spread to North America, Europe, and beyond. Artists embraced ATCs as a way to share unique, affordable pieces of art, experiment with techniques, and connect with others. Over time, ATCs evolved into a diverse art form, welcoming all media, including collage, painting, drawing, and mixed media. Today, ATC trading is popular at art meetups, conventions, and online communities, where artists of all ages and skill levels participate. The core rule remains: ATCs are meant to be traded, not sold, preserving their spirit of creativity and exchange.
Frankenstein Head Sketch Practice
You may want to do some quick warm up sketches prior to doing your drawing. This allows you to not only warm up your muscles, but it also helps you get more familiar with whatever you’re drawing.
And they’re really quick and easy to do. Here’s how.
- Get some paper and something to sketch with (pencil, pen, marker, etc.)
- Pull up some reference photos of Frankenstein
- Set a timer for three or five minutes
Then quickly sketch as many Frankenstein heads as you can before you run out of time.
You can also sketch until you fill up your paper and you run out of room. Either way is fine. Just keep your sketches quick and loose.
You don’t need to worry about adding in a lot of specific details.
How to Draw Frankenstein’s Head
I’m making my drawing on an artist trading card so my Frankenstein head will run off of all sides of my card.
If you’re using a larger drawing surface you may want to make a rectangle to do your drawing in. Or figure out a way to finish the edges.
Step 1: Guidelines
Most drawings are easier if you begin with some simple shapes or guidelines. For this drawing we’ll start with some lines.
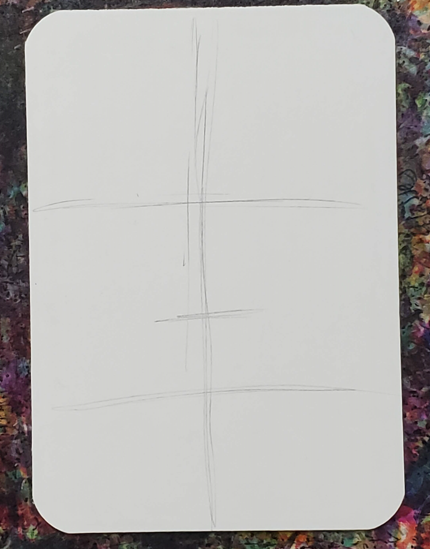
Begin by drawing a line of symmetry down the middle of your paper.
Then lightly draw some lines going across that line for the location of the eyes, nose, and mouth.
Step 2: Draw Facial Features
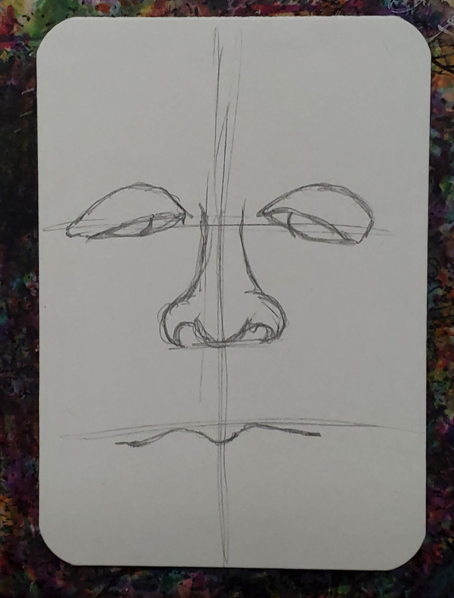
Now start drawing the facial features (eyes, nose, mouth). I like to start with the nose and then work around that, but you can start wherever you’d like.
There are a lot of different ways to draw a nose. Make sure it looks like something you’d see on Frankenstein. Meaning, don’t make it look too cute. Afterall, you want your Frankenstein head drawing to look a bit eerie, not cute.
Next, draw the eyes. Frankenstein has heavy, droopy eyes. Start by making the eyelids, then add the rest of the eyes below that. Most of the eyeball will be covered up by the eyelid.
Now draw the mouth. I want the lips to be very subtle so I’m not adding any lines for the lips. When drawing faces some things will be done with shading and by adding colors. The lips are one of those things.
Step 3: Add Final Details
Finish your Frankenstein Head sketch by adding the sides of the face and some hair at the top. You can also add scars, wrinkles, and any other details you want to add.
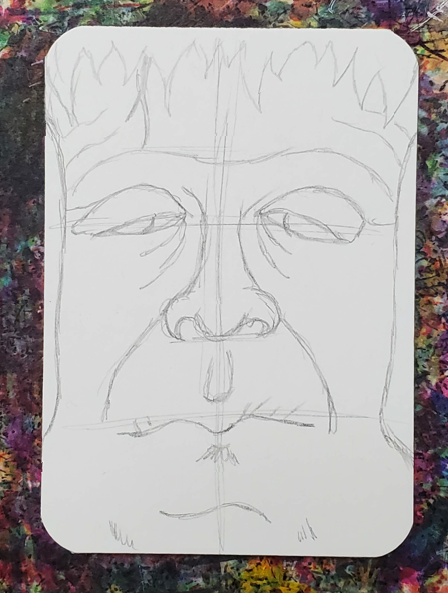
Make any corrections to your drawing before moving on to the outline.
Frankenstein Head Drawing – Outline
After you have everything sketched out, use a black pen to outline your drawing. You could also try using a different color pen as well.
Trace over any of the pencil lines that you want to keep. For this type of drawing you may not want all of your lines to be outlined.
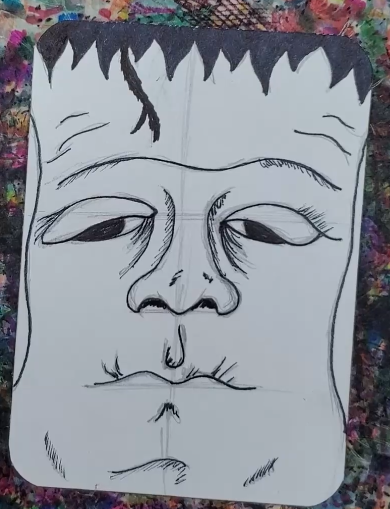
If you want a softer look, don’t add as many outlines and instead use shading to define each area.
You can also add some shading using hatching and cross hatching. This can be done using a black pen, or you could try using gray or green instead.
Frankenstein Head Drawing with Markers
Finish your drawing by adding some color using colored pencils or markers. I used markers for my drawing, but you can use whatever you’d like.
You’ll need several markers that are different shades of green. They need to be light, medium, and dark green.
Begin by filling in an area with the lightest color green. Then use the medium green to add some darker areas. You can use the lighter green or a colorless blender to smooth out the transition.
Finally, add the darker green for the darkest area. Again, blend the colors together using the light green or colorless blender.
Keep working your way around your drawing until all of the areas are filled in with color.
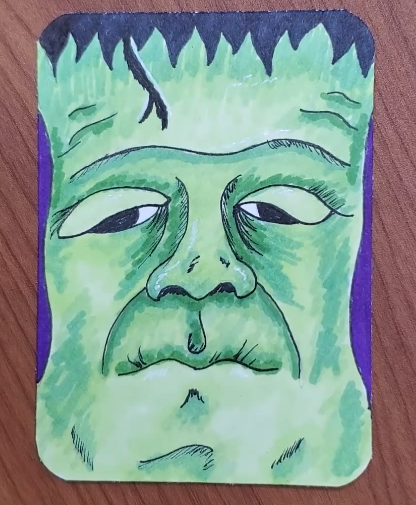
If you want to be able to blend your colors together to create smooth transitions of color you need to work while the markers are still wet. For this reason you’ll need to work in small sections at a time.
Use dark gray and black for the hair. You can use a different color such as purple or red to fill in the background around the face, if you have some.
A white Gelly Roll pen can be used to add highlights.
Final Thoughts and Next Steps
Now that you know how to make a Frankenstein head drawing, what’s next? To improve at art and drawing you’ll need to practice. The more consistently you practice, the better you’ll get. And at a faster pace.
This doesn’t mean you have to draw for hours every day. It just means you need to practice for a few minutes each day over a period of time. If you do this, you’ll see big results.
Doing a daily drawing challenge is a great way to get better at drawing. Give it a try and see how easy it is to improve.
Grab your FREE Guide to Better Art in 7 Days

