How to Draw Easy Clouds
Learning how to draw clouds is easy and fun. We’ll show you step by step how to draw, outline, and color your cloud drawings with markers.
There are a ton of opportunities for using clouds in your drawings. And the more you draw them, the more uses you’ll find for them.
Art and drawing are skills anyone can learn. It takes time and practice to improve. And the more consistently you practice, the better you will get.
Enjoy your creative time and keep it relaxing and enjoyable. Don’t put pressure on yourself to be better than other artists.
Now let’s gather up some supplies and get ready to have some fun learning how to draw clouds.
* Some of the links in this post may be affiliate links. This means I receive small commissions for purchases made through these links at no extra cost to you.
Art Supplies
- Thin black marker
- Paper or cardstock
- Markers
- Pencil
- Click Eraser, Pink Pearl Eraser
- White Gelly Roll pen
Cloud Sketch Practice
Doing a quick sketch practice exercise is a great way to warm up your drawing muscles and work through some ideas.
And the great thing is it only takes a few minutes to complete. Here’s how to do a cloud sketch practice session.
- Get some paper and something to sketch with (pencil, pen, marker, etc)
- Pull up some reference photos of clouds
- Set a timer for three or five minutes
Then simply do as many cloud sketches as you can before the timer goes off.
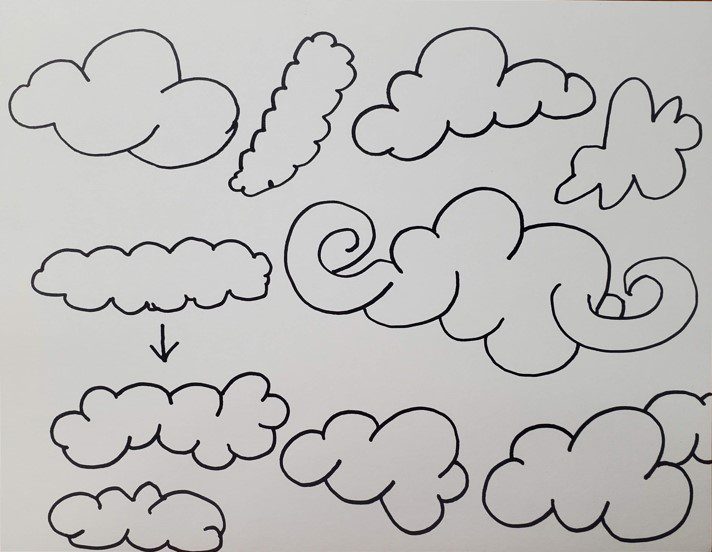
Another option is to sketch until your paper is filled and you run out of space to sketch.
The goal is to warm up and quickly work through a series of sketches. Don’t get too hung up on the details. Just get your ideas out as quickly as possible.
How to Draw Clouds Step by Step
Clouds are pretty easy to draw and aren’t at all complex. However, there are still some benefits to breaking them down into simple shapes. We’ll approach this a bit differently than we usually do, but the concept is the same.
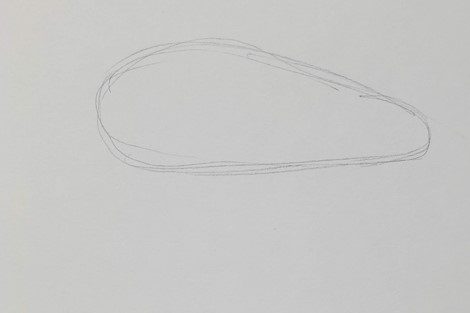
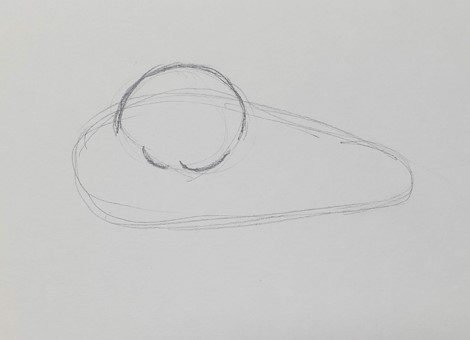
When drawing your clouds, start by thinking about the overall shape you want your clouds to have. There are an endless number of ways to draw your clouds.
Draw a shape that captures this overall shape. Don’t include any specific details. Just focus on the size, shape, and placement of your cloud.
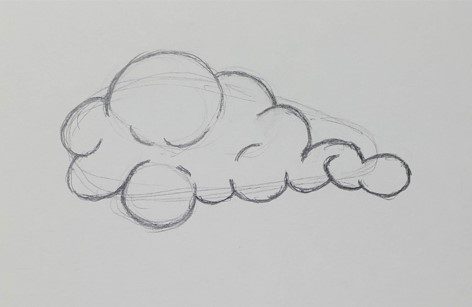
Now we’ll start drawing the individual sections of the cloud and add in some details. It might help to draw different sized circles for where you want the curves of your clouds to be.
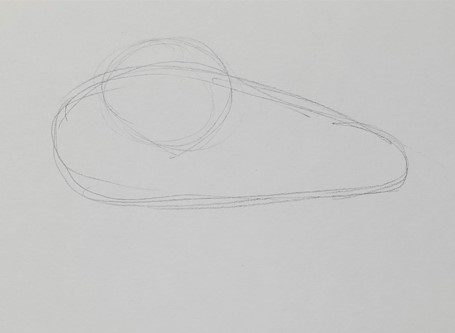
Then you can add the detail using the circle as a guide. You can add some additional lines inside the circle as well. Just don’t connect the lines together.
Continue adding more sections of the cloud by adding more curved lines, or drawing additional circles to use as guides.
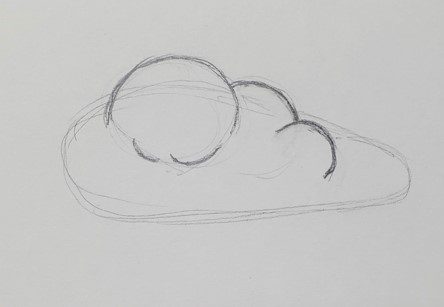
When drawing your sections, it will look better if you vary the size and how they overlap. You want some sections to overlap in front and some to go behind.
Keep drawing more sections of your cloud until you have the general shape done.
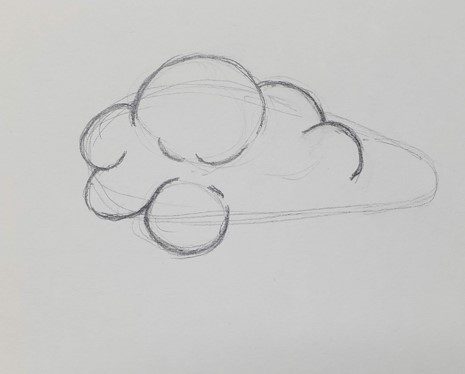
Use your original shape as your guide to help you form the shape of your cloud drawing.
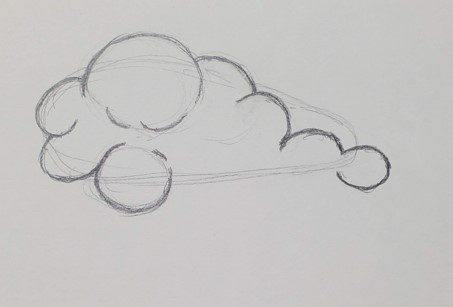
Your cloud drawing is finished when you’ve closed the shape and it’s all connected.
Easy Cloud Outline
Making your cloud outline is really easy. Simply trace over the pencil lines you want to keep with a black pen or marker.
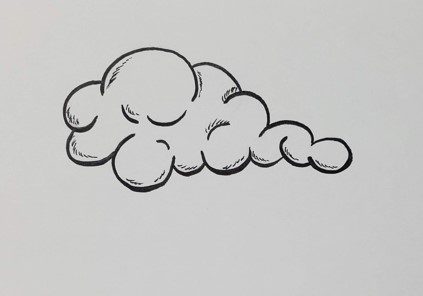
You can make your lines thin, thick, or a variation of line weights. Make them in whatever way fits your style.
You could also try using a color other than black. Maybe use blue or purple instead. Experiment and try different things.
Don’t worry if you’re not sure what your artistic style is. It will develop over time with practice. For now just have fun and try different things.
Doing your drawings on Artist Trading Cards is a great way to save time and give yourself more freedom to experiment.
When you’re finished making your cloud outline, use an eraser to clean up your drawing. You can add some shading with your pen as well.
How to Draw Clouds with Markers
Learning how to draw clouds with markers is much easier than you might think. There are a few things to keep in mind when using markers though.
First, if you want to be able to blend your colors together you need to use alcohol based markers. Bic, Sharpie, and Copic for example. As well as many others.
Second, you need to work while the colors are still wet or they won’t mix together. This isn’t a big deal. Just make sure you work on a section at a time.
Third, you need to use colors that are similar to each other if you want to create a smooth transition of color. If your markers are too different they will leave a harder edge.
When using markers for your cloud drawings you’ll be a bit more limited in the colors you’ll be using. You may not want to add anything to the inside of your clouds at all. And instead just leave them white.
Adding some accent colors looks nice though. But that’s completely optional. You could try adding some light gray or blue.

You can also add a background to your clouds, or a halo of color around them. Yellow and yellow-orange were used for this example.
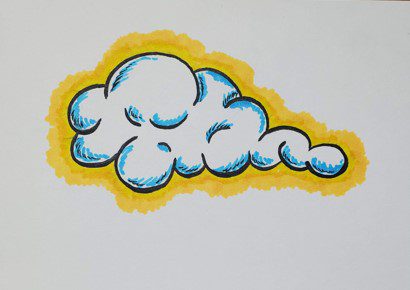
Again. Just do whatever you think looks good. Experiment, try new things, and remember to have fun.
Final Thoughts and Next Steps
Now that you know how to draw clouds, what’s the next step? If you want to get good at art and drawing you need to practice as often as possible.
Spending a few minutes every day will give you great benefits. You don’t have to spend every free moment working on your artwork.
Try making it a part of your daily routine. Schedule it into your day.
If you want to get really good at drawing clouds, challenge yourself to do a series of drawings and see what you come up with.
Your creativity will improve along with your art and drawing skills.
Grab your FREE Guide to Better Art in 7 Days
